Well after a period of procrastination I finally made the switch from the diorama project to the track-laying project.
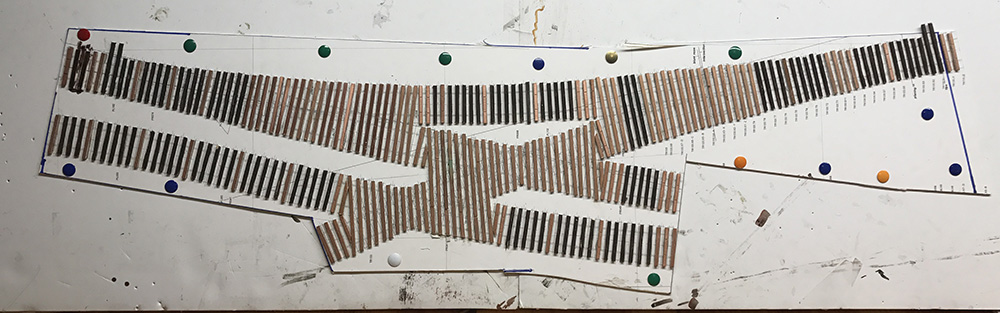
I have to admit I was quite nervous. It had taken two months to learn Templot to get curves on the diagram just right, then I had to figure out to how get the plan printed out, and then I spent another week preparing and laying down ties – all done just to get to this starting point.
The crossover and the two supporting turnouts are meant to be the focus of the layout – the ‘star’ element – so getting this right was crucial. As this is the first crossover I’ve ever built I had to find a method that seemed straightforward enough for a beginner. Tim Warris’s method of notched rails looked very promising. However he had a bunch of tools to assist him which I had no chance of ever obtaining. The question in my head was could I do the same thing without those tools? Now that I’ve finished the project the answer is a resounding yes!
Deciding that the best form of attack is, well, attack, I just started and worked my way carefully through each stage.
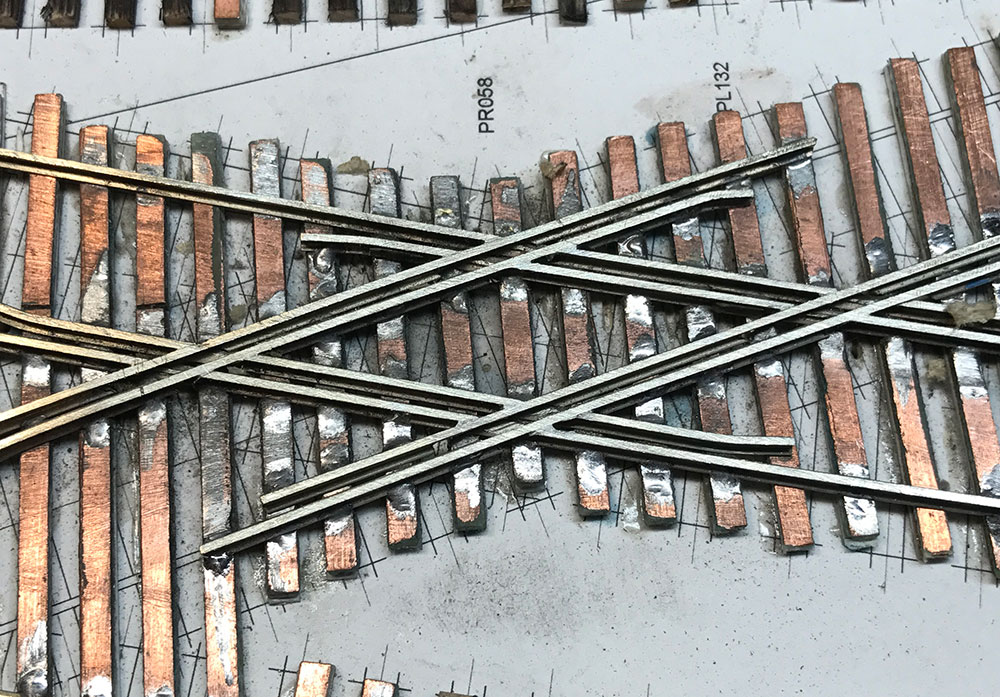
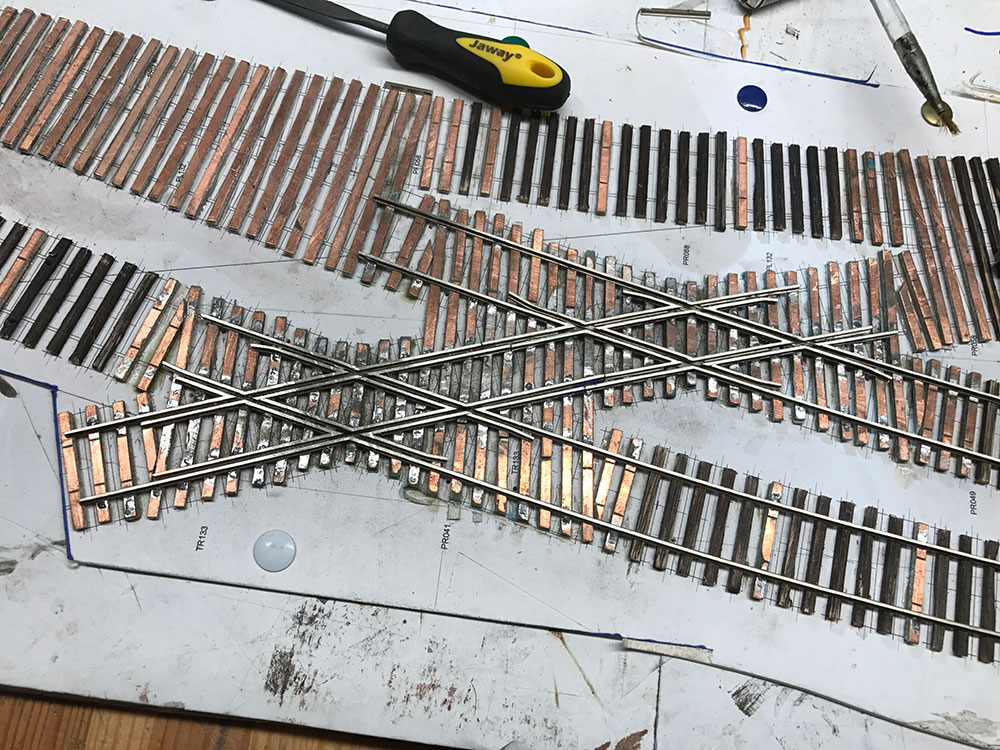
Here’s the starting point:
First things first was to lay down the main line rails with guard rails. Pretty straightforward.

Then I cut notches in the rail to receive the first crossover rail. I cut them narrow at first and then made them wider when I fit the second guard rails.
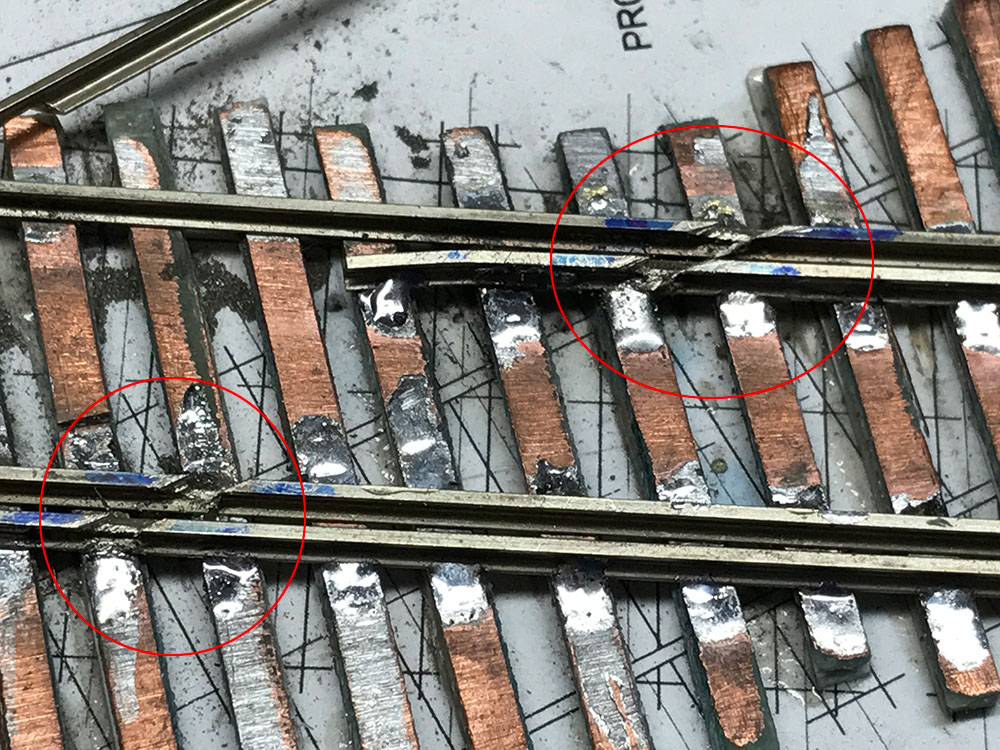
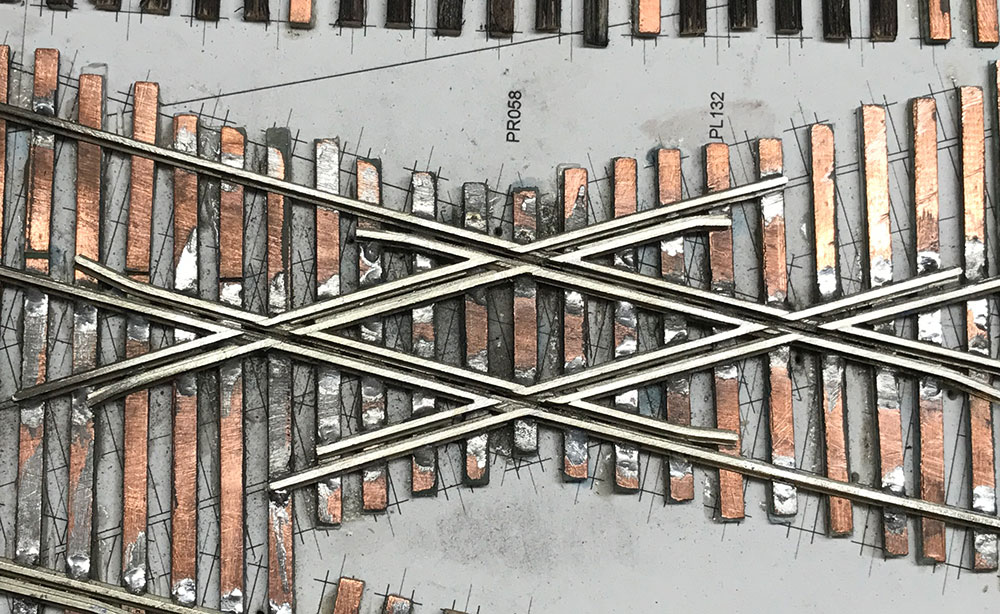
I laid down the outer rail, soldered it and then widened the gap and repeated the process for the guard rail. Here’s where I ended up:
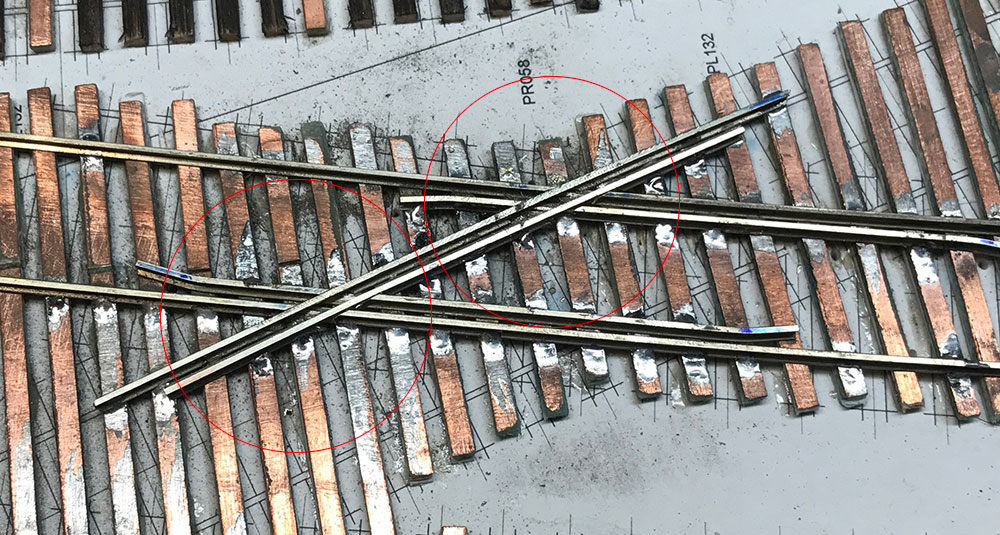
Repeat the process for the second rail:
Then finally I opened the gaps and there was the first crossover. It took 3/4 of an hour:
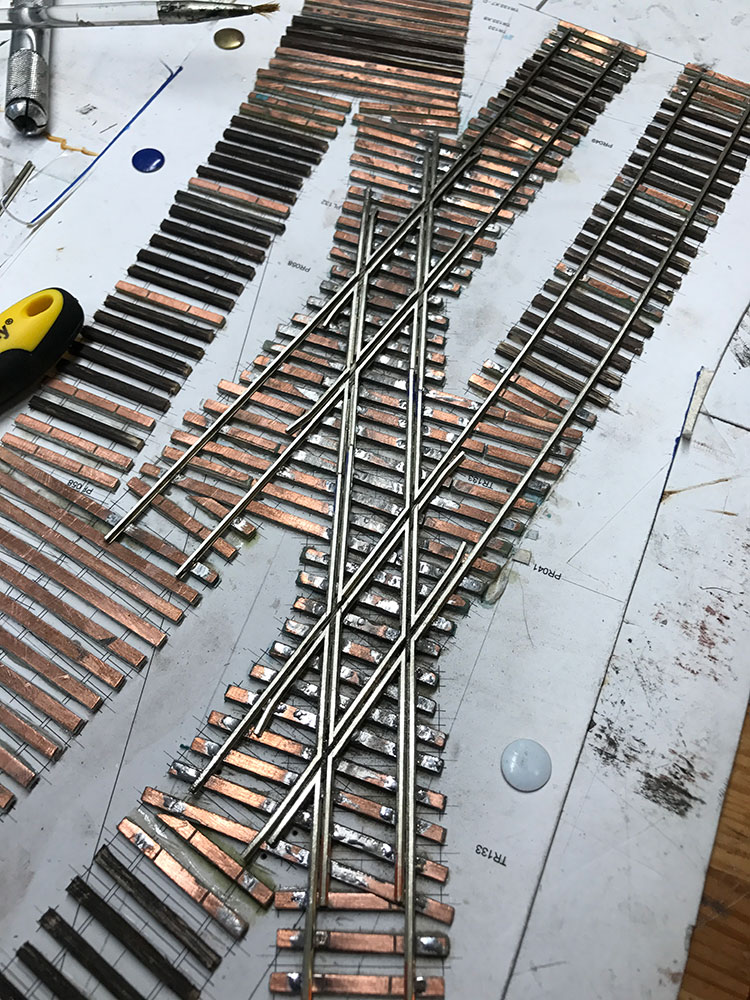
I repeated the process for the second track until I reached this point:
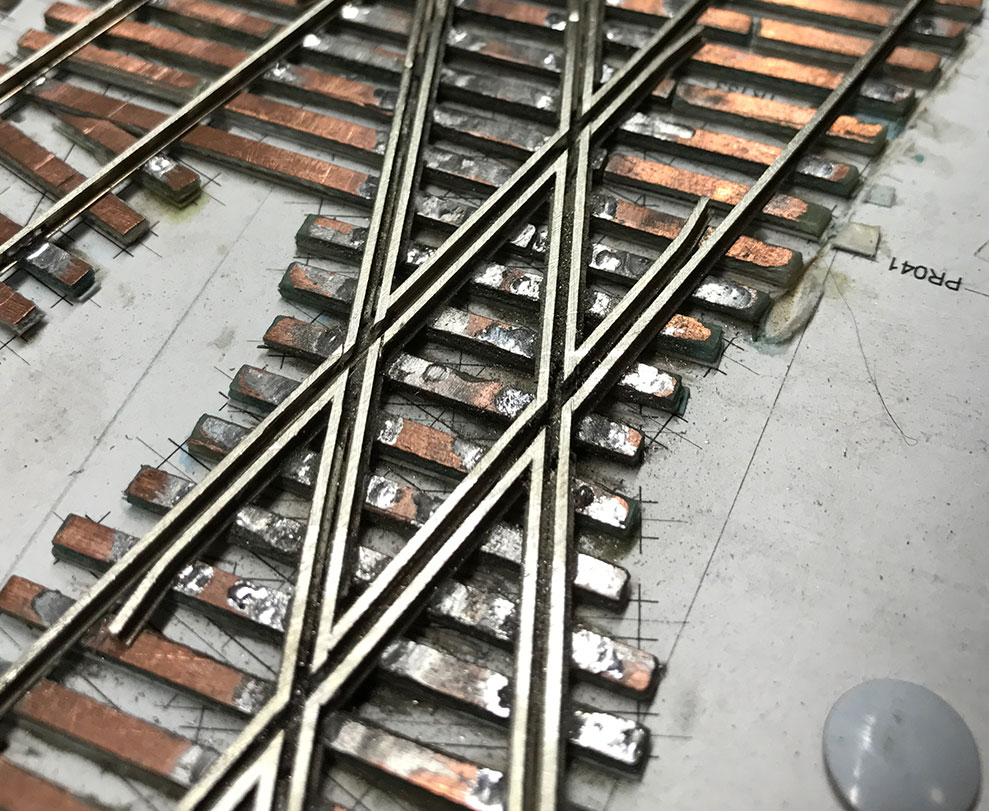
The Tim Warris method does a great job of preserving curves through crossovers. By laying tracks in one piece across each other the frogs are perfectly lined up and allow trucks to travel across smoothly.
In conclusion, I would say that this project turned out to be much easier than expected. I really expected it to fall apart at any moment but in the end it came together like a charm.
This part of the project was the summit, hopefully it will be all downhill (in a good way) from now on.
I’ll get to the turnouts this week and post photos once I have them.