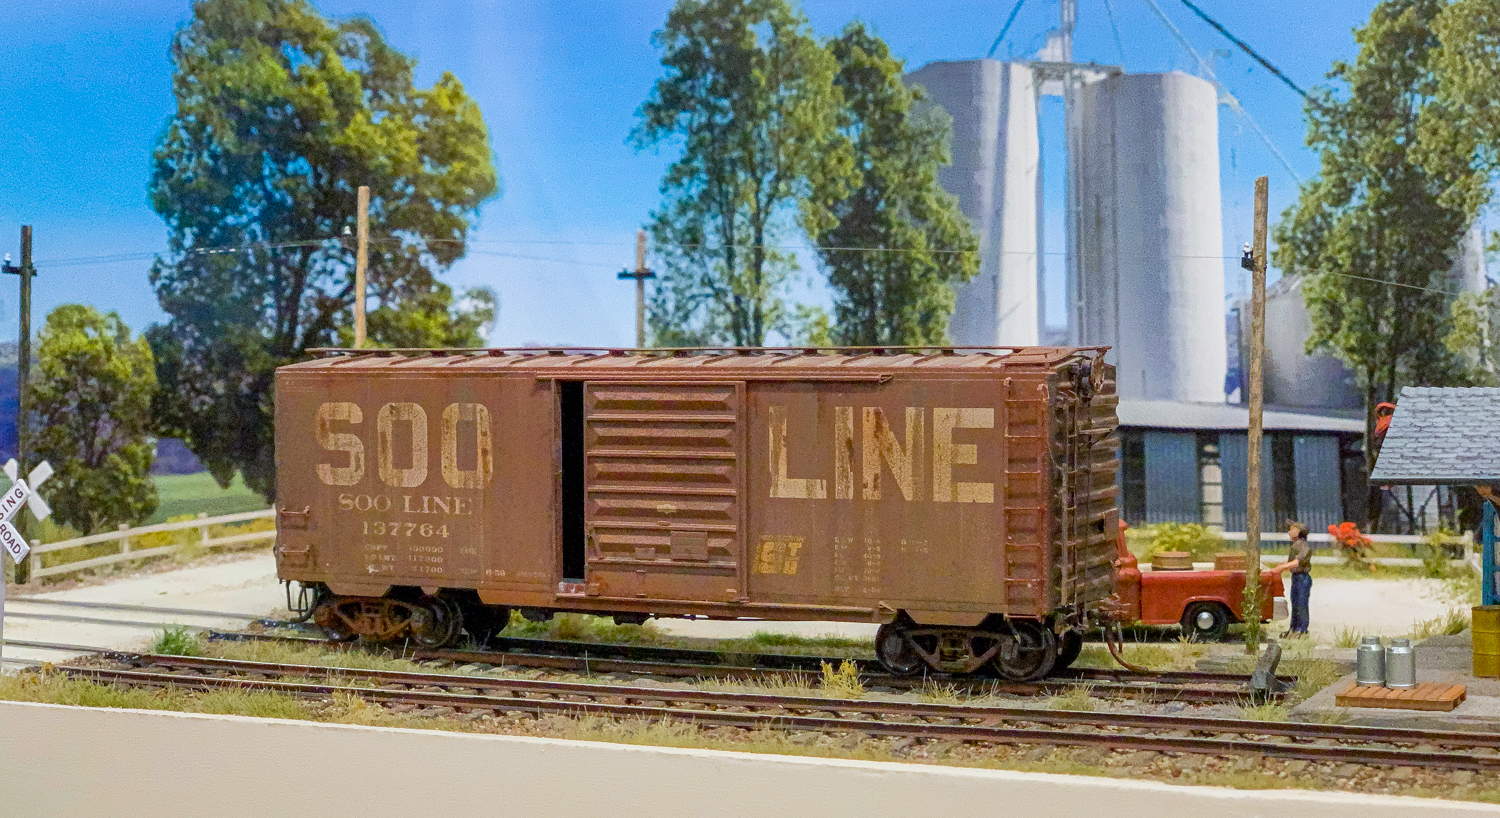
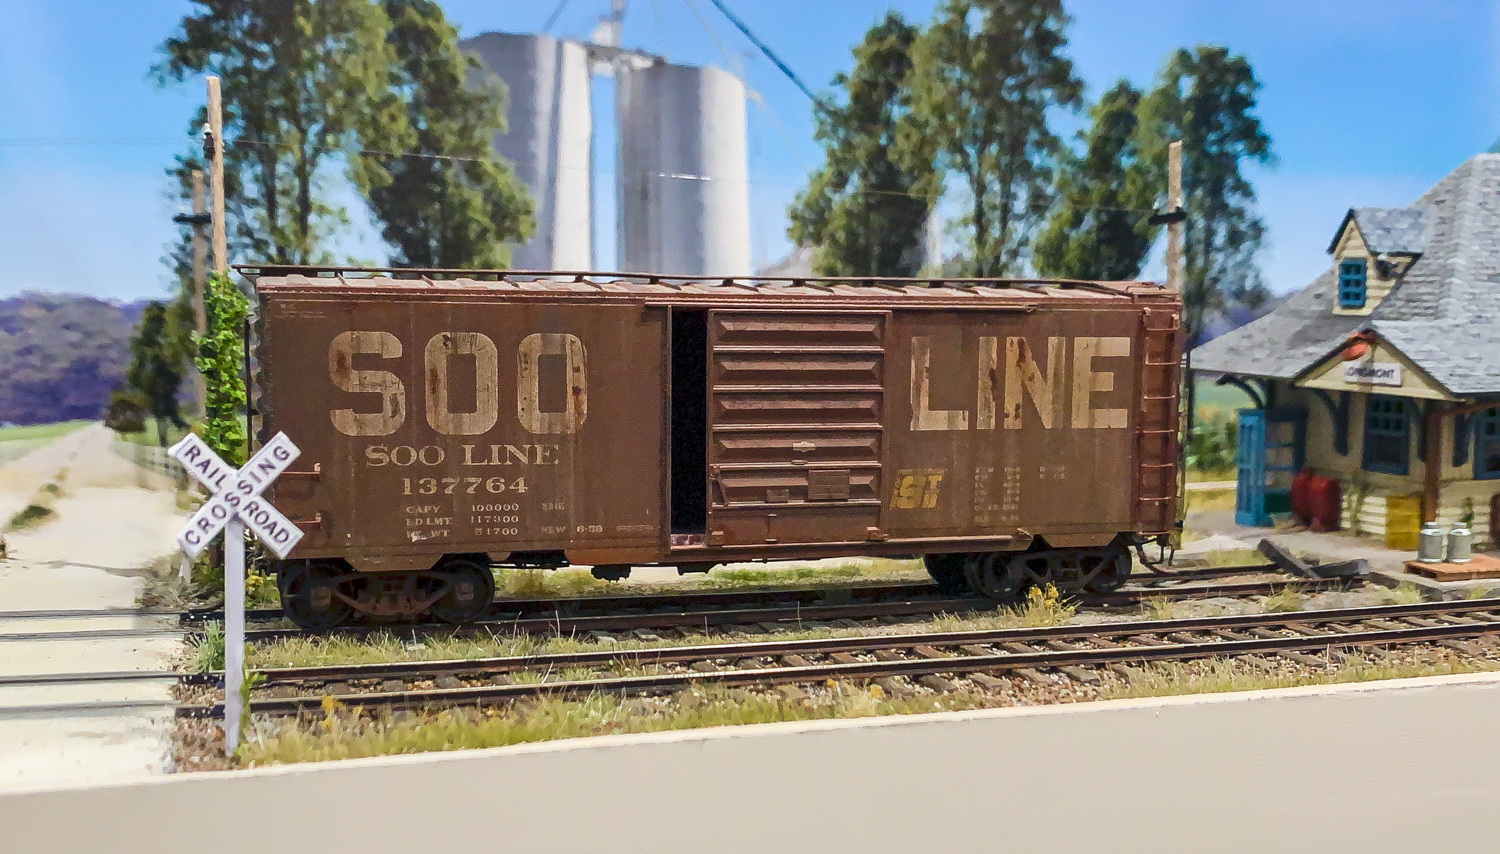
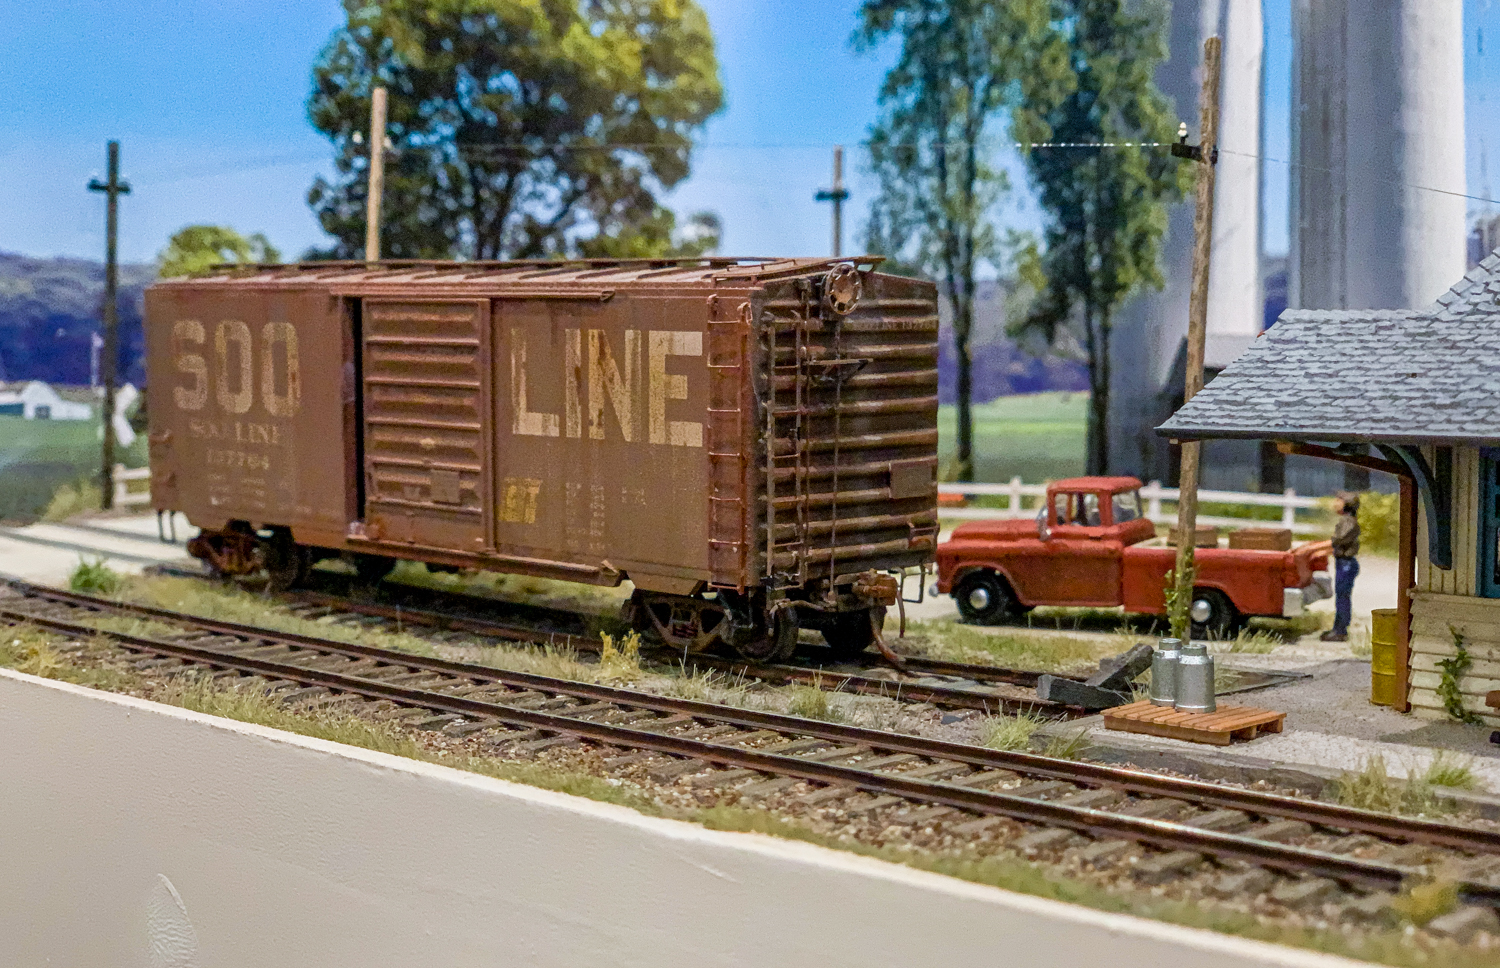
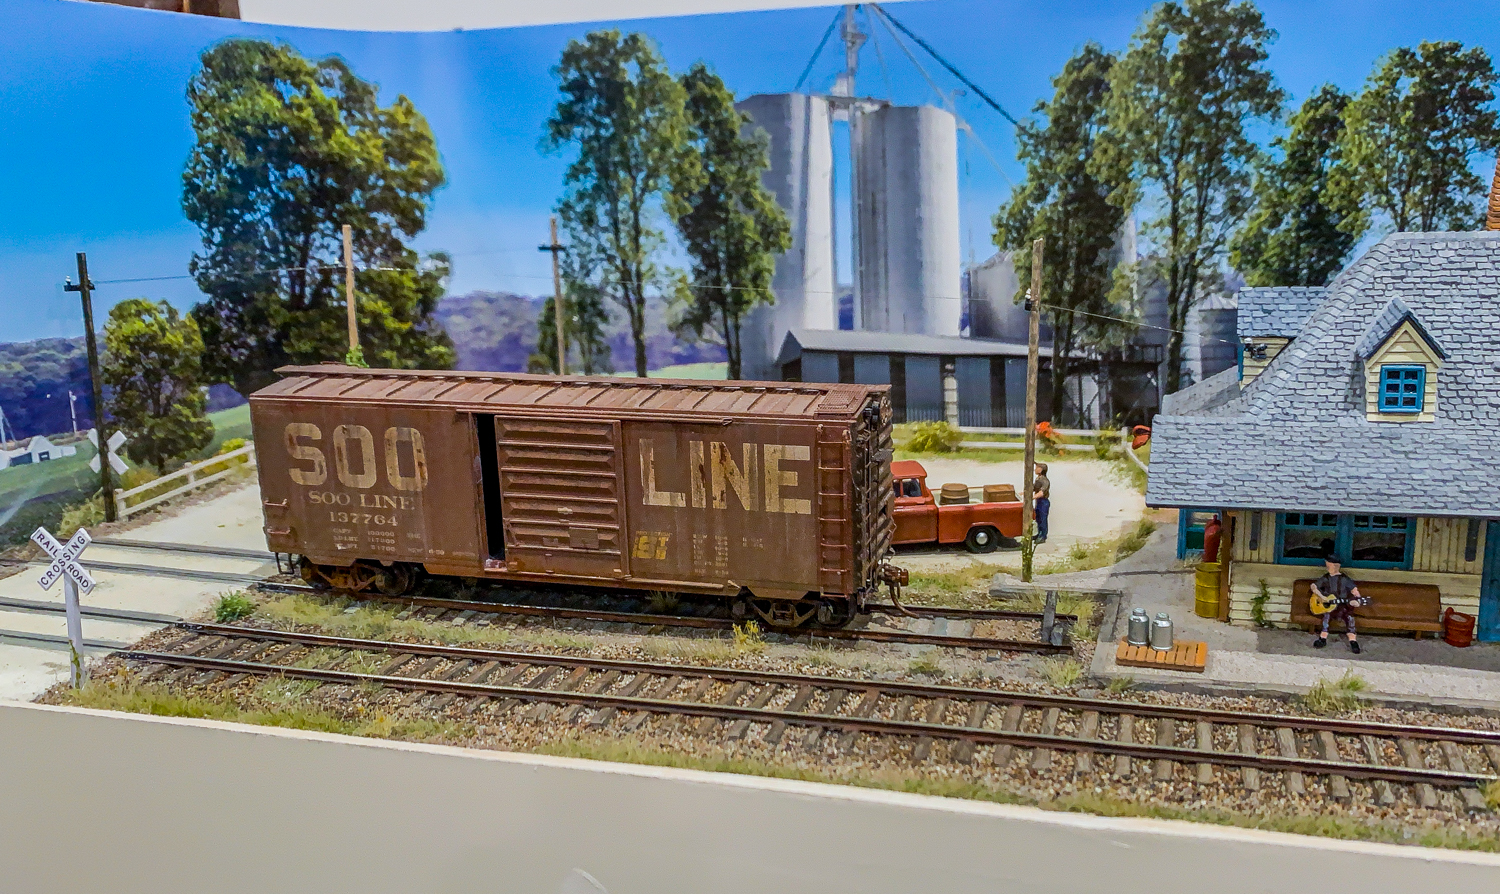
Both the Longmont diorama and the Trestle diorama were meant to function as photo boxes for my rolling stock projects. Here is an example of my very first weathering attempt from five years ago. I’m currently working on a flat car and an outside braced single sheathed box car which I will post when done.
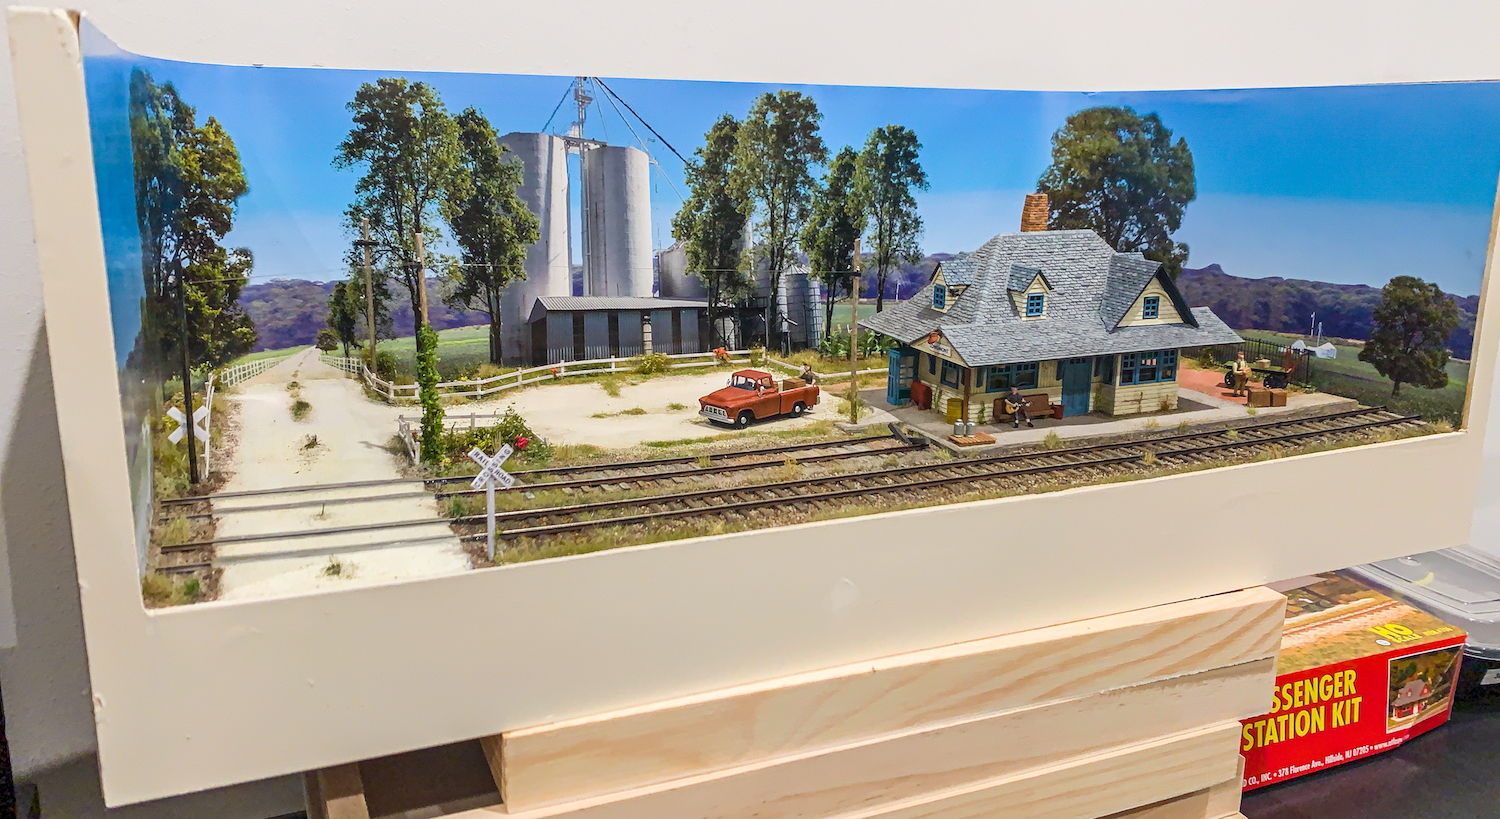
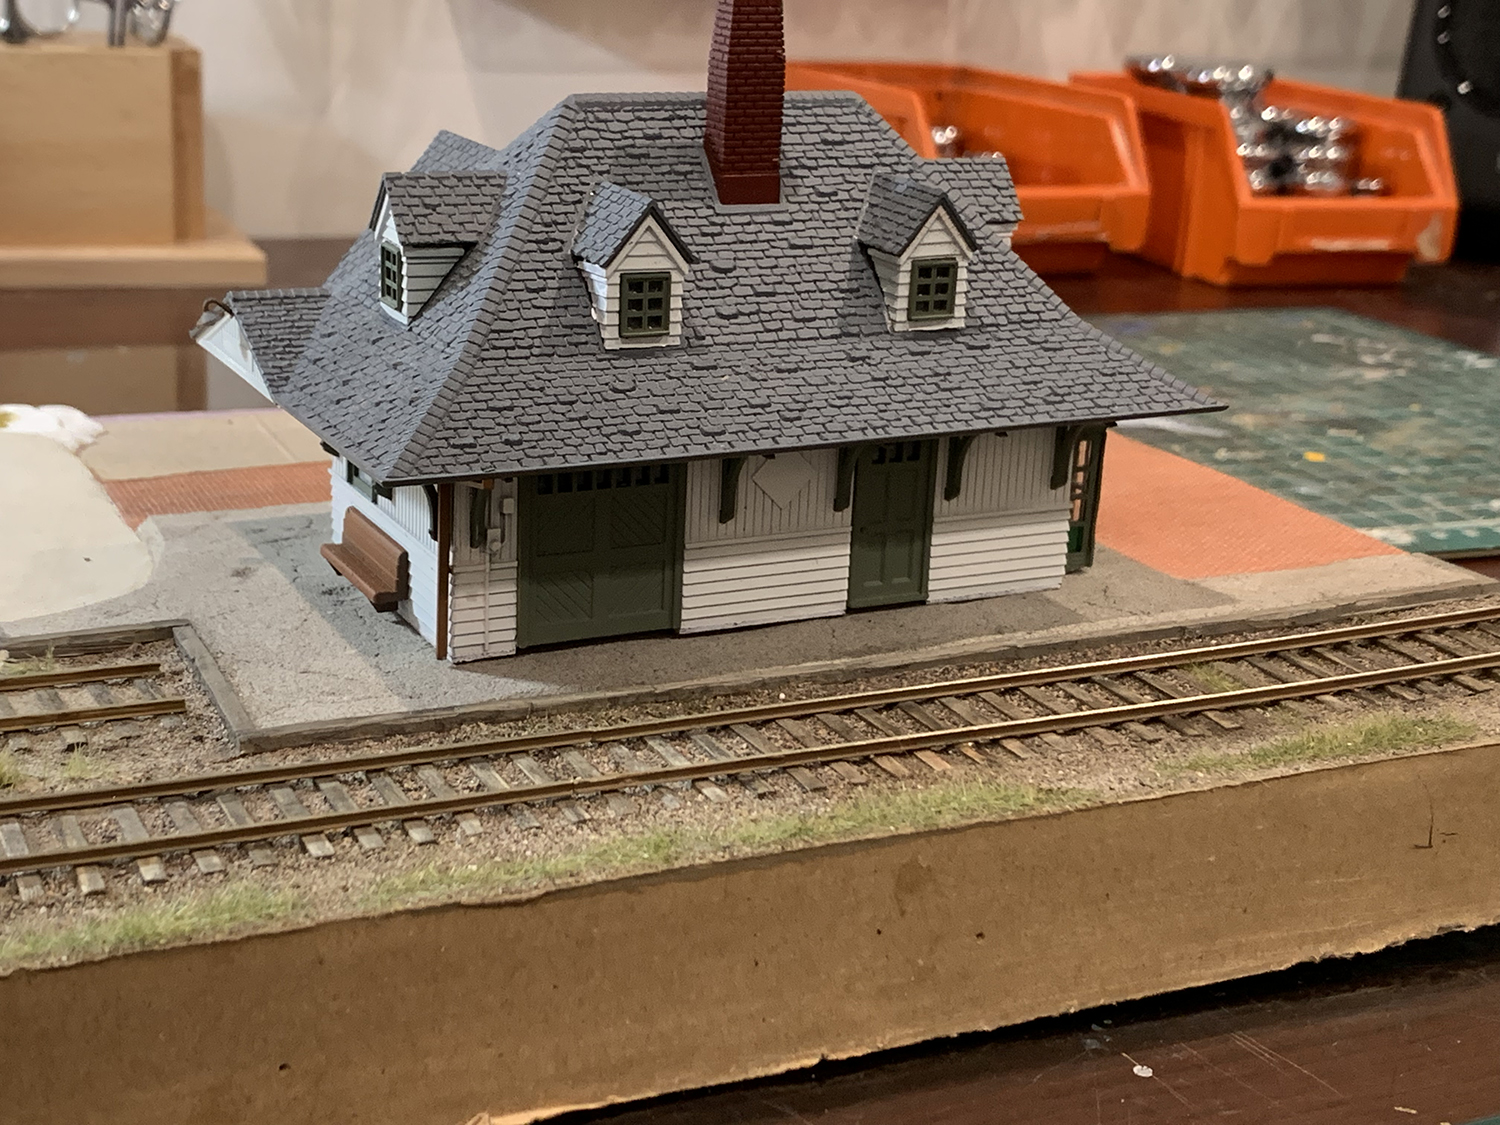
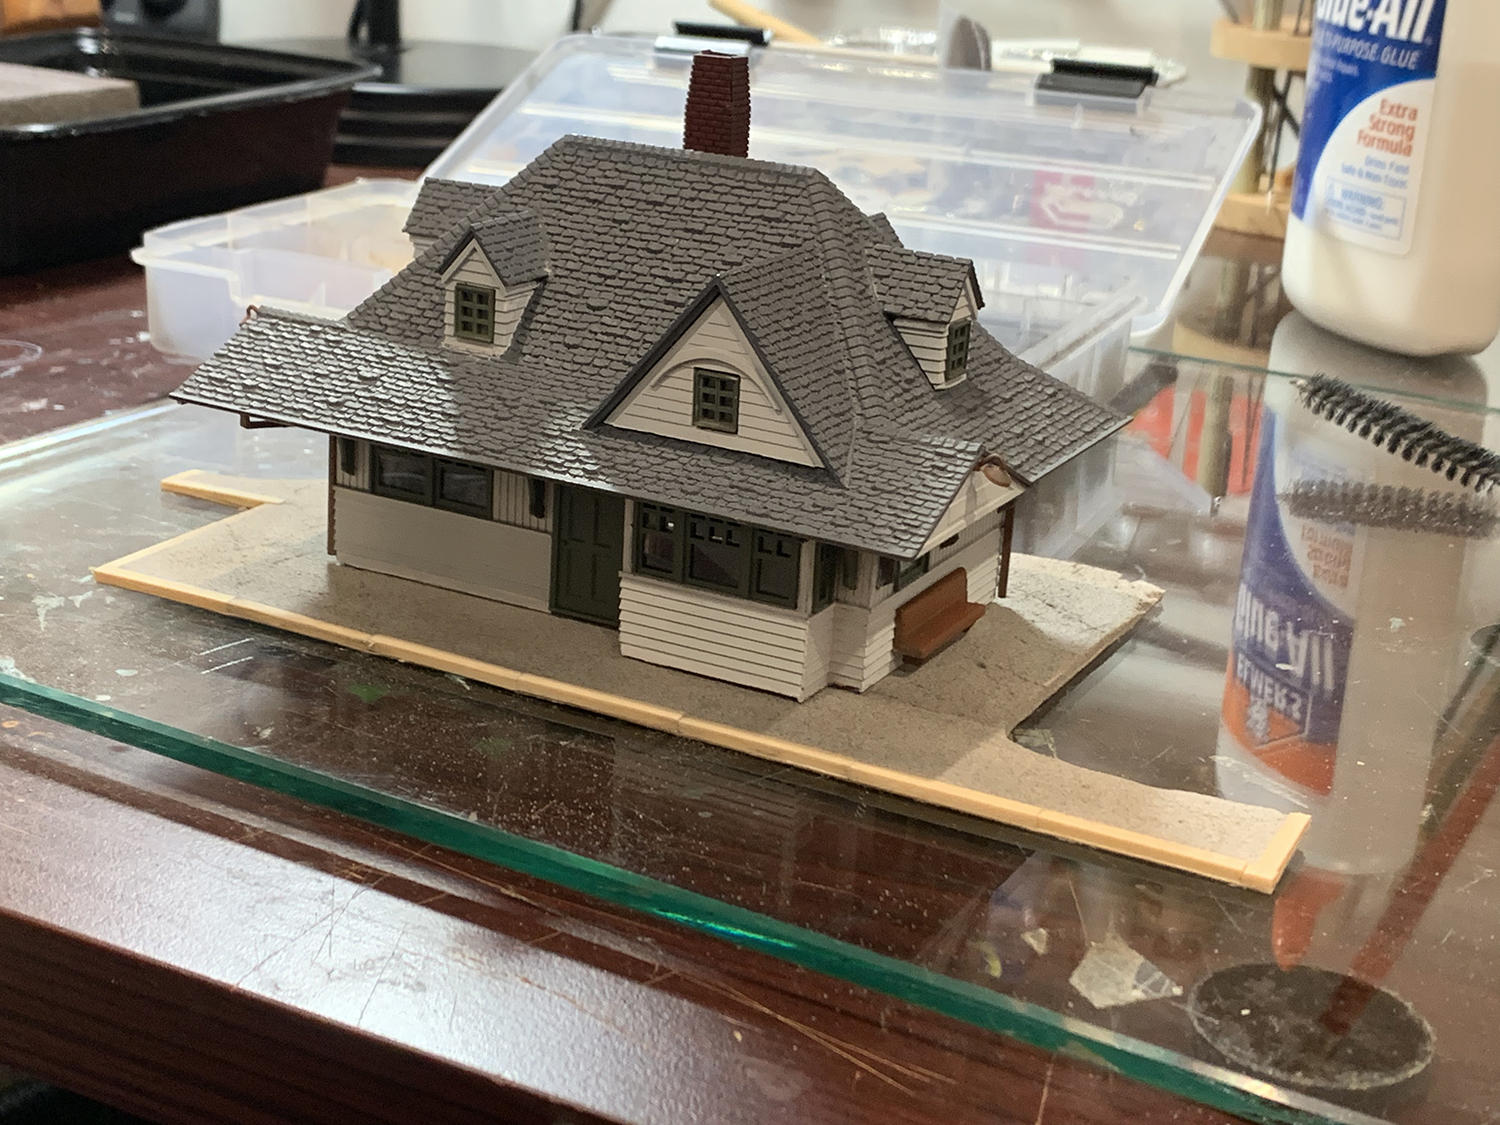
I finished the diorama this week and I’m happy with it. The initial plan for the project was for it to help me organize my new dedicated modeling room, figure out a good time to model during the day, and get back into things after a 2-3 year break. As such it was supposed to be just a small throwaway project using a cheap plastic kit and a not-very-original concept of a country depot. I did not want to scratchbuild or kitbash and used commercial products as much as possible. As these things do the project ballooned into something a little bigger to allow me to work on ideas and techniques that had been swirling around my head while I was away from modeling. Continue reading “Longmont diorama finished!”
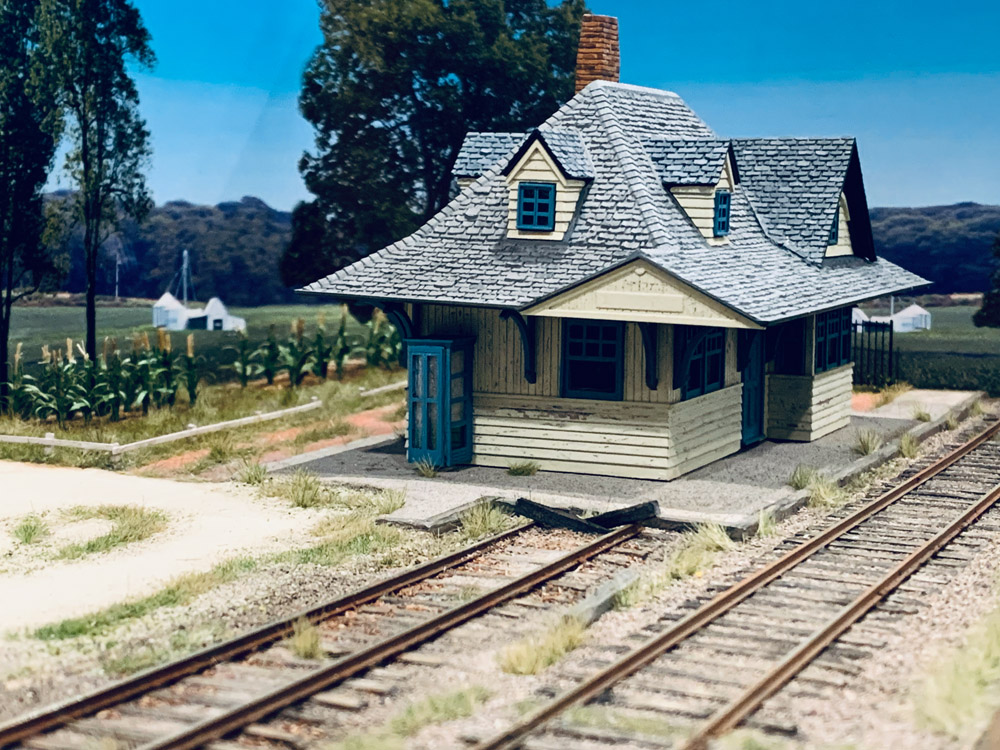
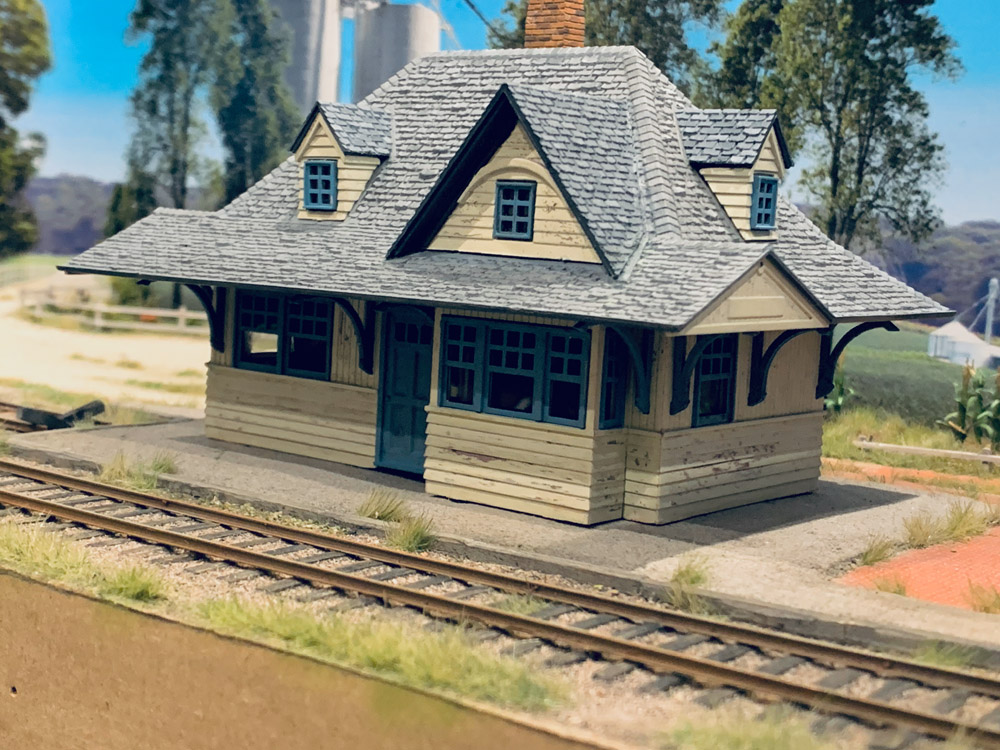
It’s been a while since I last posted but during that time I have been working on the diorama. I don’t have a lot to say about the construction other than I wanted to learn how to make a plastic structure look like worn wood. To do that I used chipping fluid over a coat of wood colored paint and then sprayed the surface with the final coat. Once dry I simply chipped away leaving a nice worn paint look. I gave the final effect a wash and dry-painted over areas where I felt there was too much wear.
Here are some pics:
I am now working detailing the building and surrounding area. I’ll post on that in a couple of weeks.
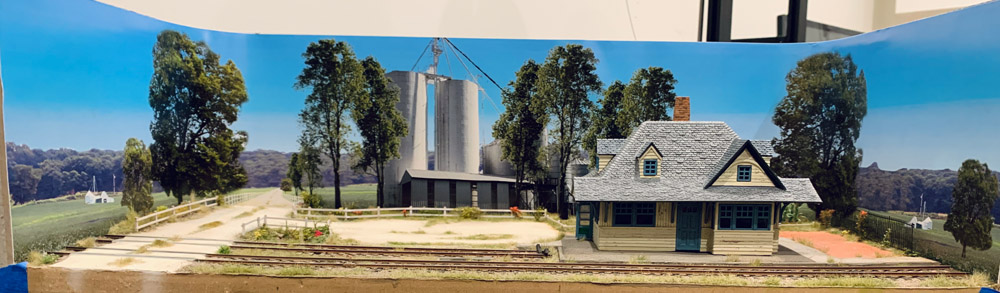
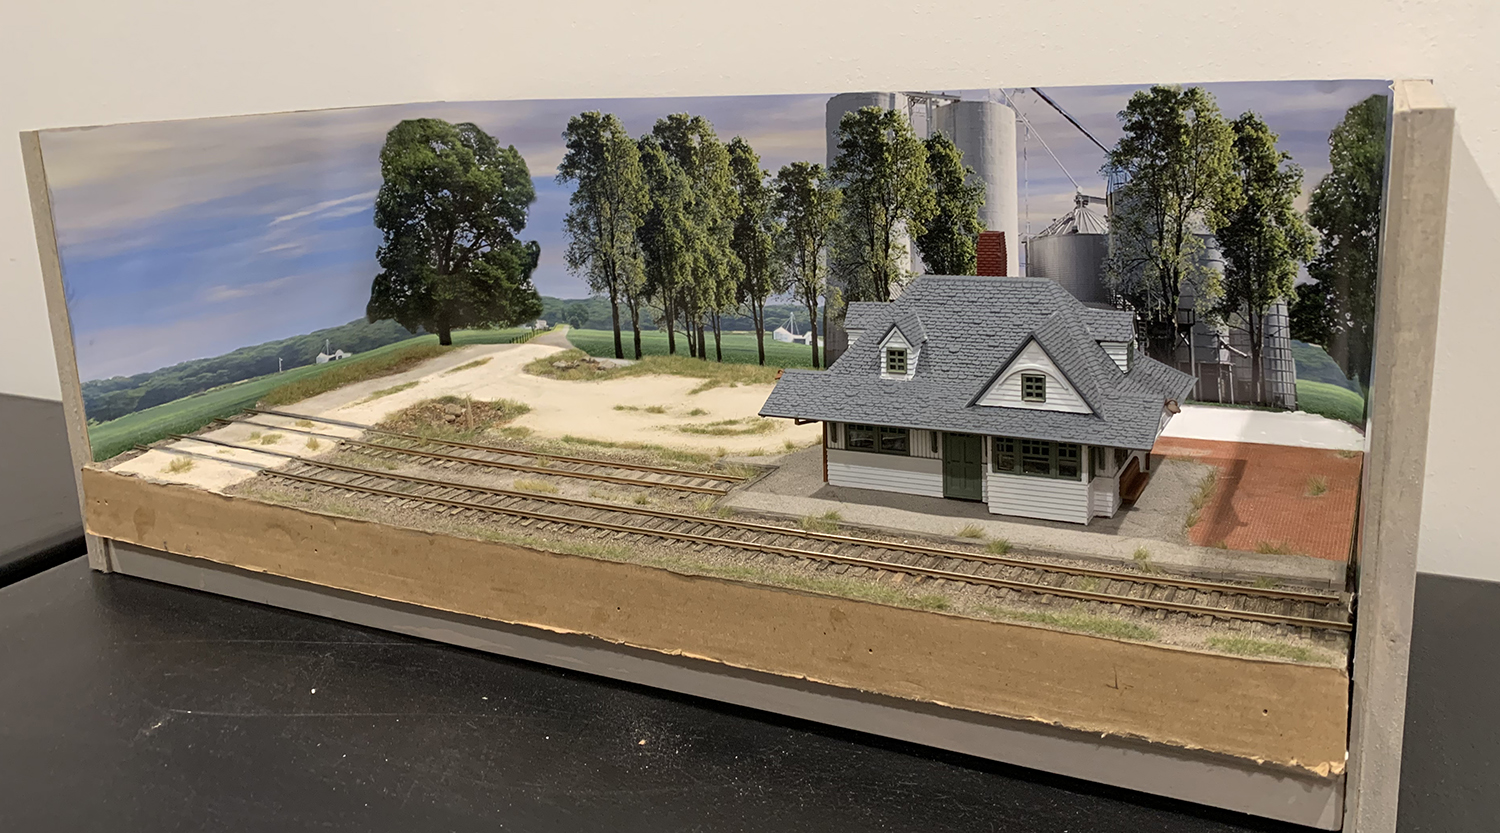
I’ve been working on the backdrop over the last few weeks. It’s not something I enjoy because I don’t like being on the computer once the work day is over. Nevertheless once I started I found I enjoyed the process more than expected. Though not perfect – there are a few errors here and there – the result was good enough to tick it off my list and move on.
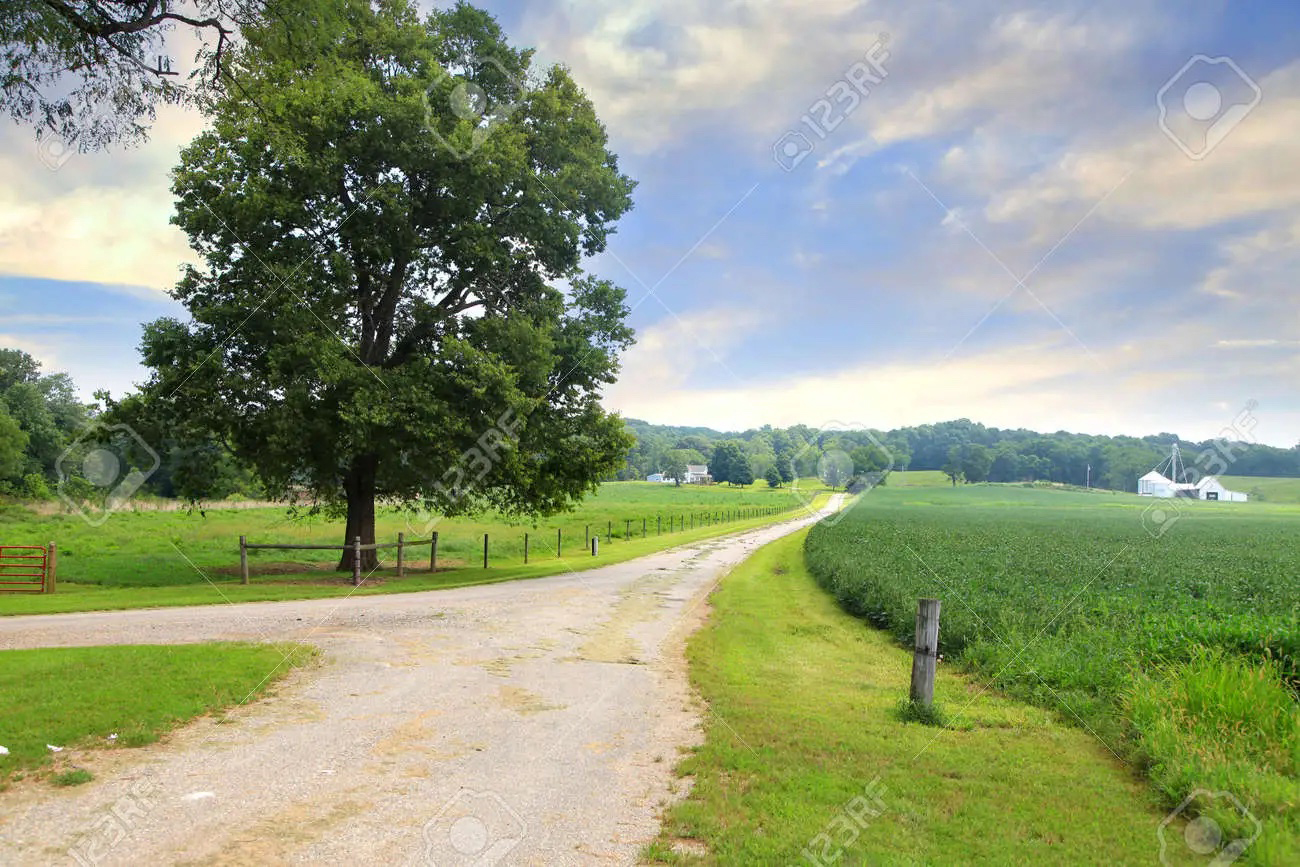
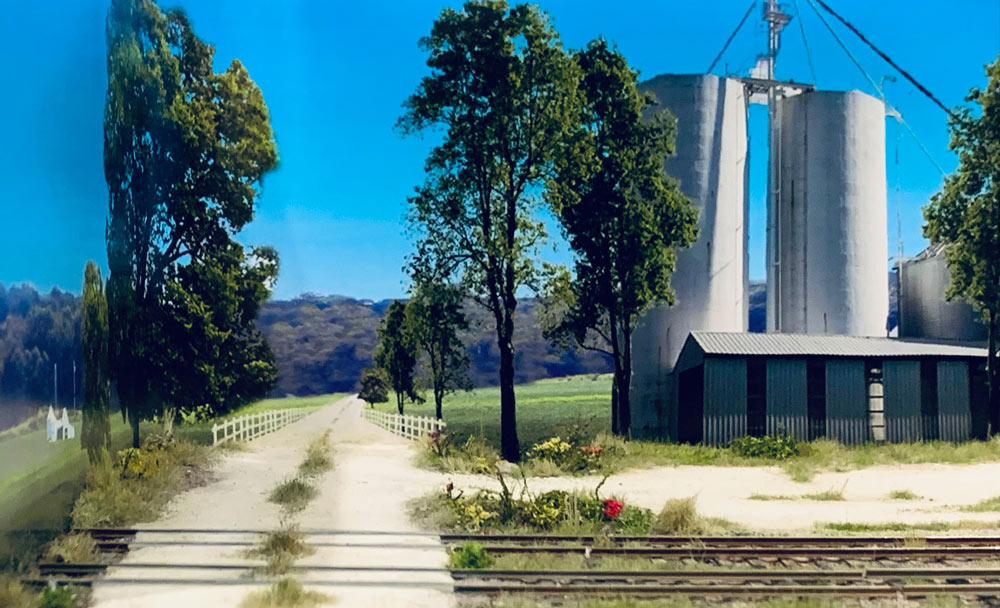
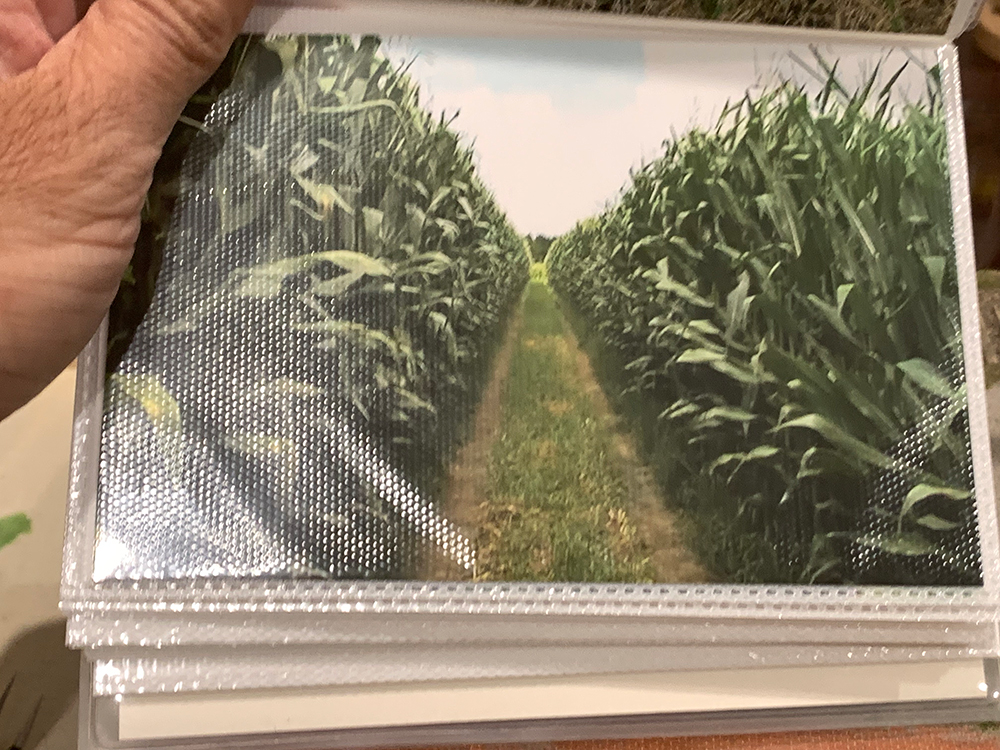
A Quick reminder of the starting point for the backdrop. This image is rural scene in Indiana. I purchased the printable version from the photographer.
I used Photoshop to extract all the elements I wanted and then used the various tools: clone, stretch, transform to create a scene that would stretch around the diorama.
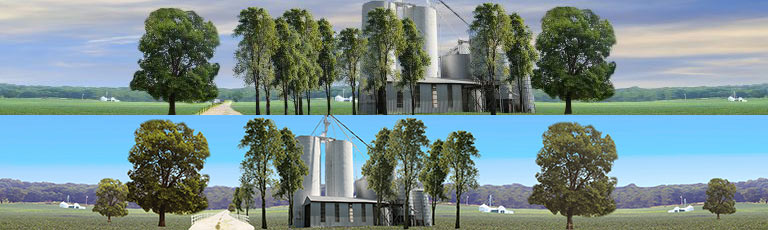
I made several changes to the latest version:
The color of the grass on the diorama did not match the color of the grass on the backdrop. I used Photoshop’s color balance tools to get them to match. I took a photo of the grass on the diorama, turned it into a layer and laid it on top of the grass in the photo. I then adjusted the green color by fading it and adding more yellow till the line separating the two colors faded away.
I also moved the mill so that it was no longer hidden behind the depot building.
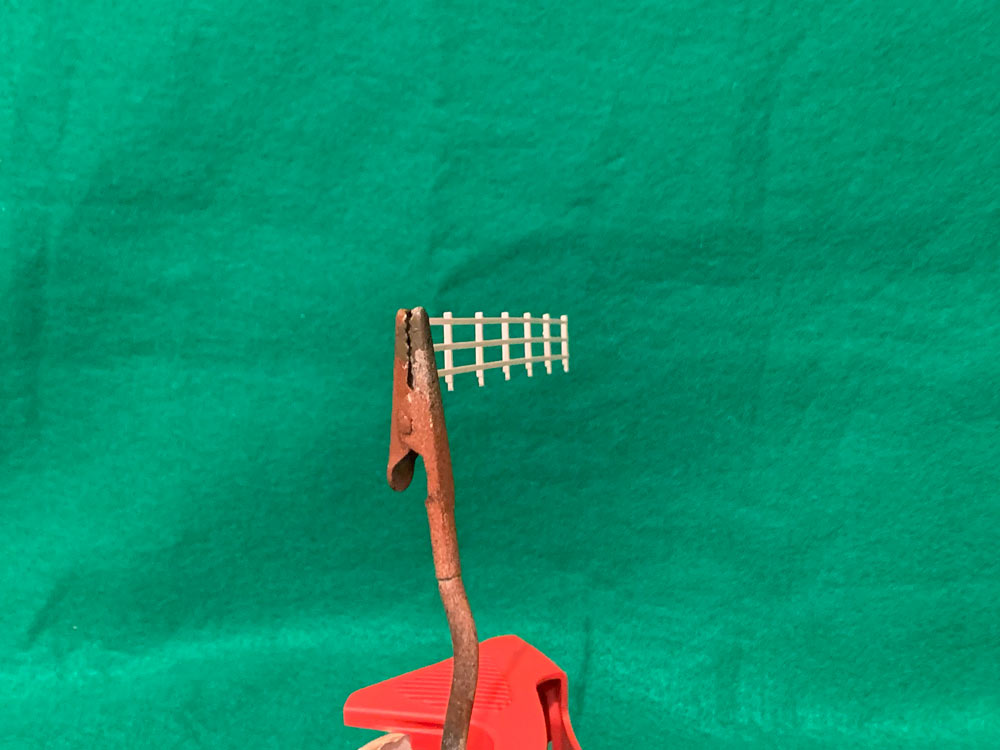
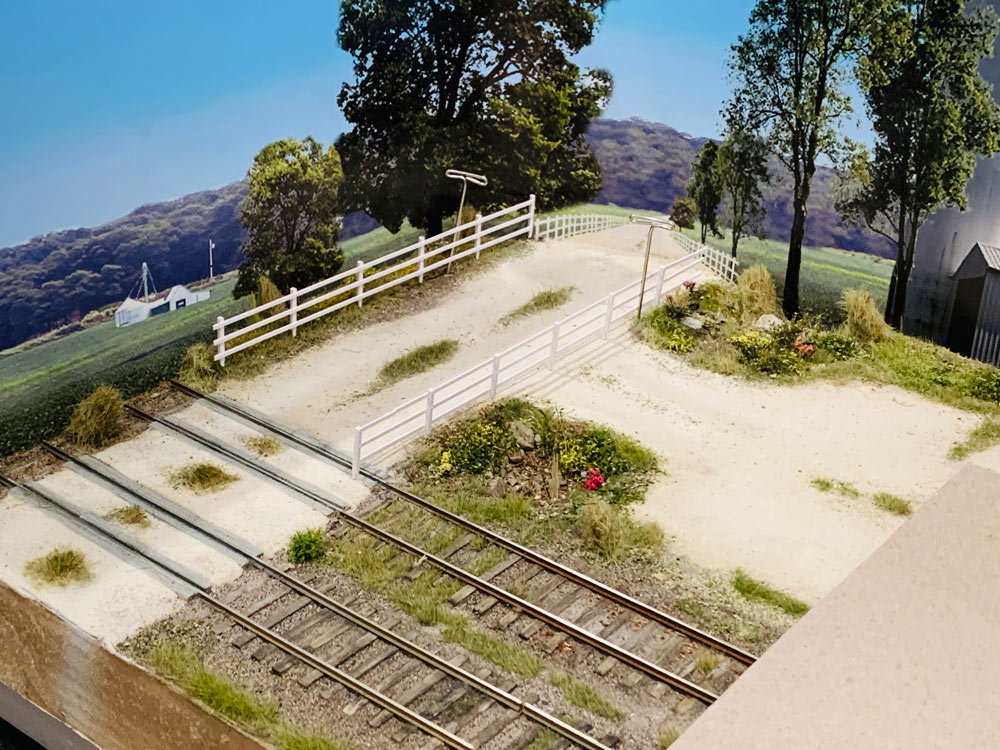
I raised the road and added a fence fading into the distance that matches the HO scale estate fence that is going to be installed.
I added a clear blue sky.
Here is the before and after picture:
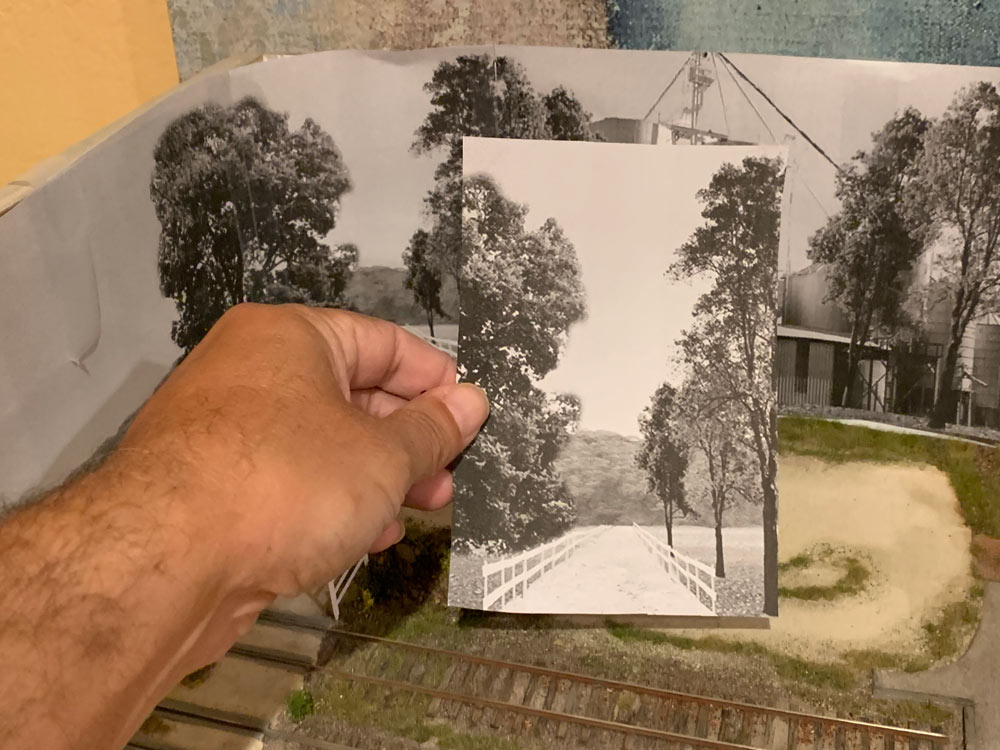
Before sending this to the printer I printed out a black and white version on my home printer to make sure that things were lining up.
It took a few attempts to get the road lined up properly but I only needed to print a section with the road in different positions it was finally in the correct place (or so I thought, see below).
To create the fence that fades into the background I green screened the HO version of the fence and then extracted it placed it on the image.
I then printed out a color version on my printer, stuck the sections together and placed it the diorama to see how things were looking. The colors are not accurate because of the limitations of my printer and the final printed version ended up looking a lot better.
Anyhow at some point I was satisfied so I sent the final image to the printers and a week later a couple of prints arrived.
I used spray glue to fix it to the back and sides of the diorama and made sure to line up the roadway correctly.
I then glued the diorama base and the backdrop together and filled in the edges around the sides.
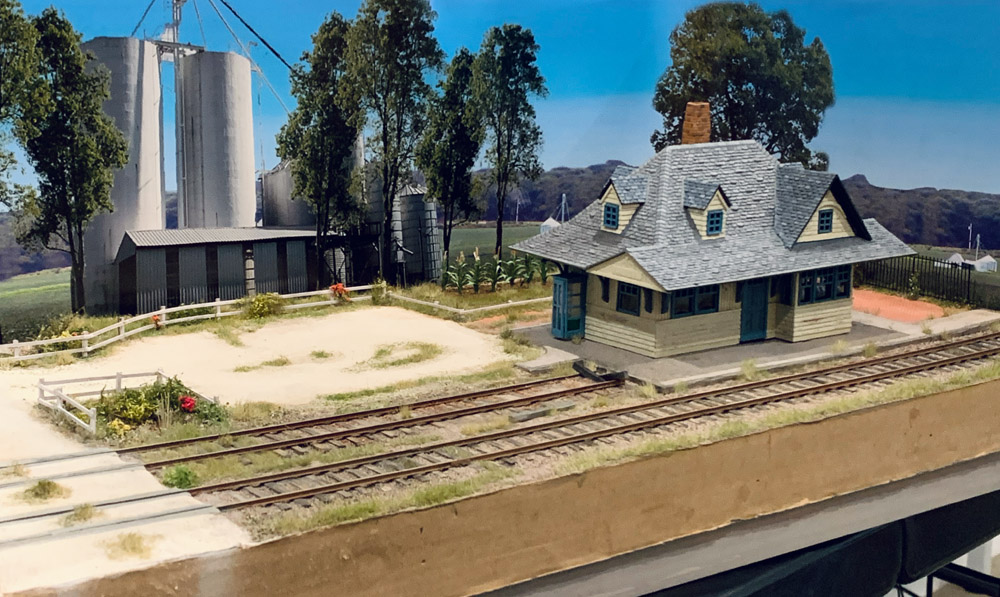
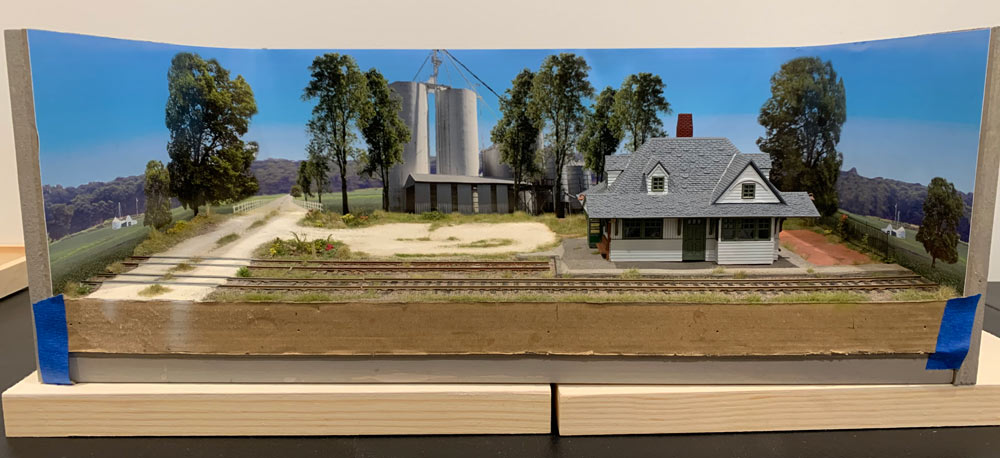
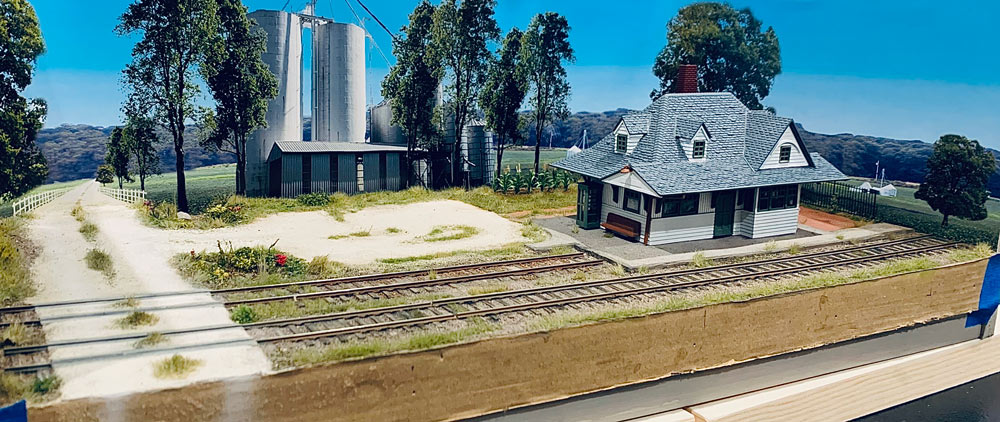
The final result:
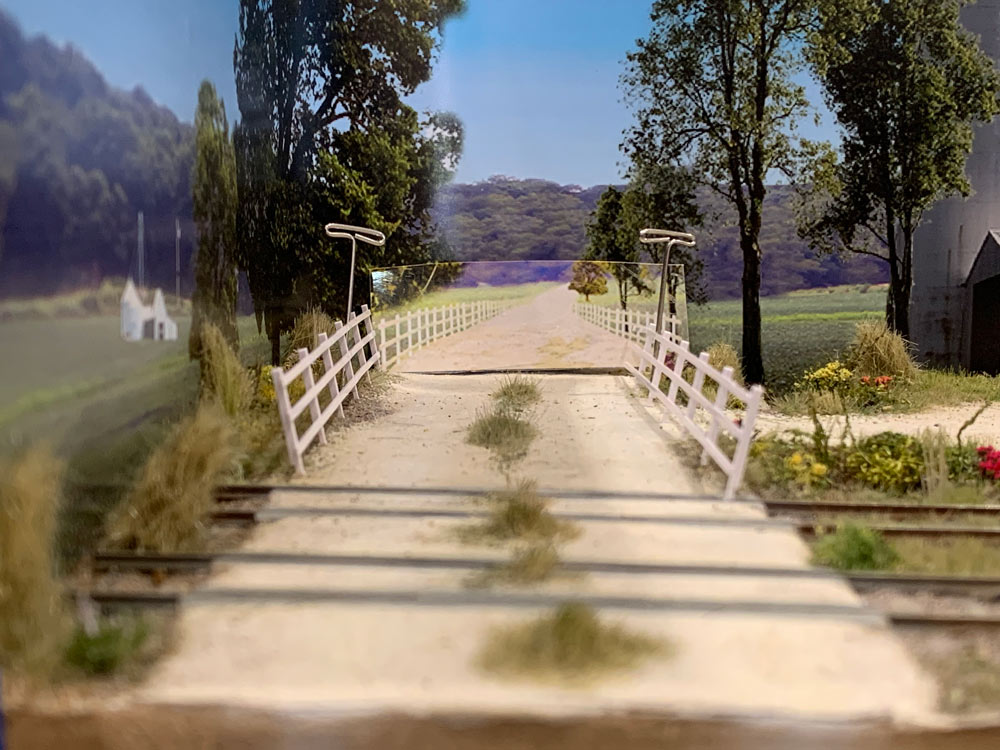
Some close ups:
The roads fades nicely into the background but is still too low. I tried over and over to get the position correct but for some reason I failed. I’ll reduce the height of the HO fence as it approaches the backdrop to get them to match a bit better.This picture illustrates fence issue a little better. If I cannot get the heights to match I may add an overlay on top of the backdrop where the road will be raised a bit.I used a snippet of the road and laid it on top of the backdrop. This could work but would need to disguised in some way.
Other details.
I’ve started adding small details here and there.
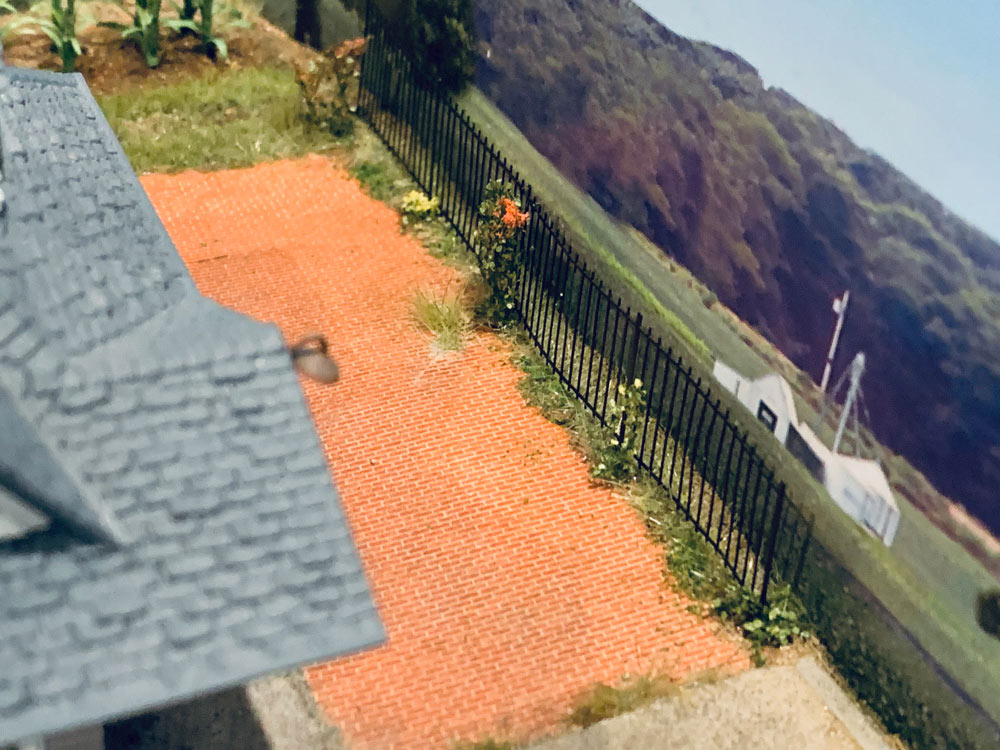
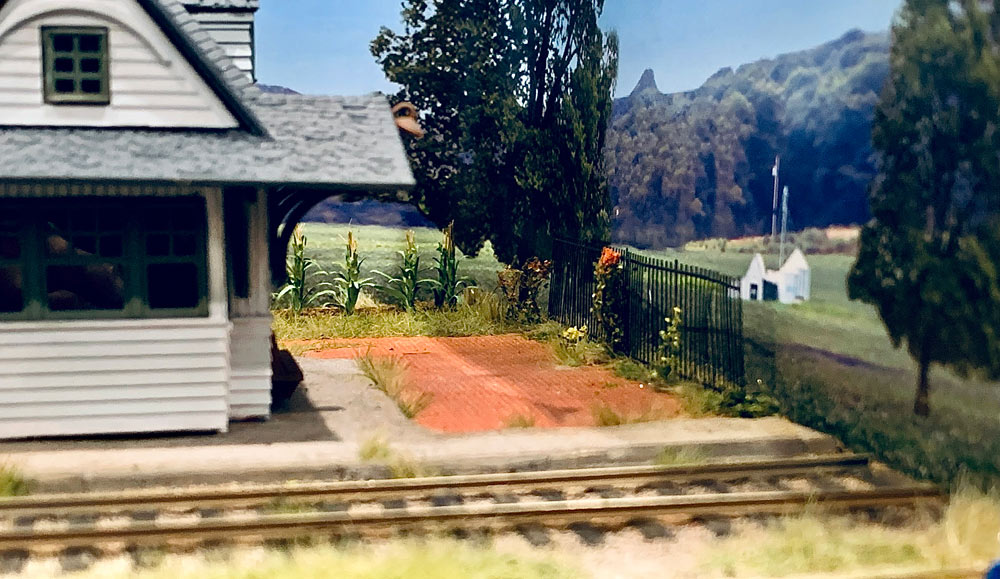
Corn in the cornfield. I’m going to add a fence around this little section in the next few weeks.A fence around the brick path. I warped it on purpose but now I’m thinking that I will straighten it.A view of the new fence and cornfield together.
And finally the point at which I am at:
So still lots to do:
New depot building
Fencing
Cross bucks
Vehicles
People
Team track platform – I’m scratch-building this.
Telegraph poles and wires
Whatever else I can think of to bring the scene to life
Once again been super busy with life but have kept on with the diorama in my spare time. As mentioned before progress has been slow but steady. Besides modeling the diorama I continue to experiment with different techniques and materials, and continue to organize the modeling room. I have also started the planning of my new layout which I intend to commence building early next year.
Here is the latest:
Cornfield
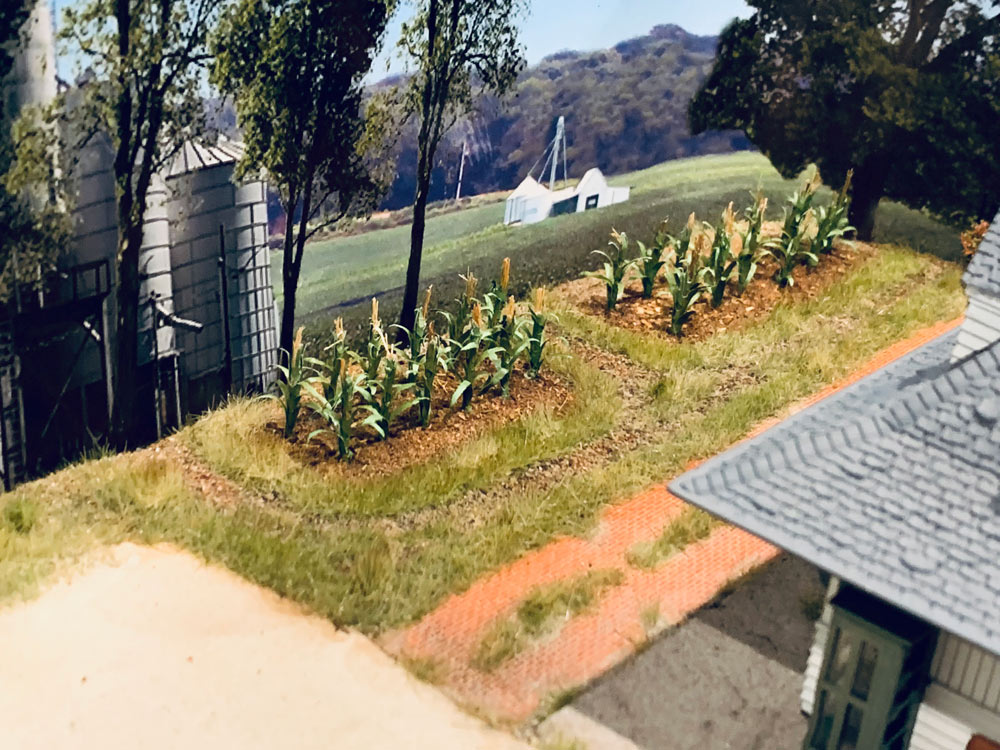
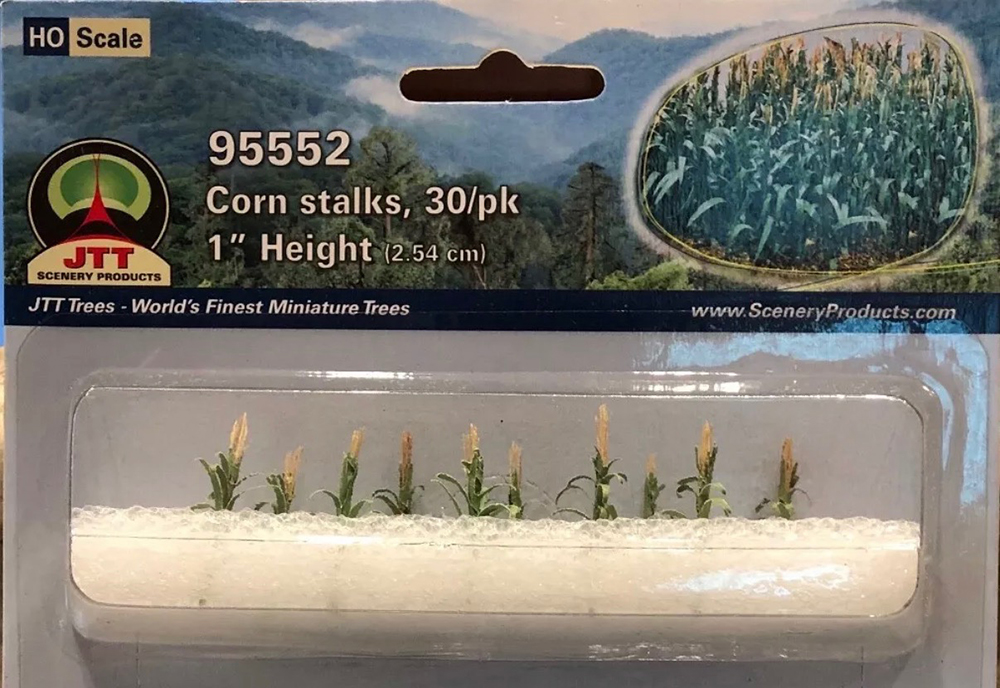
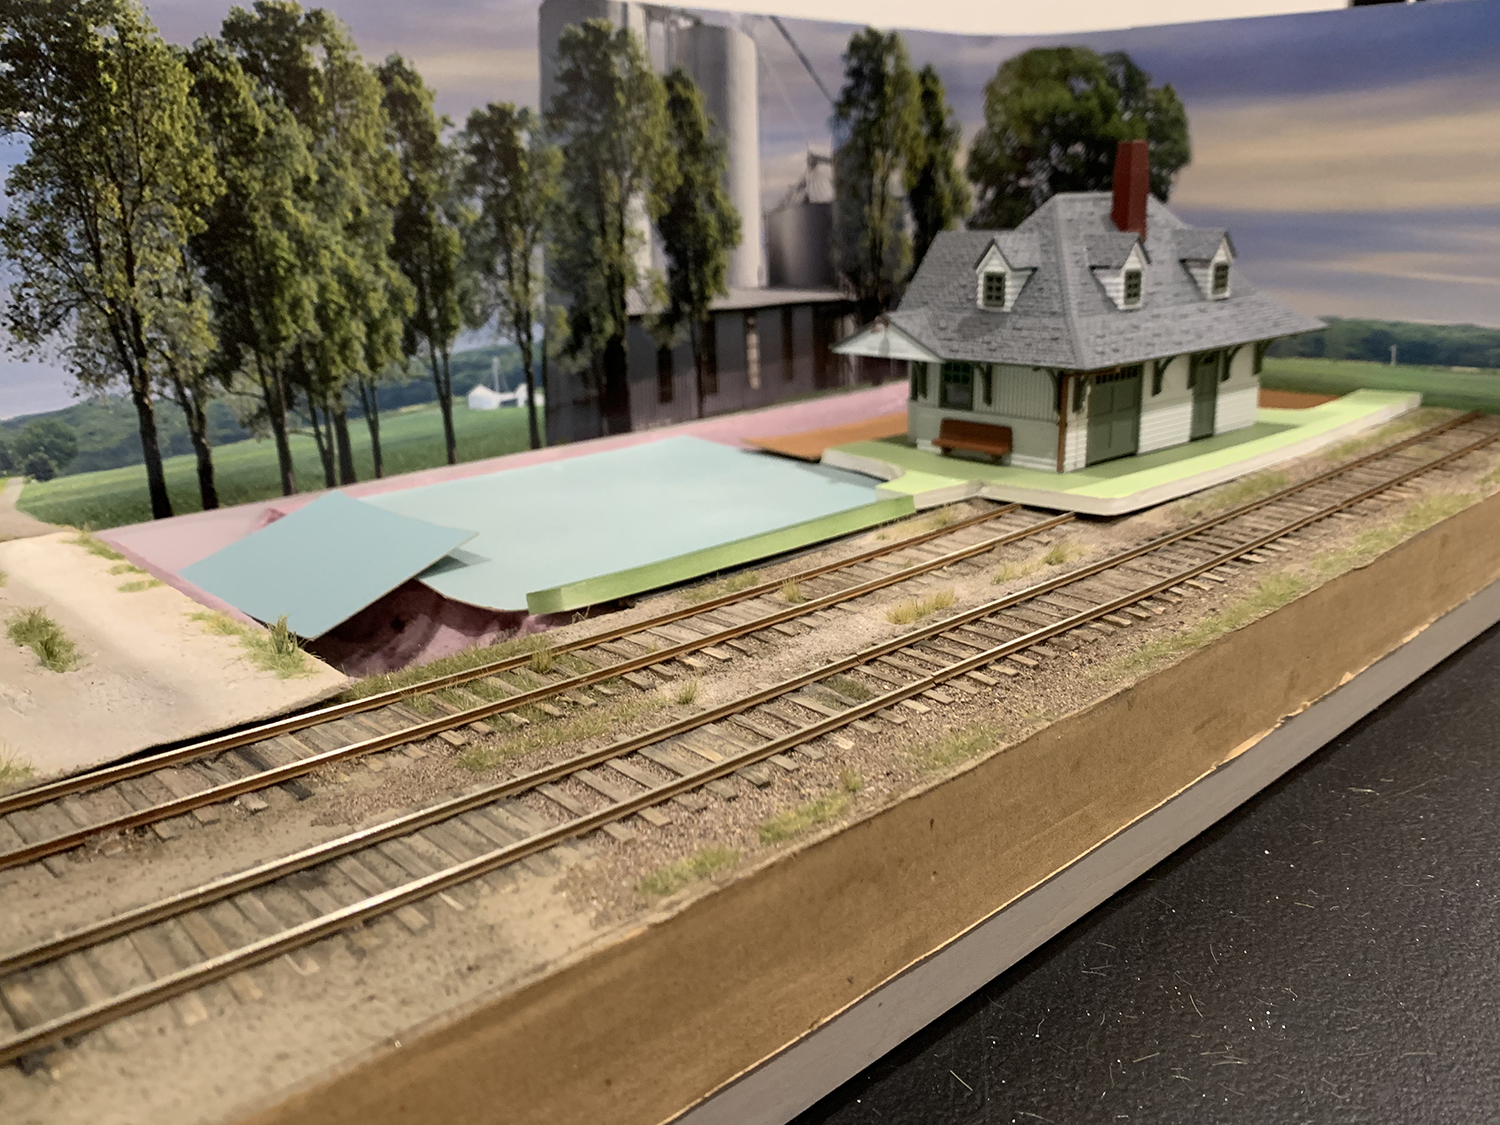
It took a little while to decide what to put into the little area alongside the rear path behind the depot. I thought about modeling a garden or some maintenance buildings, but in the end decided upon a corn field. This would hide the backdrop join and blend the diorama with the feed mill in the background.
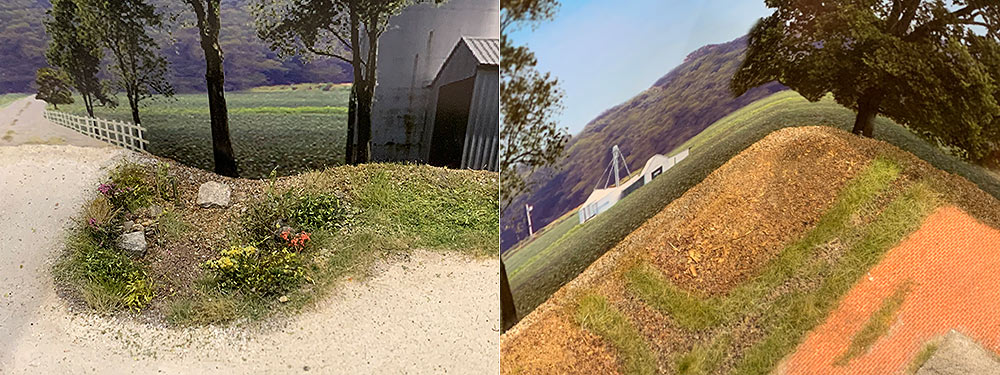
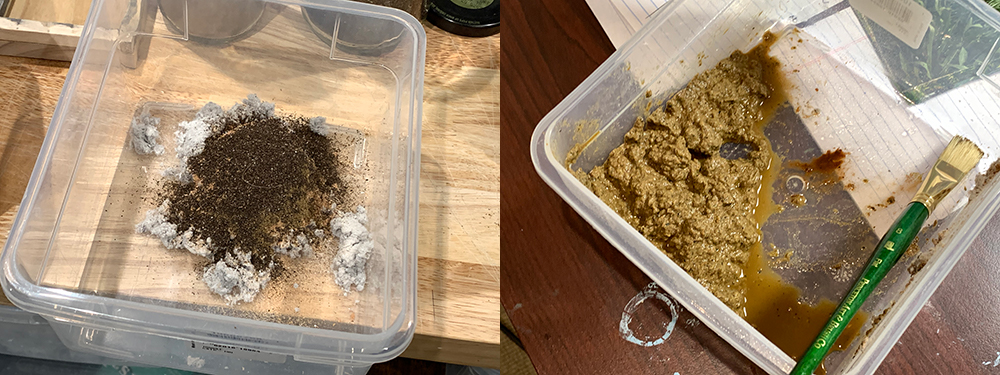
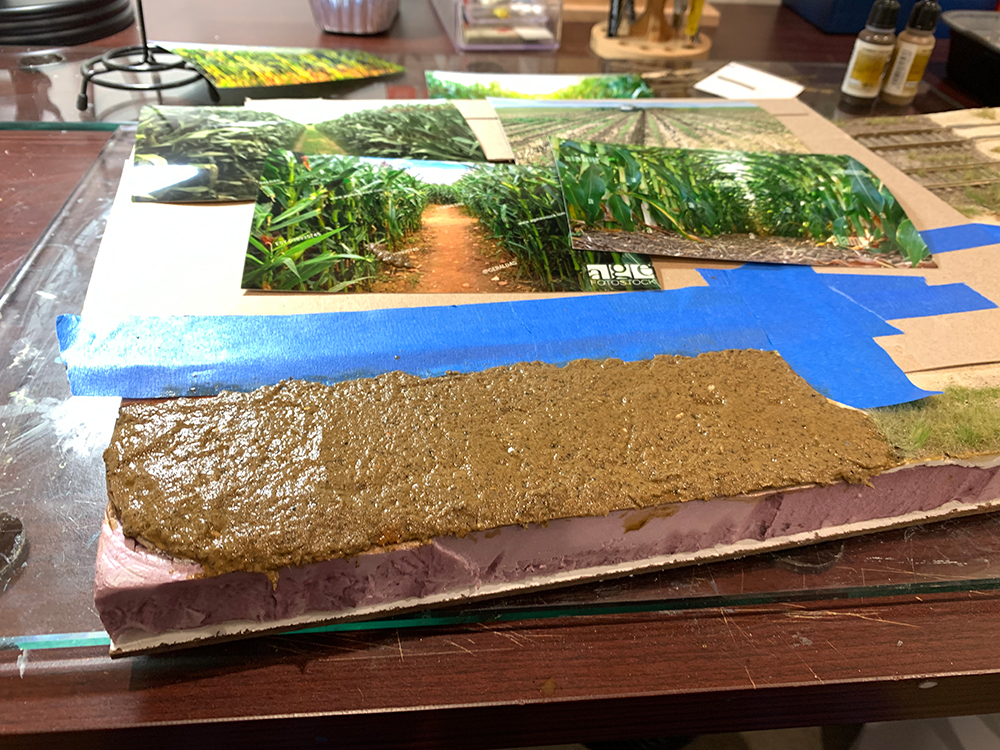
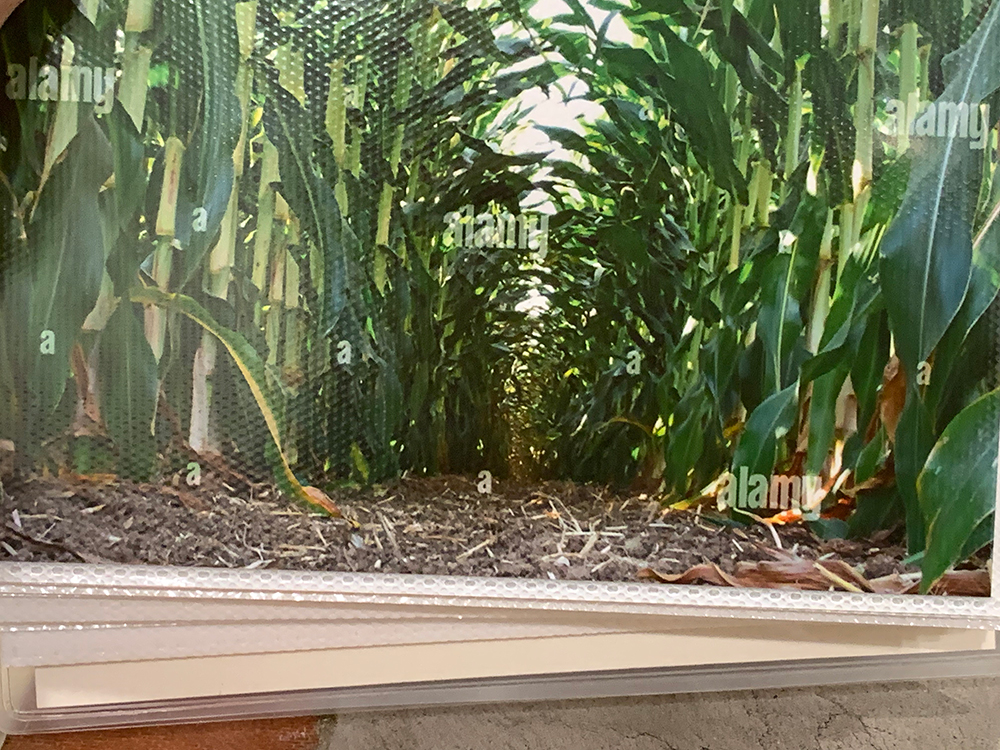
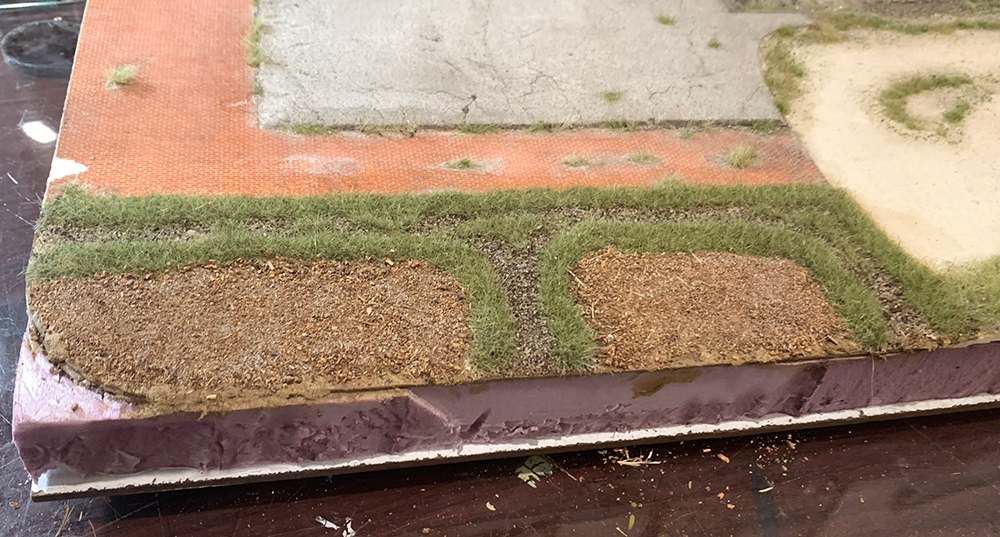
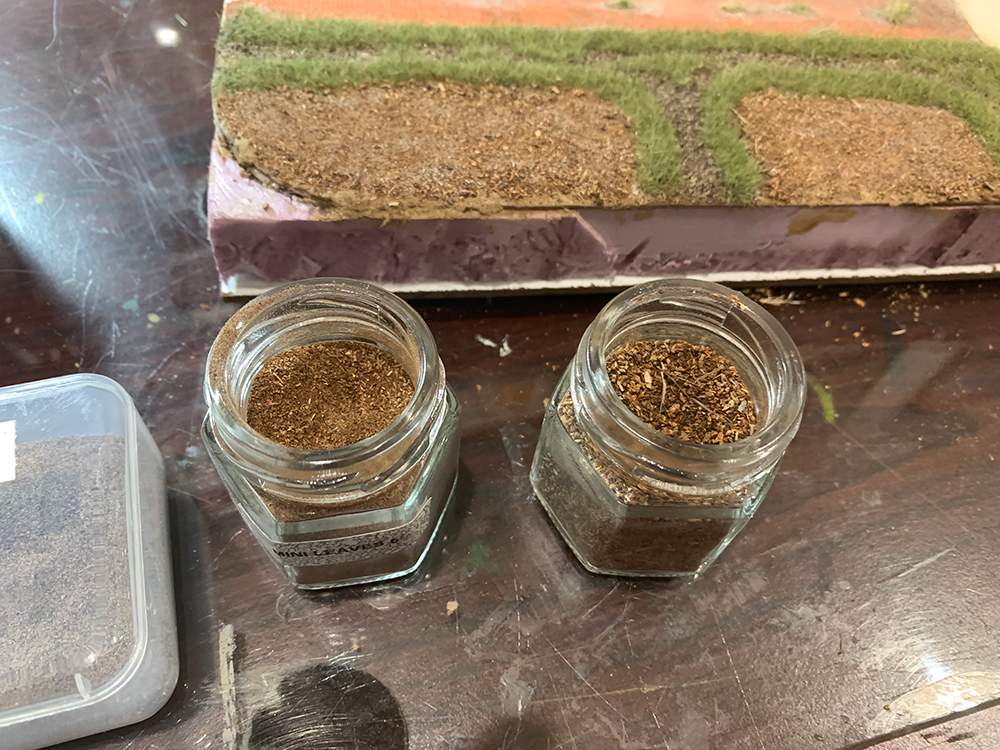
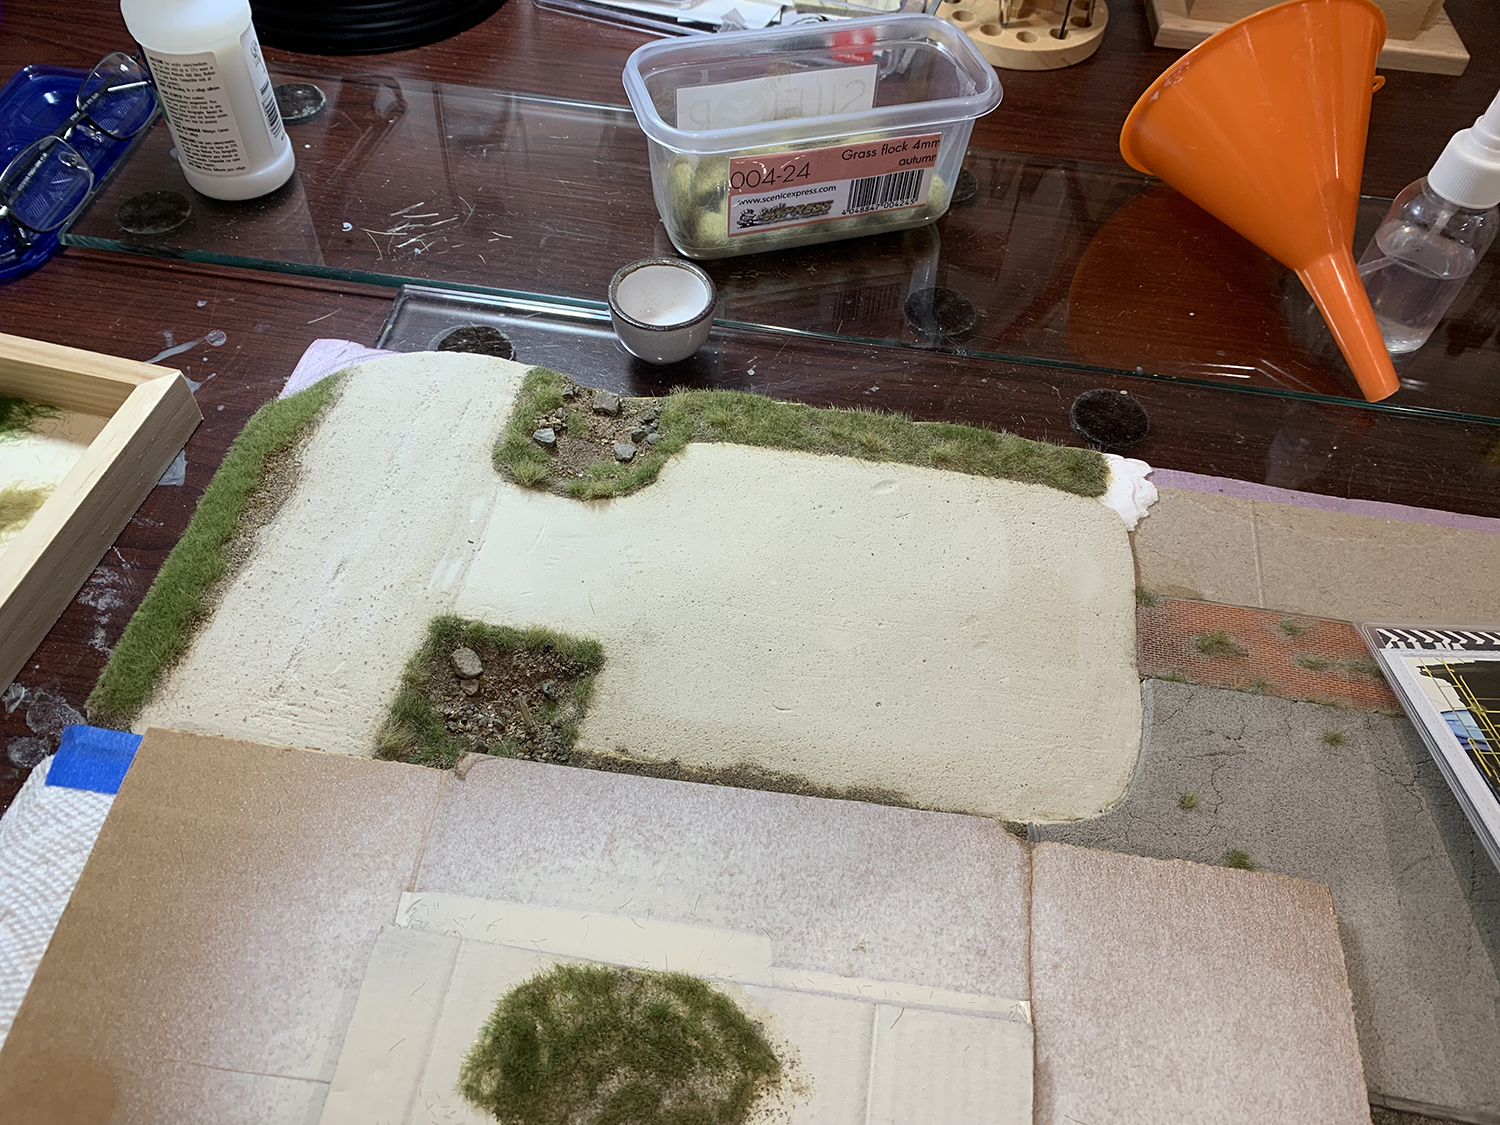
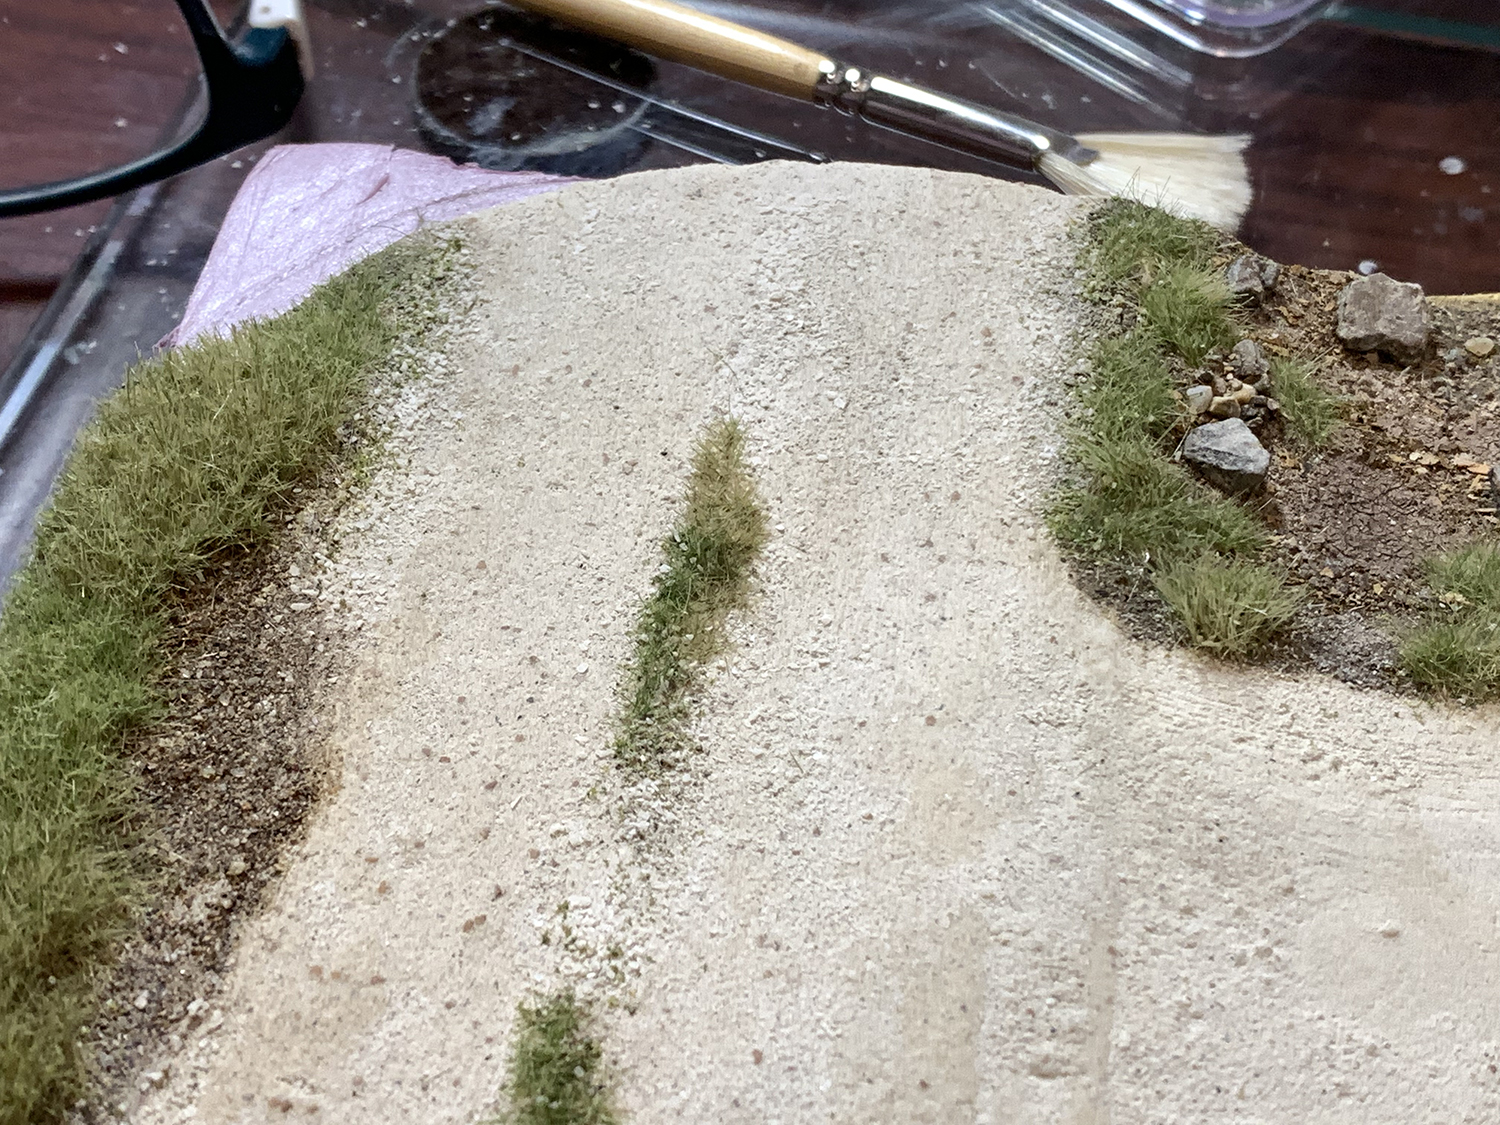
The area beside the path needed modeling and I decided upon a cornfield.I didn’t want to make the corn stalks myself and was able to find several products that I could use. I decided upon these from JTT. I still have to ‘plant’ them and until that time I won’t know how they will look. If they don’t look good I may have to customize them or simply use another brand.I like to model the landscape in a way that matches real life as much as possible and one of the first things I do when modeling the earth is to create an earth-mix to use as a base. The mix is made from Celluclay, white glue, sawdust, Woodland Scenics earth undercoat, water, and a mix of sand and soil from my natural materials collection. I also gave it quick spray of germ killer. It looks unpleasant but spreads easily enough and hardens in a few days to very nice and prototypical mud base.Once spread across the area there is nothing to do but wait a few days for it to dry and harden. In this case I left it a week and when I returned it had hardened to a very nice workable top soil.As mentioned in the past I like to model from photos as it keeps me on the prototypical straight and narrow. In the case of the corn field I could see from photos that there were two ground features to keep in mind: the base upon which the corn stalks would be planted and the surrounding borders to the planted area. I decided to model these two features next. The picture above has an example of a grassy verge.The picture above shows a muddy base with dried vegetation. I used real dried vegetation to get this effect.And here is my version of the same thing. Still needs a lot of work but it generally heads in the right direction. I used masks to create that manicured grass effect which I will mess with it to make it look a little wilder over the next few weeksReal dried leaves that I obtained by grinding up real leaves and wood.
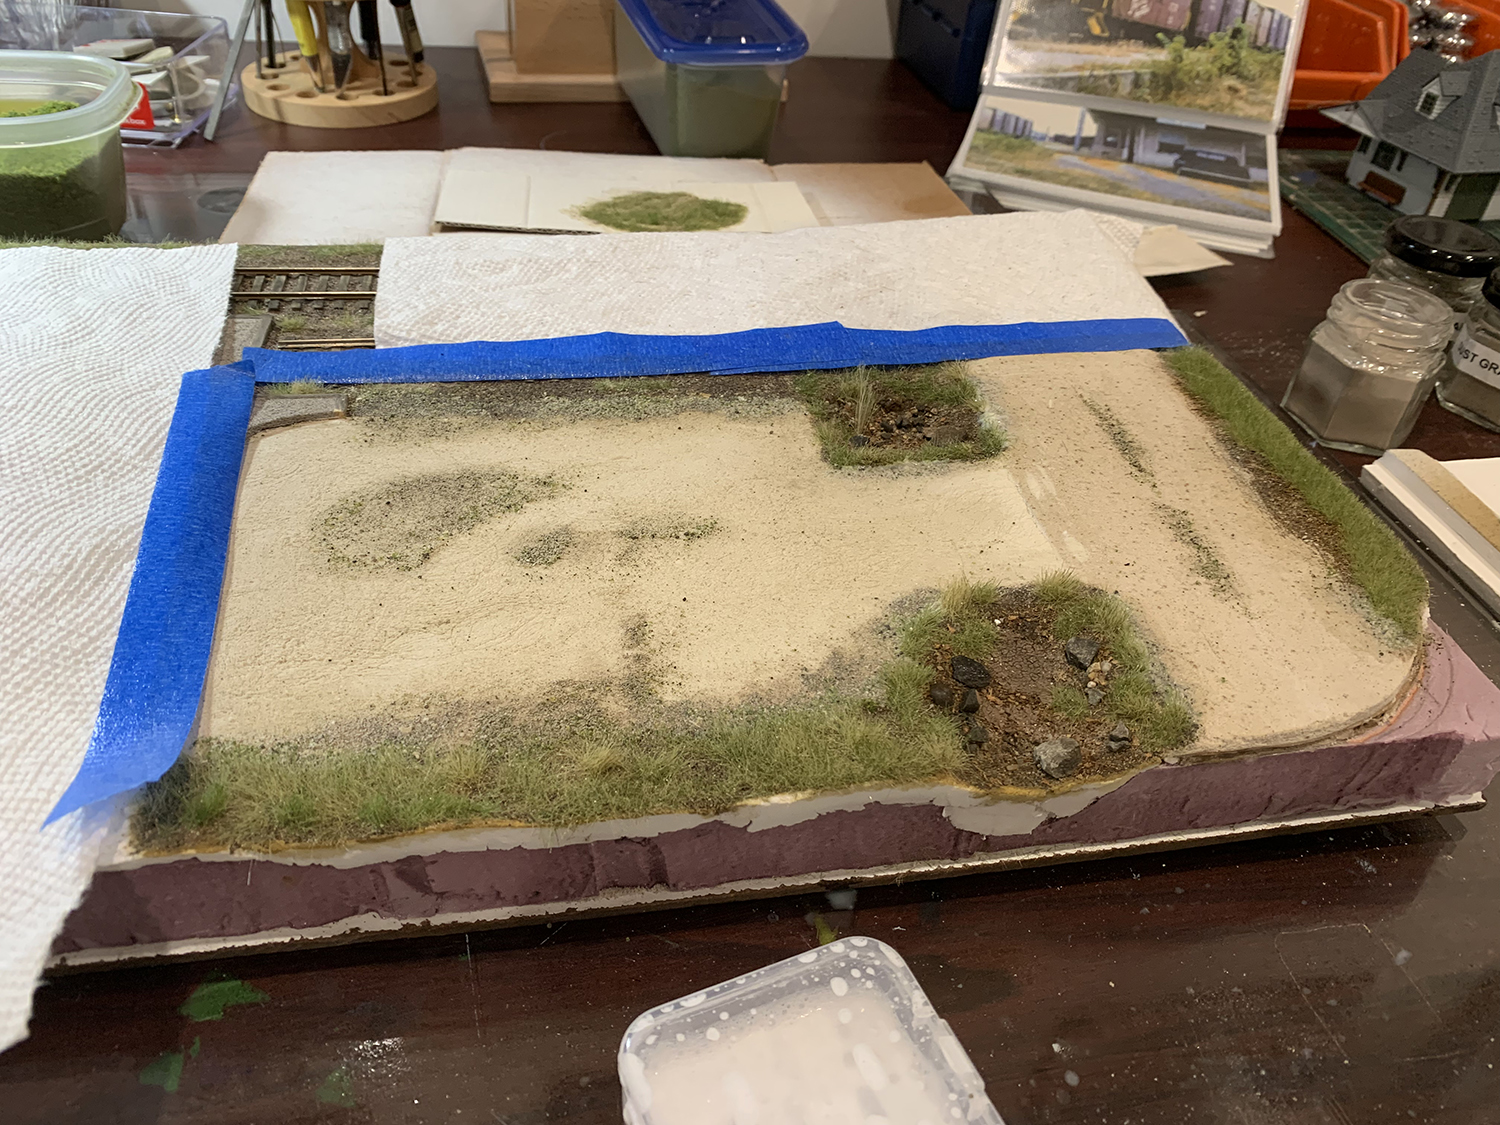
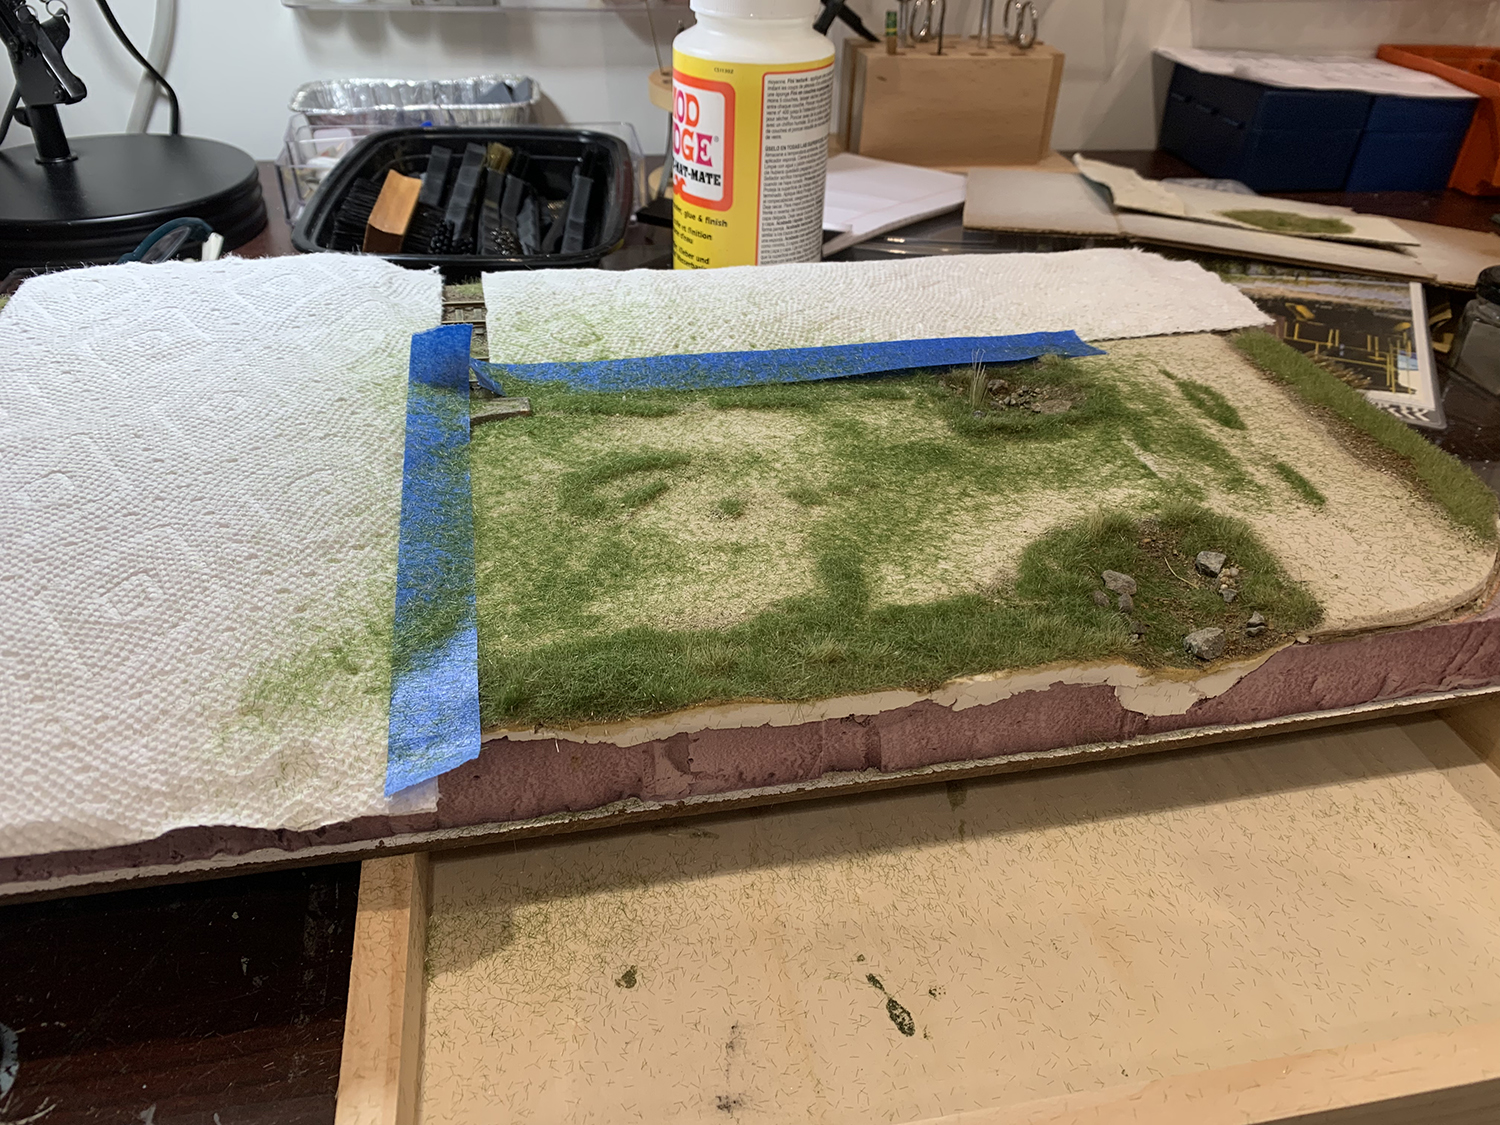
I’m happy with the corn field area for the time being. Plenty more to do but good enough to keep moving and come back to it at a later date. The diorama is looking a little grey and messy right now but that is about to change. I’m going to start cleaning things up and will add vegetation that will make the overall diorama look brighter and more colorful.
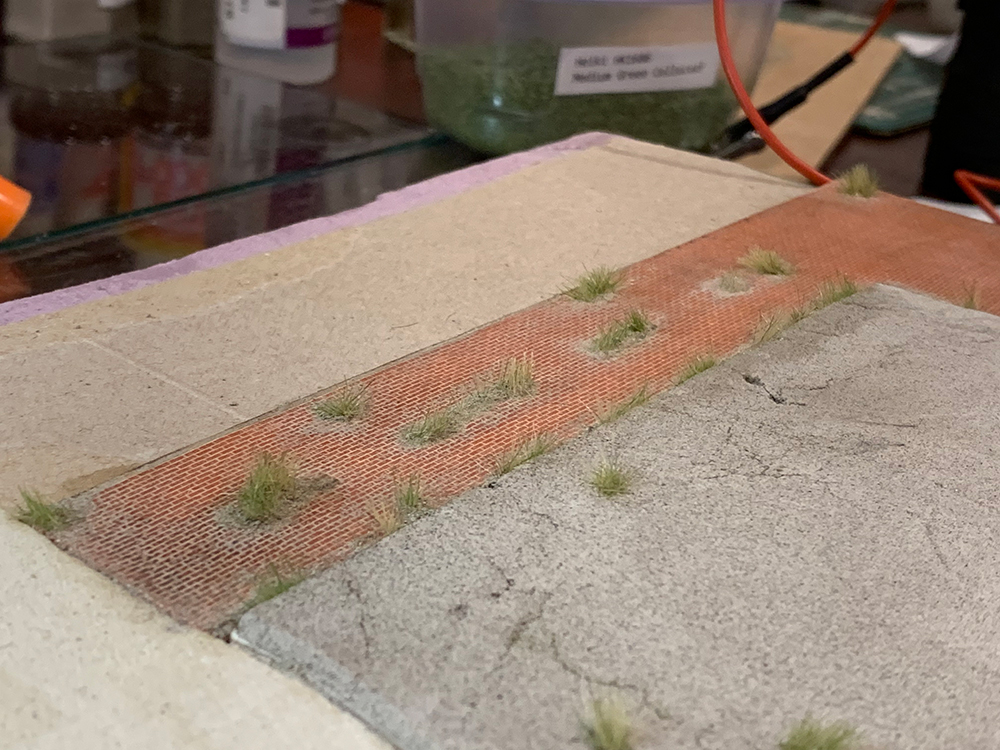
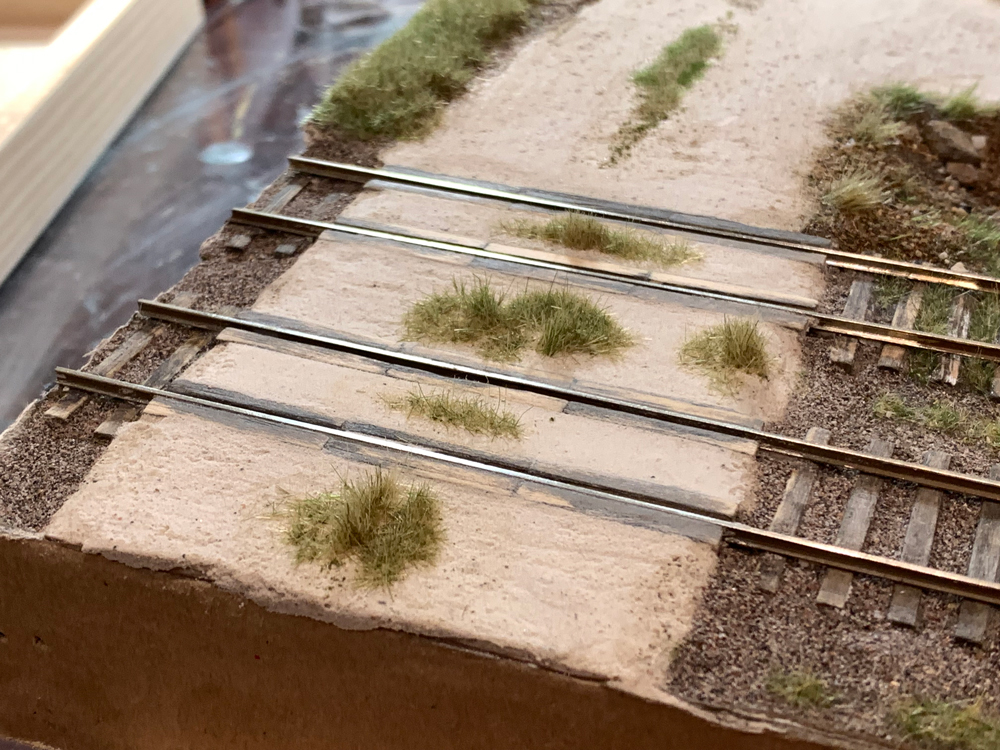
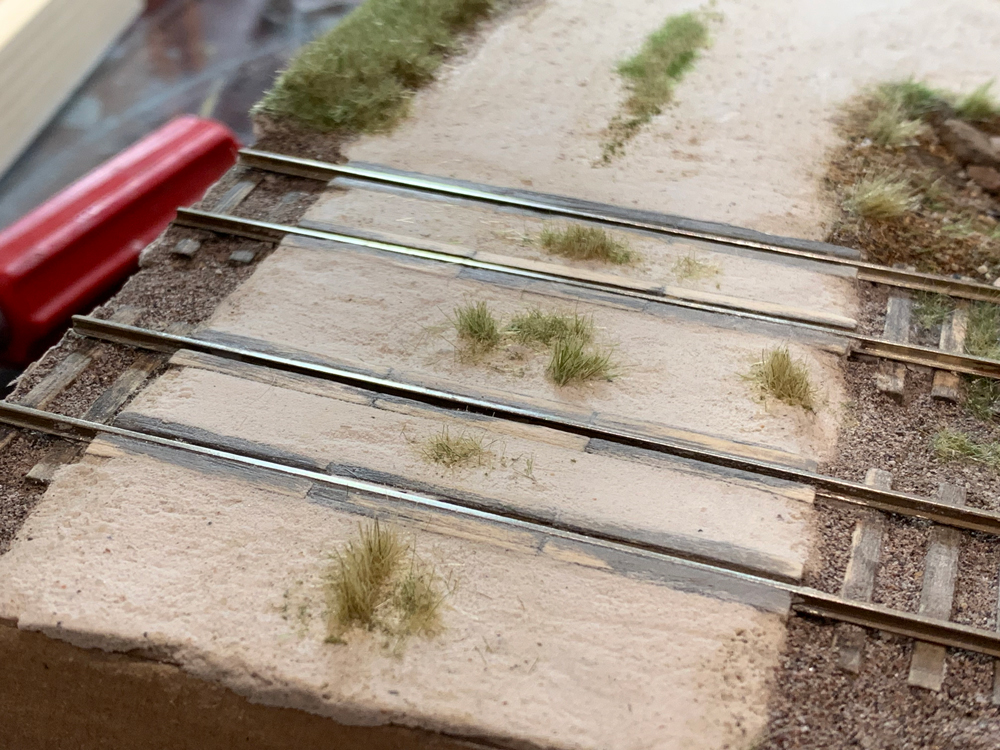
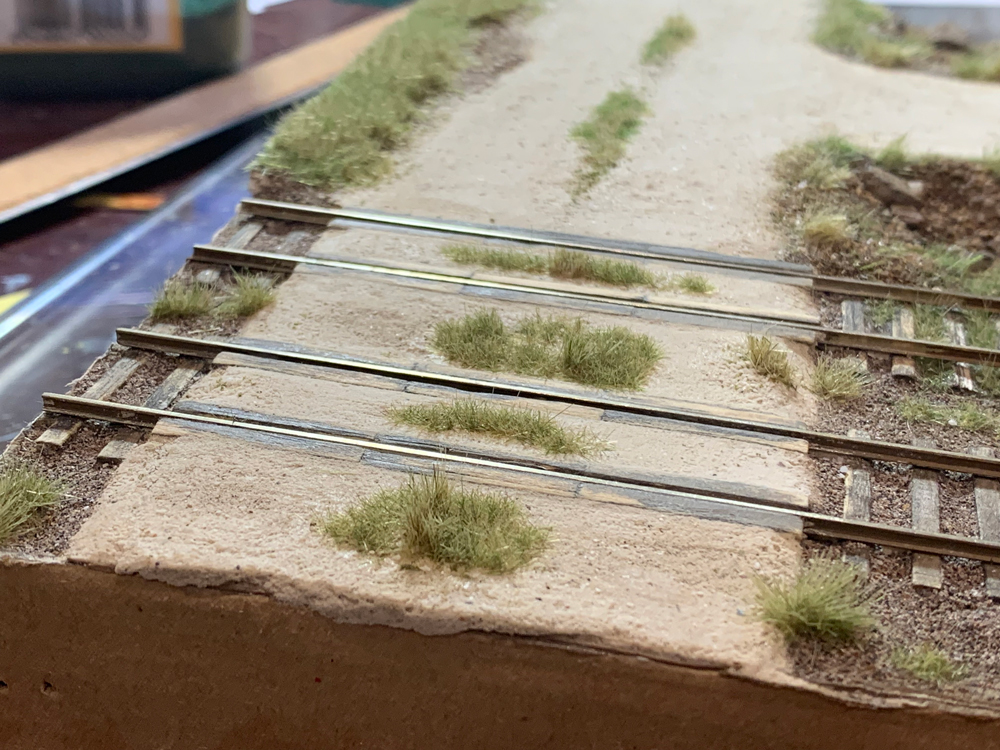
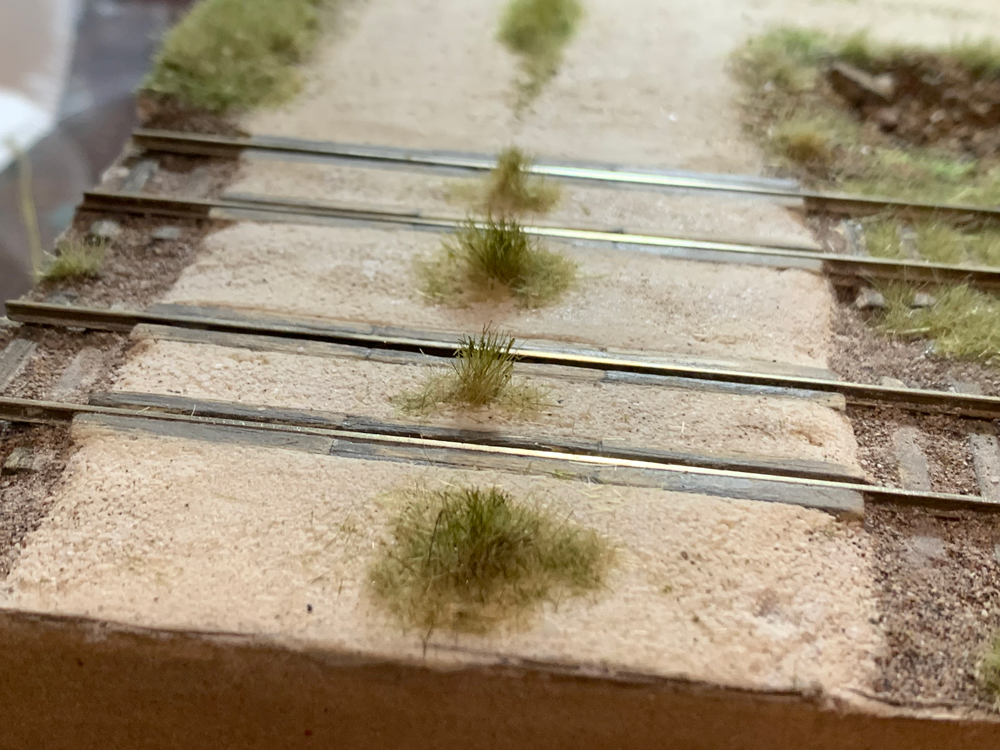
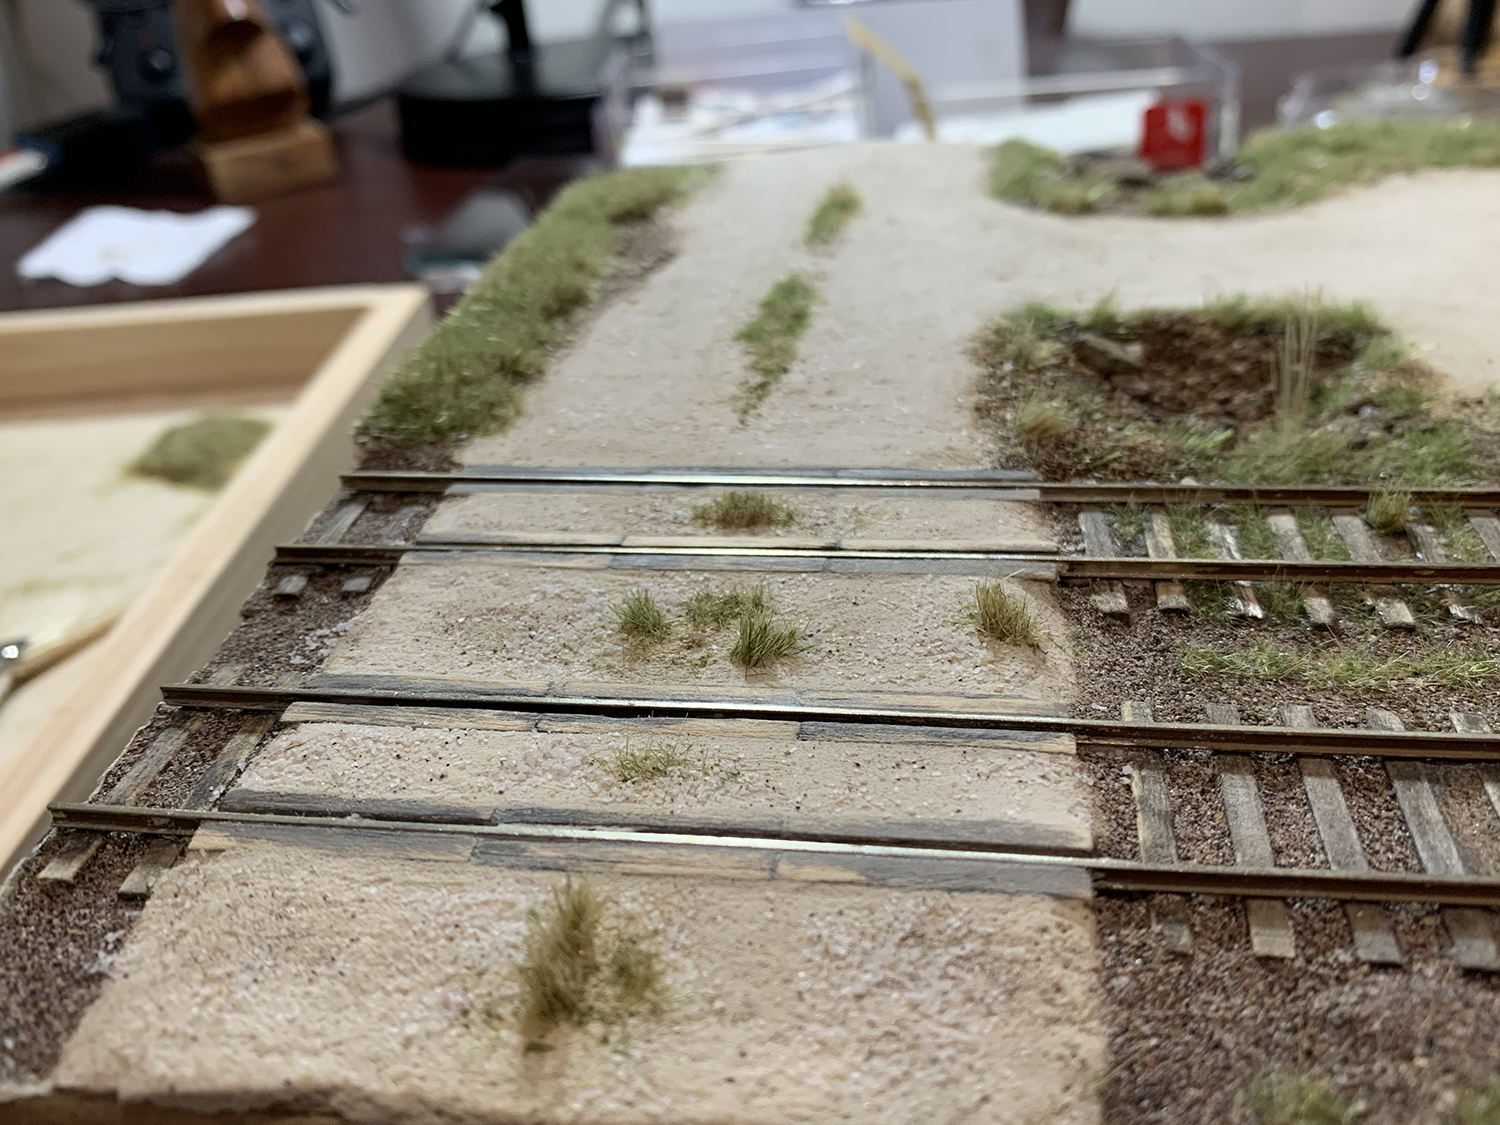
Crossing tufts
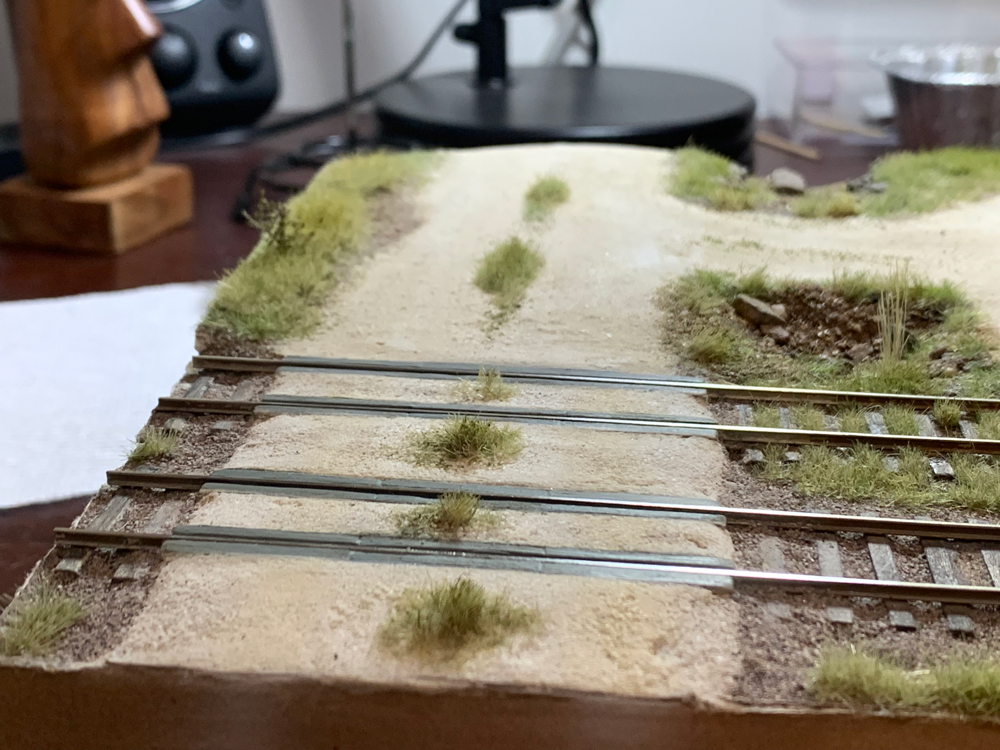
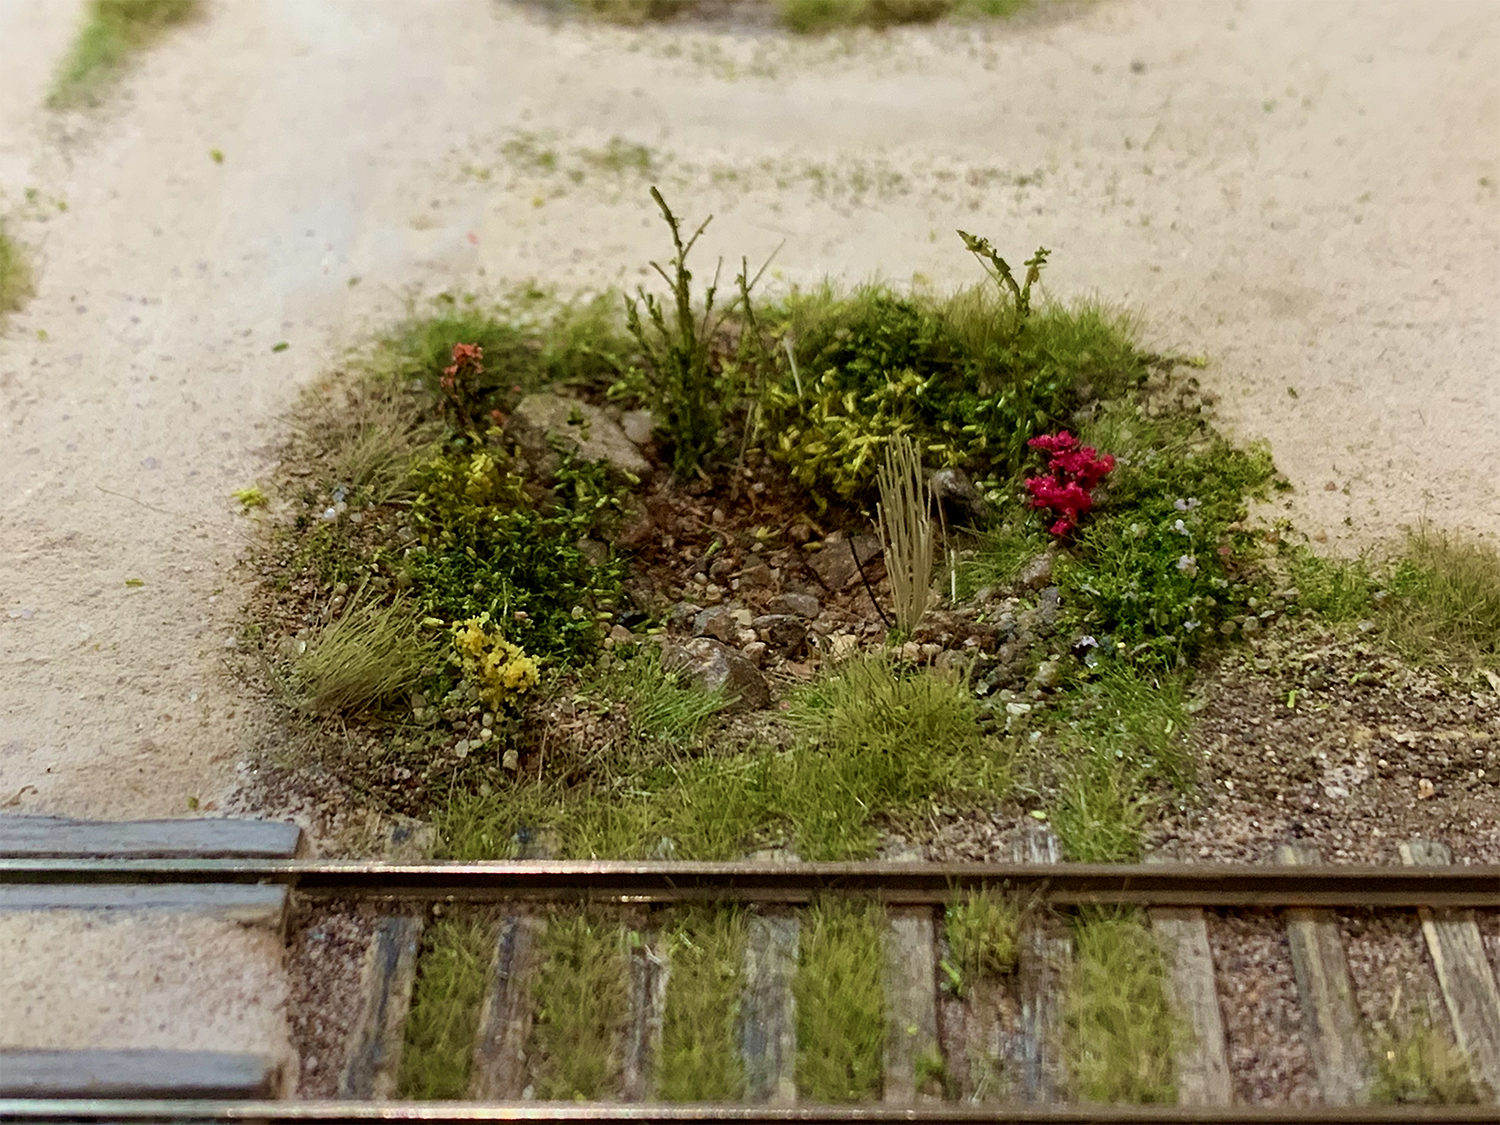
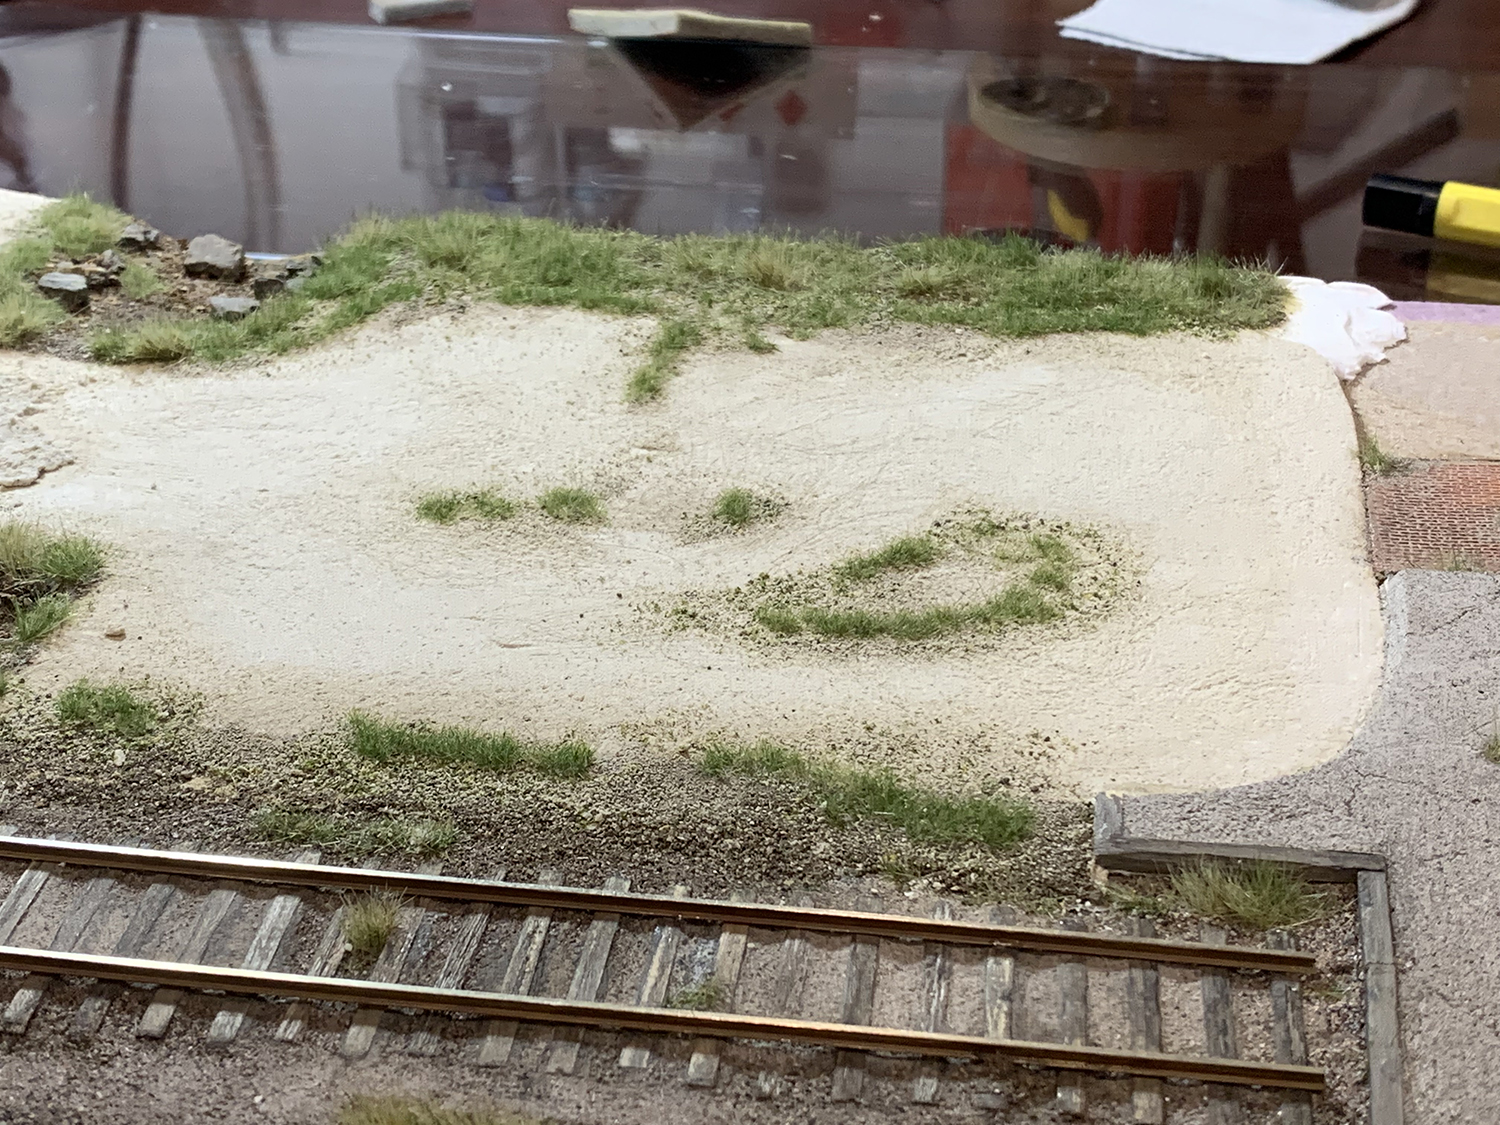
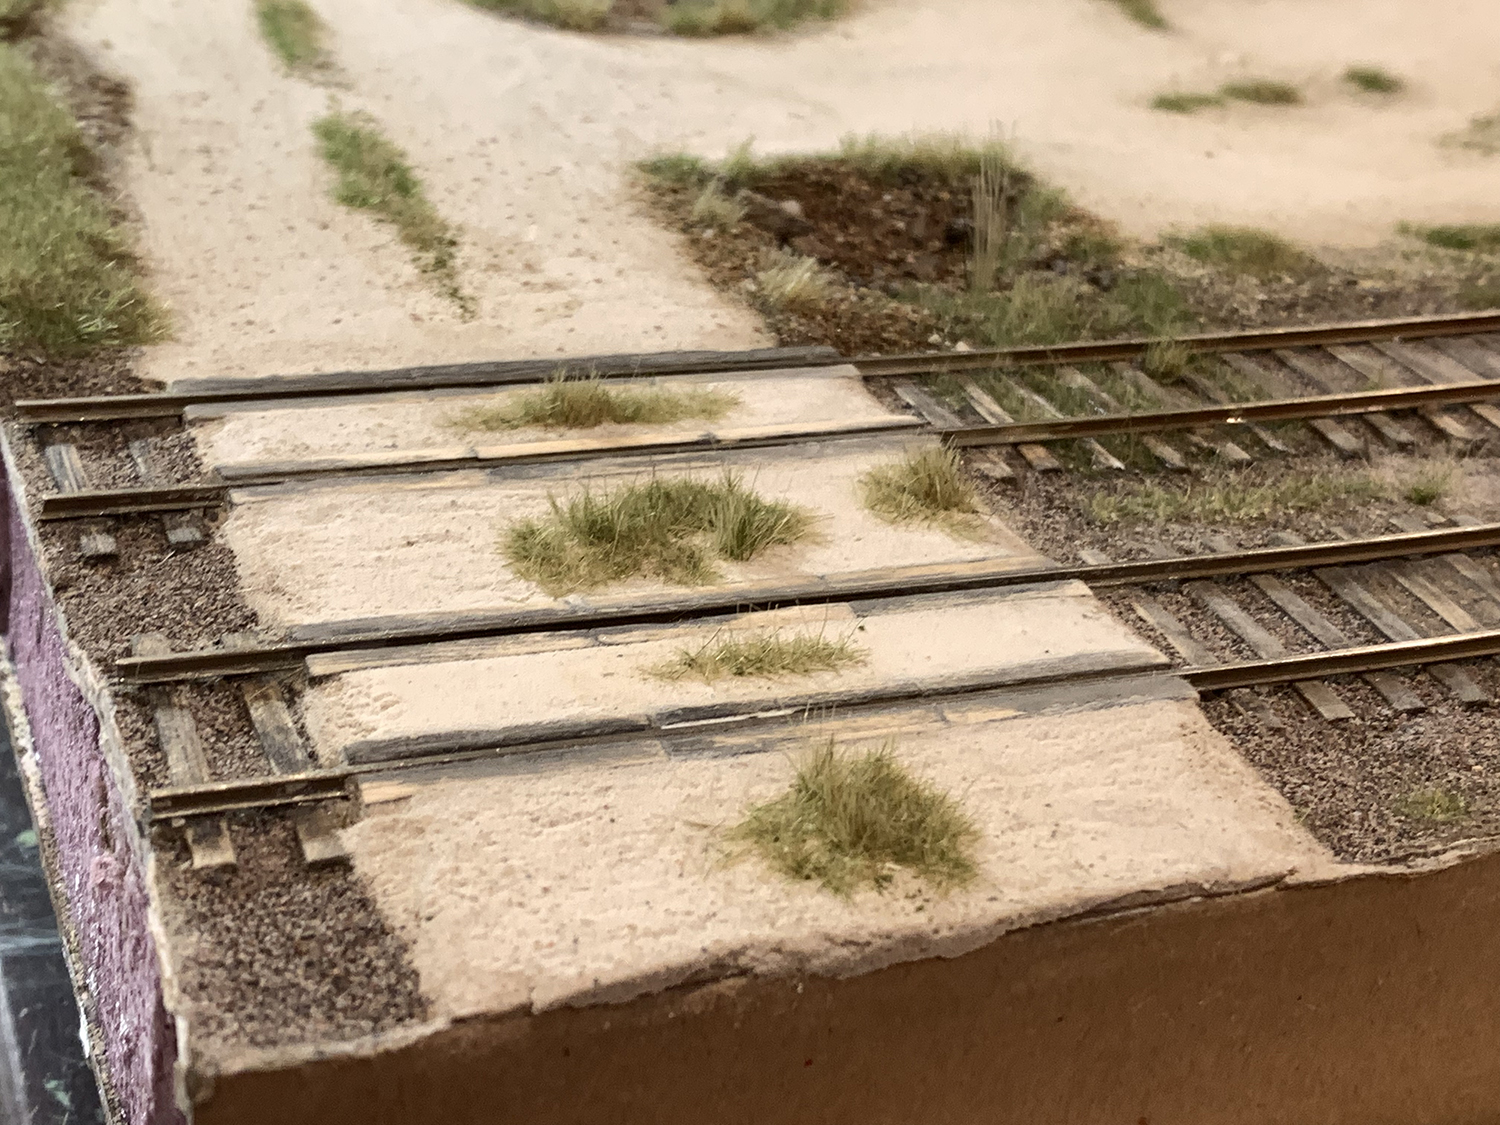
It took three attempts to get the center grass tufts just right. My original modeling rules had stated to not experiment on the model itself but unfortunately I broke by not having a method worked out before attempting it on the model. By breaking that rule paid the price as each time I failed to produce something I was happy with I had to remove the crossing gravel base, remake the paste and wait three days for it to dry before starting the tufts again. As such the crossing area and the grass tufts took nearly four weeks to complete to my satisfaction. I would even go as far as saying that they are still not quite right – they seem a little overscale – but at some point you just have to move on and take your learnings on to the next model.
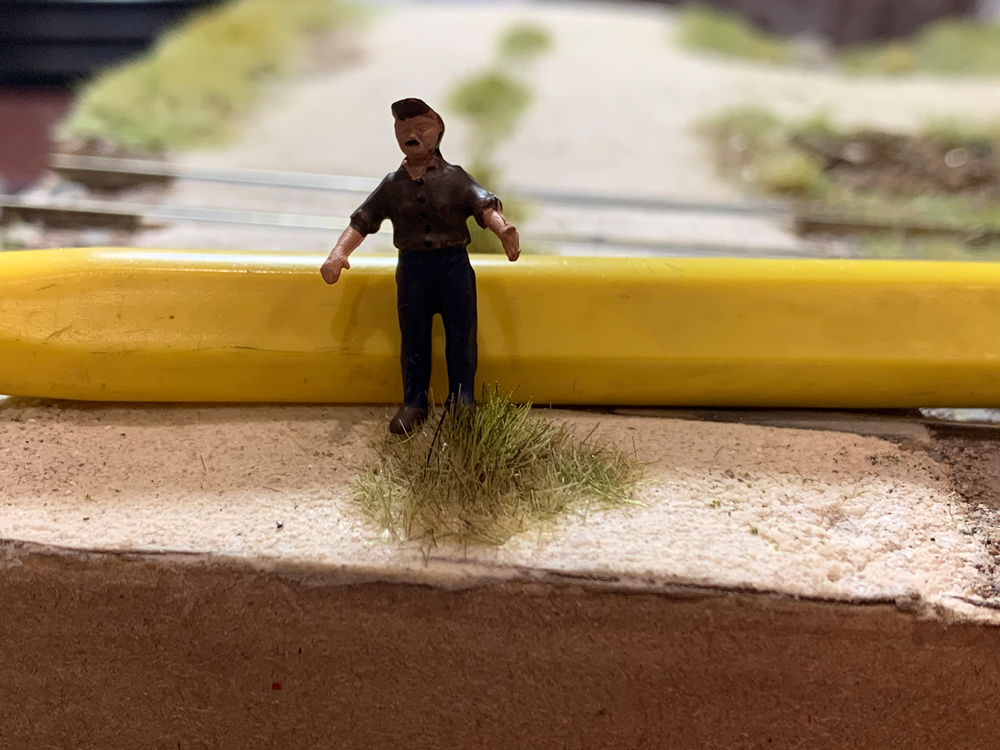
The goal with the tufts was to model them in a much more realistic way than you generally see. Most model grass tufts splay outwards as result of the electric charge that pushes the strands away from each other. In some circumstances that is realistic and has a place on a model. However I like grass that points straight up, that is sculptured and groomed, and I like grass that has a defined shape and a prototypical height. The method I devised gave me complete control over the creation of tufts and minimized leaving the shape to chance. In the end the method to create tufts ended up being quite simple and I will post the method with photos another time.
Here are some pics:
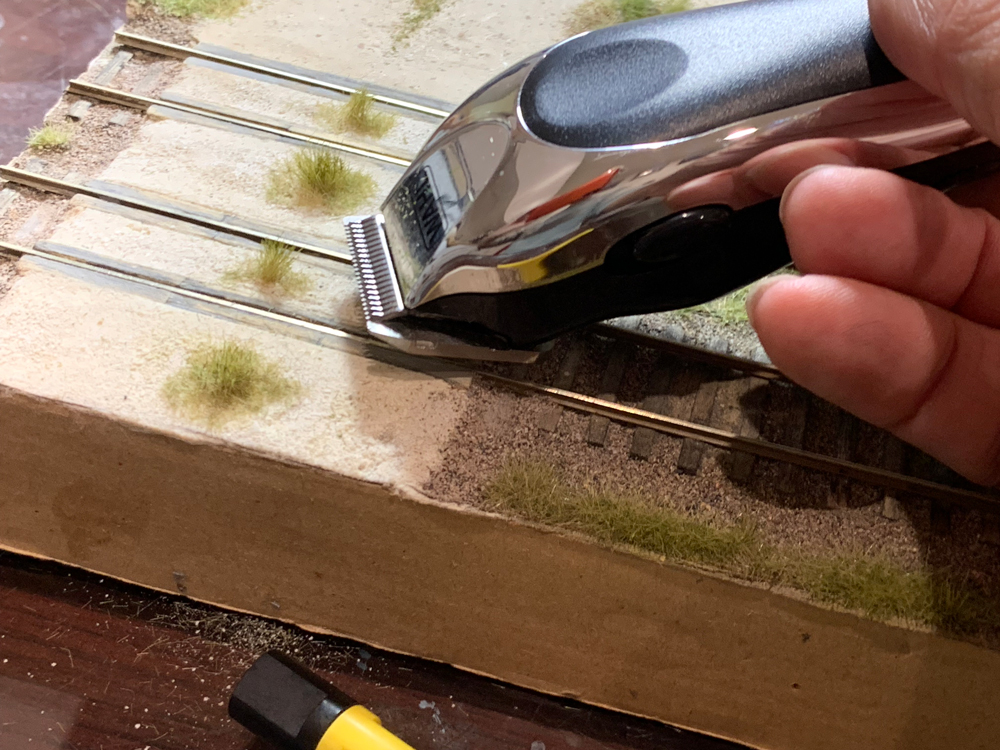
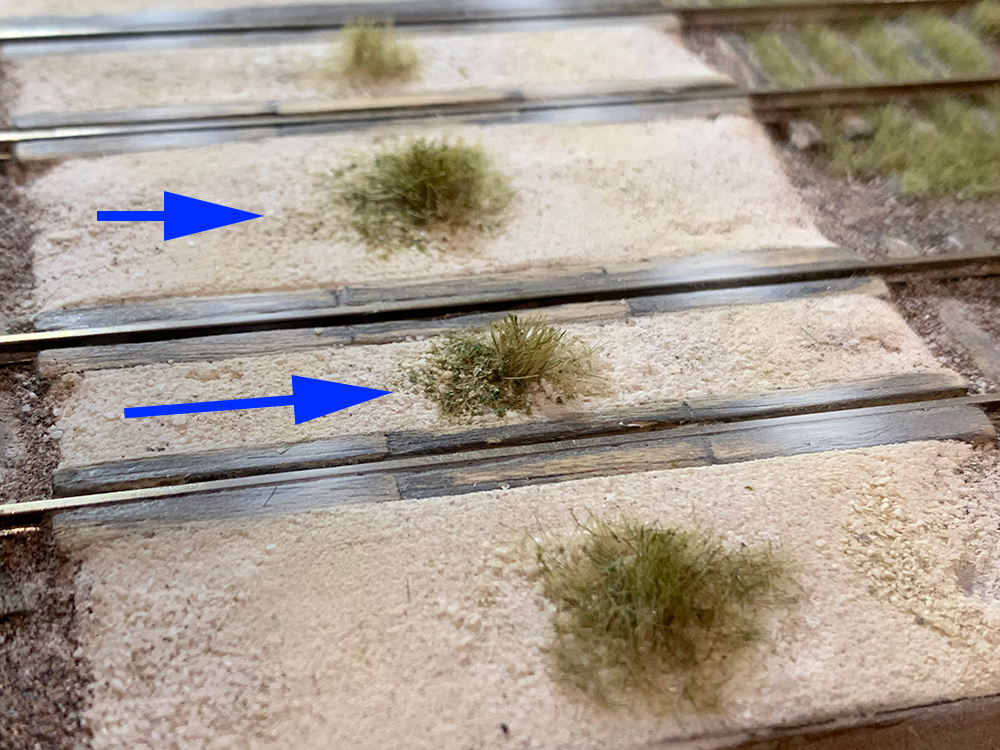
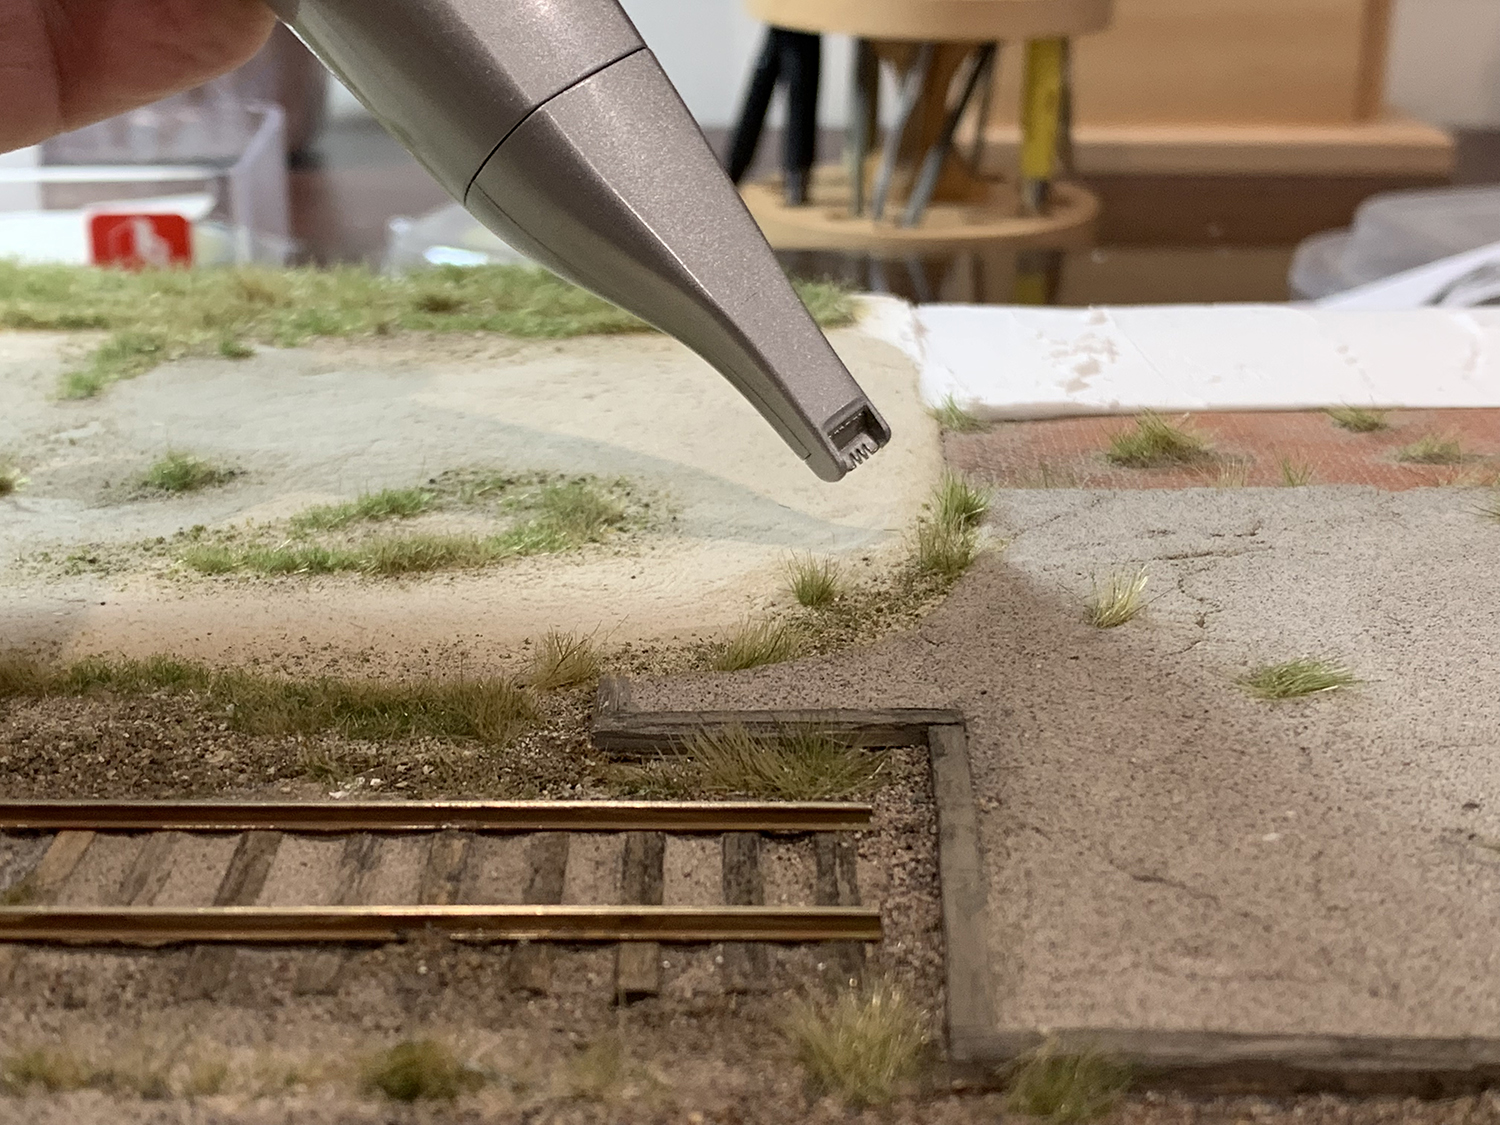
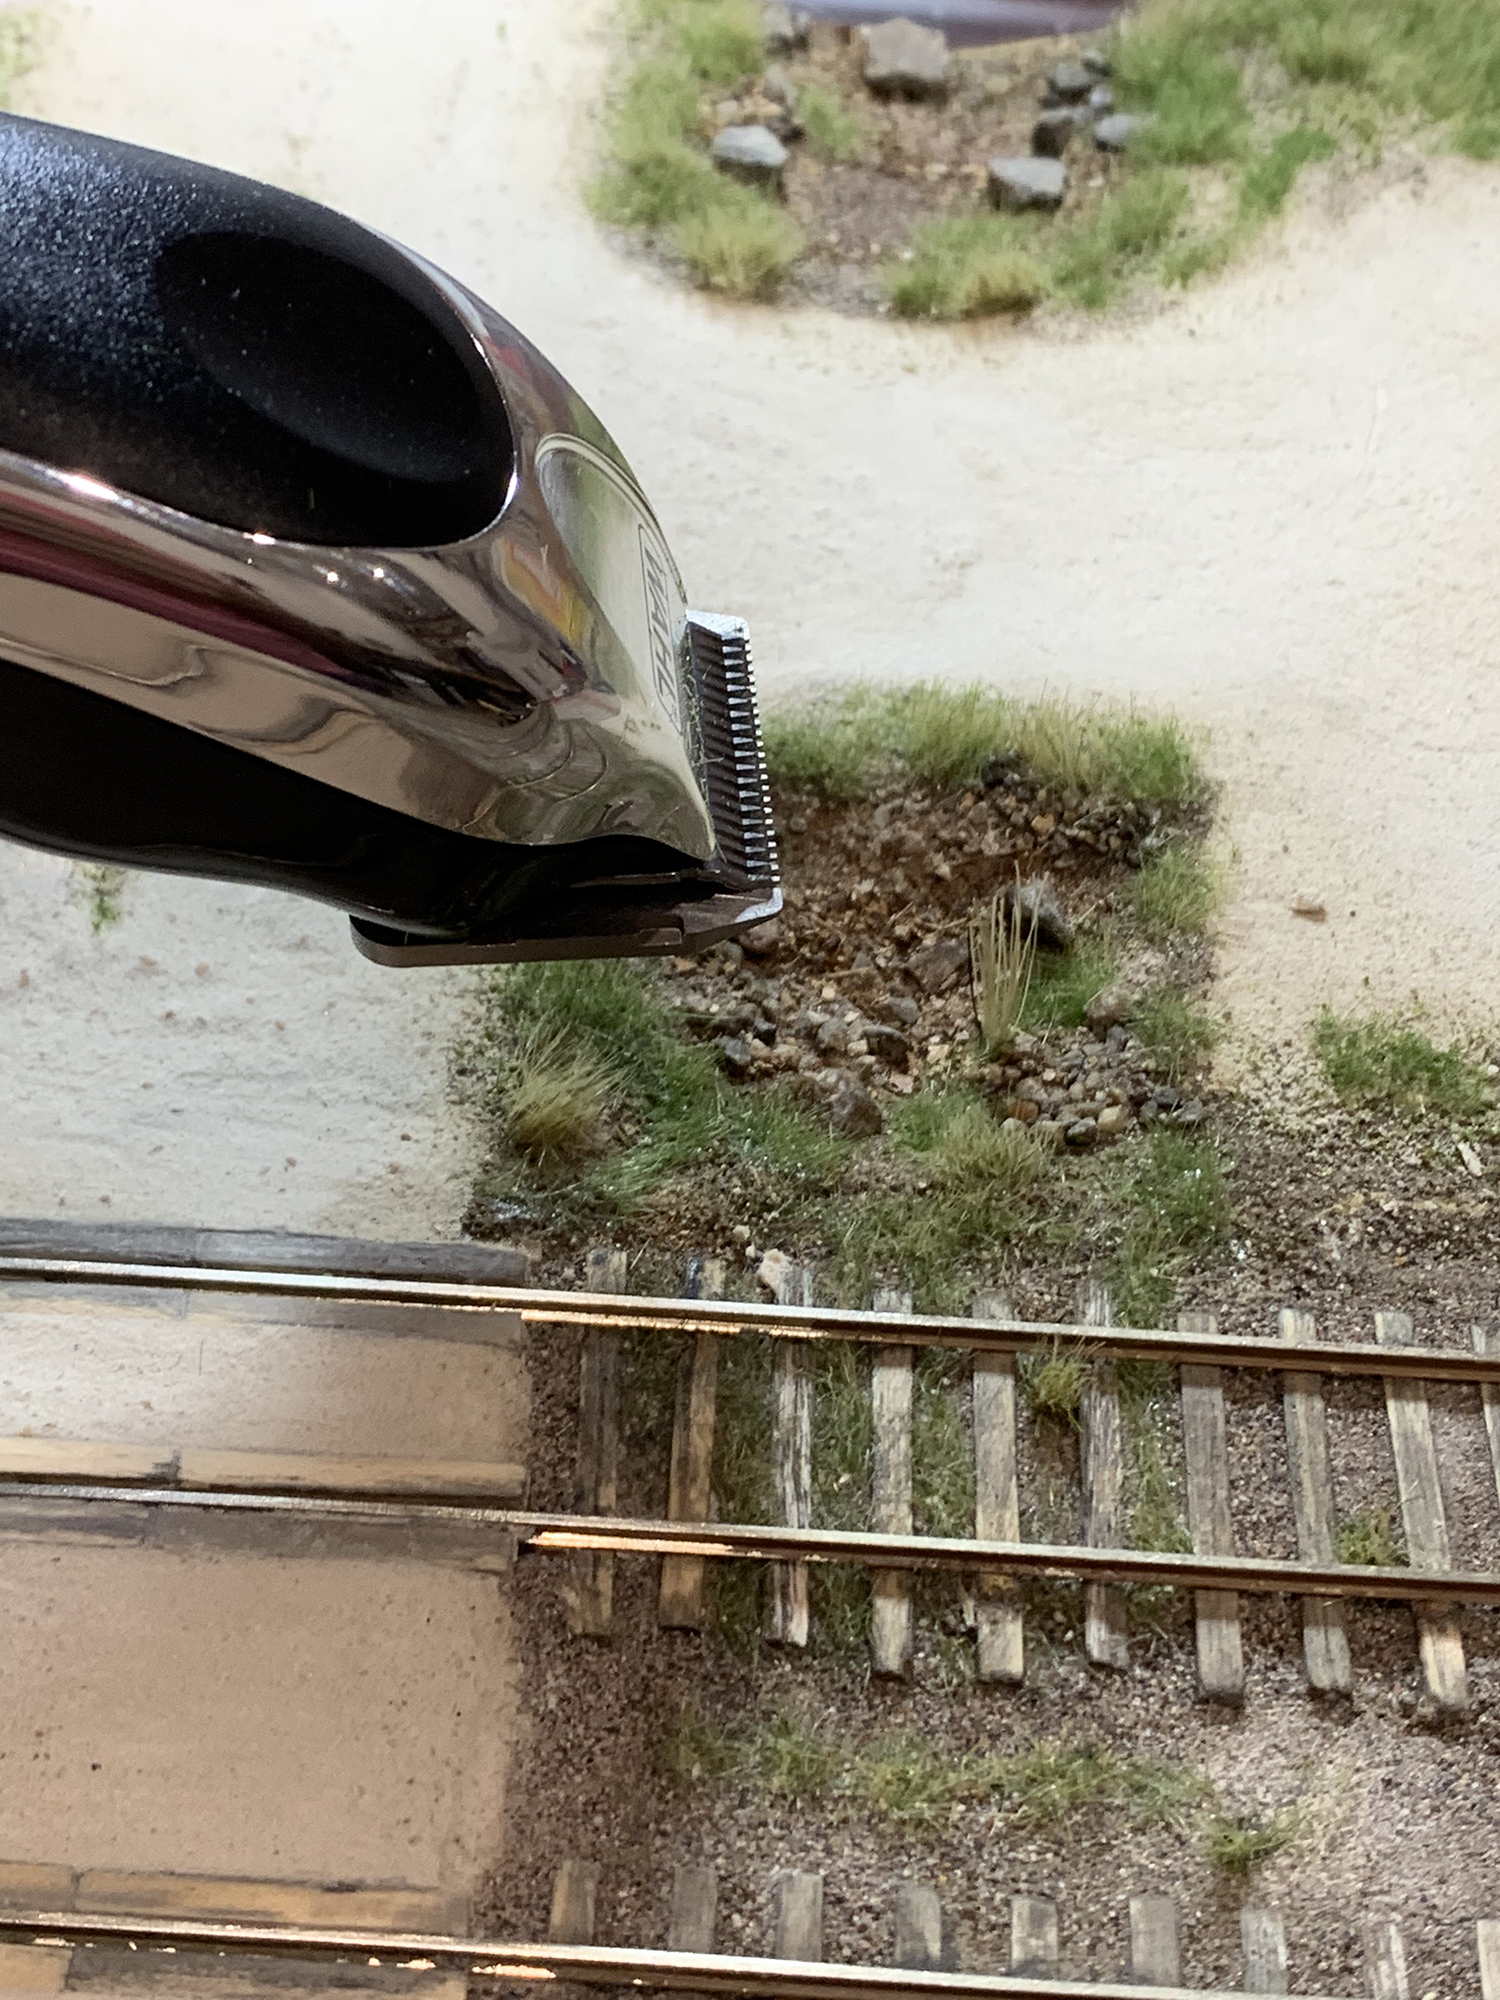
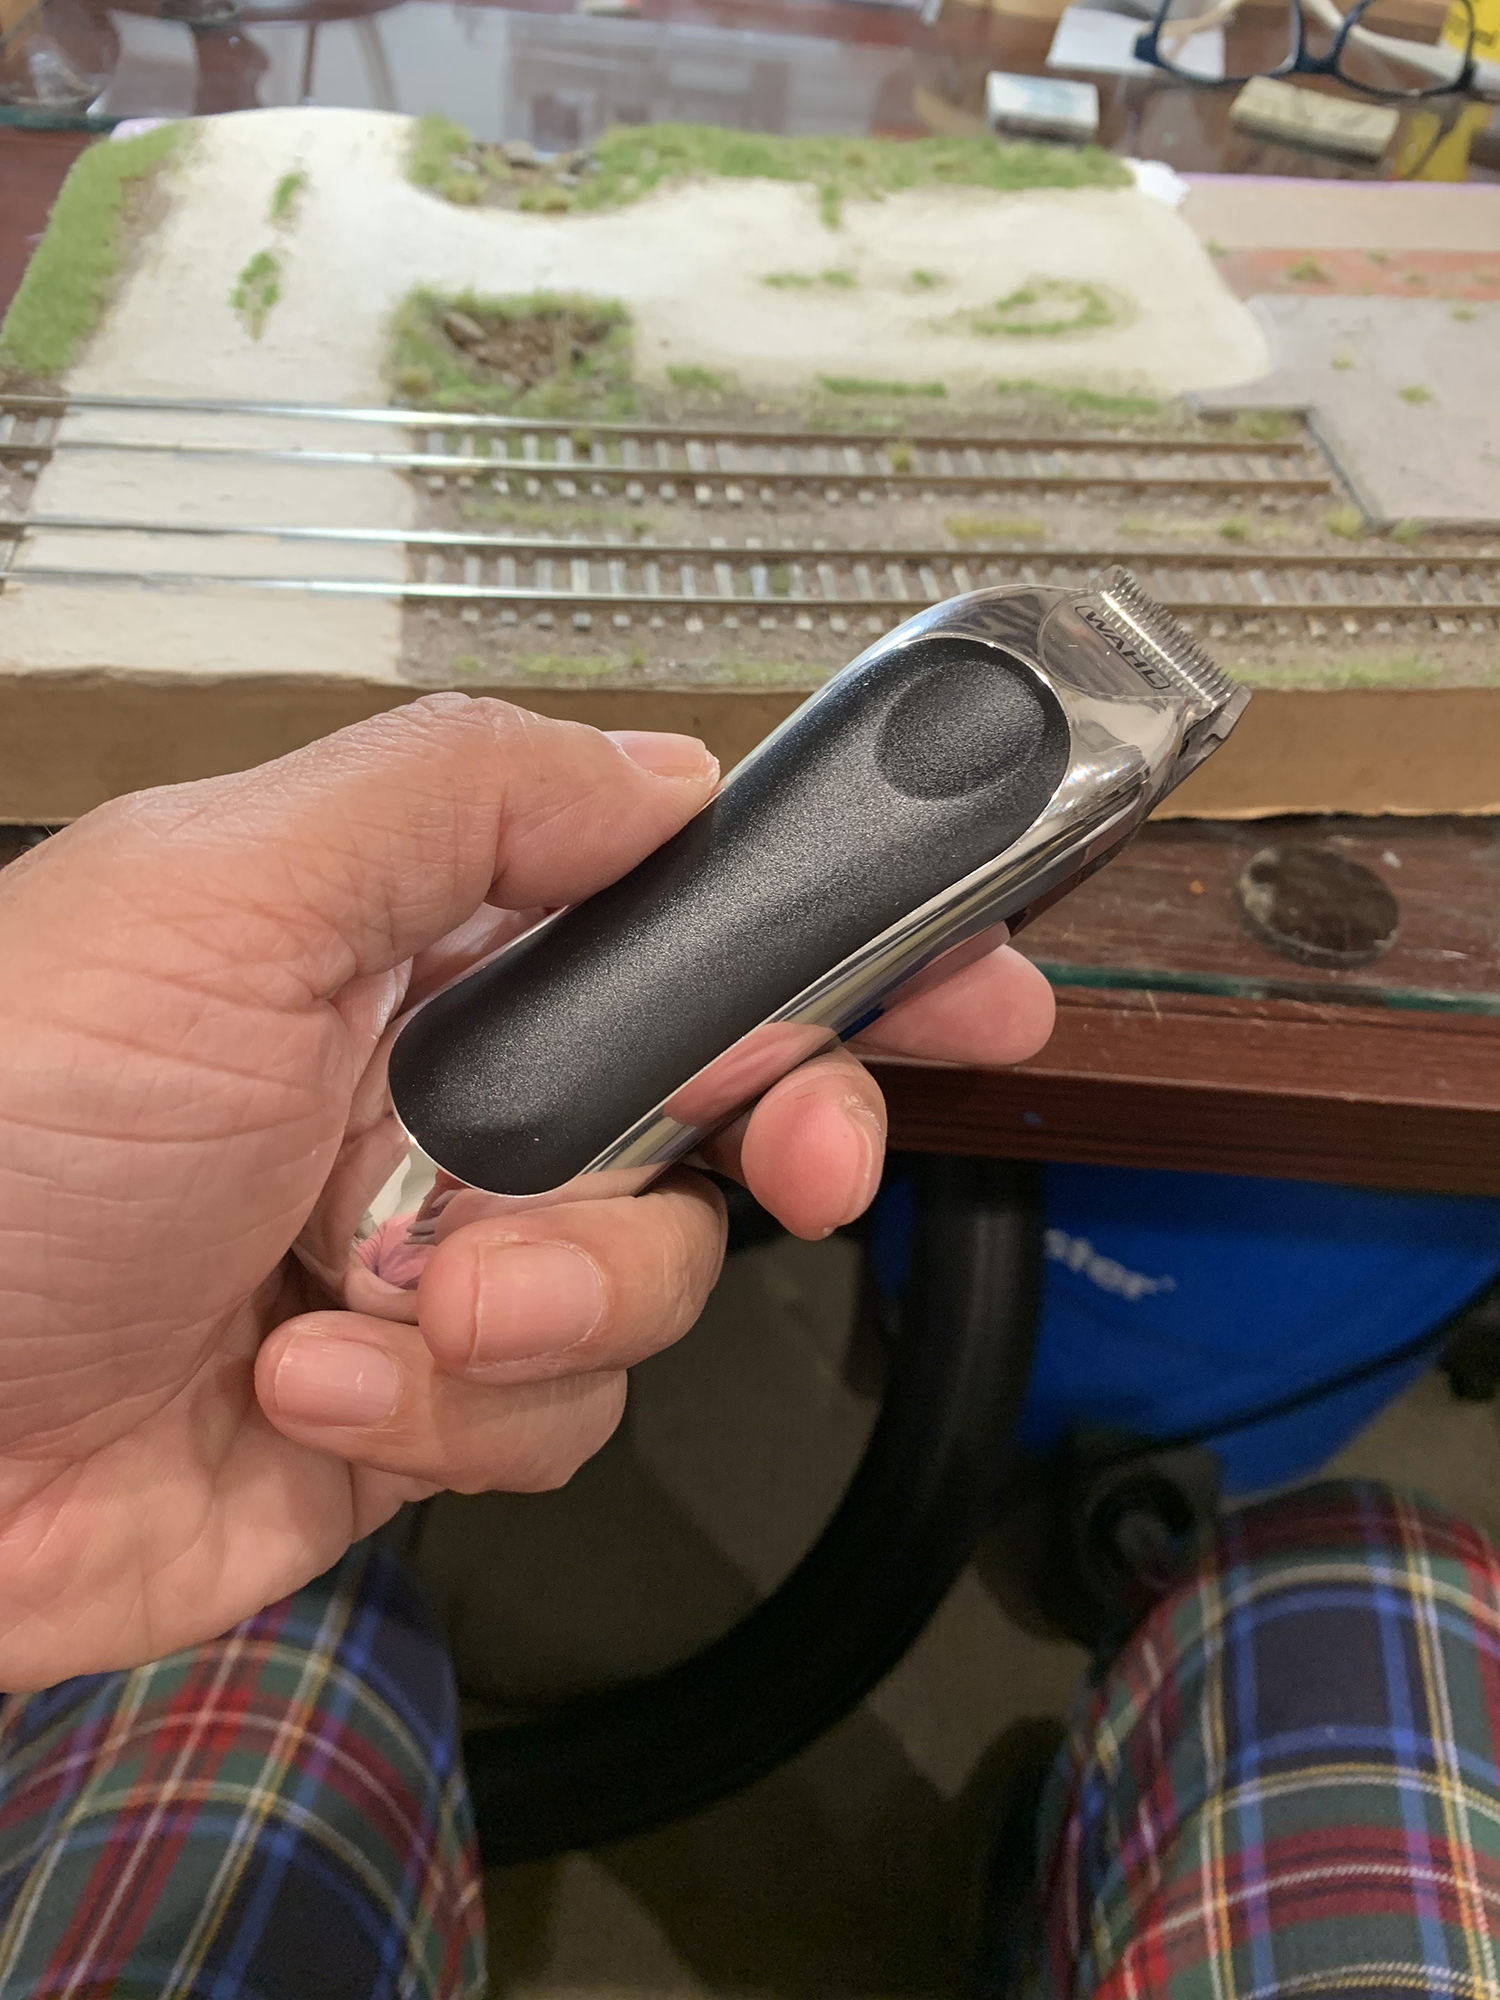
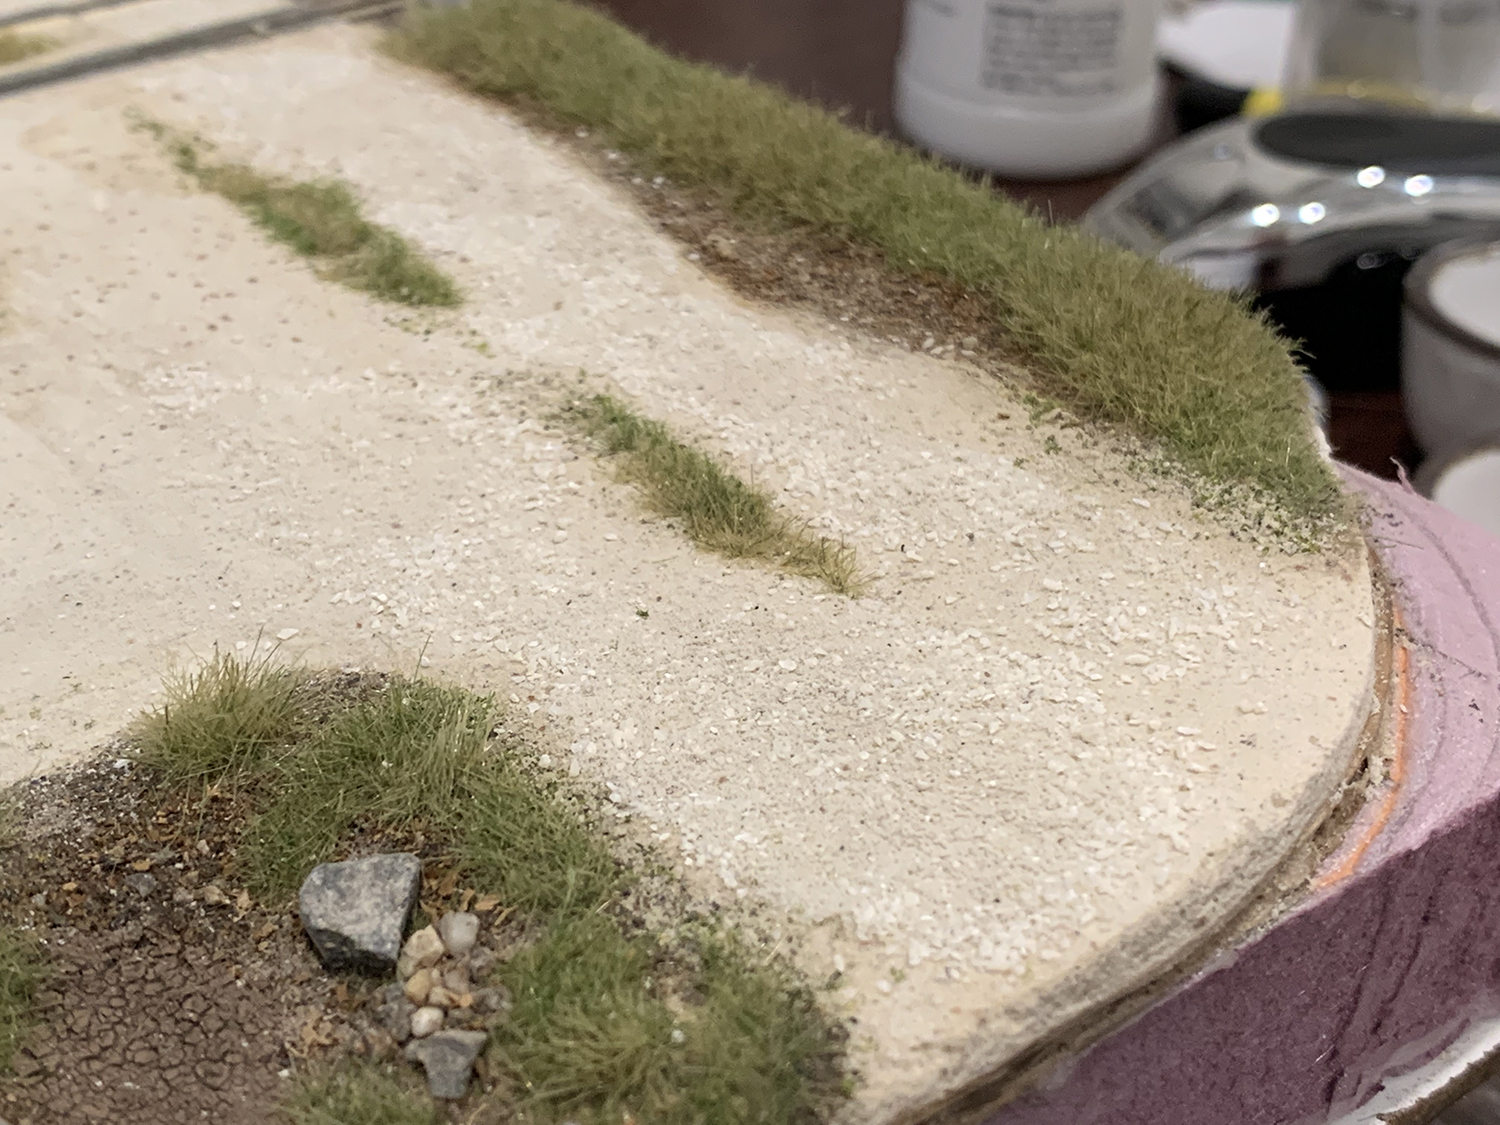
This was a starting point. The grass tufts were created by pressing 6mm grass between my fingers and then jamming the tuft into beads of Aleene’s Fabric glue. Then I laid down a layer of 2mm static grass using my static grass applicator. Once dry I used my nose clippers to cut the grass into shape. In this particular instance the method was correct but the result was not. These tufts are shapeless and blobby and make no prototypical sense in this context – they need to be thinner, smaller, shorter and inline with the center grass of the main road.To try to improve the look of the tufts I used my weathering brush to thin them. Unfortunately I ended up removing too much grass and ended up with this messy and poorly defined profile. The width of the tufts needs to match the widths of the center grass further up the picture and I needed to figure out a better blending method. Even though some modeling might be prototypical it also needs to be aesthetically pleasing and sadly these tufts were not. Time to start over.Once again, I finger-pressed tufts into glue that were then shaped using my electric hair tools,. Once again I added 2mm grass around the outside. Once again I used my weathering pen to thin things. It looks better but the tufts are still too wide. Trucks and road vehicles would have worn down the edges of the grass leaving a thin sliver in the center and that is not what you see here. I decided to try again.Ah ha. Almost got it. The tufts are not too wide, are in line with the center grass ahead, have a nice pyramid (cone) shape and is nicely blended with the road. Still more to do but on the right track at last.To get grass heights and widths correct I like to use an HO figure. By using this as a guide I can start clipping the grass into shape. However you have to be careful not to go too far as from a distance grass that is too short can simply disappear from the model. My compromise was grass that was about 1-2 feet tall – still too high – but nevertheless looked good on the model. I may still work on them more, strand by strand, cutting them down and into shape but for the moment this was good enough to move on.My mini-clippers – one of two electric hair cutting tools that I use to shape grass. The other is a nose hair tool that can cut strands one at a time – great for the fine-shaping of grass at an almost microscopic level.I have largely abandoned course turf for modeling. In this day of phone cameras taking extreme close-ups of layouts those old school materials seem much too bulky and ‘course’ for the fine detail modeling I like to do. However fine turf still has plenty of uses – one of the main ones is to act as a blender between a surface and adjacent vegetation. I mix fine turf with whatever matching color materials – sand, stones, rocks, dirt and dust and then use it in transition areas around vegetation. You will see it all over the diorama and it has an amazingly realistic effect.The arrows mark the use of blending materials. In this case they are Woodland Scenics fine mixed turf, some sand, some road surface material (dried and ground up), and a touch of ground and filtered gravel. The effect is to assist the transition between tuft and road and provide an extremely short vegetation effect around the tuft.Well by this point looking so much better. I really took my time to construct and shape each tuft while keeping in mind the plausibility of the shape of the tufts: ie what is the story of their shape? Does the shape make sense in this context? They are still not perfect – still too wide and tall – but I will come back a little later to fine-tune their shape after other elements on the diorama are worked on.
Landscaping materials and vegetation
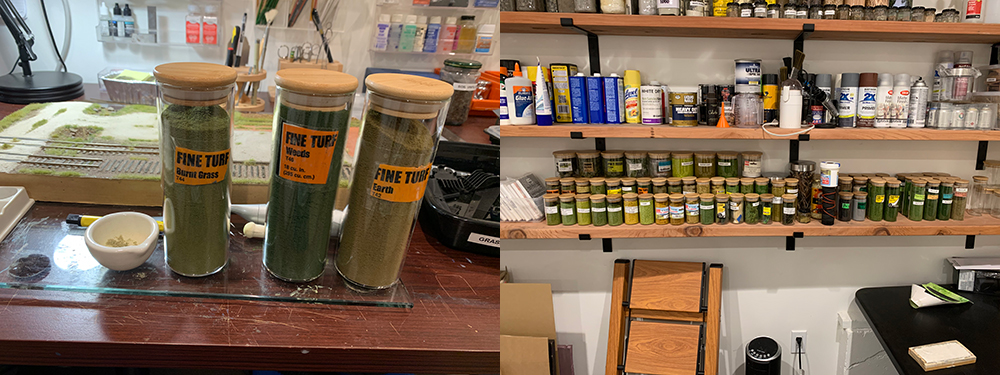
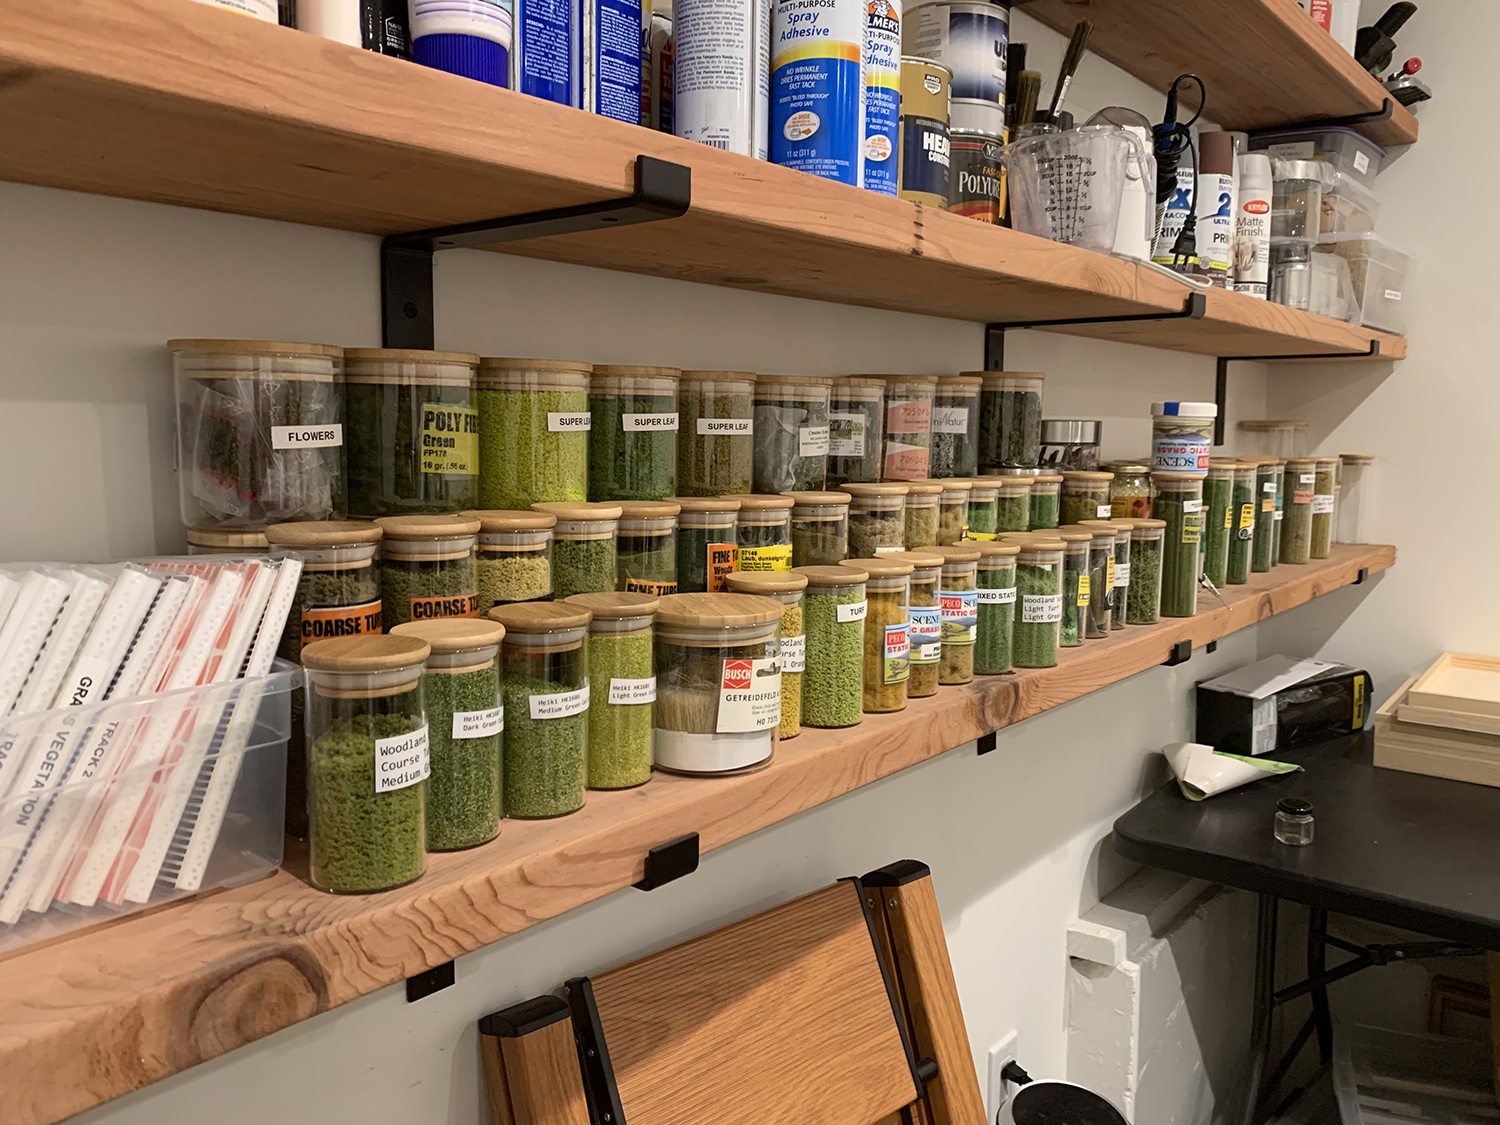
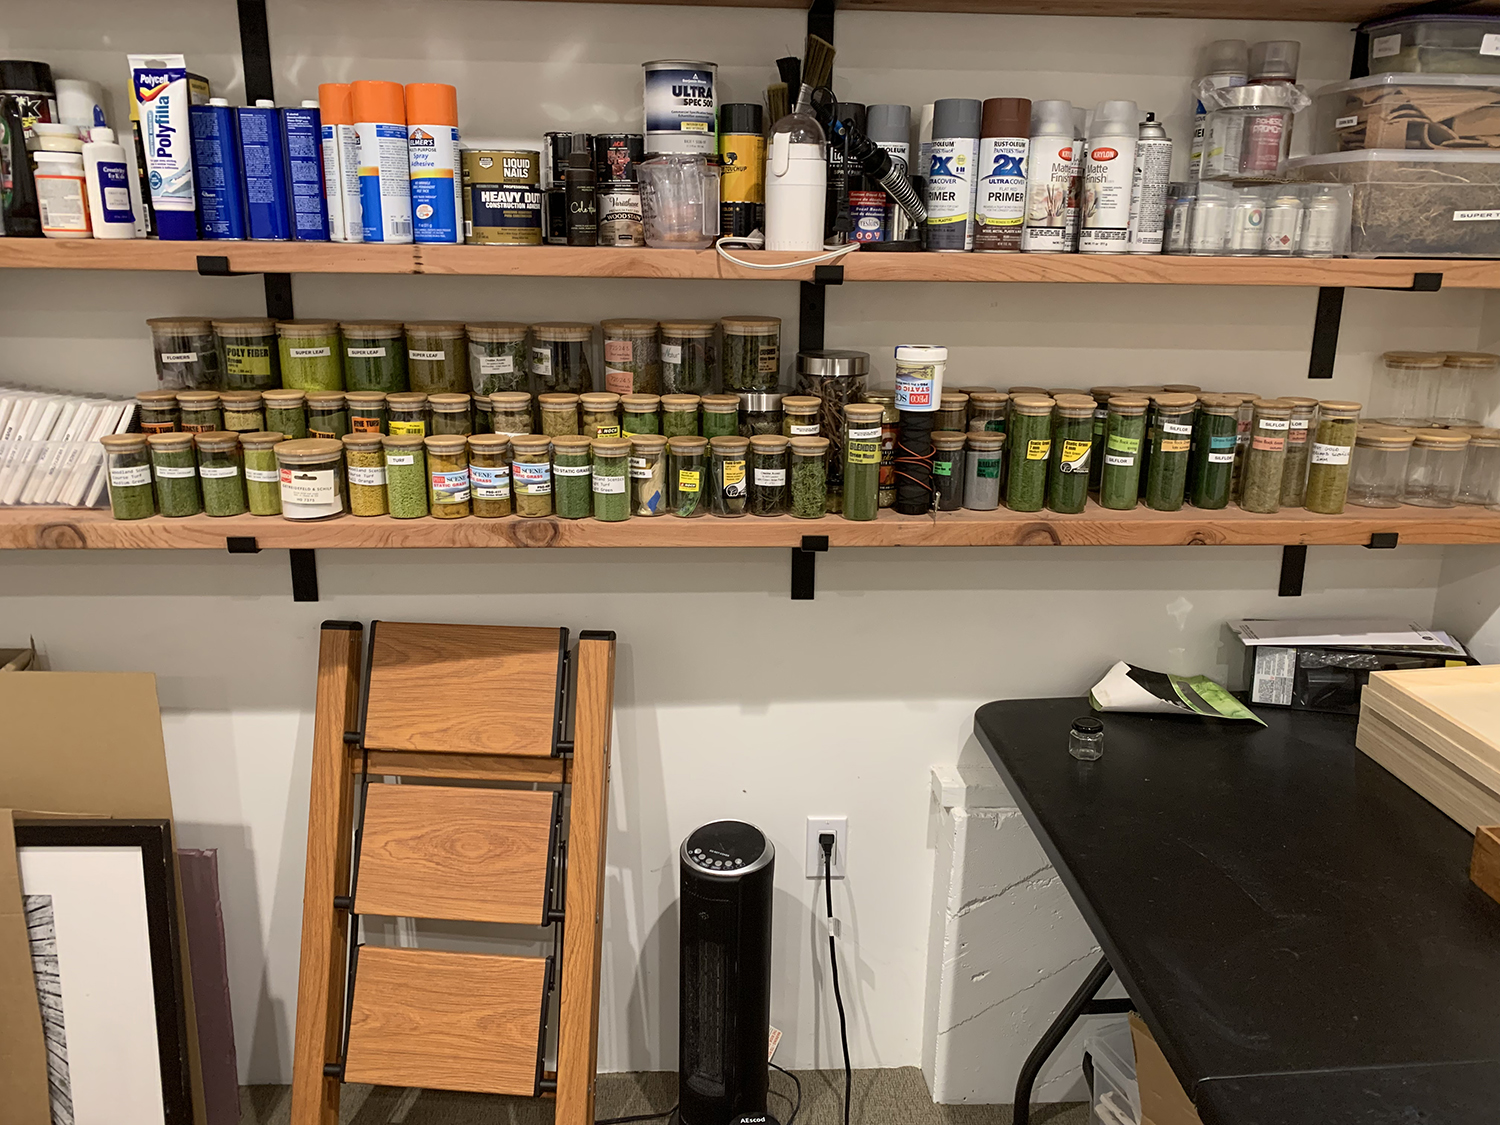
One of the reasons to build the diorama was to help me organize my tools and materials in the new model train room. I was about to start working closely on the vegetation and took the opportunity to reorganize all my landscaping, vegetation and terrain materials. Previously they were stored either in the original packaging or in supermarket-purchased plastic containers. I looked online for a better method of storing these materials and discovered bamboo-lid storage jars. here is one supplier I purchased them from: https://www.hobbylobby.com/Crafts-Hobbies/Glass-Crafting/Glass-Containers/Glass-Jar-With-Bamboo-Lid—24-Ounce/p/80846497
They can be bought in bulk and in different sizes. I worked through the packets and containers and kept purchasing jars until I had all my materials ‘decantered’. You can buy the jars for an average of $4-$5 a jar so not super-cheap but not too expensive either. They also look great and make accessing materials easier.
What I really like about these jars is that it is so easy to view the contents. I don’t have to open them to observe the type of material, the color and the texture. I can see at a glance what it is and whether it is appropriate for the task at hand.
Stored on the lower shelf for ease of access.I’m buying more materials each month and will continue purchase jars as needed.
Track ballast
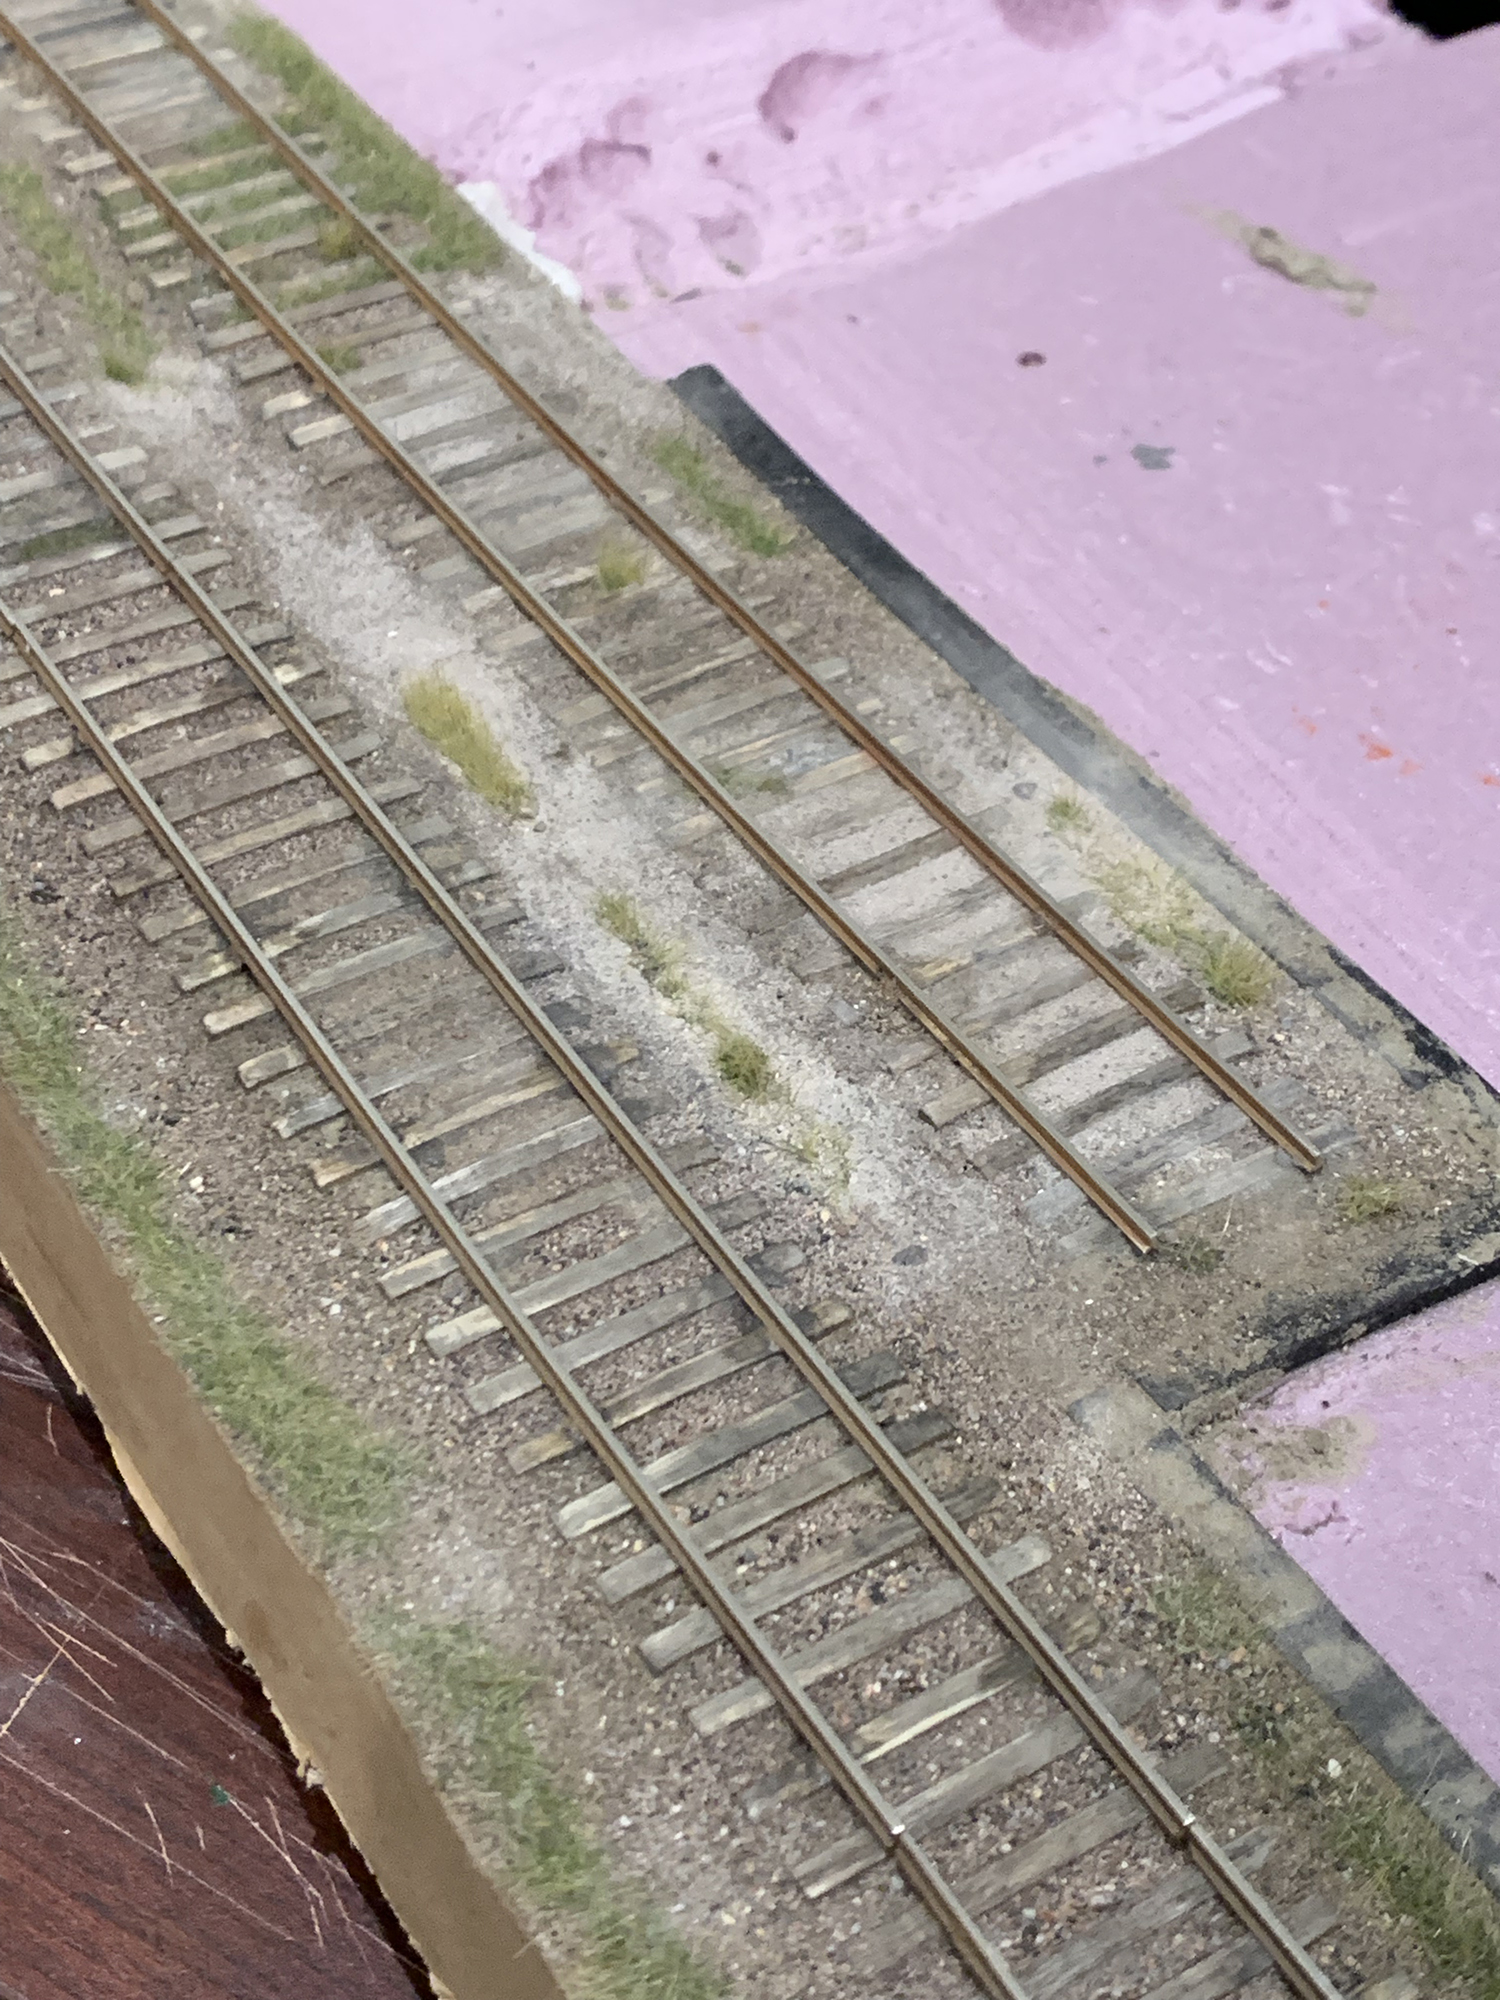
I decided to re-ballast the main line as I found the look of it too messy. I felt that either the ties or the ballast needed to be a consistent color. I removed the rails and used a nice clean ballast from Arizona Rock and Mineral. This layer is just a base onto which I will be lightly staining using my spray gun, rusting the rails and adding some invasive vegetation. So far I think it looks much better.
The road bed is looking much cleaner now. There is a nice contrast and better definition between the ballast and the ties. Next time I try this I will do the reverse – make the ties a consistent color and allow the ballast to be messy..I redid many elements in this scene. I added another layer of static grass and spread the grass to further invade the road bed. Landscaping – like weathering – has a story to tell. In this instance the grassy trackbed is caused by water spillover from the small pond adjacent to it. Nobody can be bothered to fix the overflow problem and so the grass continues to grow and spread across the track.
Flowers and Plants.
Here is a quick peek of current work: flowers and vegetation. I’m not finished but it looks pretty good so far and I wanted to share progress. I had to come up with a method to control the placement of plants and I spent several days just figuring that out. I’ll do a full post on plants in a couple of weeks.
Time flys when you are having fun. I can’t believe my last post was quite so long ago. I’ve been hacking away at the diorama most days early in the morning. Even though I’m working at it each day, I’m working in such fine detail that several days can go by while I put together even smallish scenes. The time is spent mostly waiting for paint and glue to dry and thinking things through and planning during the day. The process is something like:
1. Set up in the morning – gluing, painting etc
2. Check work in the afternoon, clean up and then photograph the work so far.
3. Think things through in the evening, look over the photos of the work and have a plan of action for the work in the morning.
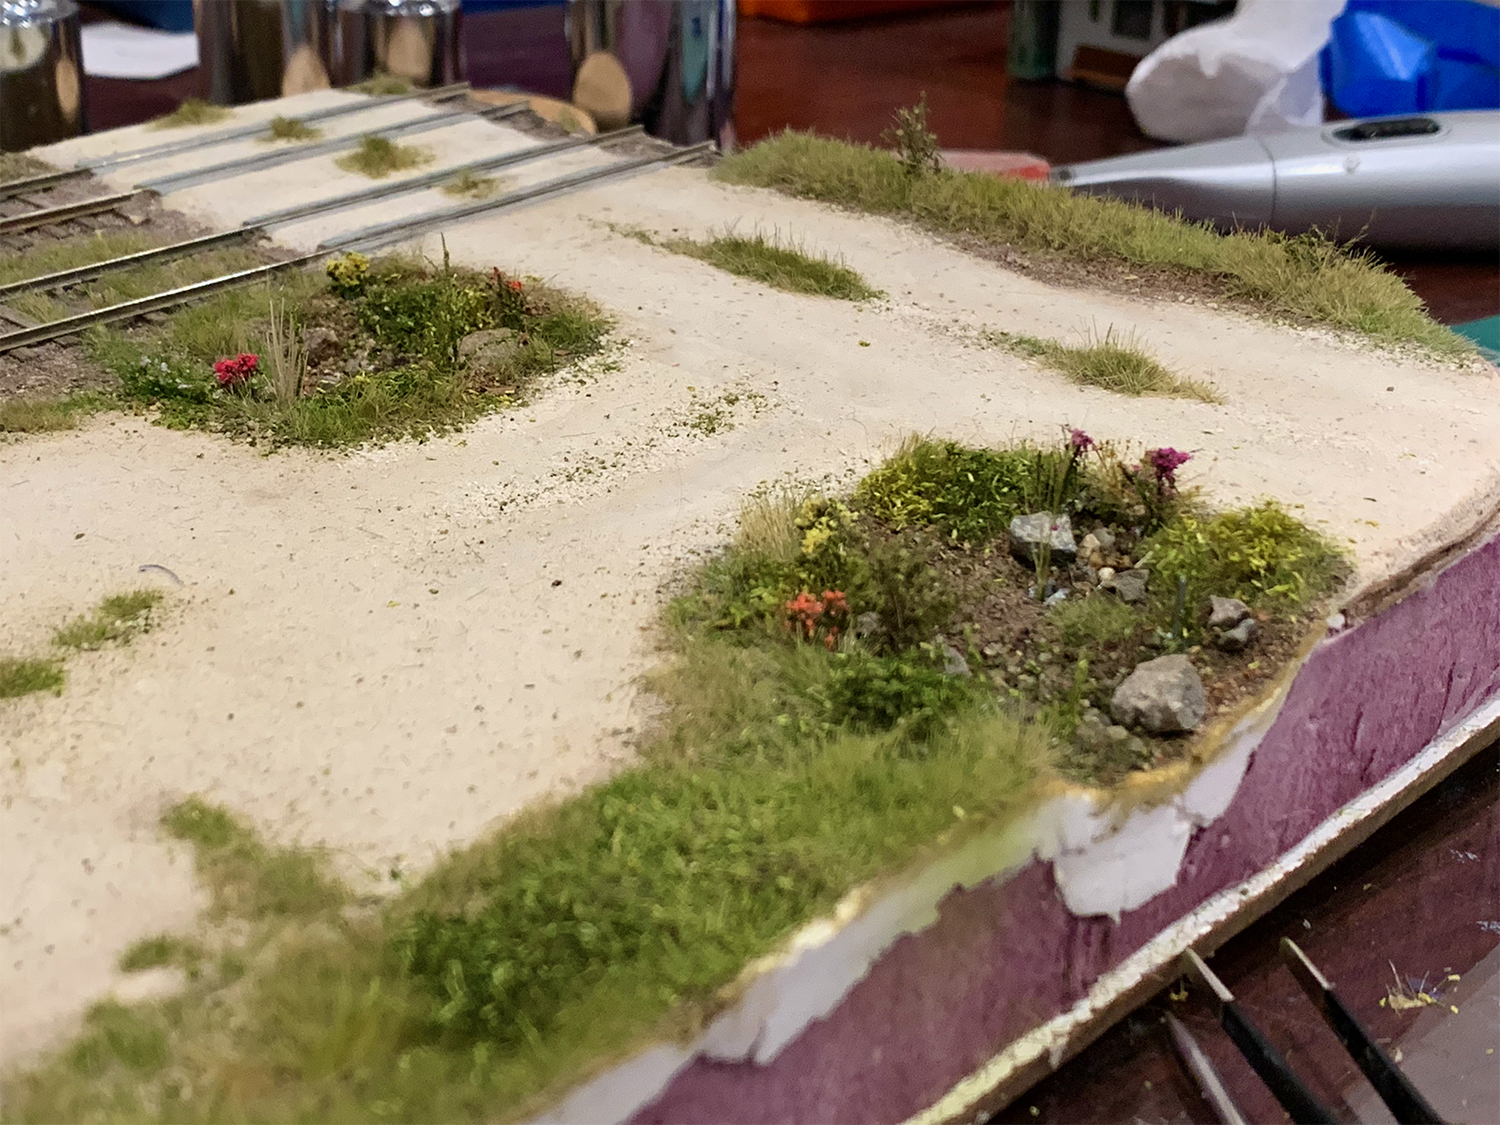
I applied this process to the parking and delivery area:
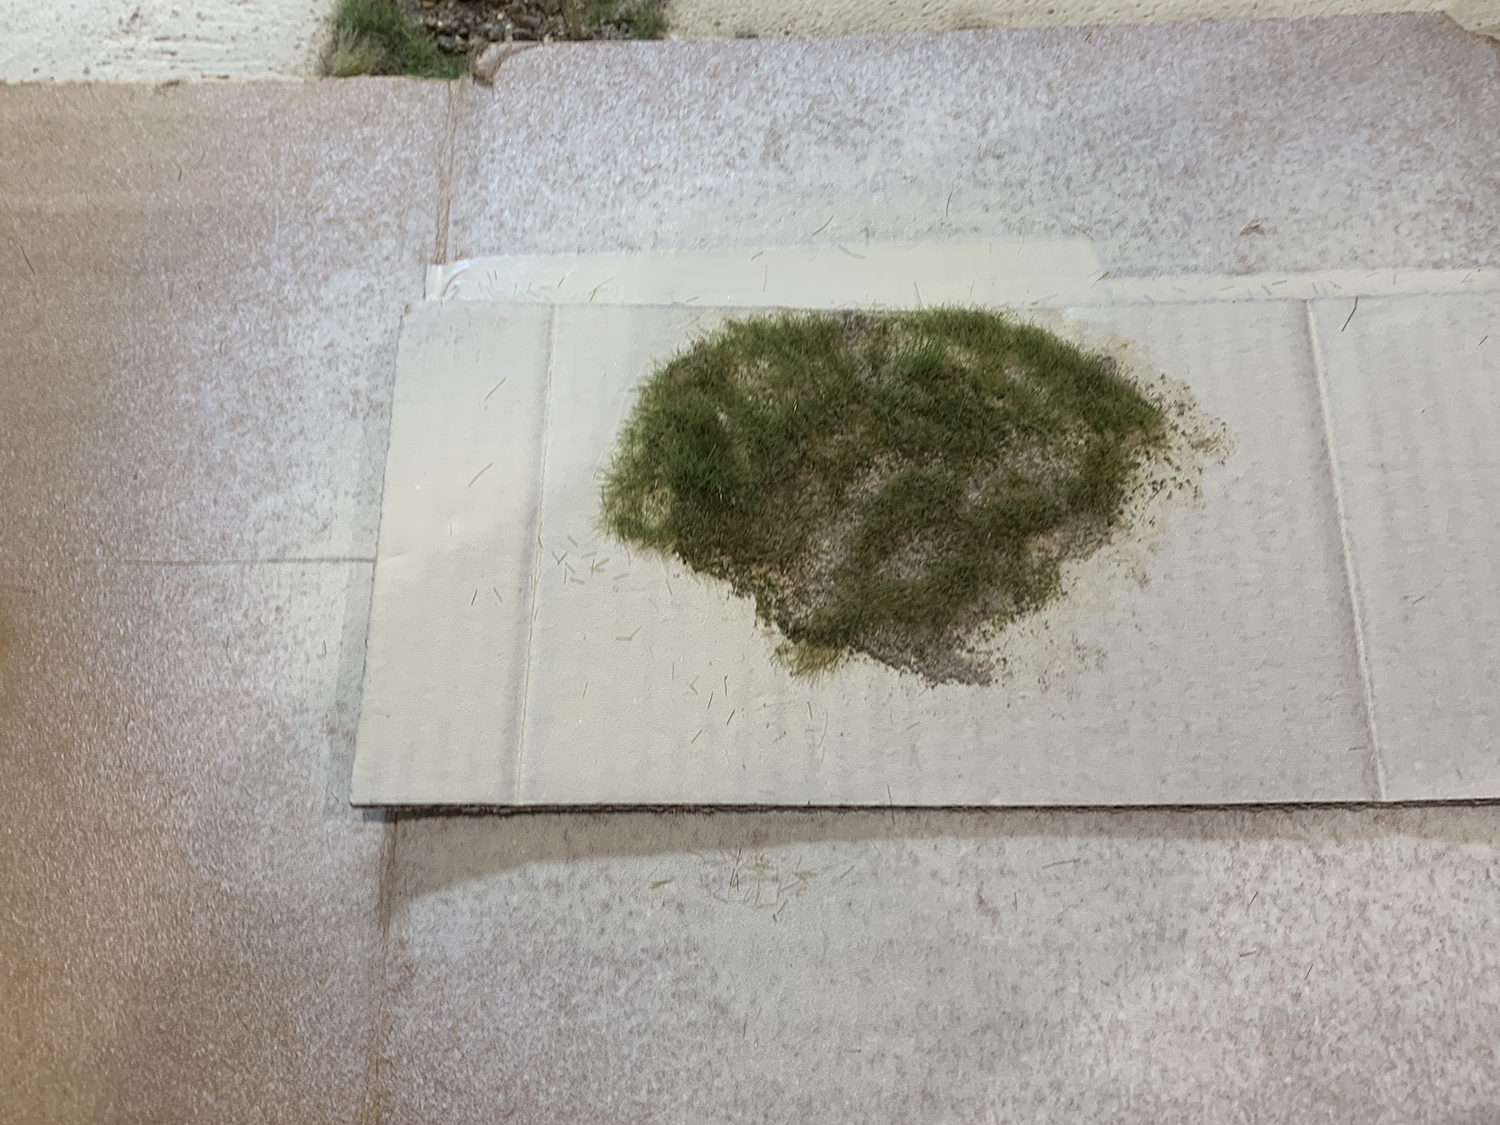
Here is a heavily overgrown parking area with the gravel just peeking through the invasive grass and brush. I wanted a similar effect on my parking area – just a little less overgrown. The picture shows the grass as a blend of green, dry, long, and short grass. I wasn’t sure how best put this together so I did a little test.The first layers was a mix of gravel and fine Woodland Scenics flock glued down using the ink drop method. Then I added tufts glued down with Aleene’s Fabric glue (my favorite tacky glue) and then lastly I added a layer of 2mm static grass of green/summer grass. This is how it came out. The order of the method got me a nice blend of grass heights and grass density and allowed some of the gravel below to peek through.
So starting with a clean parking area I got to work.First layer stones and flock.Tufts added and then static grass.And here is the result. Looked pretty good to me – good enough for the moment. Still work to do such as add a variety of colors/plants and smooth out the parking surface. I’ll get to that during a round of tidying up at a later date.
Road and crossing
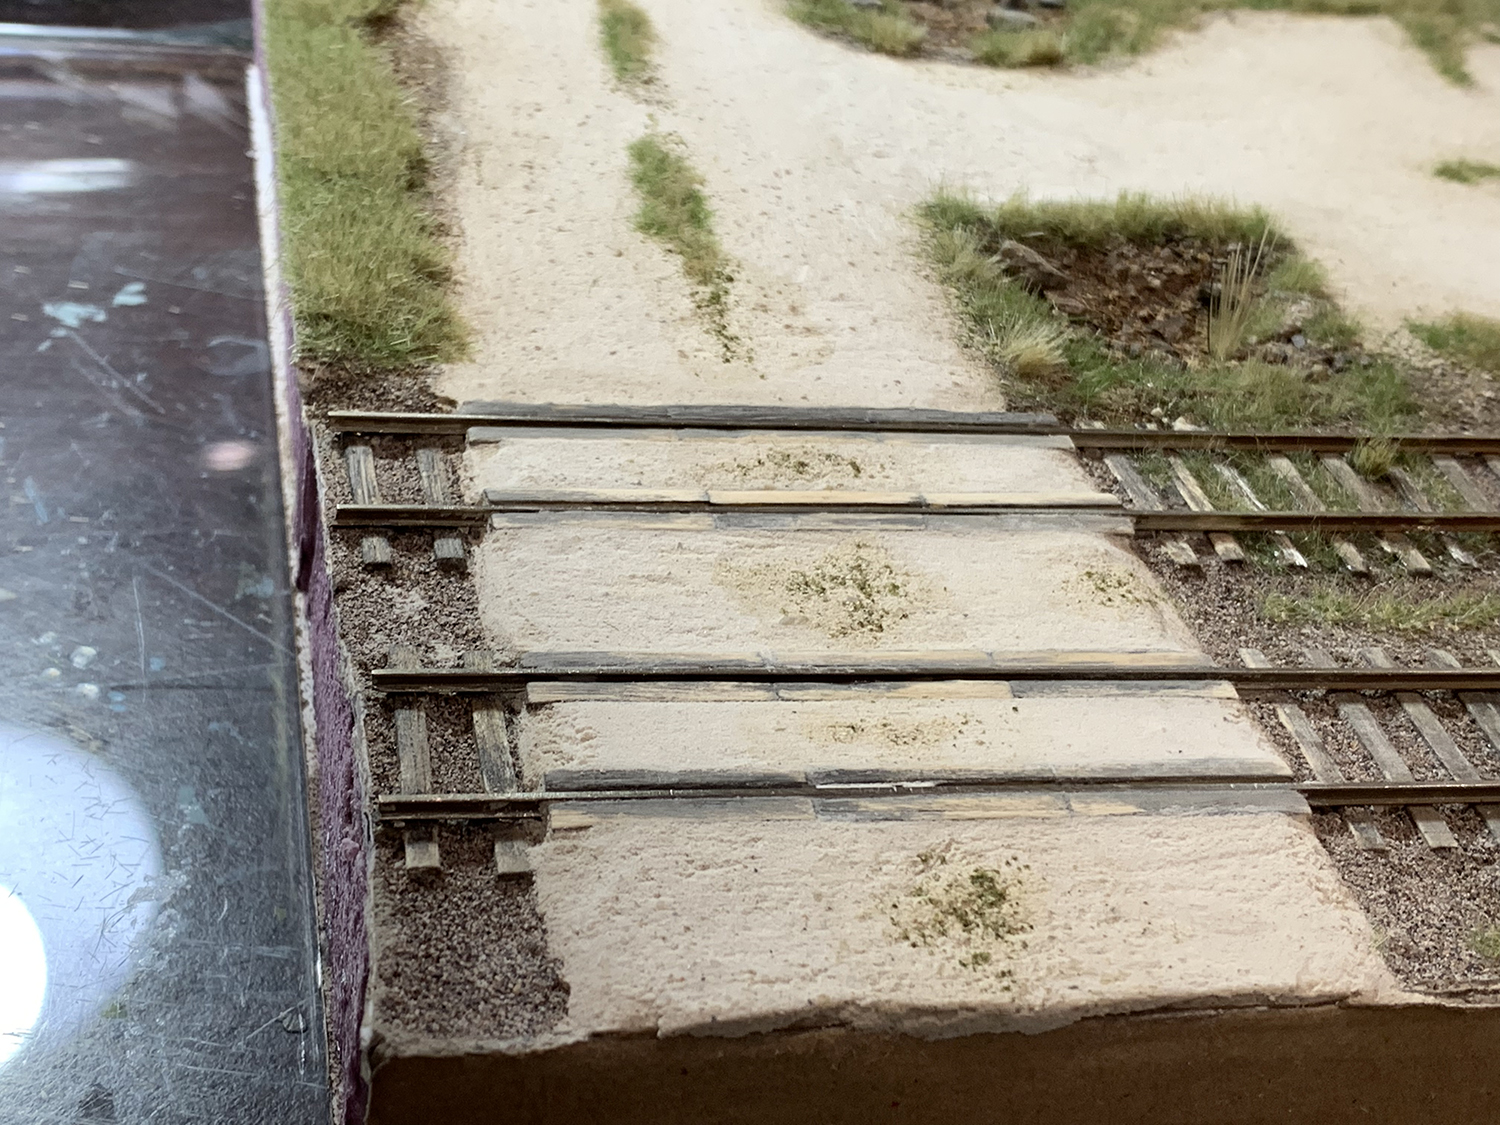
Using a similar process as above – glue in mornings, tidy up in afternoon, ponder in evening I turned back to the road and crossing. Generally I’m not happy with the crossing – even after trying to improve its look: I didn’t like the surface, the edges are sloppy, and there are gaps here and there due to poor modeling. I’ll do a round a of tidying up and tweaking later but for now I decided to salvage what I could.
I resurfaced the crossing. I cut out the old surface and added a some of the wet roadway mix that I had saved in a jar. It came out ok: yes there is probably a prototype crossing somewhere in the world that looks like this but I’m not happy with the way it looks. I would have liked to have had a smoother surface and overall cleaner modeling.Once dried the surface looks cleaner but still rougher than I would have liked.I decided to add some center vegetation. The first layer is a mix of gravel, fine flock and dirt.Then I added tufts and then a layer of 2mm grass. It came out nice but thicker that desired. Below I describe how I chop grass down to fine and very short length – not using scissors.After thinning, blending and cutting. It looks like I went too far: the grass looks a little less grown but I need to do a better job of blending it and will spend more time on this at a later date.
Grass cutting tools
Some of the issues I have with static grass are that you don’t have fine control over the density, shape and height of the post-glue result. Mixing in different lengths and colors will only get you so far. On the Trestle diorama I found the grass to be too tall and messy and made a mental note to find a way to cut and shape grass. At the time I called it ‘giving the grass a haircut’. That was the clue to finding adequate tools to help me control the use of static grass. The tools I settled on were:
1. Eyebrow scissors: https://www.amazon.com/dp/B08ZDM4L9Z/
2. Mini hair clippers: https://www.amazon.com/dp/B001S4GMV8
3. Nose hair clippers: https://www.amazon.com/dp/B003S4XC2I
Using these tools was able to shape static grass in any way I wanted. The electric tools were especially useful as I they were easily able to cut single hairs down – grass that was sticking out sideways for example. I was able to cut grass down to below 2mm (as can be seen on the parting area)
Nose hair clippers great for cutting single strandsMini hair clippers:
Road Surface
I wanted to bring out more texture in the road and decided it was time to add a layer of gravel. It took a couple of attempts. The problem is that my collection of white stones is translucent and this caused an unrealistic glowing effect when I ground the stones down. I eventually found a stone that was flat matte white and that produced a very nice effect on the road once glued down.
I did a quick test on my test piece to make sure I was heading in the right direction. I also wanted to see what size stones I would need. When I ground down my white stones I filtered the results into four grades. The final two grades worked best and were a realistic and prototypical size.My first attempt actually looked pretty good. I needed to remove some of the gravel and generally blend things a little better. What you cannot see however is the translucent effect which eventually led me to try again.After gluing down and before removing much of the gravel you can see the translucent effect of the stones. The translucence was quite jarring and led me to remove most of the gravel and start again. I eventually found a matte white stone to create my gravel from.Looking much better. This gravel was made from a matte white mixed with a touch of dirt and some of the dried mix that I made the road from. It brought out the texture of the road surface. I still need to do a round of tidying up – stones need removing from the grass and the edges of the road need a bit more blending but this is as good a starting point as I am going to get.Just a quick view of the diorama as it stand. It looks a little bare right now but that will change once I start adding details such as fencing, crossbucks, etc. I will also have to adjust the color of the grass to match the backdrop (or visa versa) but so far I’m pleased with the way things are turning out.
I’ve been plugging away at the diorama and have made some progress. Although progress has been slow it has also been steady. For me landscaping is done in layers over time. For example I installed the crossing and although it looked rough it will do while I work on other areas. Then I’ll come back to the crossing and tidy it up and then move to work on other areas and so on and so on. Sometimes it’s not clear how a feature should look until other areas start coming together so I don’t like to consider any area ‘finished’ until the end.
Here’s where I’m at:
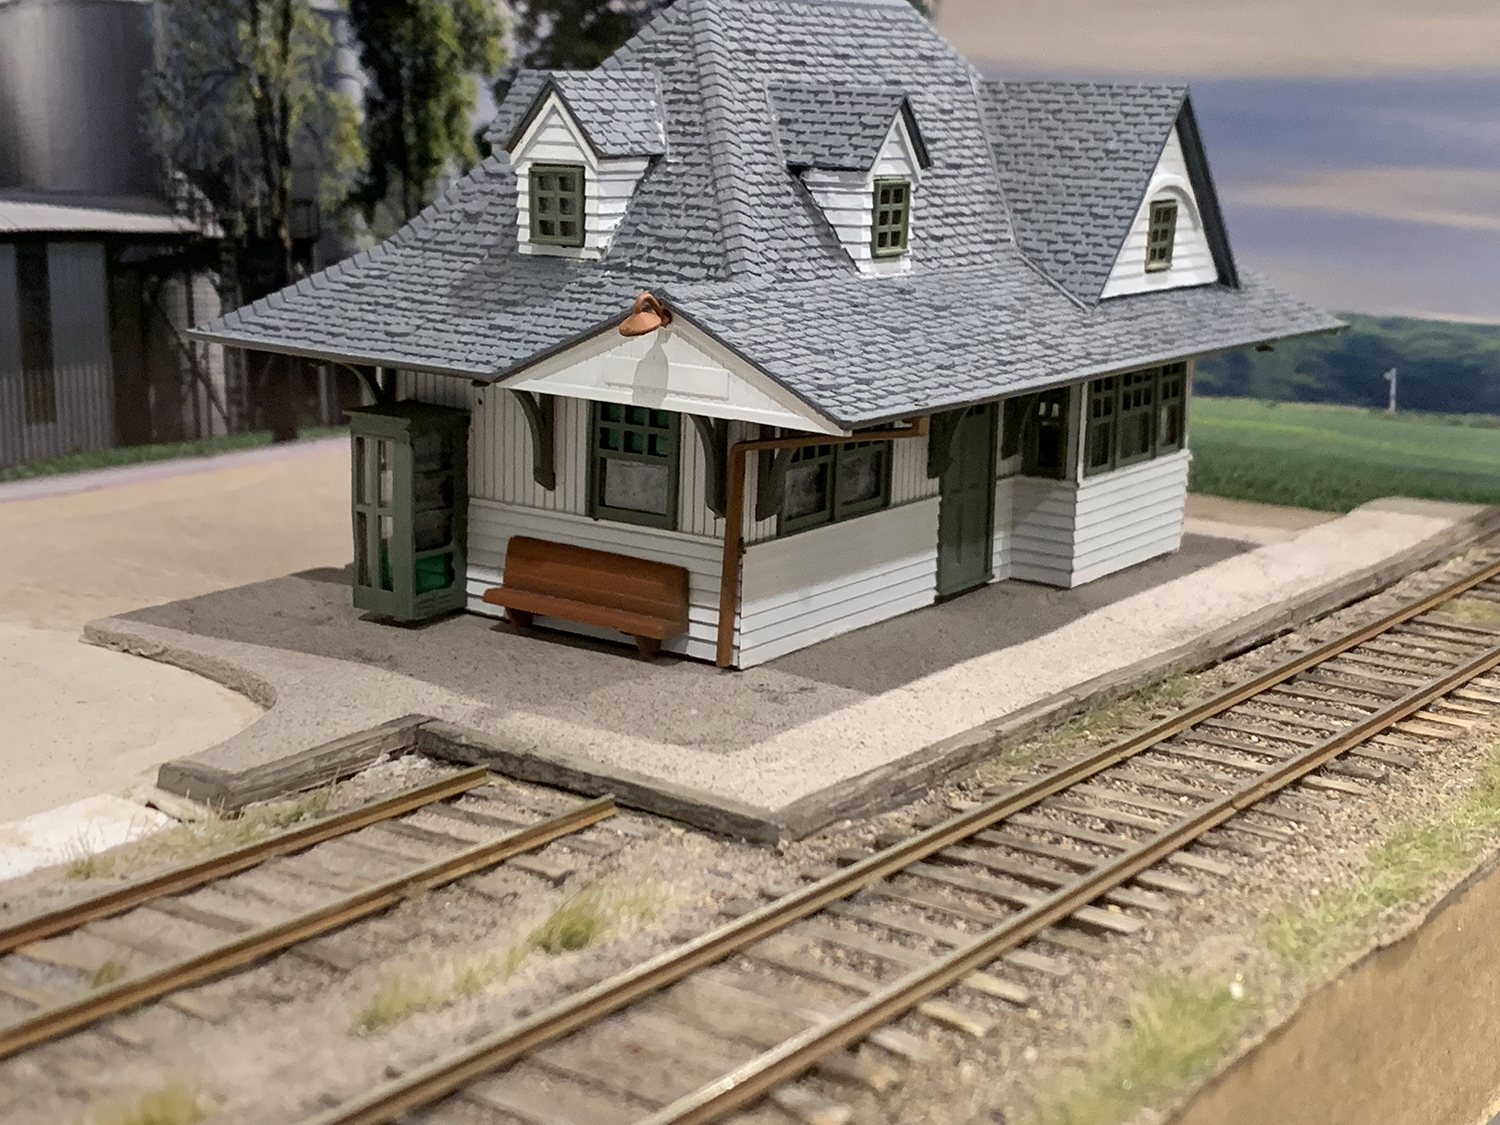
Platform
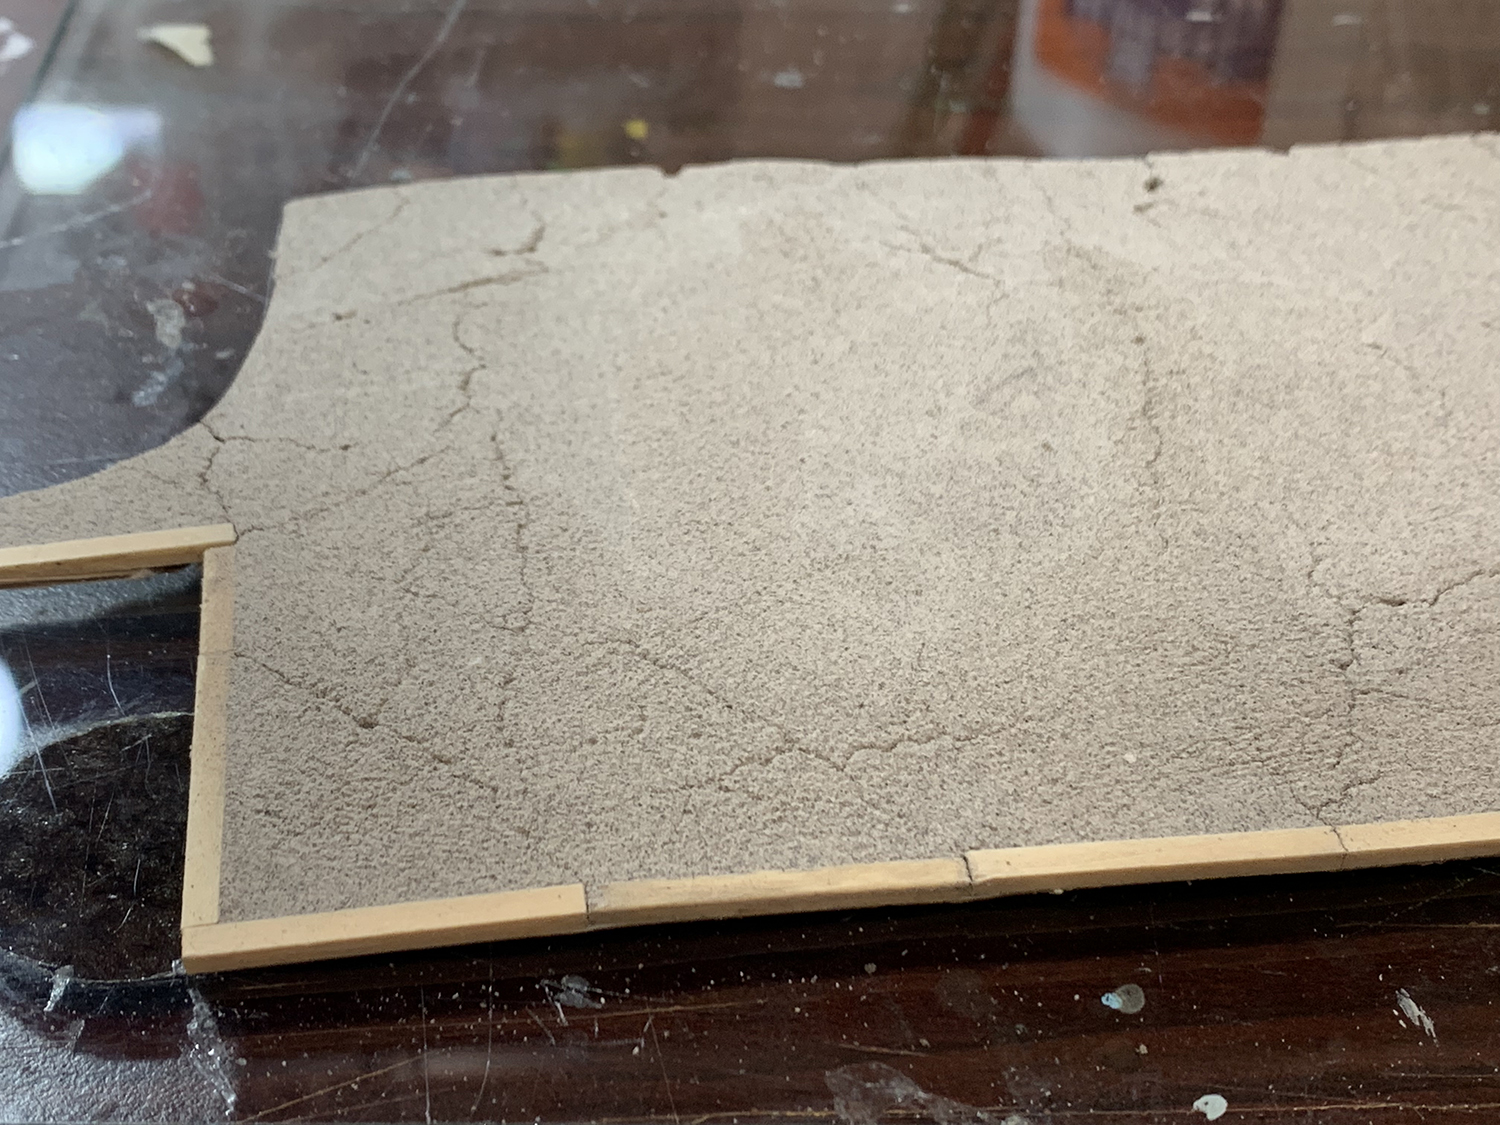
I painted the platform edges – made from basswood and meant to represent repurposed ties – in grey paint and then ran my chalky finger over the grain to give it a weathered look. I think it came out great and represents the weather-beaten look of old worn wood. While I’m pleased with the cracks in the asphalt so far, at a later date I will add some potholes, grass and I will darken the cracks to emphasize them more.
Crossing
I tidied up the crossing a little and it is starting to look much better. I’m intending to clean up the surface as it still looks messy. I’ll be adding more details at a later date such as grass edges and different shades of dirt and dust.
The edges where the crossing surface and the ballast are looking more prototypical. I’ll add some vegetation to help blend the transition more.Looks better but still plenty to do before I am happy with it. I’ll be adding some vegetation to soften the edges and I’m going to rework the surface as I want to have a cleaner look (not too weathered).
Ditches
There are small ditches either side of the entranceway. I like to use a mix of natural materials for these little vignettes. I have store of different grades of rocks and sand and any grades I’m missing I grind up in my pestle and mortar. I’m still not brave enough to use paint to enhance the colors but moving forward I’ll build a few test vignettes and see how best to combine natural materials and paint to create an attractive scene.
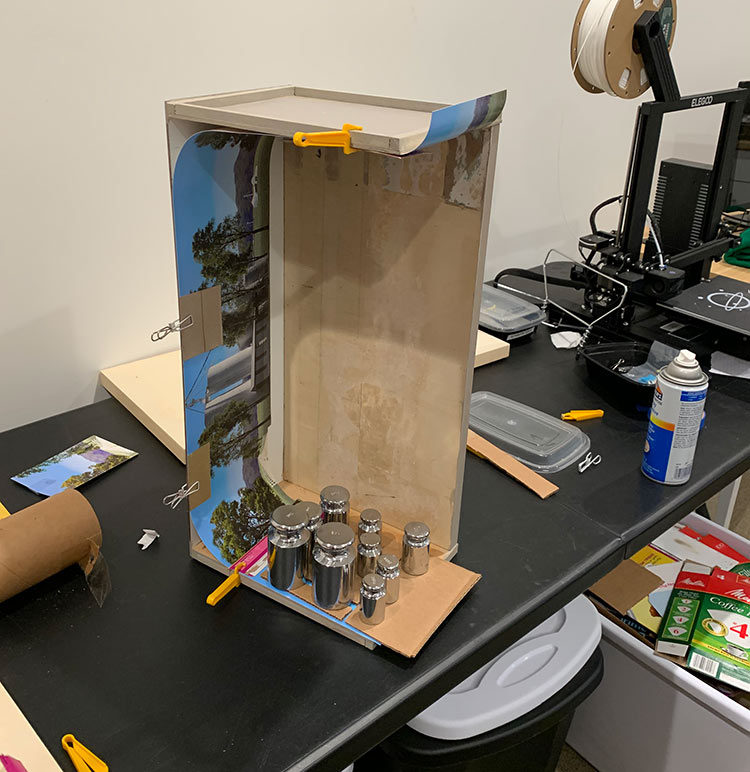
I have a range of natural materials (here being used as weights) which I use for landscaping. Most has been collected from railroad rights-of-way. I always take jars with me on my railroad photography trips and if I see a color or texture that I think I can use then I just fill one of my jars. Natural materials scale very well but sometimes they photograph very flat and boring. I think they need to be enhanced with paint or chalk but have yet to take the plunge myself. I’ll experiment with paint once this diorama is finished.I used tacky glue for the rocks and then added a second finer layer of sand and dirt which I glued down with alcohol, and diluted Mod PodgeThen I added grass tufts which I stuck down with tacky glue.then I clipped and blended the grass to crate a more realistic vegetation scene. I will be adding more layers of vegetation at a later date.
Brick path
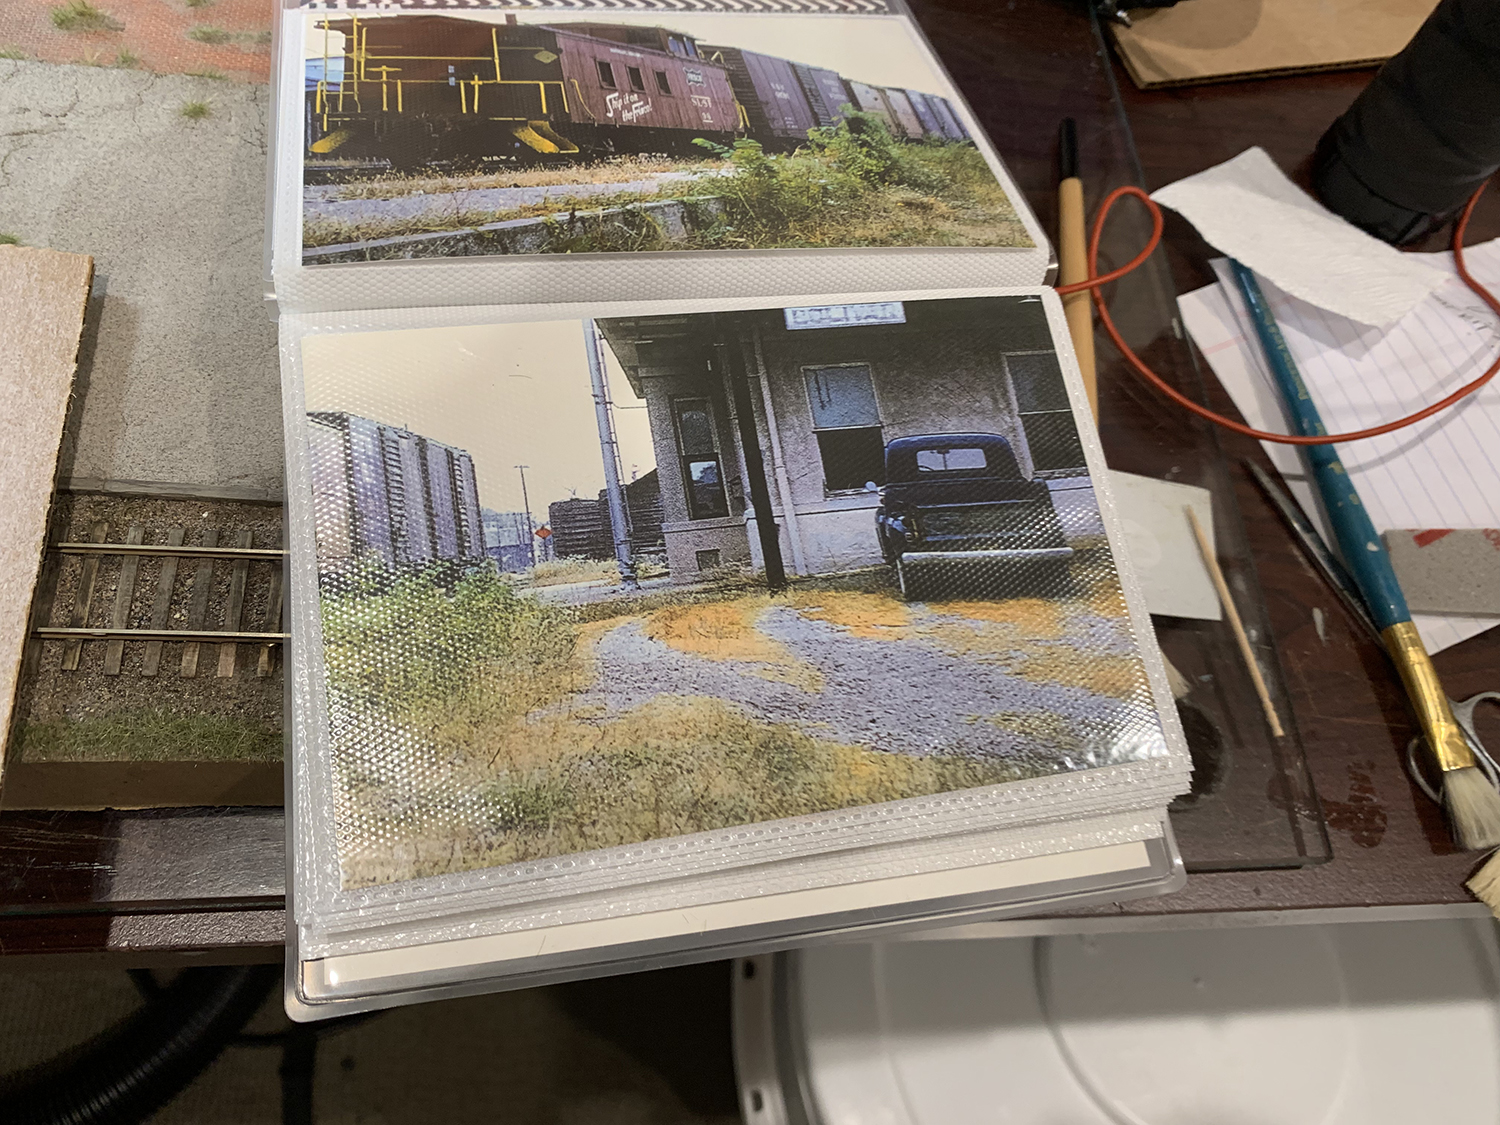
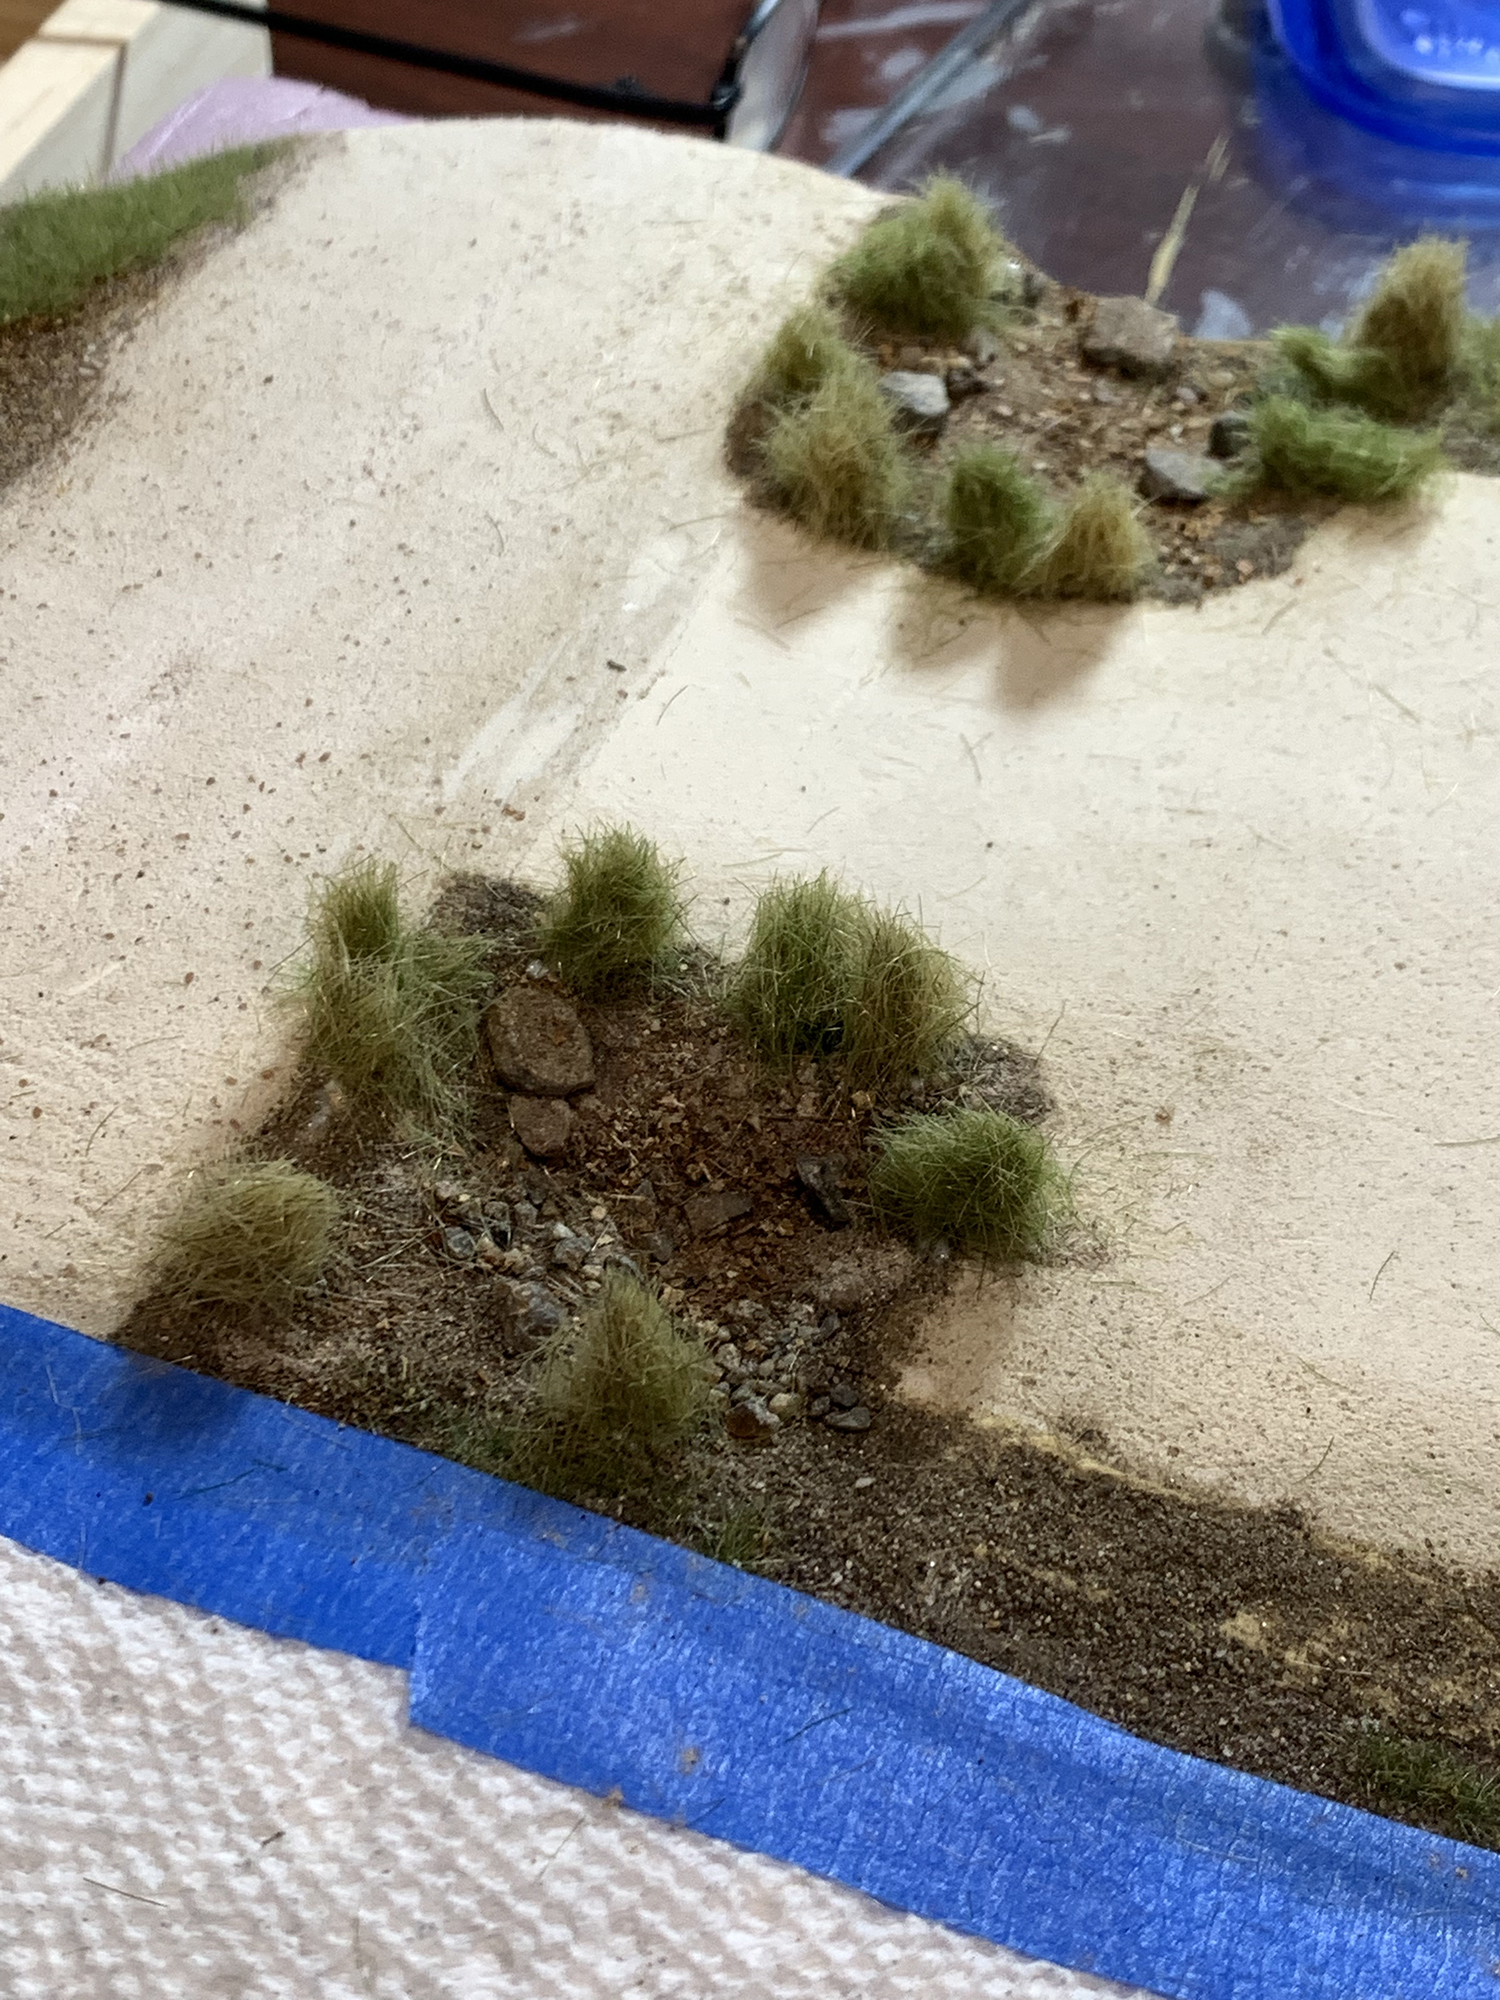
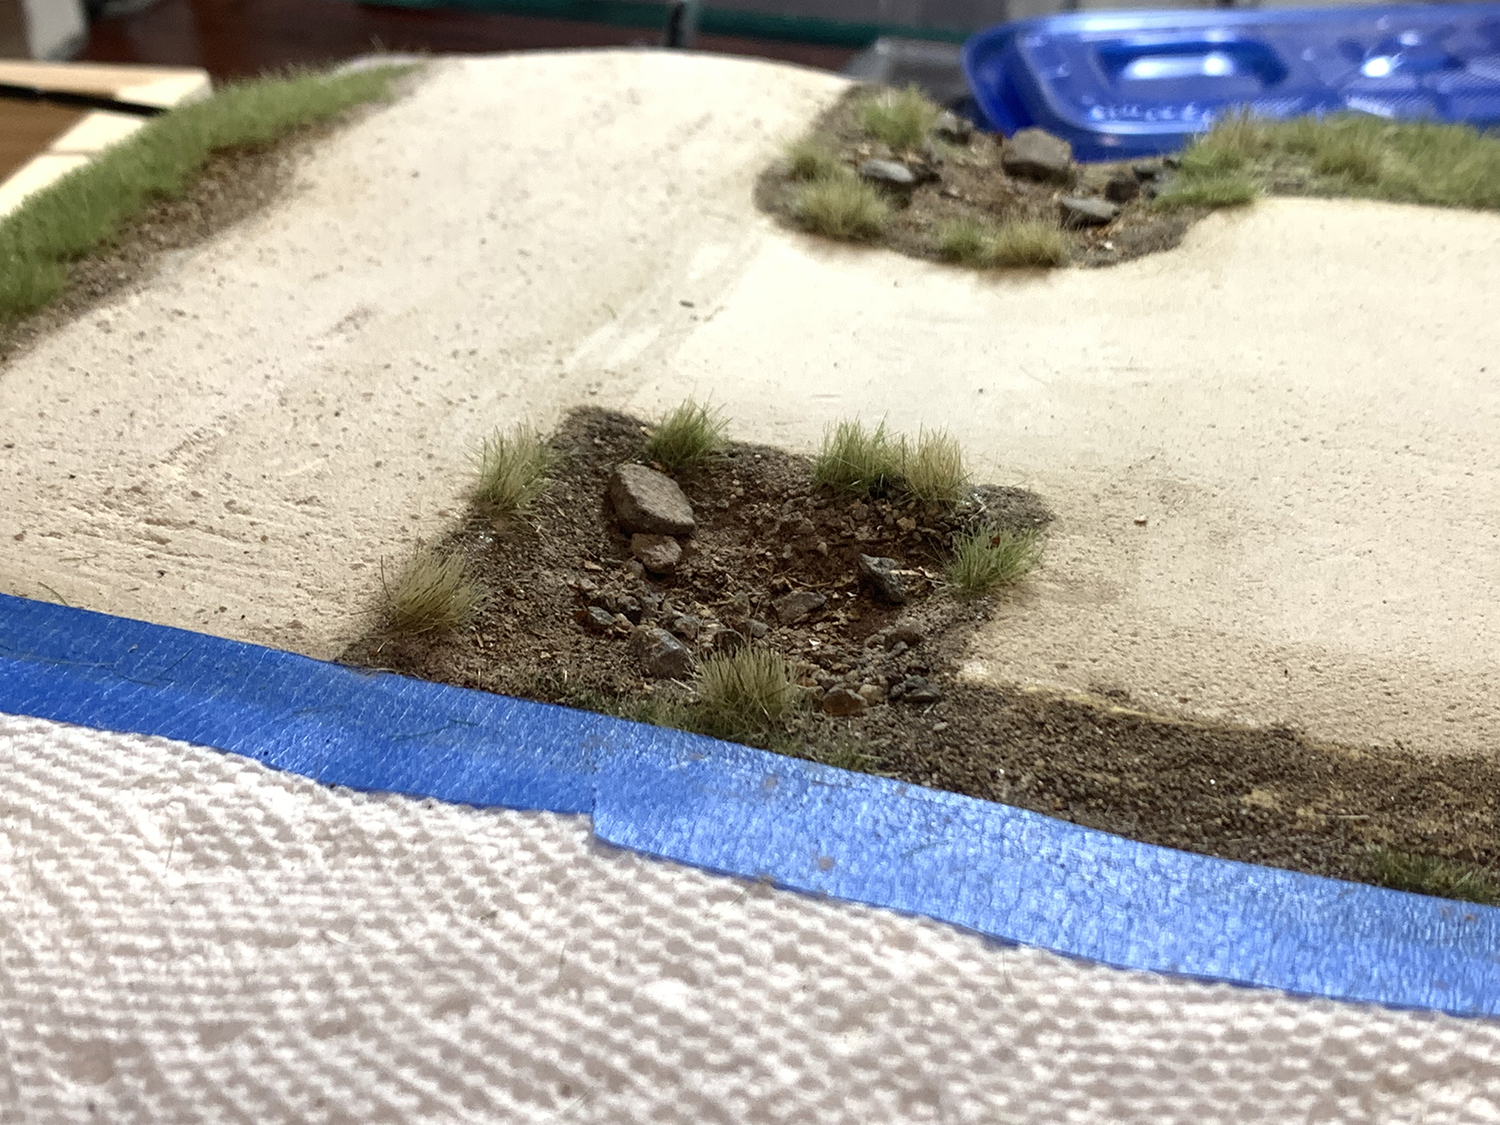
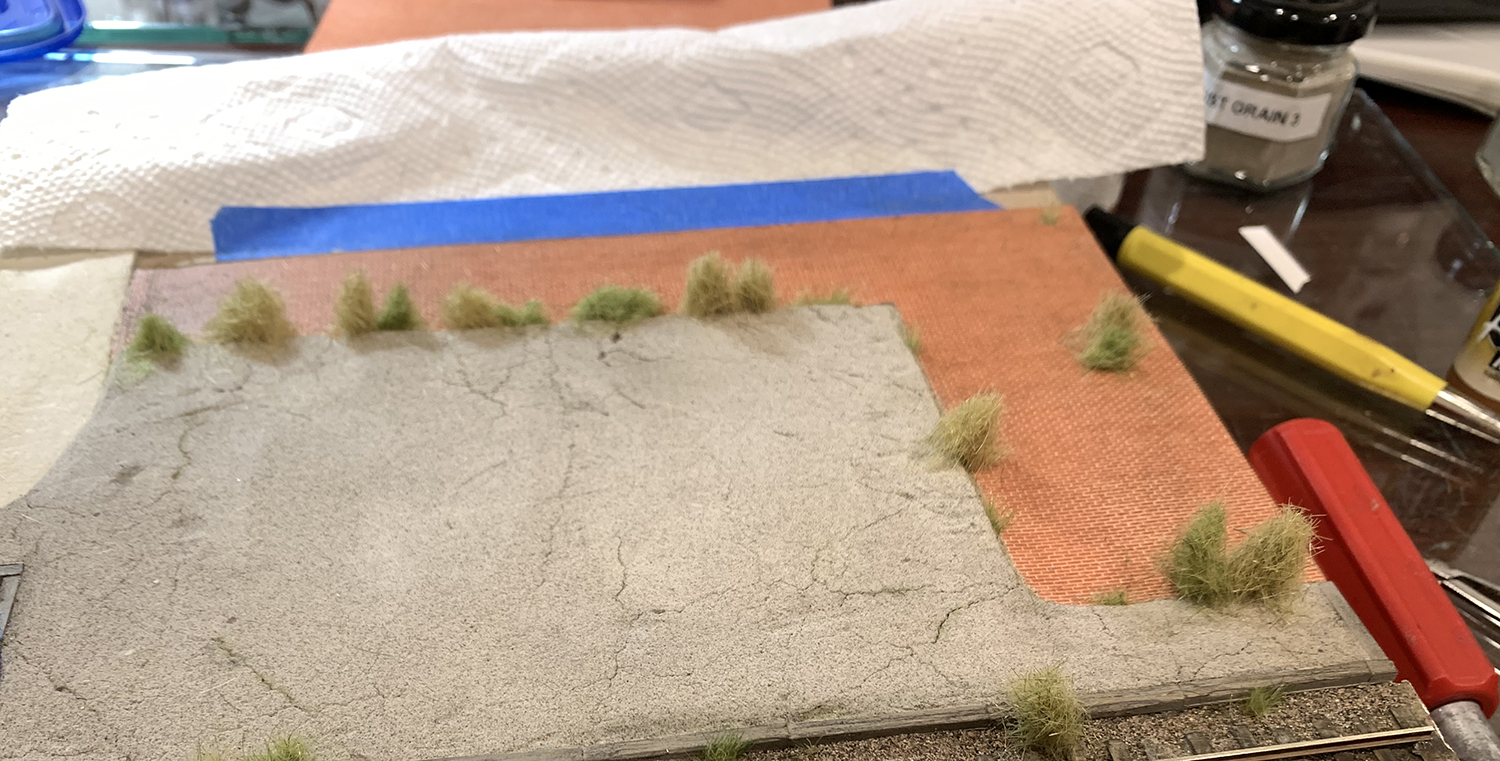
I had some Micro Mark embossed brick paper laying around and decided to use it for the surface of the path at the rear of the depot. This has been the only risky feature I have built so far as I had no idea how it was going to turn out. I built a few tests to practice laying the brick paper down as well as test weathering. The result is ok for the moment and I will come back to it at a later date.
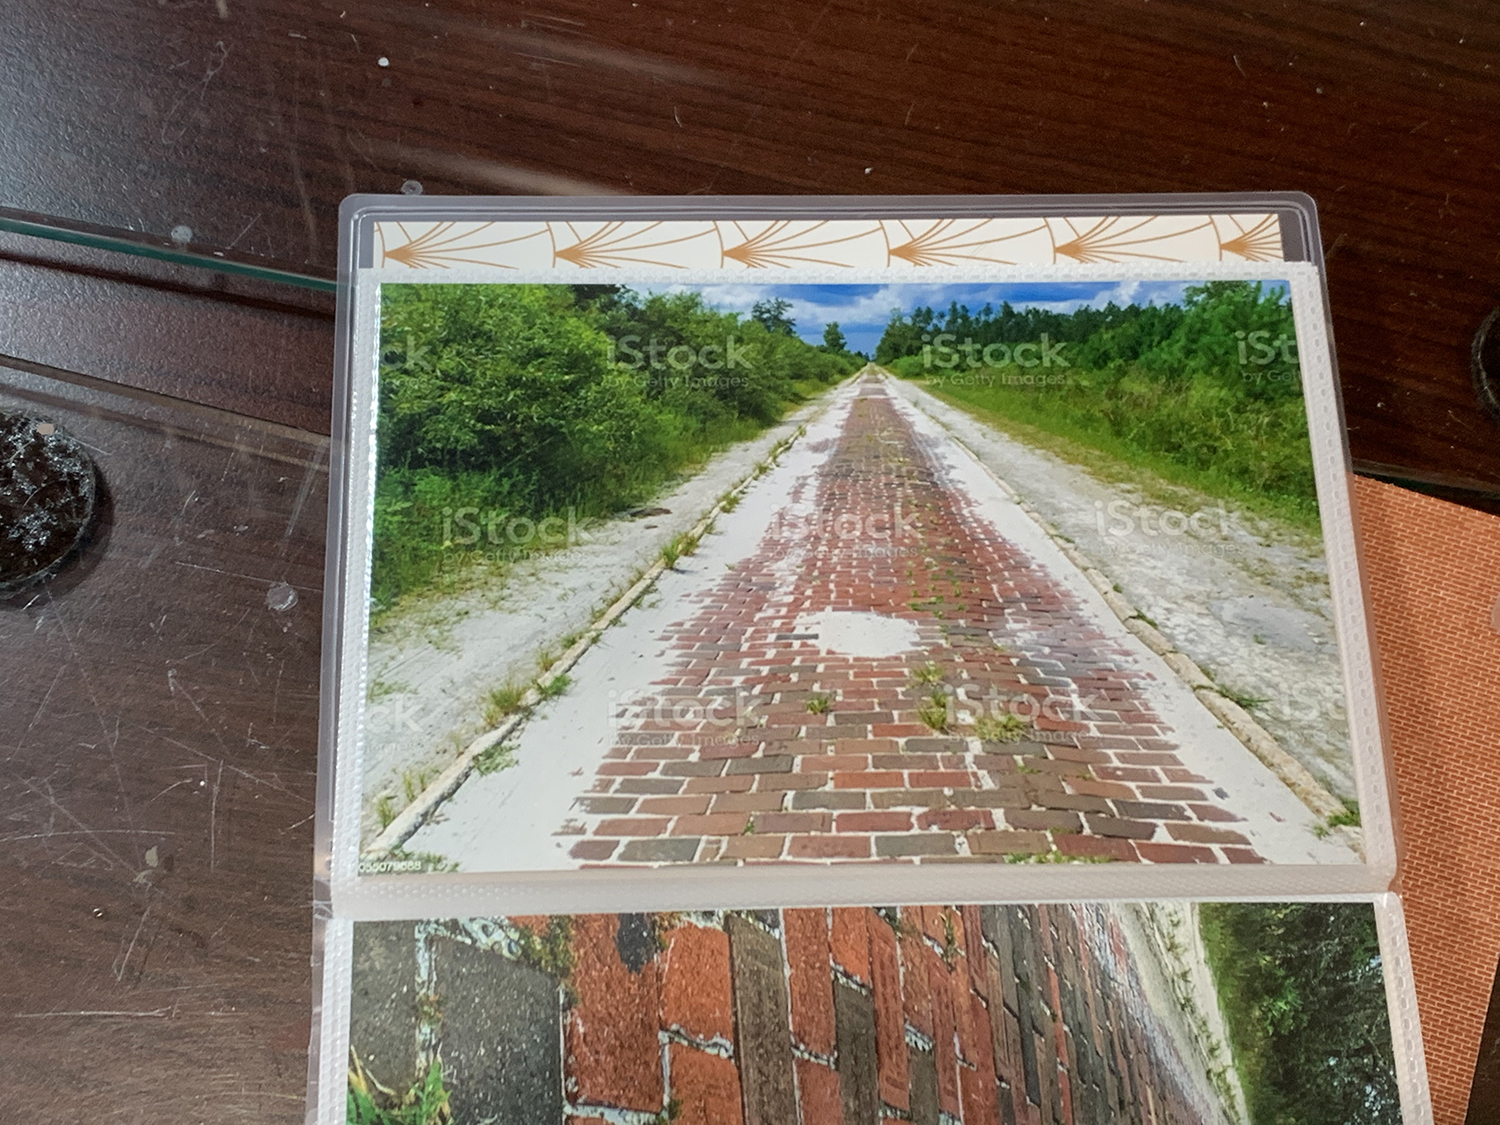
I downloaded several photos of brick paths to give me an idea of how to weather and add vegetation. I really liked the brick and sand effect in this photo. My version will use less sand.The working area. I had my photo book, my test and the diorama at hand while I worked.Once the brick paper was stuck down I gently weathered the surface with a dark chalky finger tip. I then started adding grass tufts.I added grass tufts over sandy bases. The sand was stuck down using diluted Mod Podge. I have more work to do here: blend the tufts, sand and brick. Reduce and randomize the vegetation: it looks a little too ordered right now and some of the tufts need thinning.
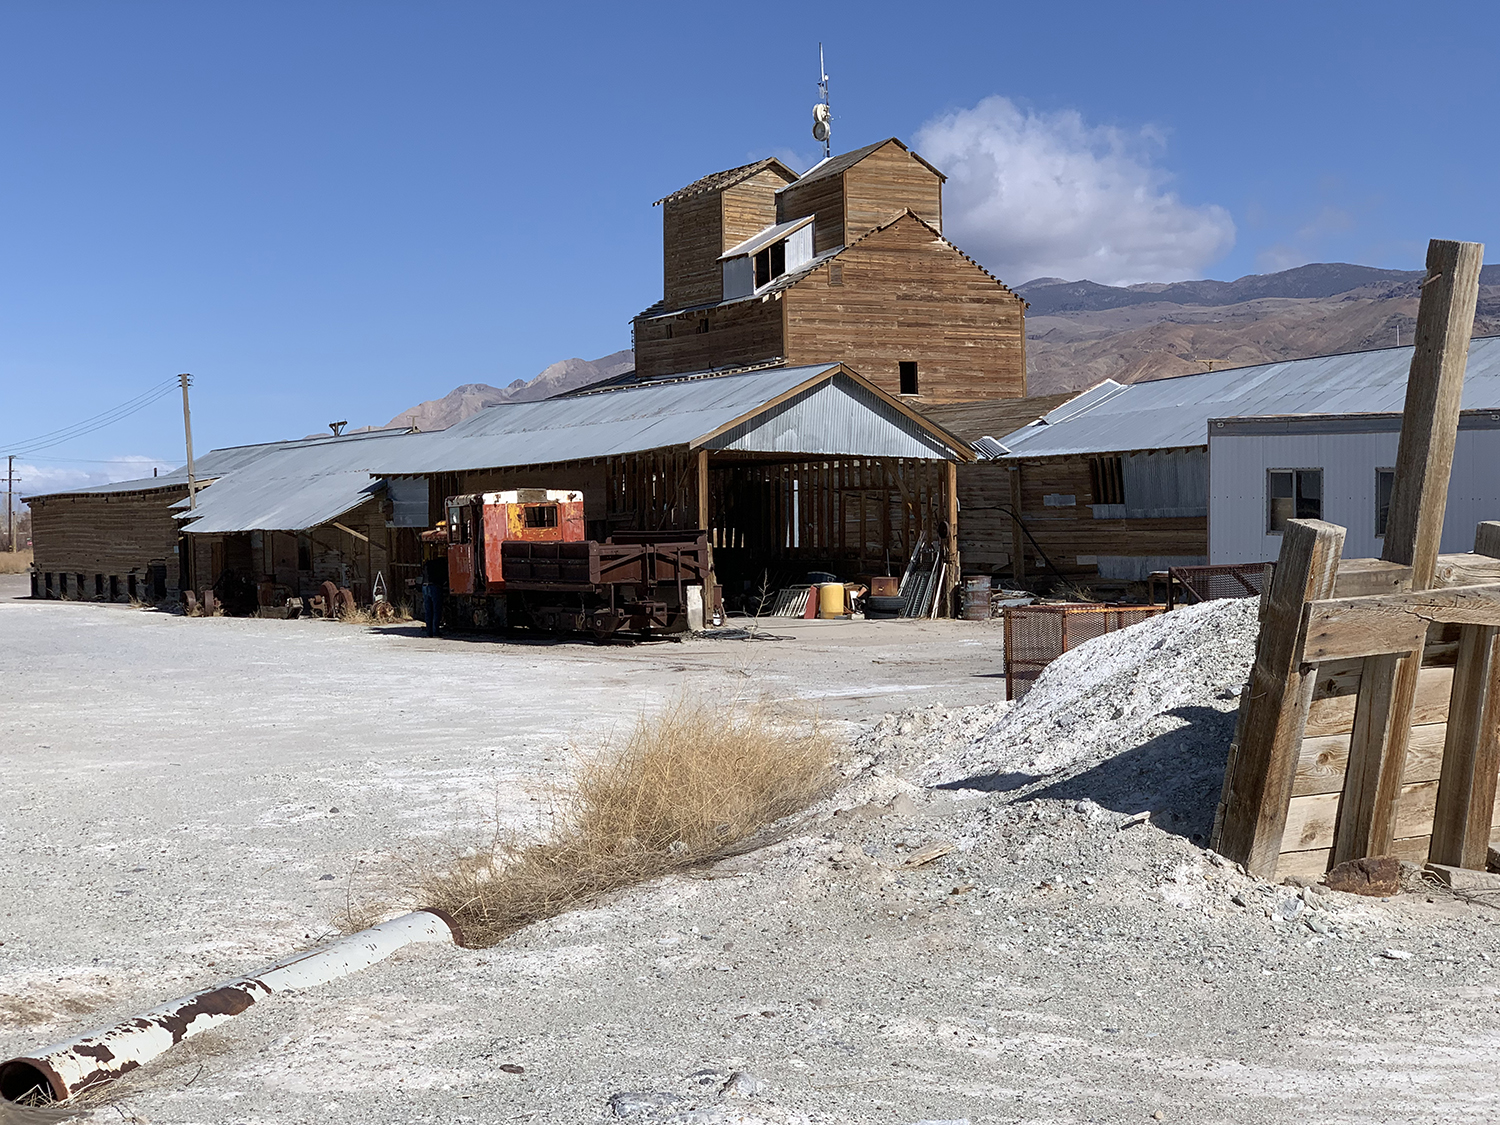
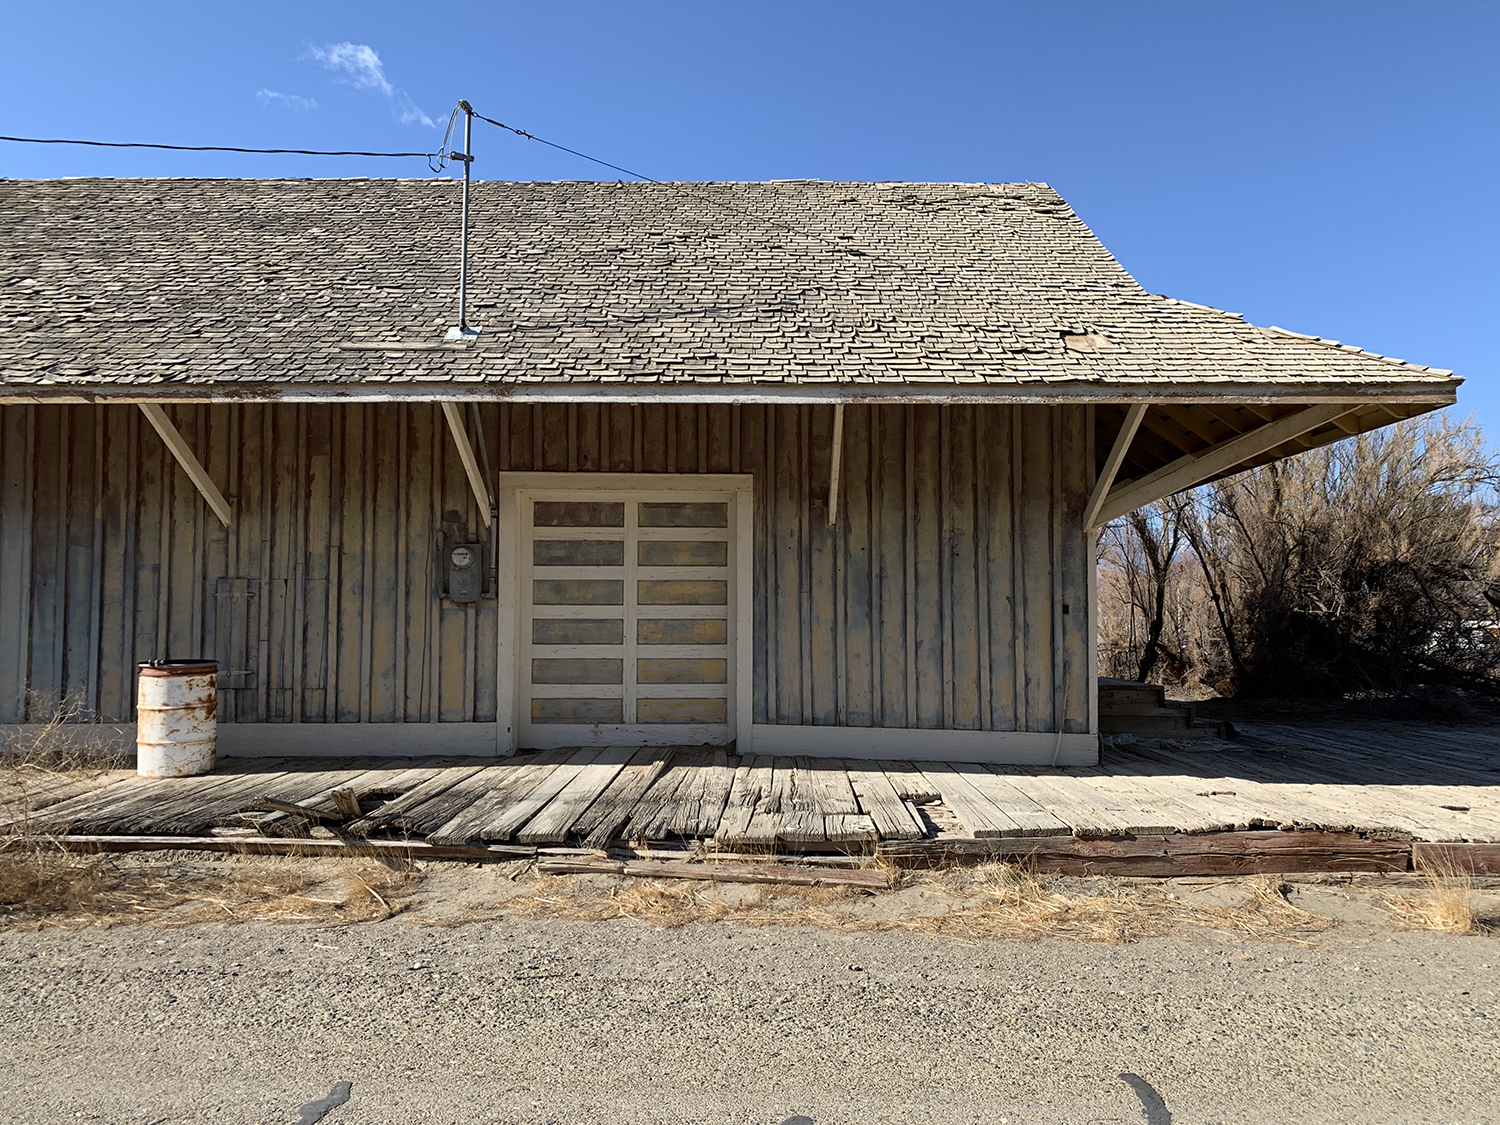
It’s been a while since I last posted as I was away visiting Eastern California. I went with a pal of mine to explore the southern end of the Carson and Colorado Railroad that shut back in 1960. We visited Keeler, Lone Pine, and Laws. It’s nice to see that so much remains to be seen especially at Keeler which retains the original depot building, the talc plant and some of the track layout near the original locomotive service area.
The talc plant. It is in pretty good condition considering it shut many years ago. There was a narrow gauge locomotive being stored there which I believe is being slated for restoration.I have many pictures of the depot which is well know among fans of the Carson and Colorado. We are lucky to still be able to see it and it is a real shame no one has made any effort to restore it beyond what you see here. I’ve seen a few models based on this depot and it is definitely a great modeling subject.
3D Printing
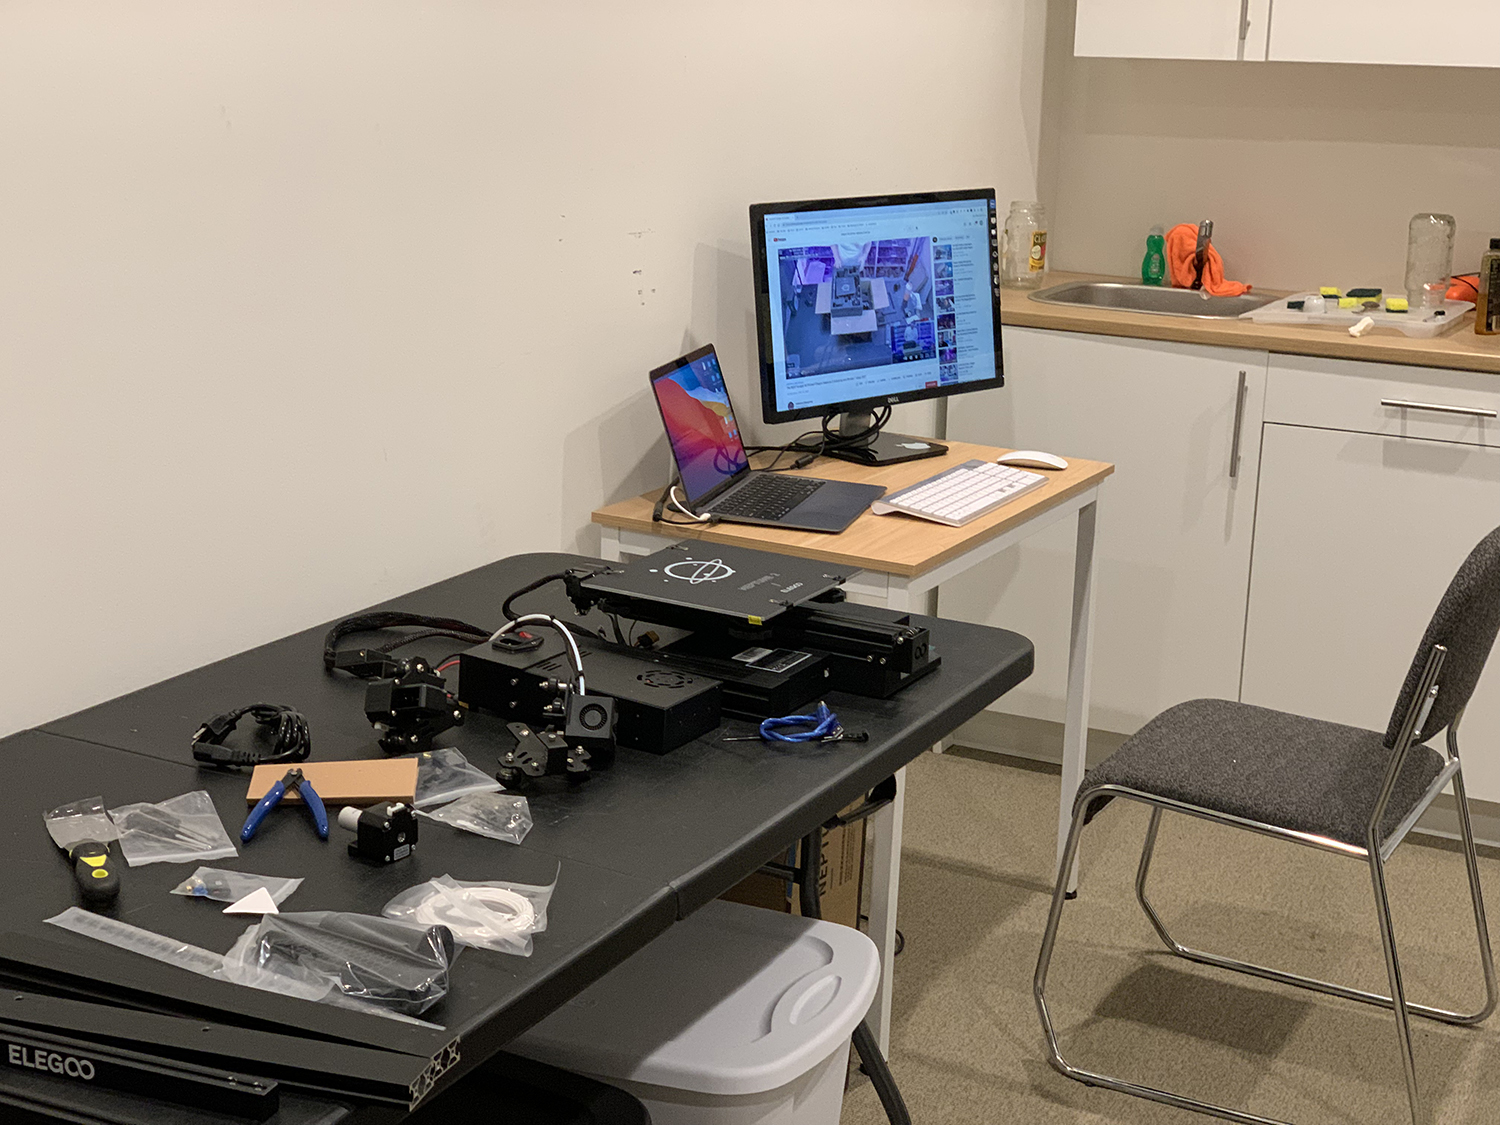
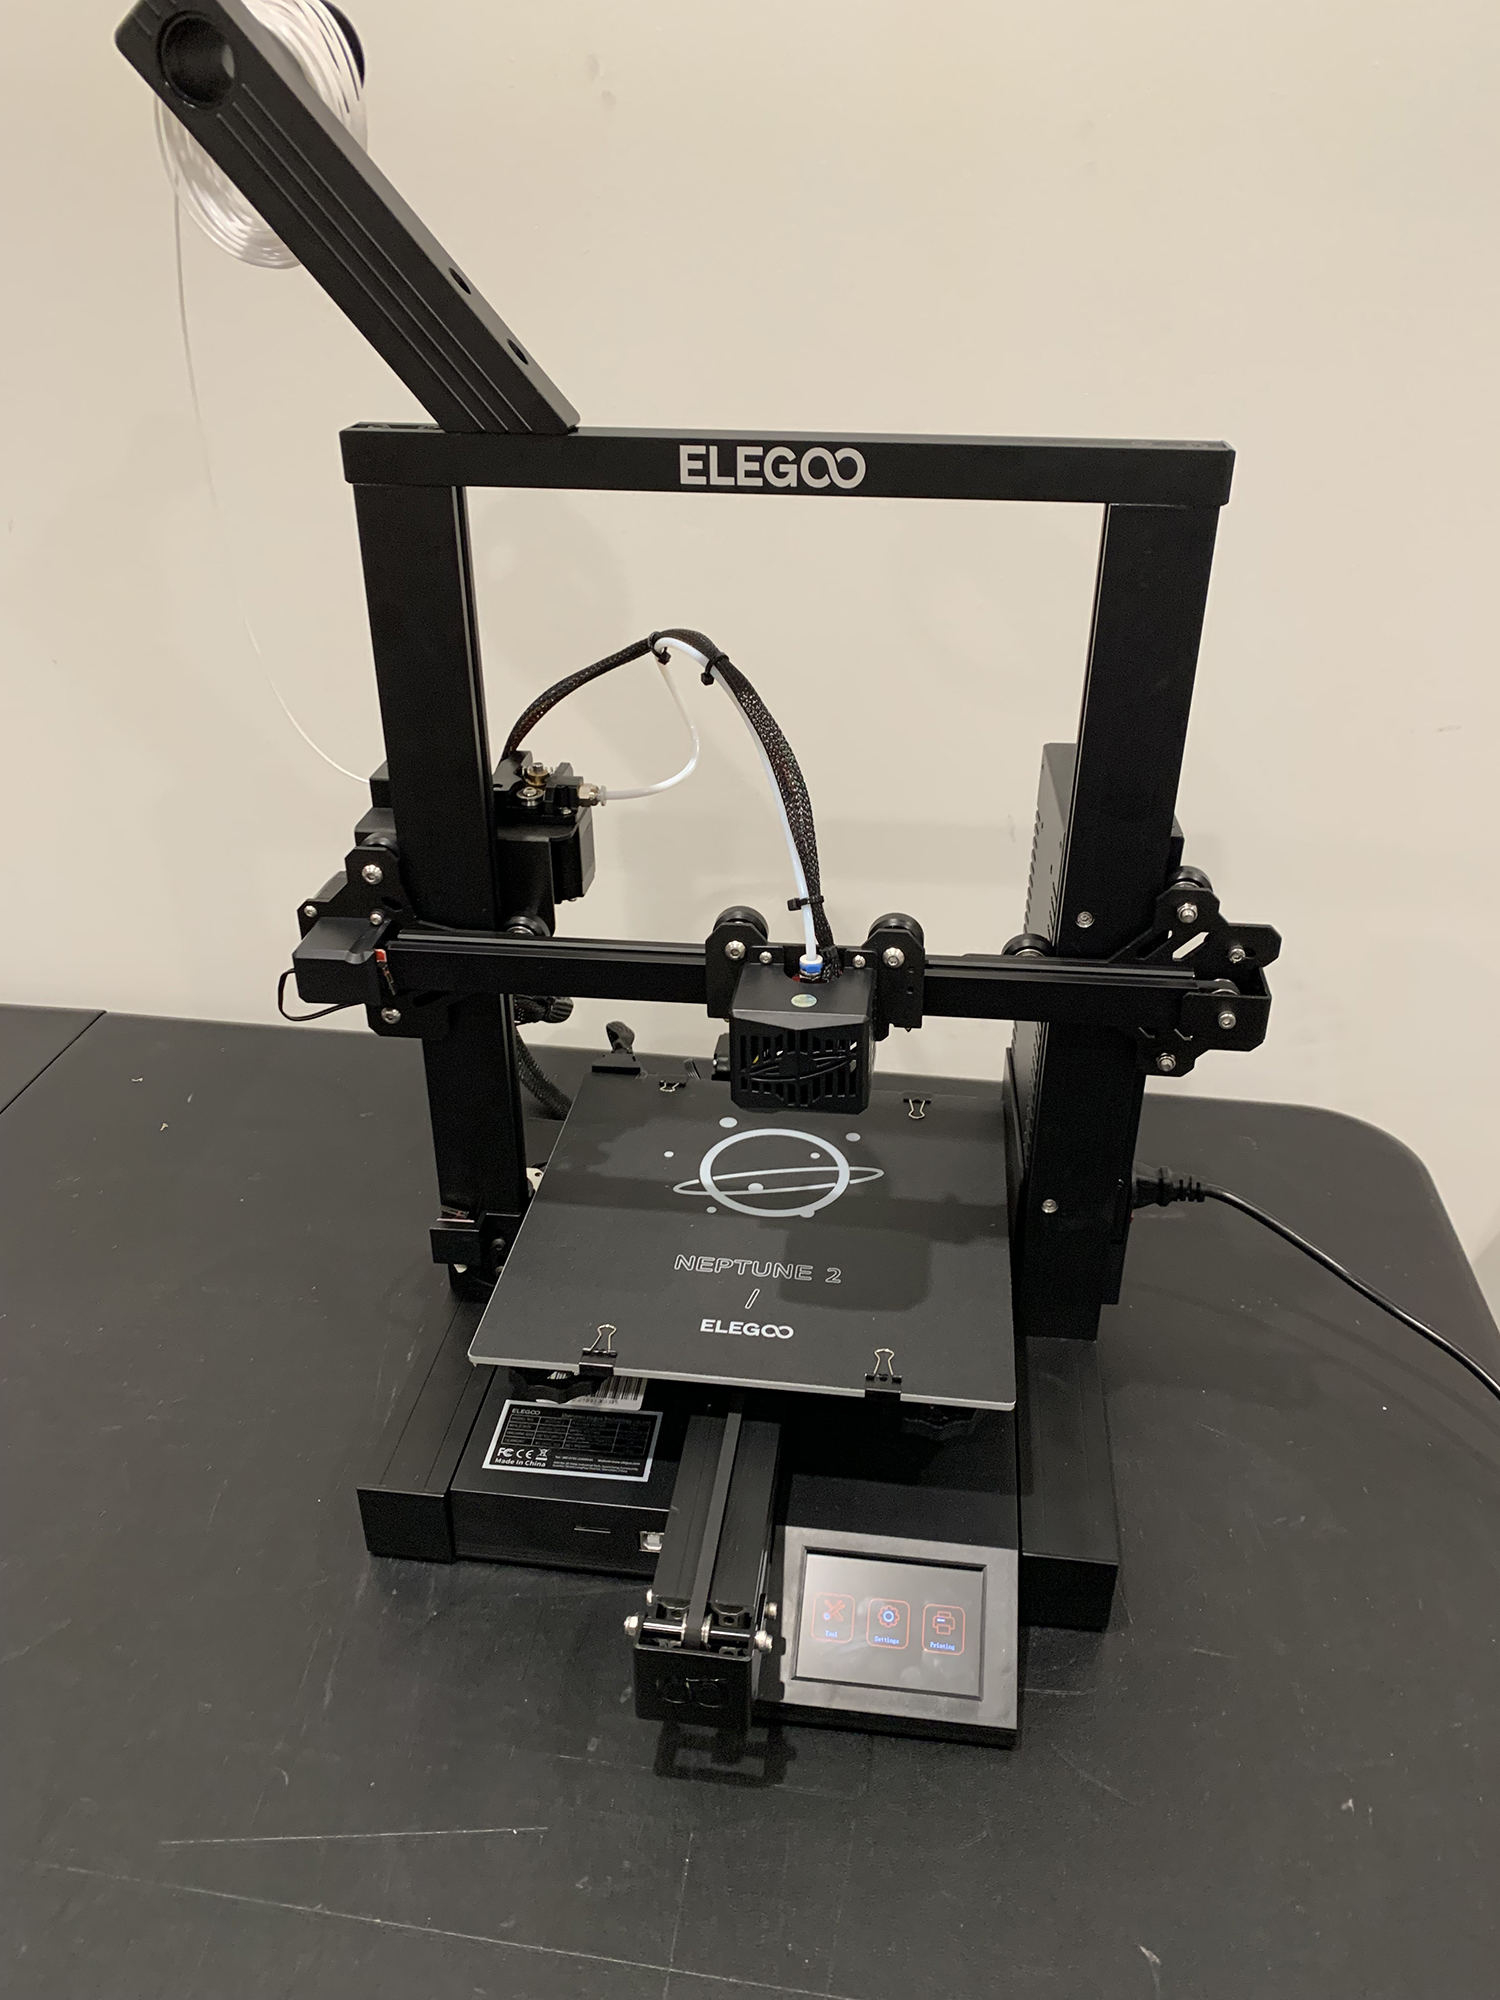
I first got into 3D printing a few years ago. At that time I used Sketchup to design railroad features that I wanted to add to my last layout. However instead of printing at home I sent the designs away to Shapeways who printed up the design and sent me back the result a couple of weeks later. Since then printers have dropped in price and are now able to produce very high quality work for a very reasonable initial outlay/cost. It seems to have become a huge part of the hobby in the last few years and the time seemed right to finally invest in one myself. I watched a few YouTube videos on how to choose a printer and which printer would best suit my needs and then settled on the Elegoo Neptune 2. It cost around $200 from Amazon and arrived disassembled a few days later.
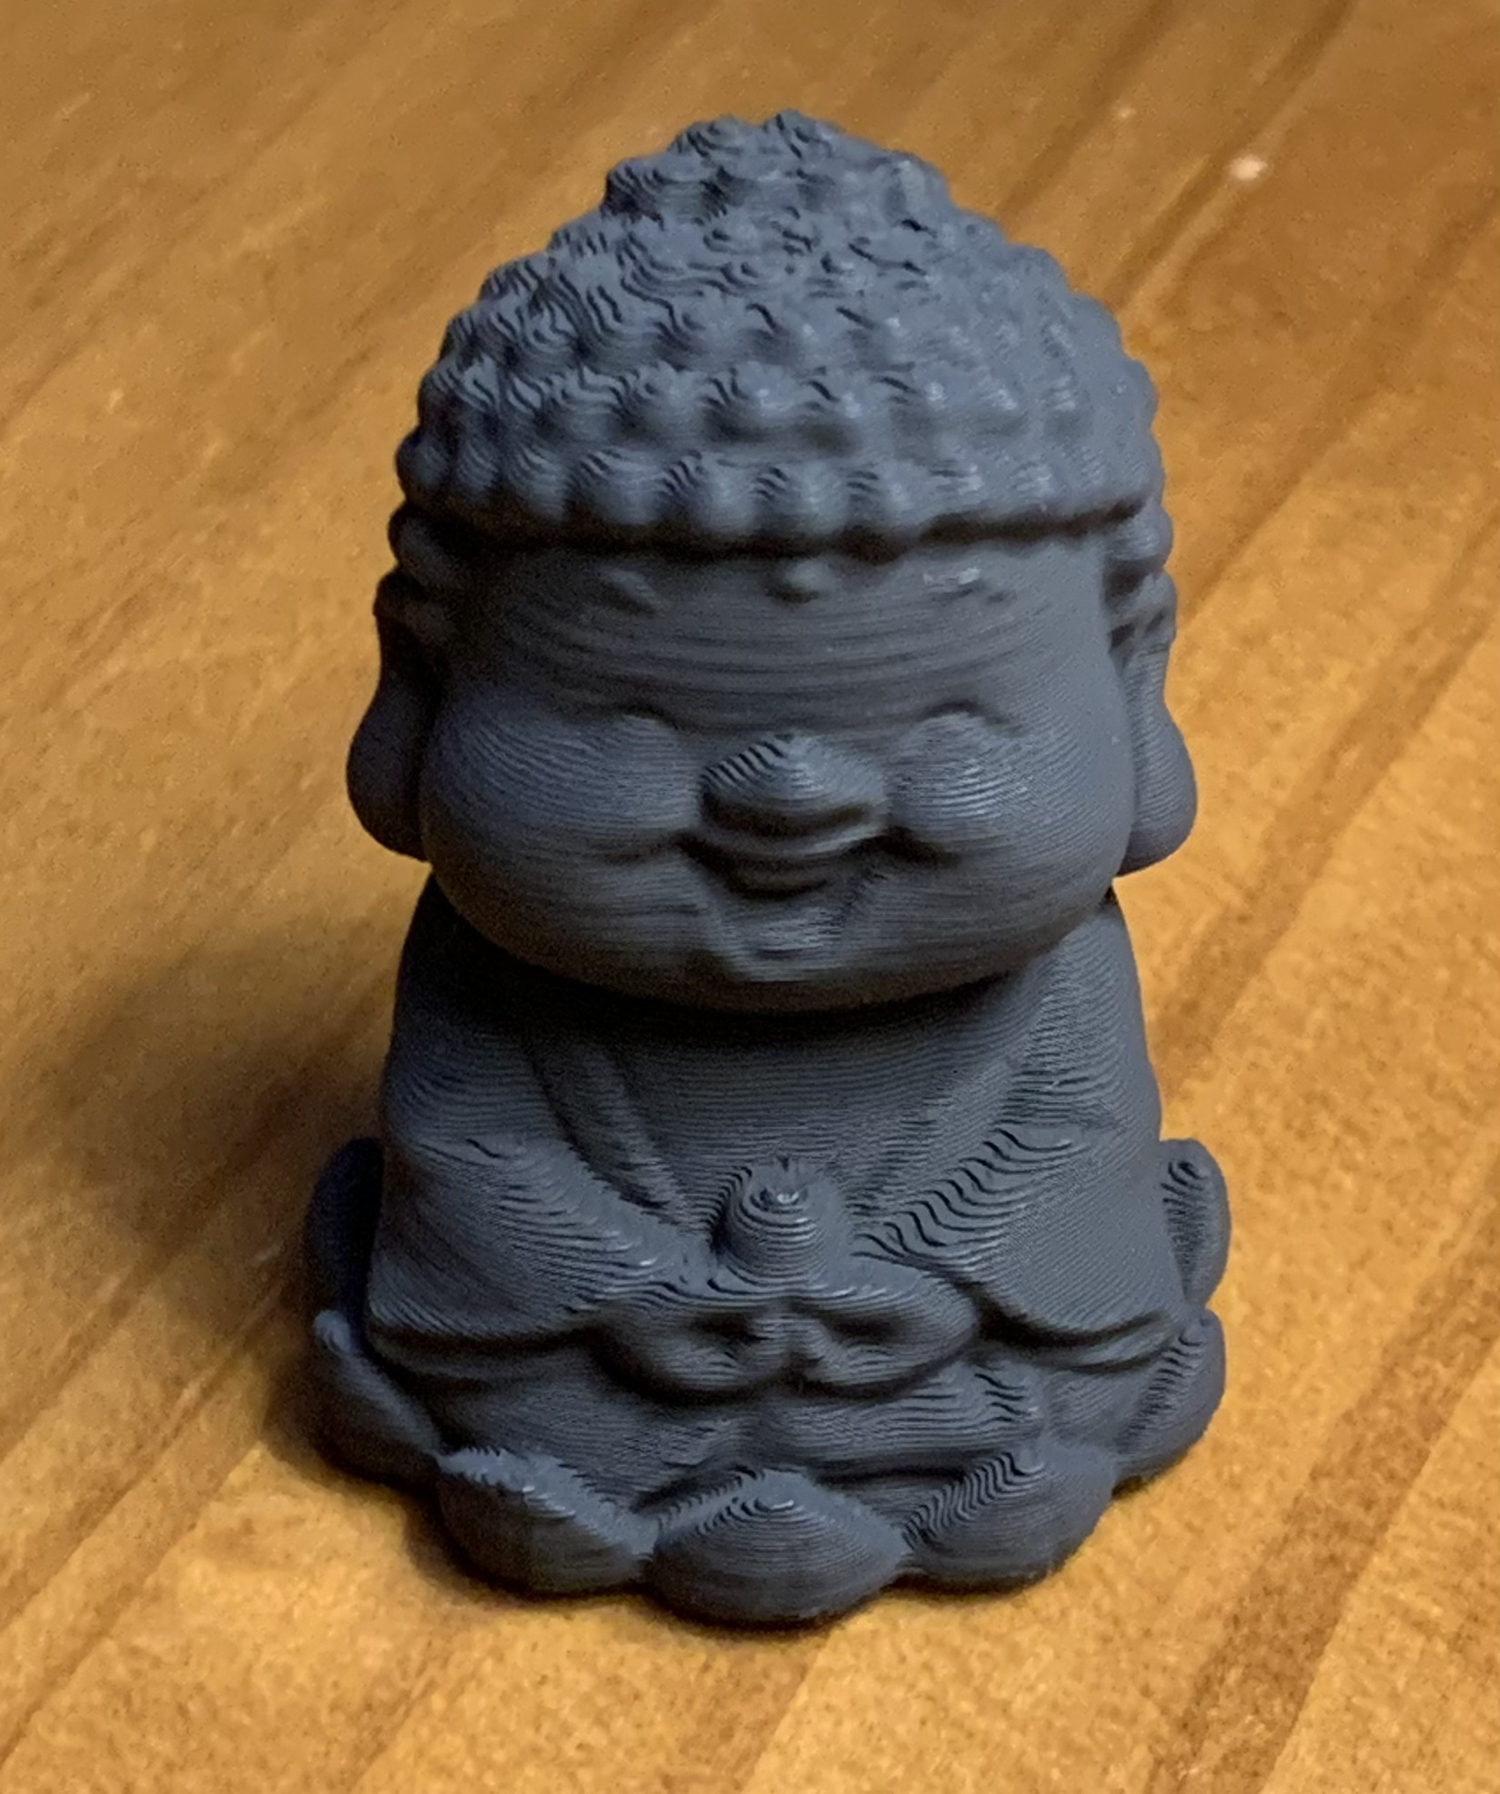
I had to assemble the printer before I could use it. I watched an assemble video, followed the instructions, and after a couple of hours I had a working 3D printer.There is a small learning curve involved in getting things working correctly – leveling the bed, understanding filaments and printer settings – but once done I was able to create my first print.A pretty good result I thought. As I get to know the process better I should be able to improve the quality of the print. I spray-painted this figure and gave it to my wife as a small gift.
I’ve been busy with the diorama so I have not had a chance to use the 3D printer for a few weeks but as I start adding details to the diorama I am hoping to start making them by printing them: details such as crossing bucks, telegraph poles, fences, benches etc. I have decided to use Fusion 360 as my design tool and still have to get up to speed with the software. Also, there are various websites online that allow you to download drawings and plans by other modelers – sometimes free and sometimes for a price – which is a huge timesaver if you need something quickly.
Diorama
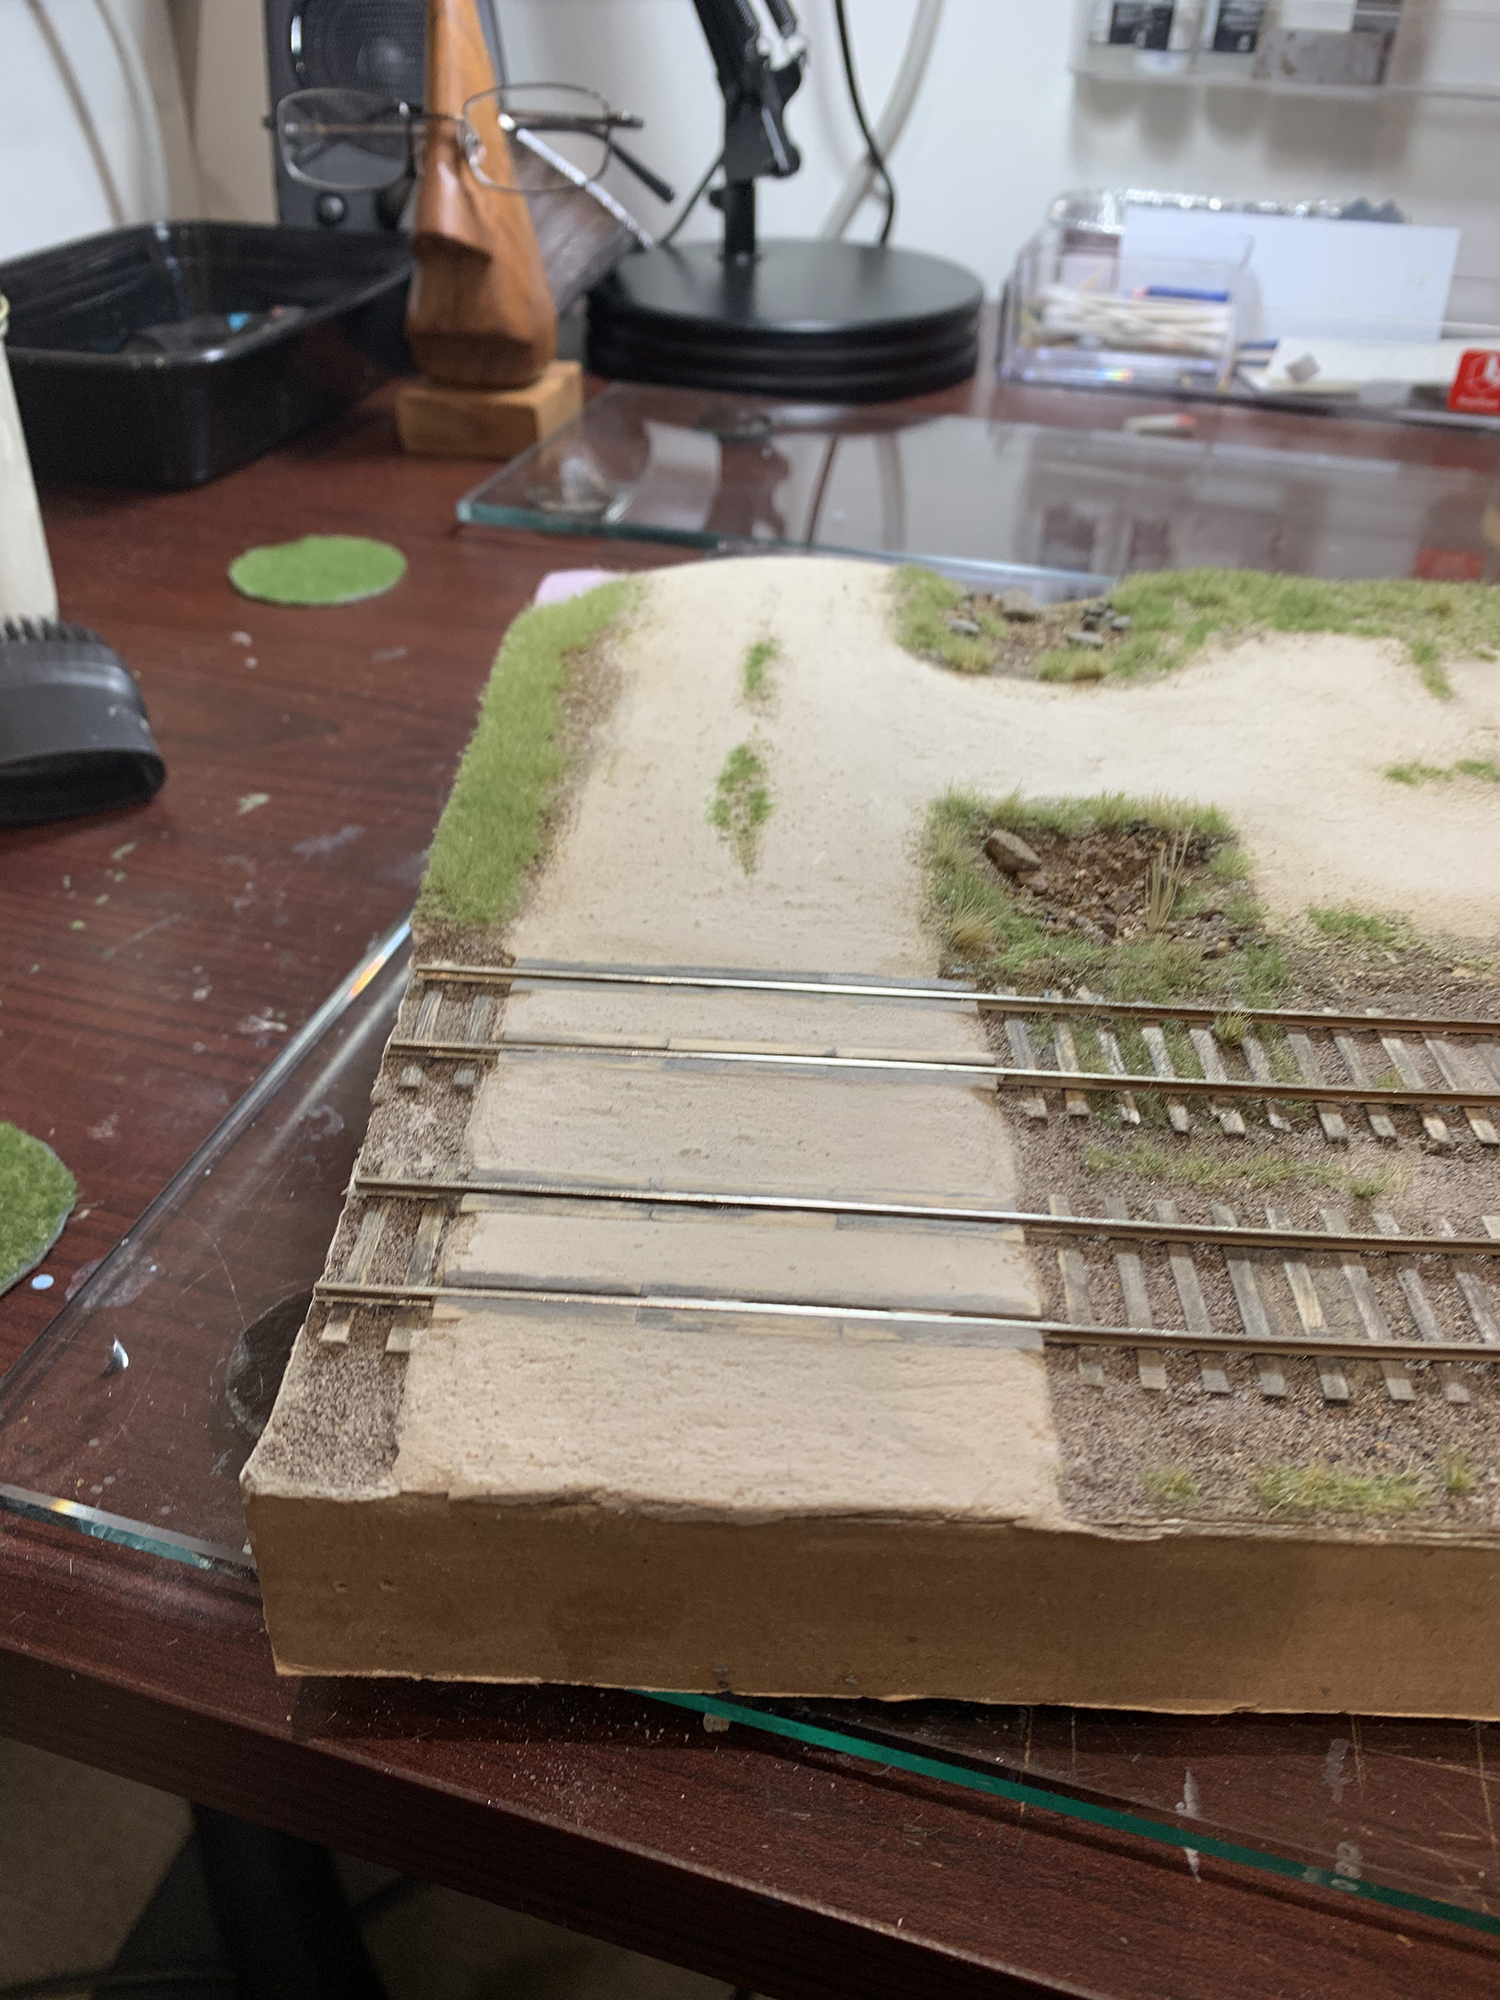
1. Grade Crossing
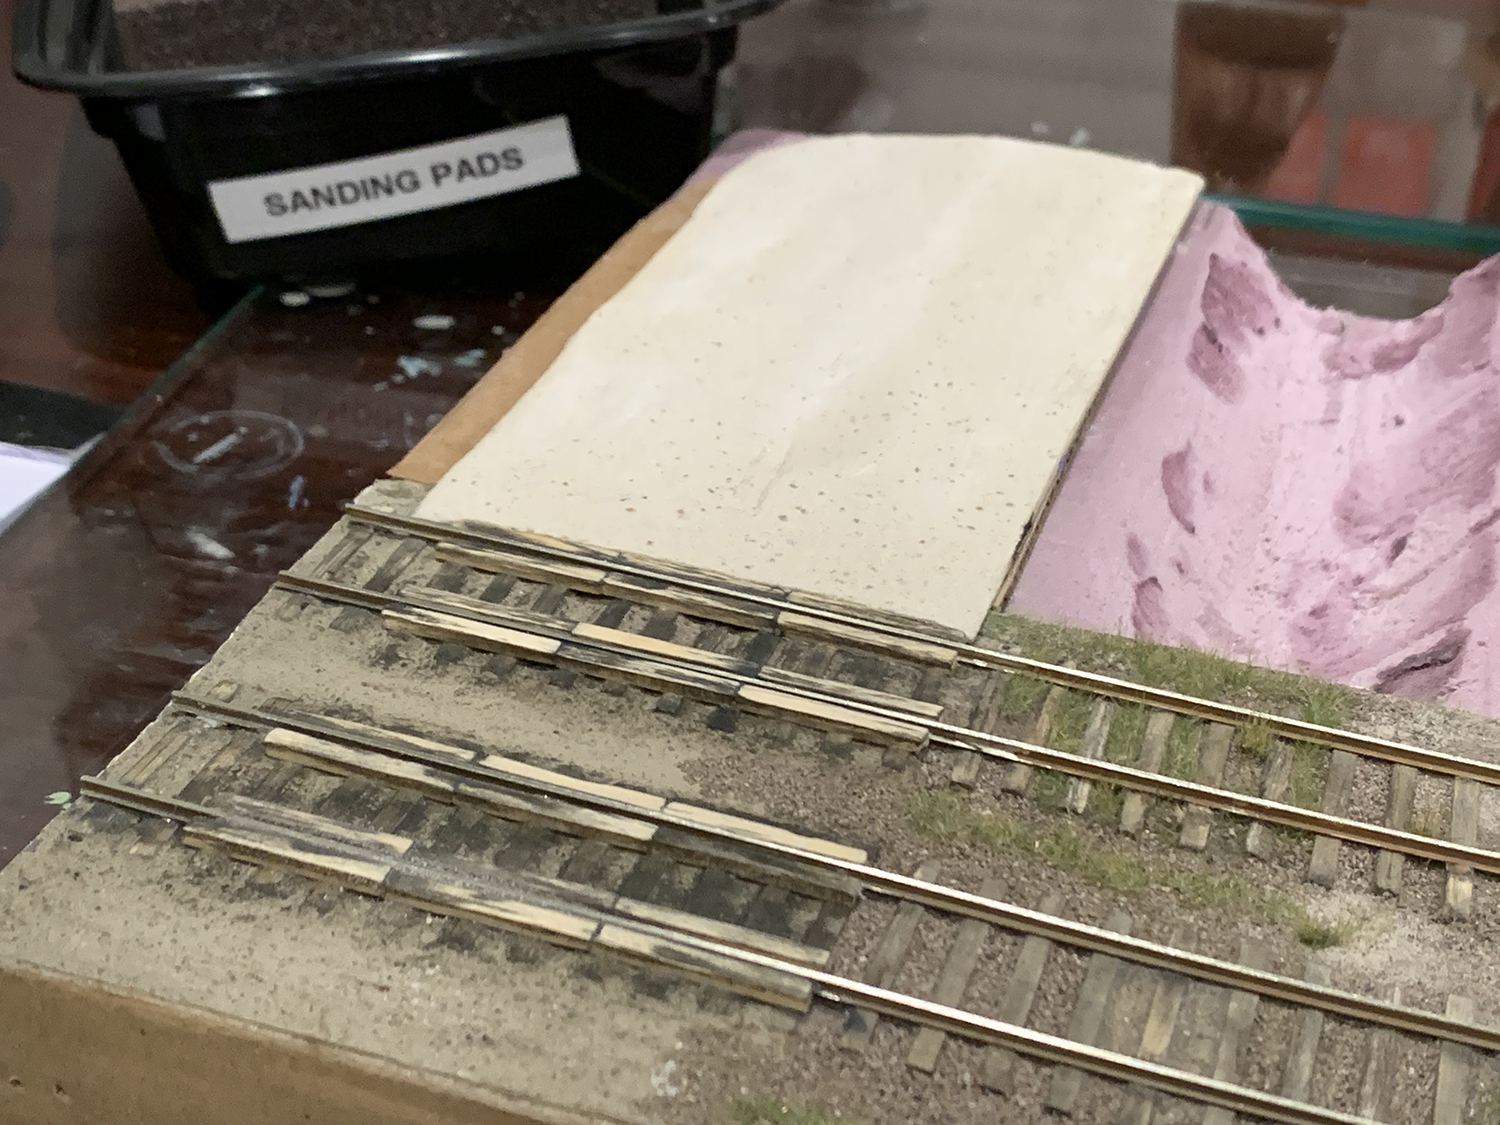
I used some ties to protect the flangeway gap. I sanded down the ties to match the rail height and lost some of the stain. I will recolor the ties at a later date.I used my test roadway that I had completed a while back to fill the gaps. I still need to finish the ends and smooth them down. The difference in width between the roadway and the crossing will be dealt with at some point. I’m doing a lot of rough modeling at the moment but will start fine tuning features and colors once all the main features such as driveway and platform are completed.I added some sandy mix to the edges of the crossing and then smoothed it down a little. It is looking a little rough at the moment but will look much better when I go over the area again and improve the ballast and general coloring.
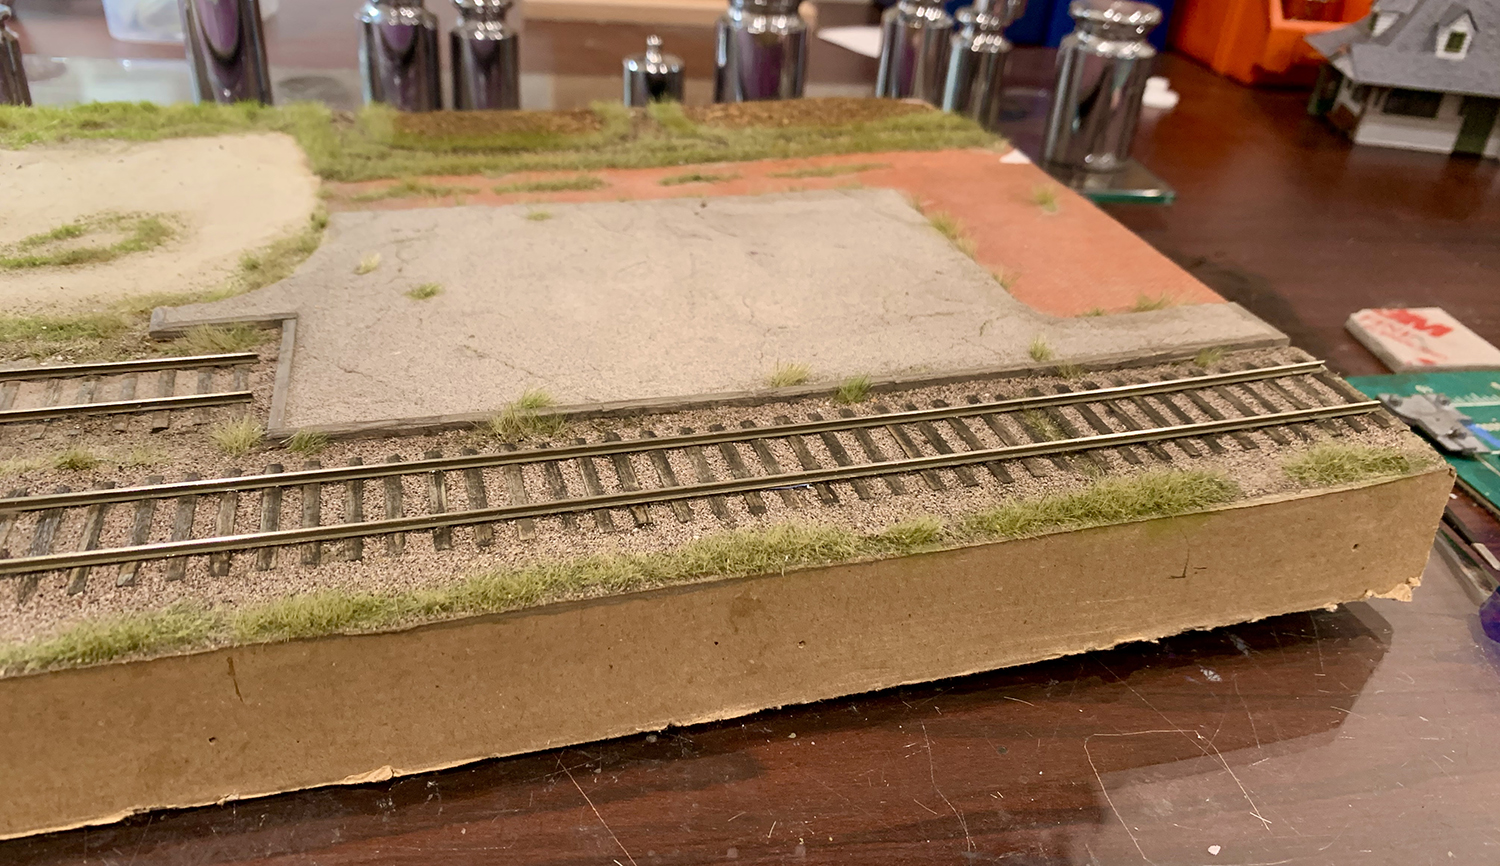
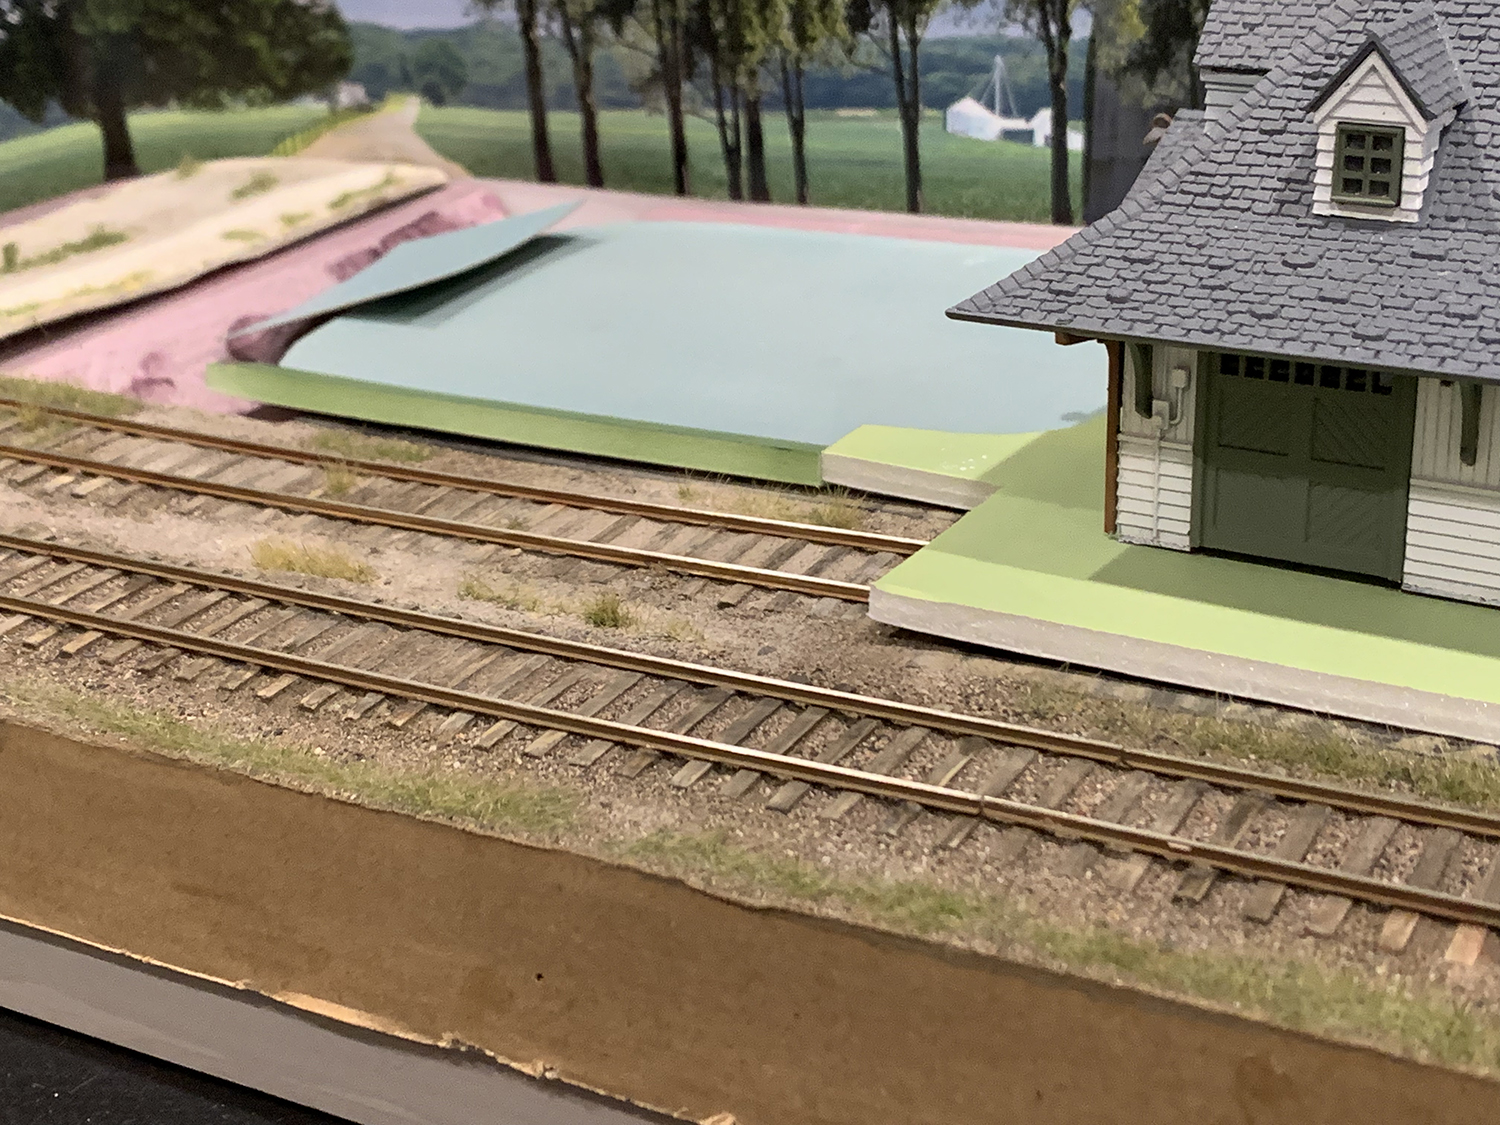
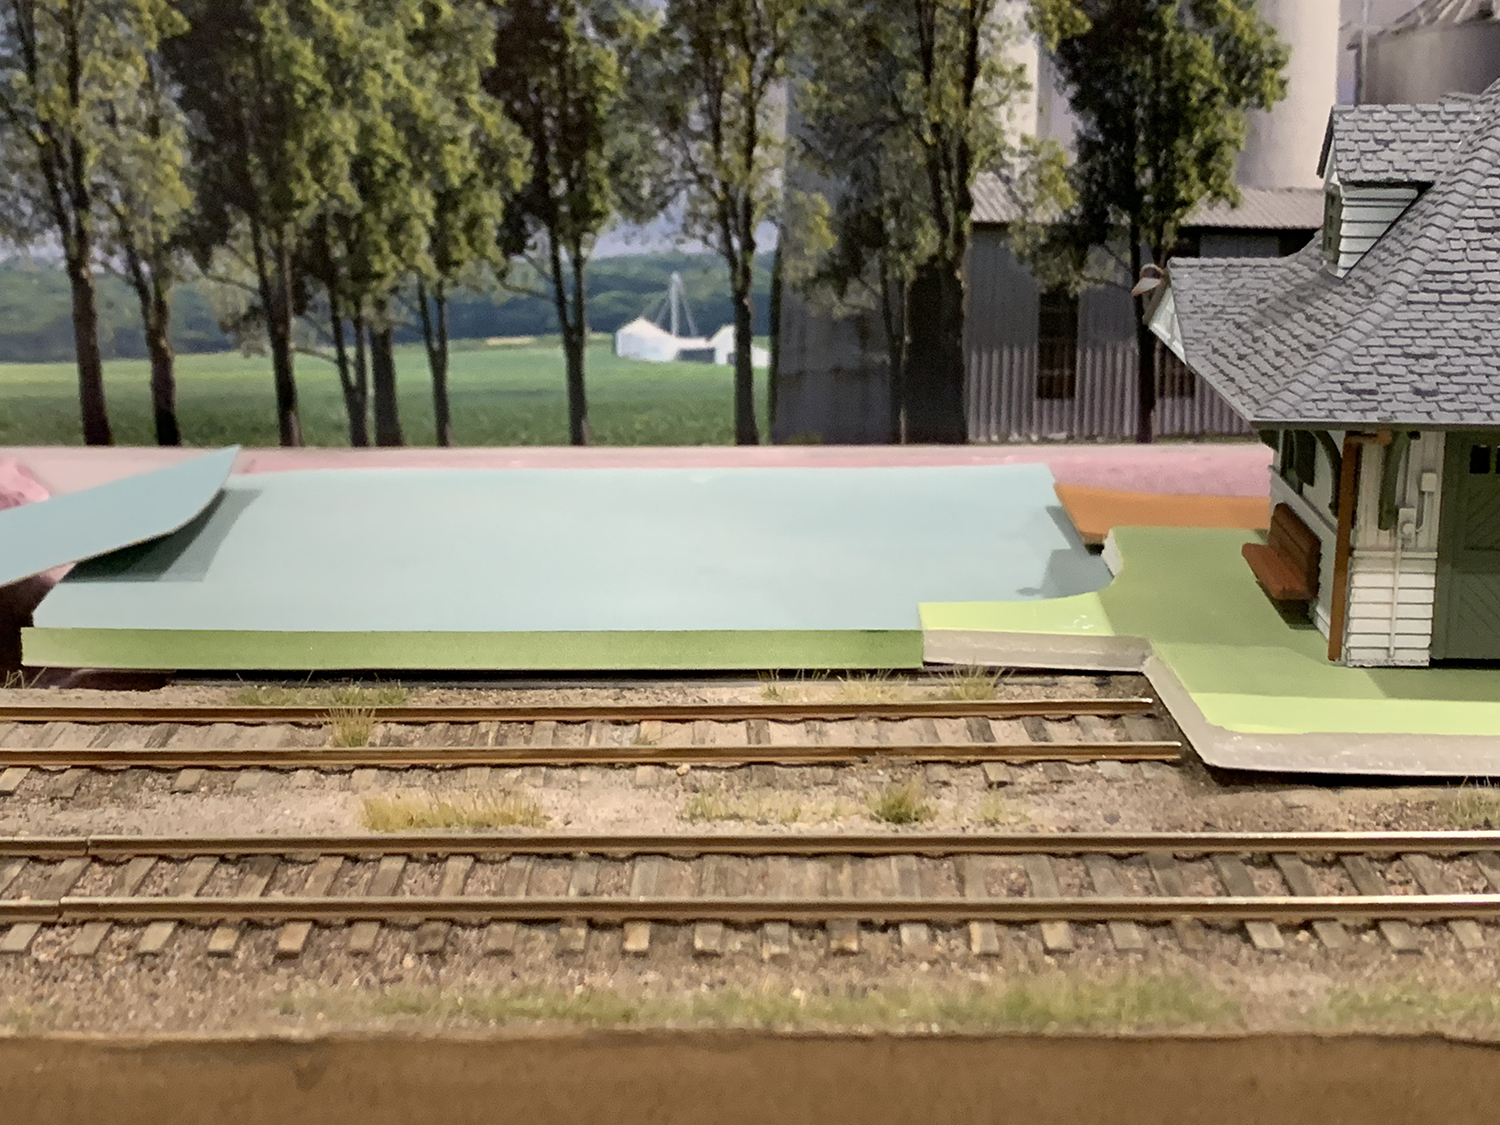
2. Drive and parking area
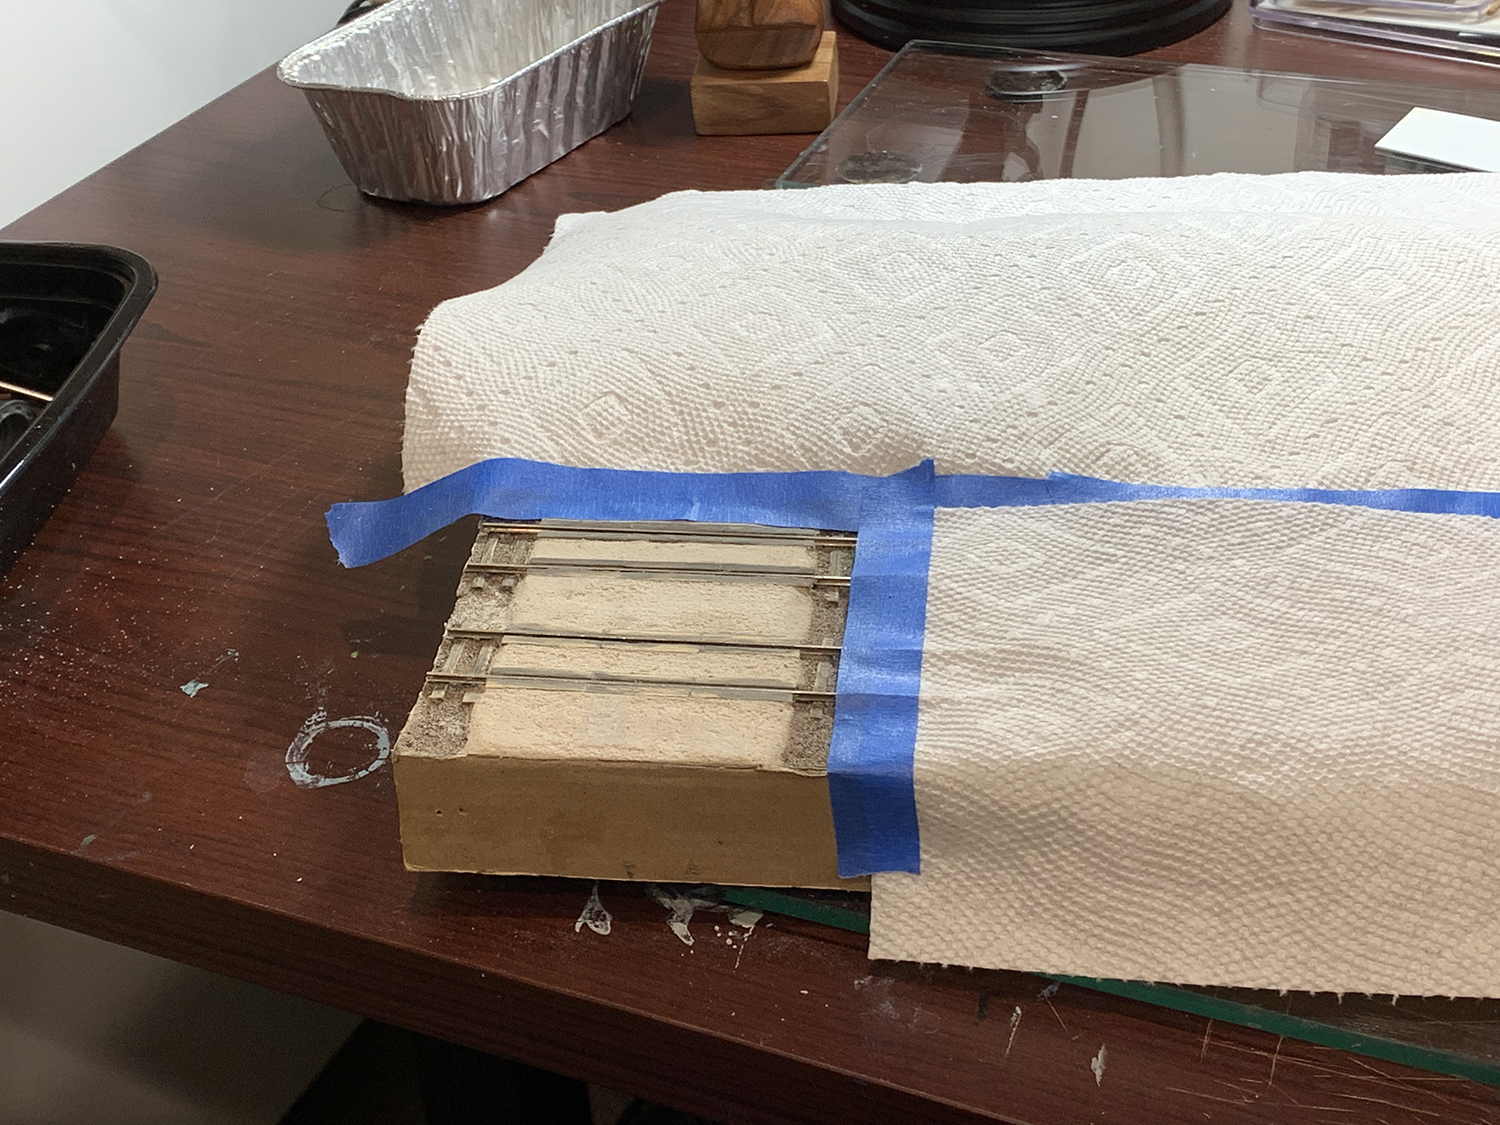
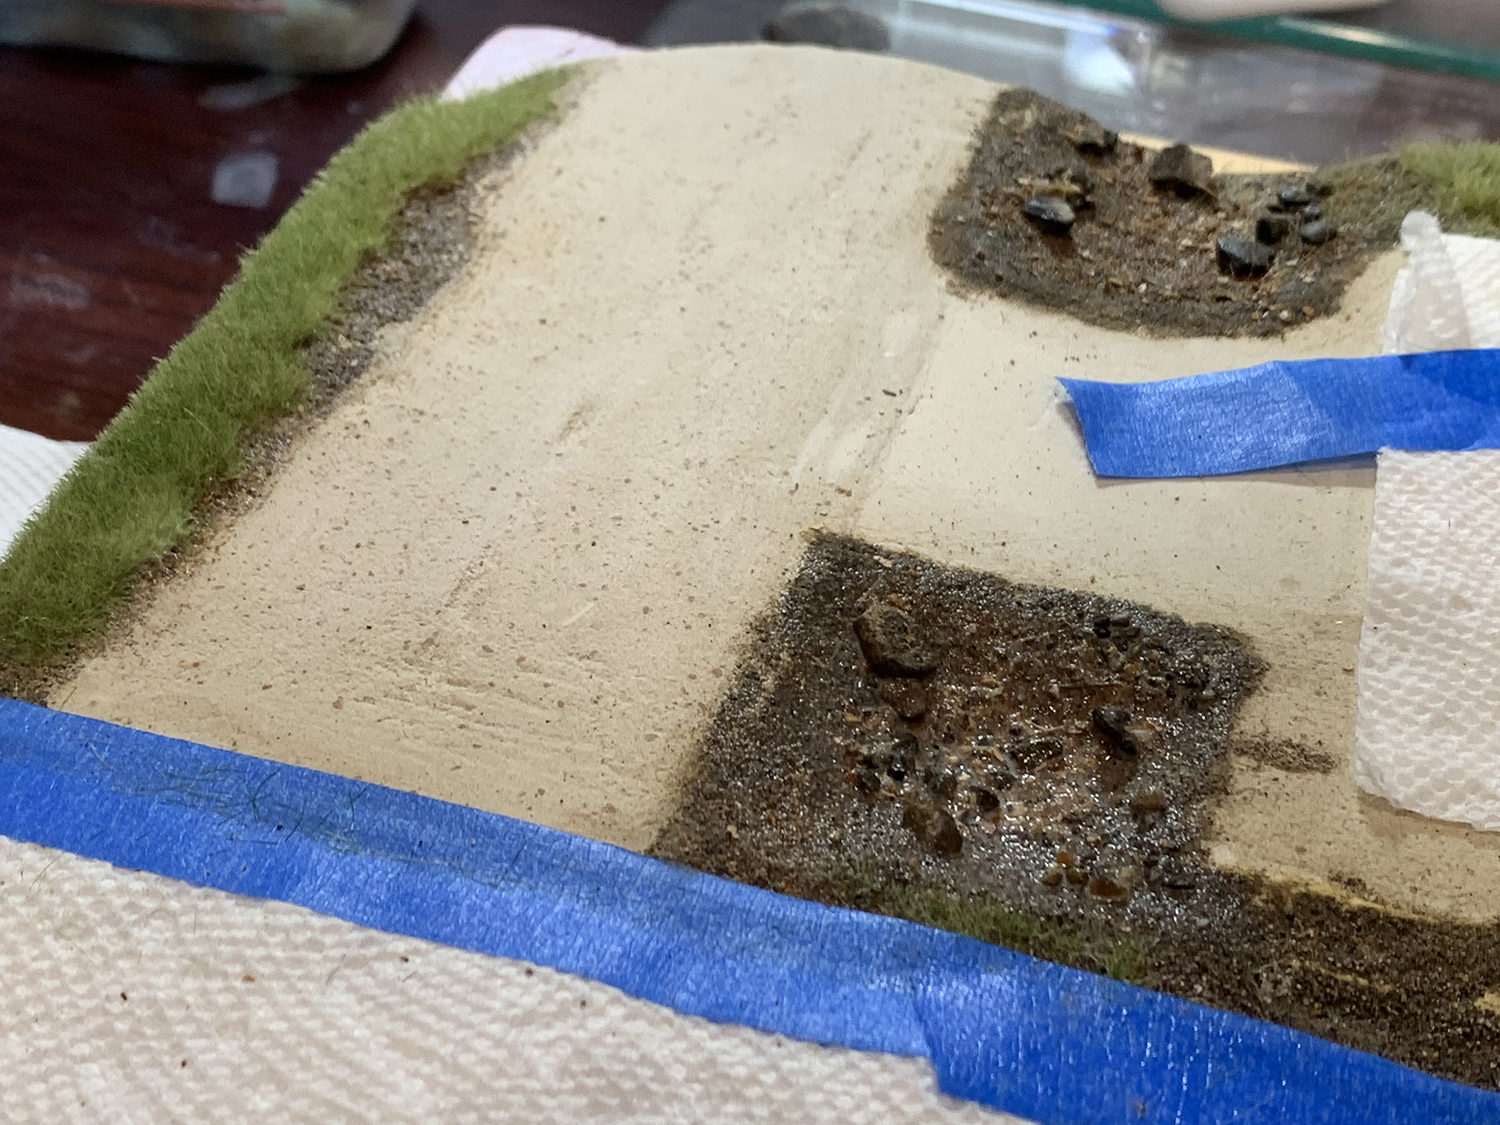
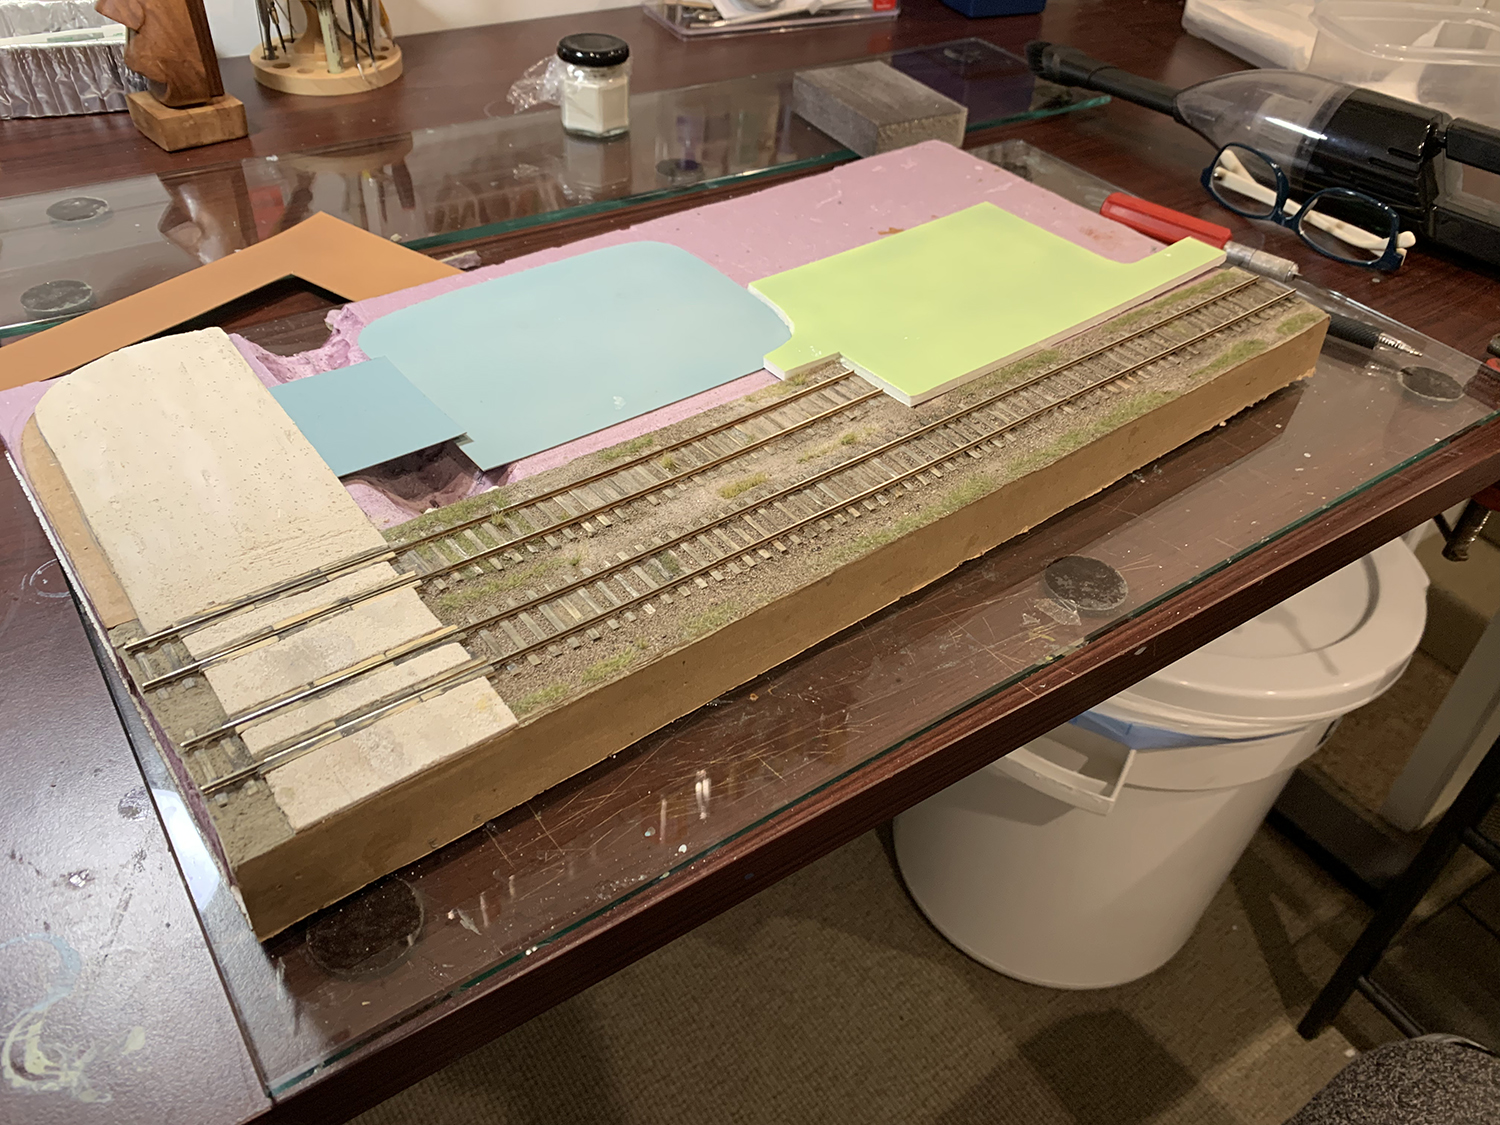
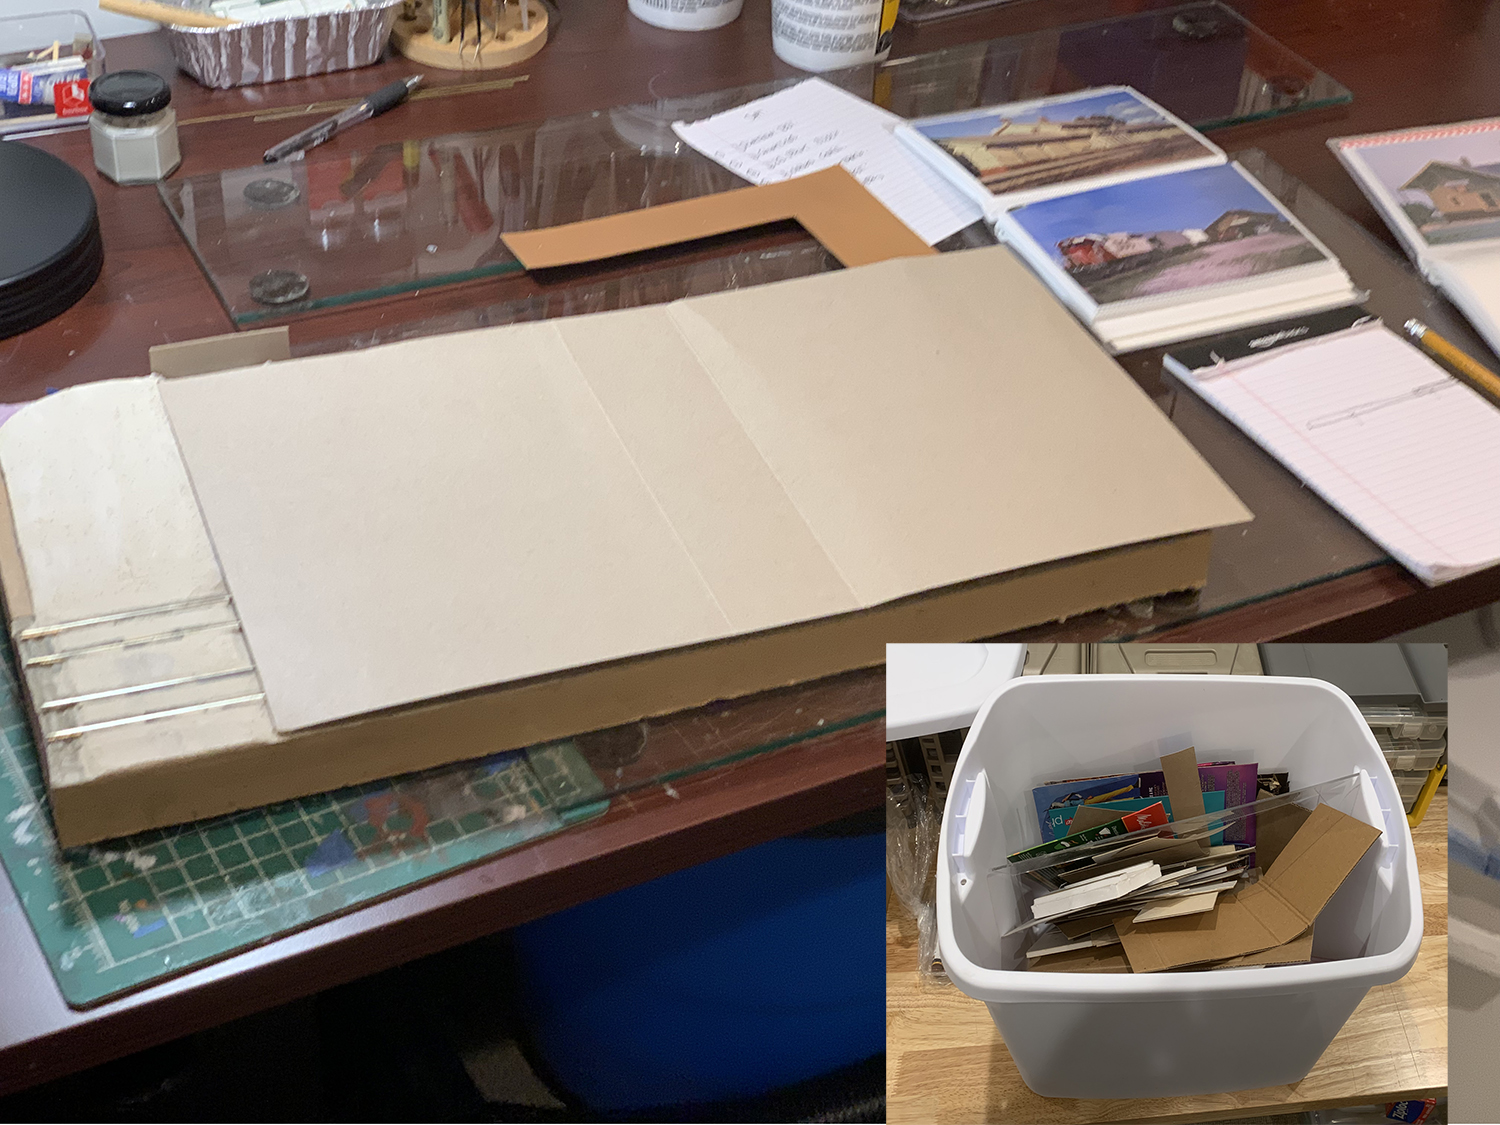
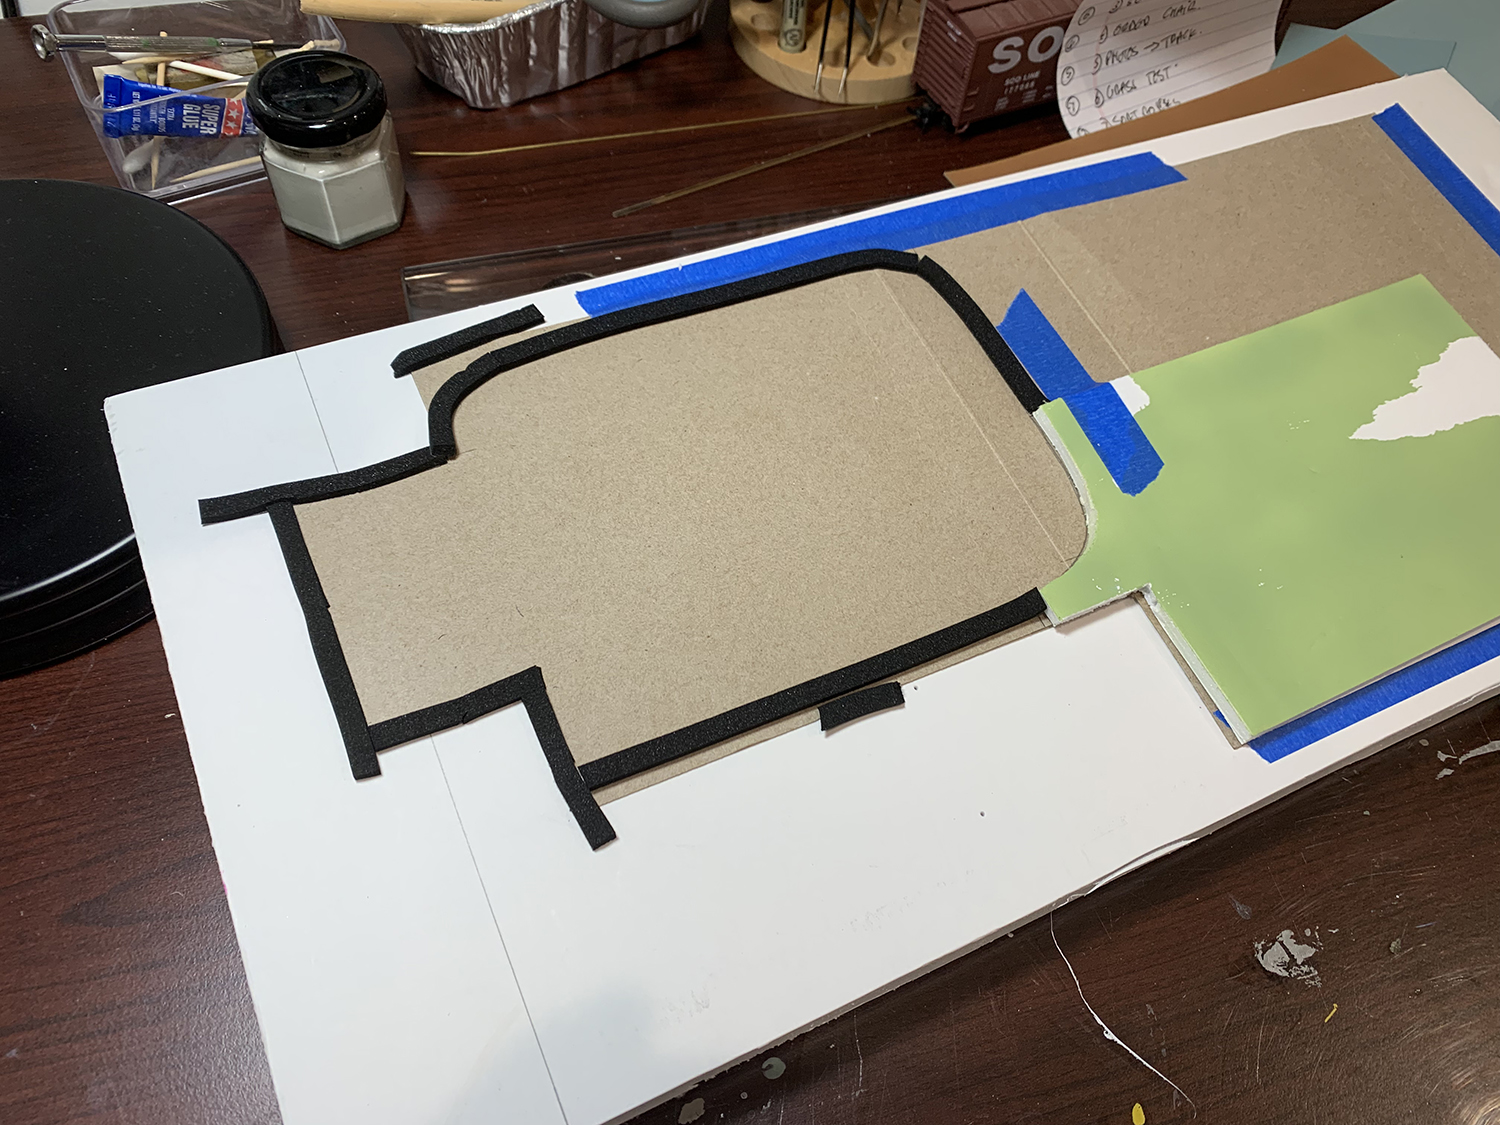
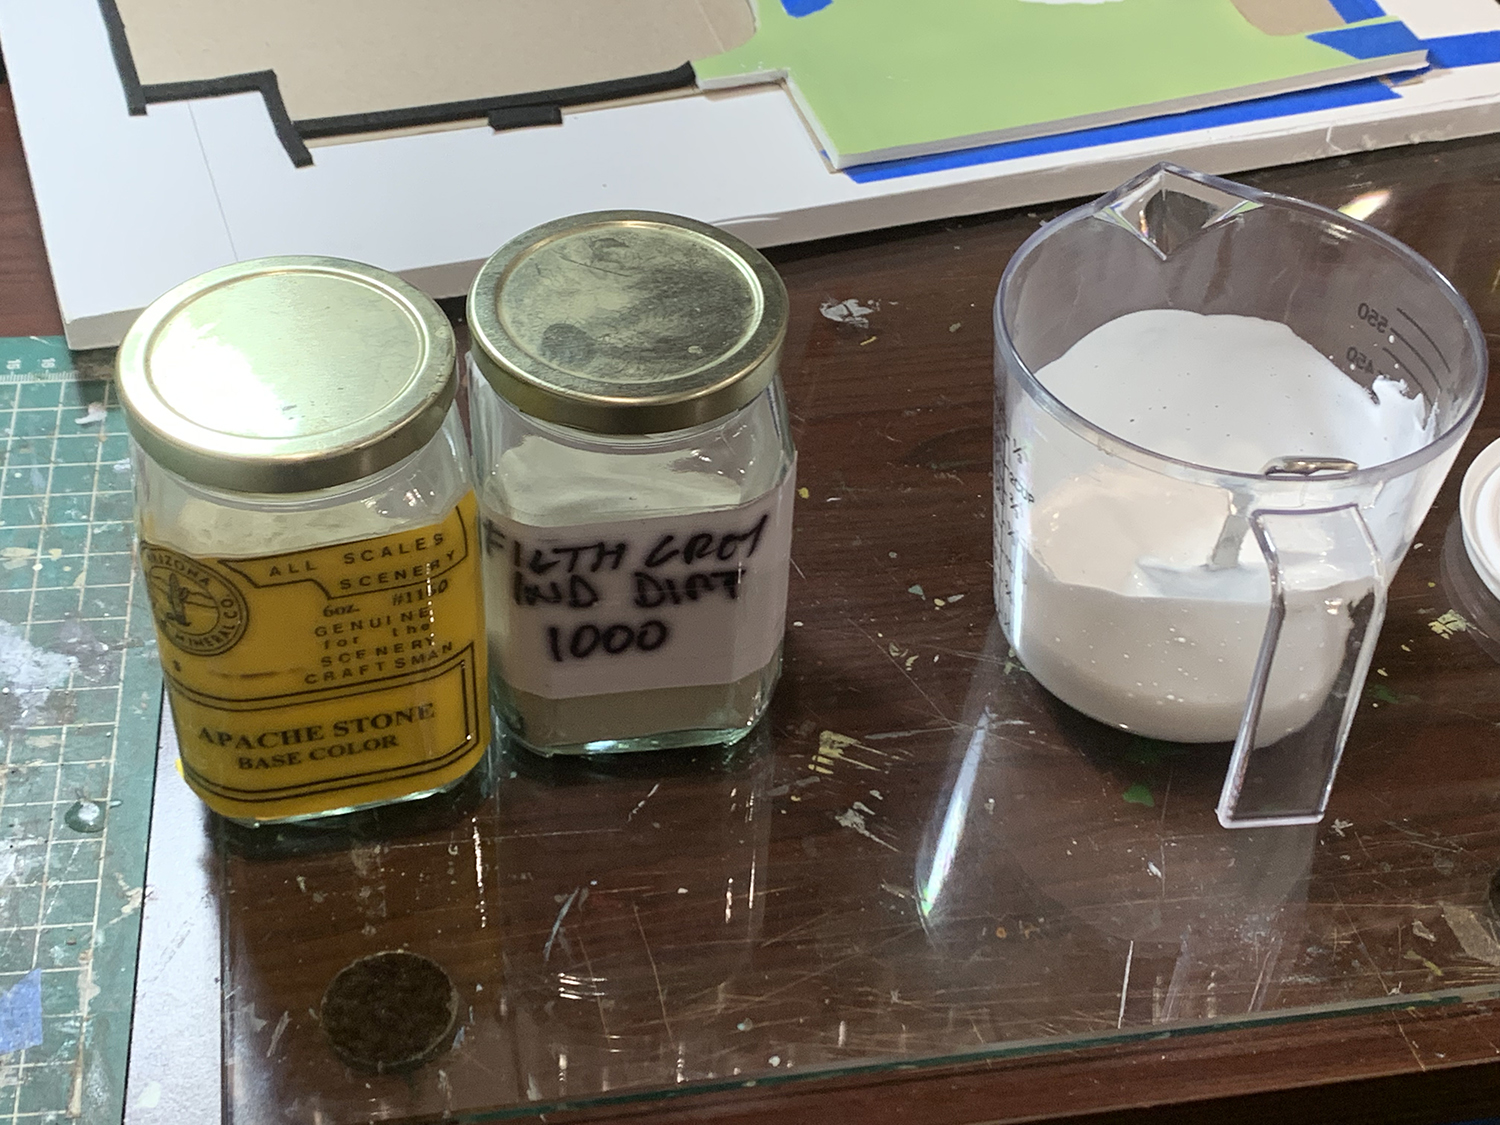
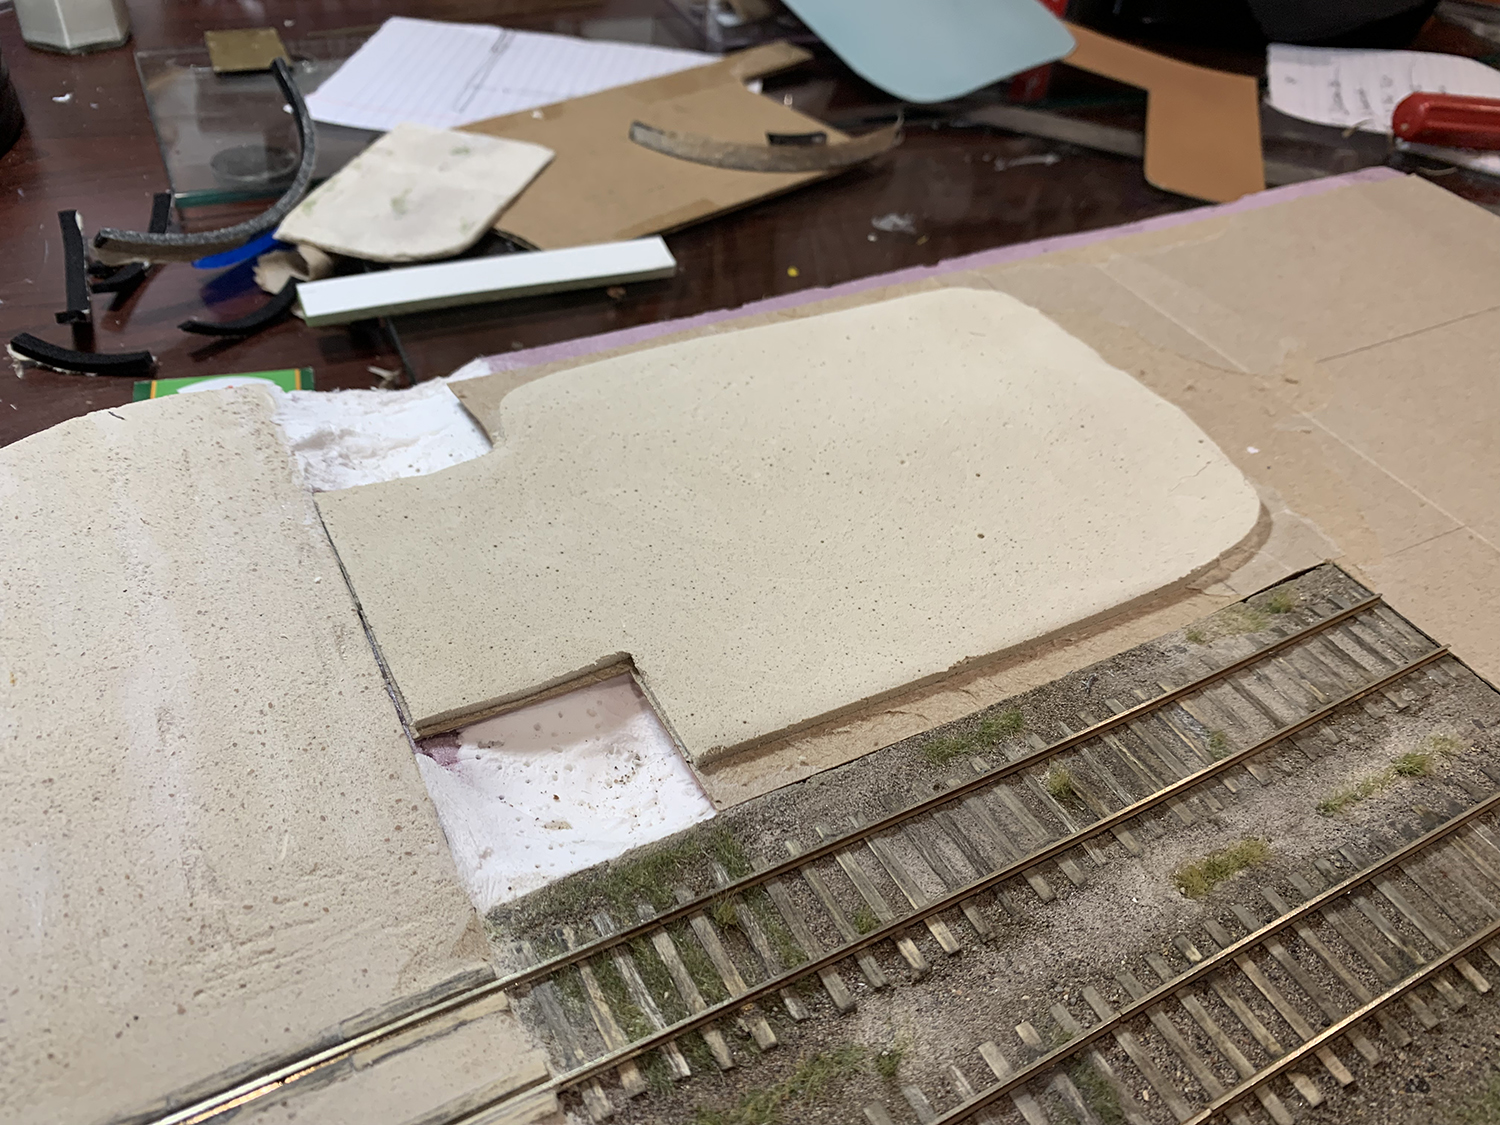
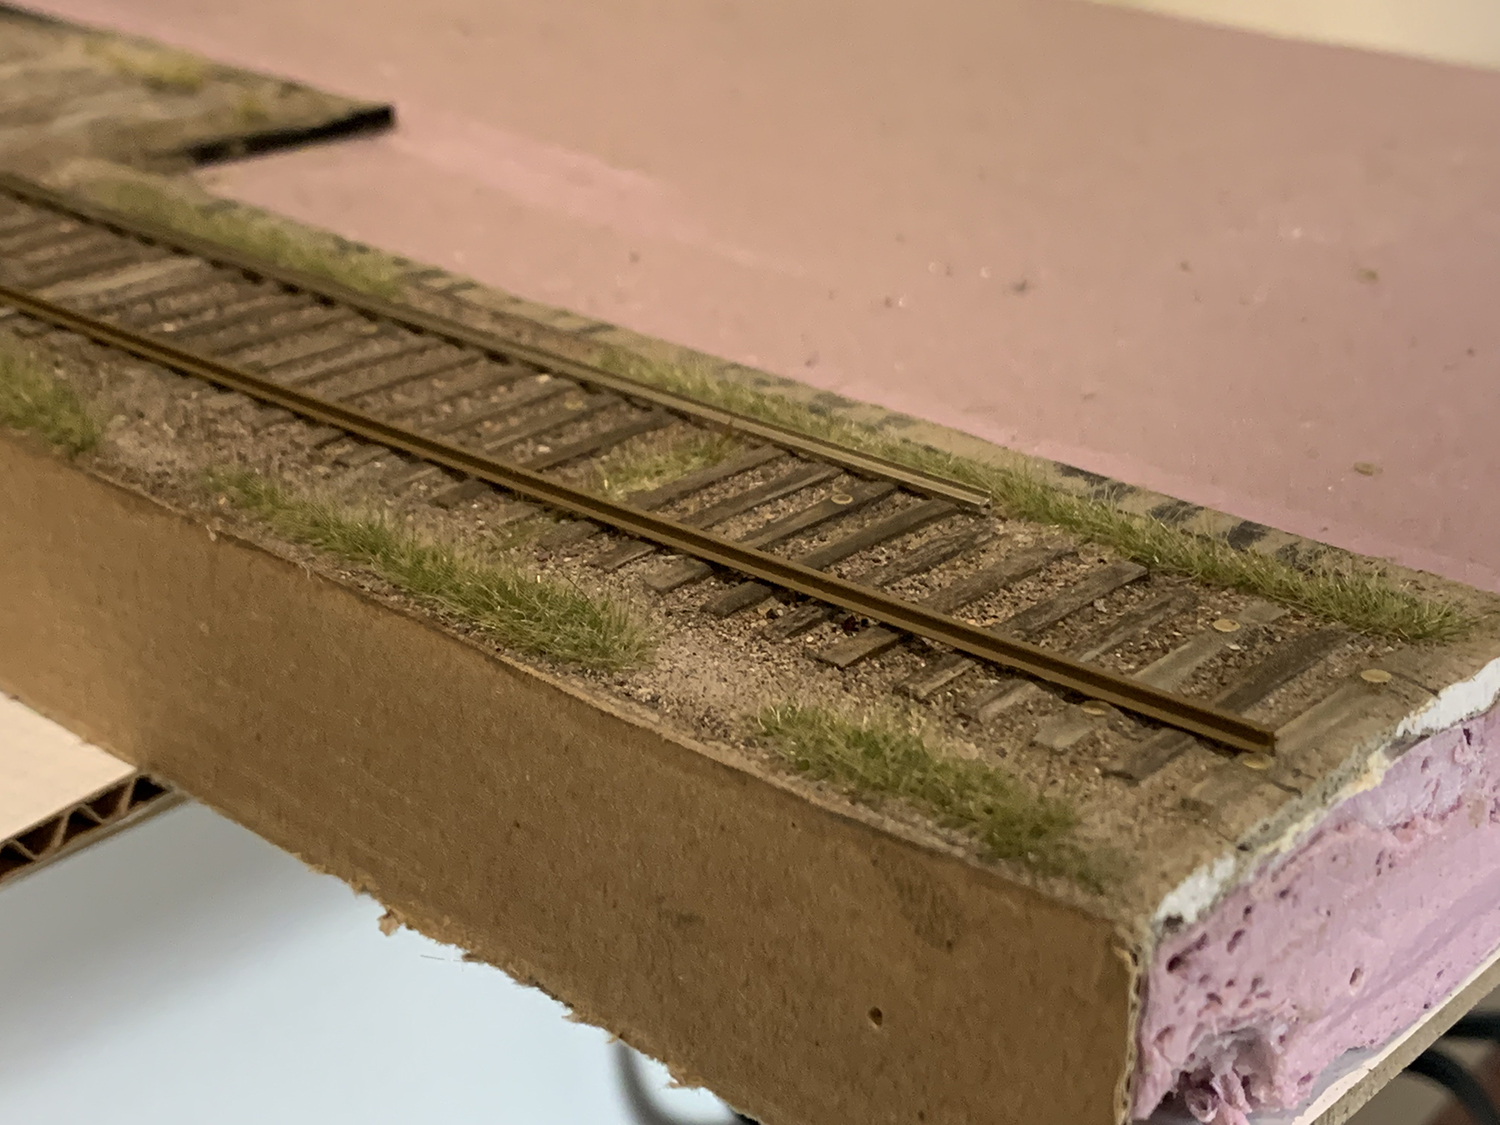
I cut up a large piece of card taken from my cardboard box. I keep as much cardboard as possible – cereal boxes, Amazon boxes etc – and have created an invaluable supply of card materials. I used this card as a base for all the remaining elements. The goal here is to control the relative heights of all the elements in relation to the track. Track levels in relation to the surrounding ground play a huge role in the atmosphere of a railroad – especially when poorly maintained. I did not want the trackbed to be above the height of the surrounding ground – I wanted the reverse – the track to be level or sunken beneath the surrounding ground. This card base is meant to give me control over the height of the elements.I cut the card to fit snugly around the trackbed and meet the roadway.I created a small mold for the parking area using soundproofing tape. The tape allowed me to easily create curves where needed.I used my formula of Woodland Scenic Foam Putty, water, and various light colored gravel to create the sandy mix. I wanted the parking area to be the same color as the road so I used the same formula as the roadway.
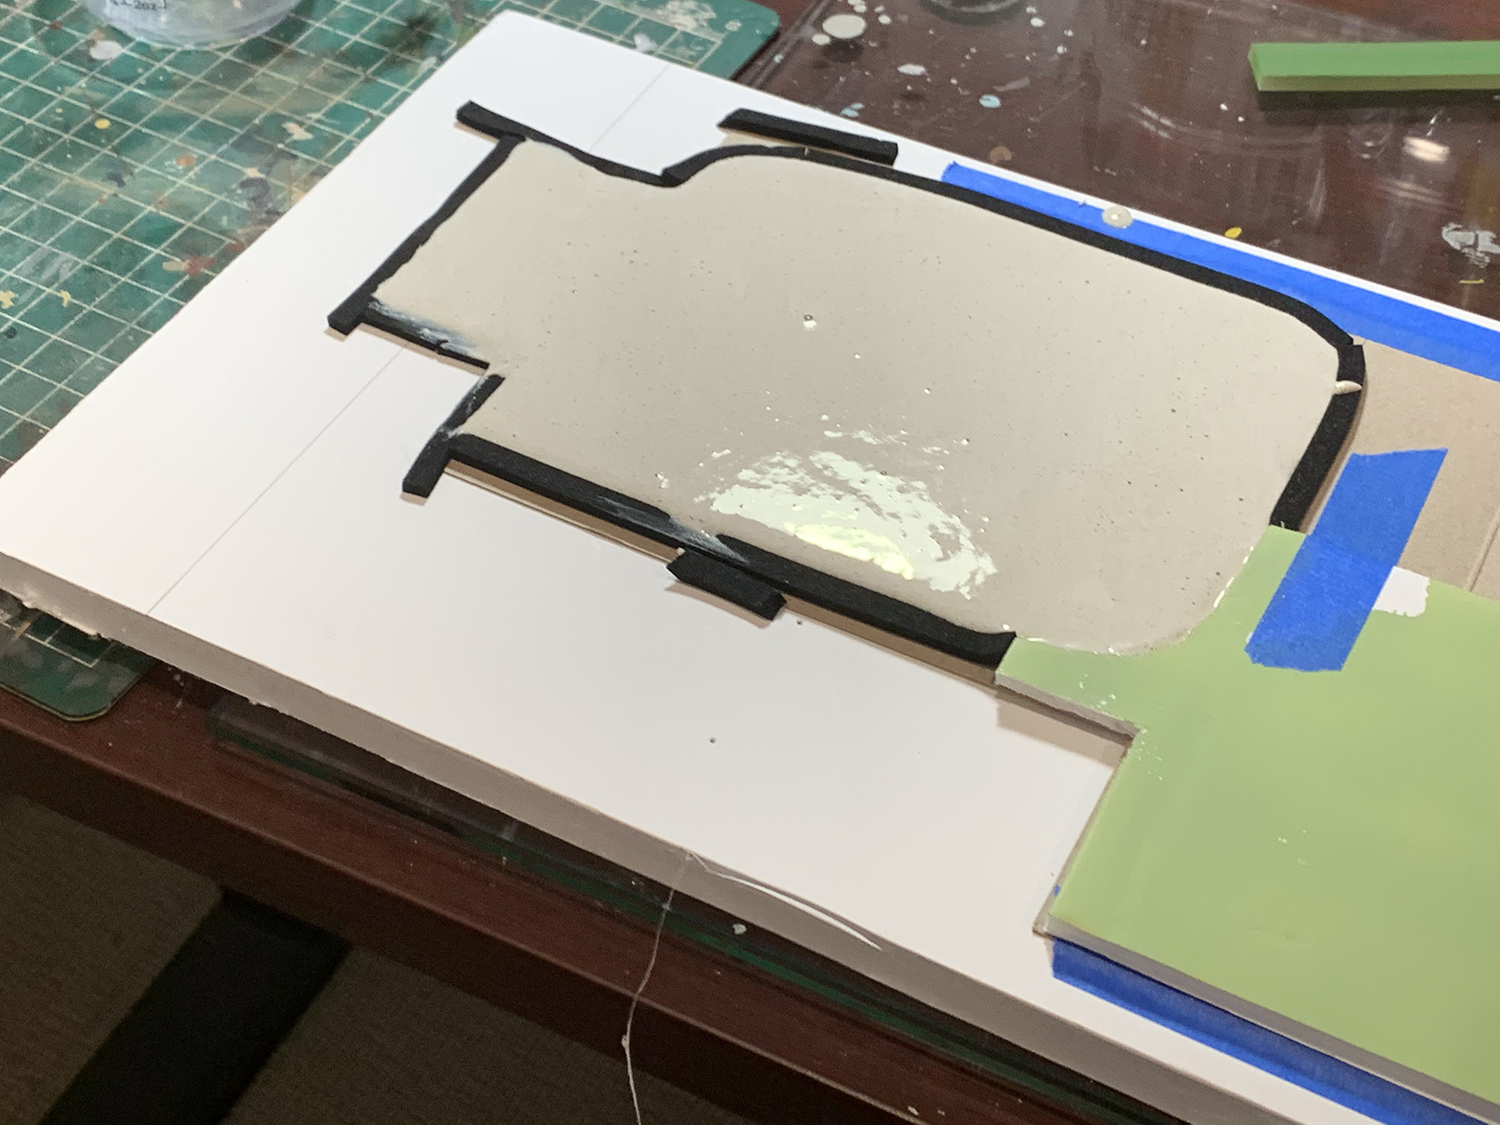
I poured the mix into the mold. I will be able to easily sand down the surface to get an even height once the mix has dried.
Two days later the mix had dried. I pulled up the surrounding tape and had a nicely formed parking area. Still plenty to do but a good starting point.A view of the overall area after I had stuck down the card base. I’ll fill any outstanding gaps etc with some of the original mix that I have stored.
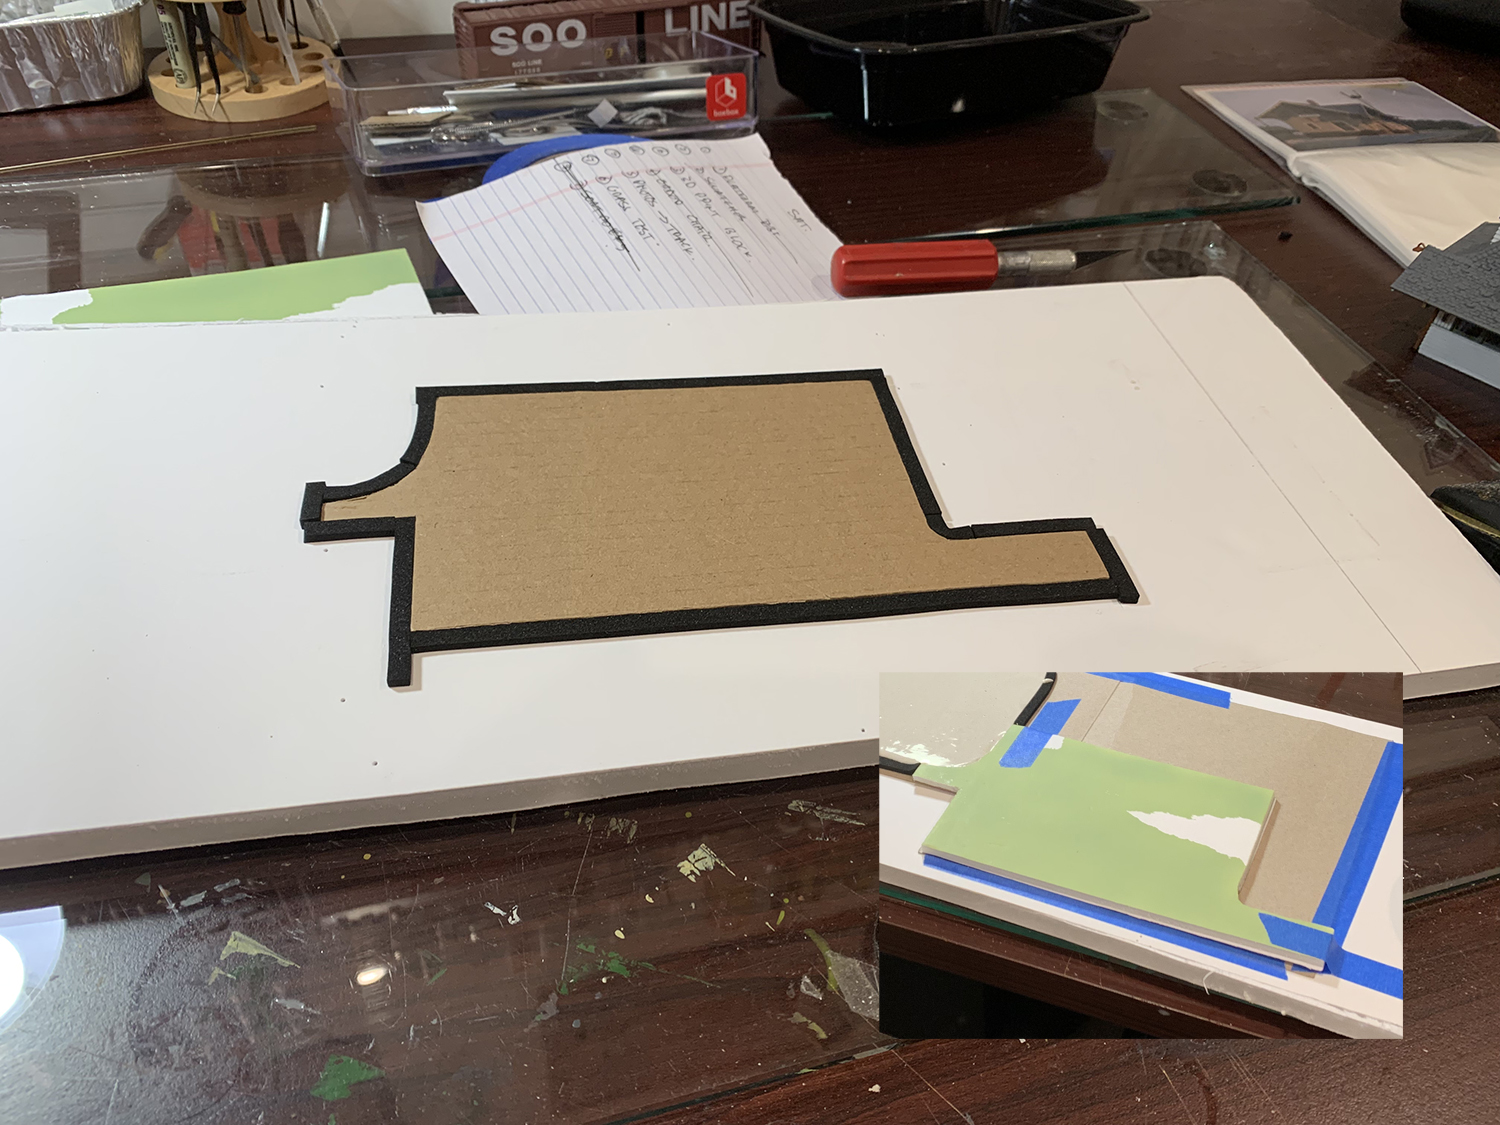
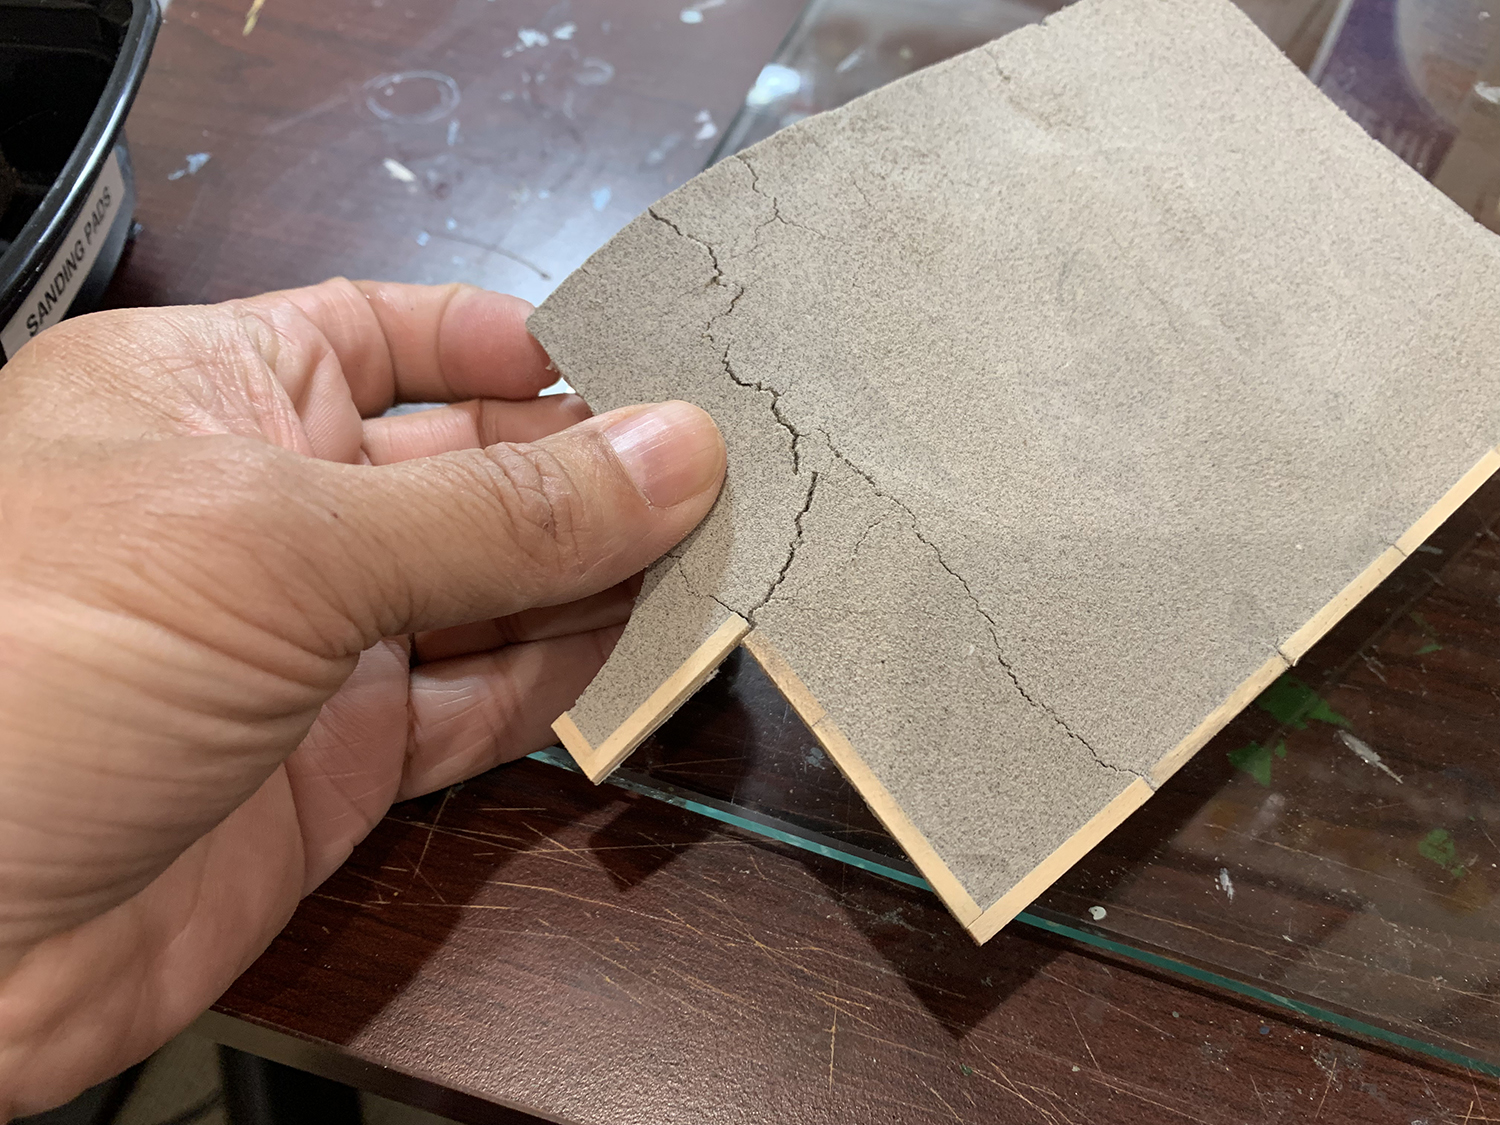
3. Platform
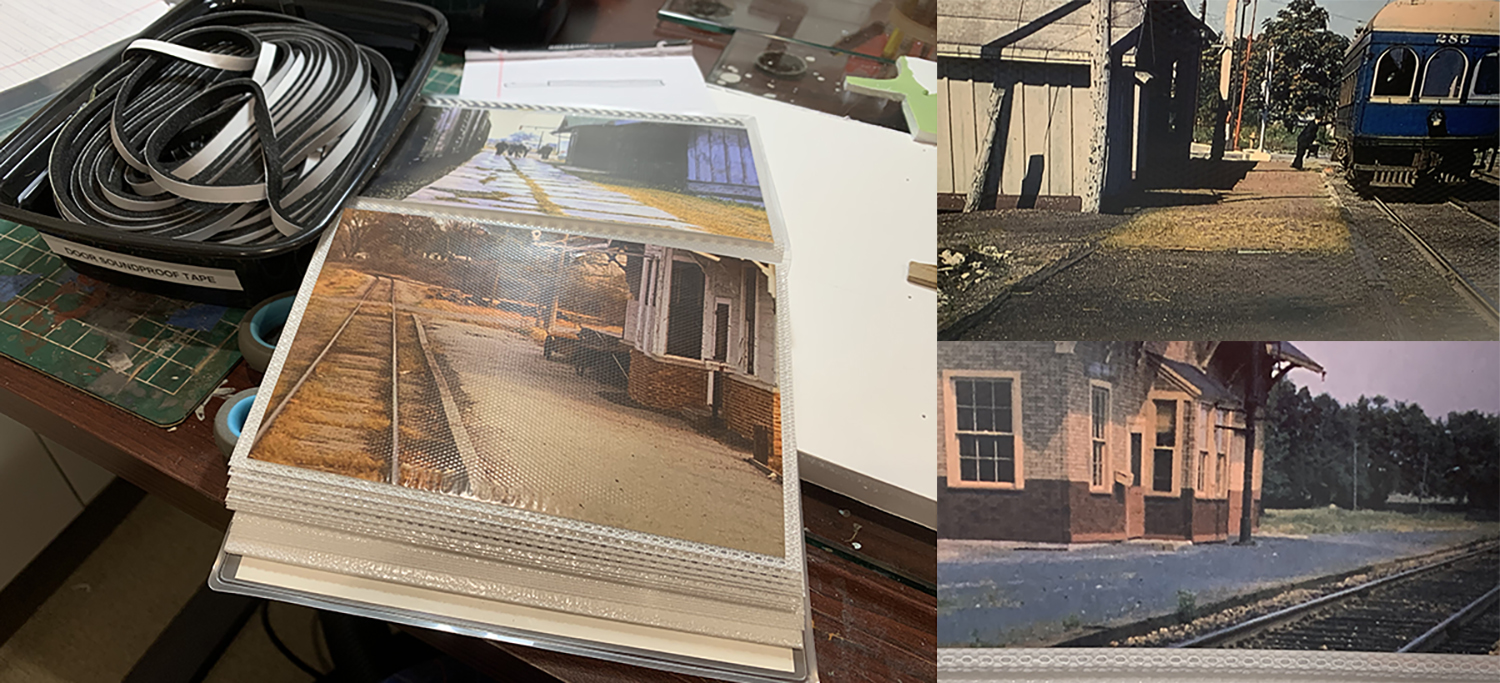
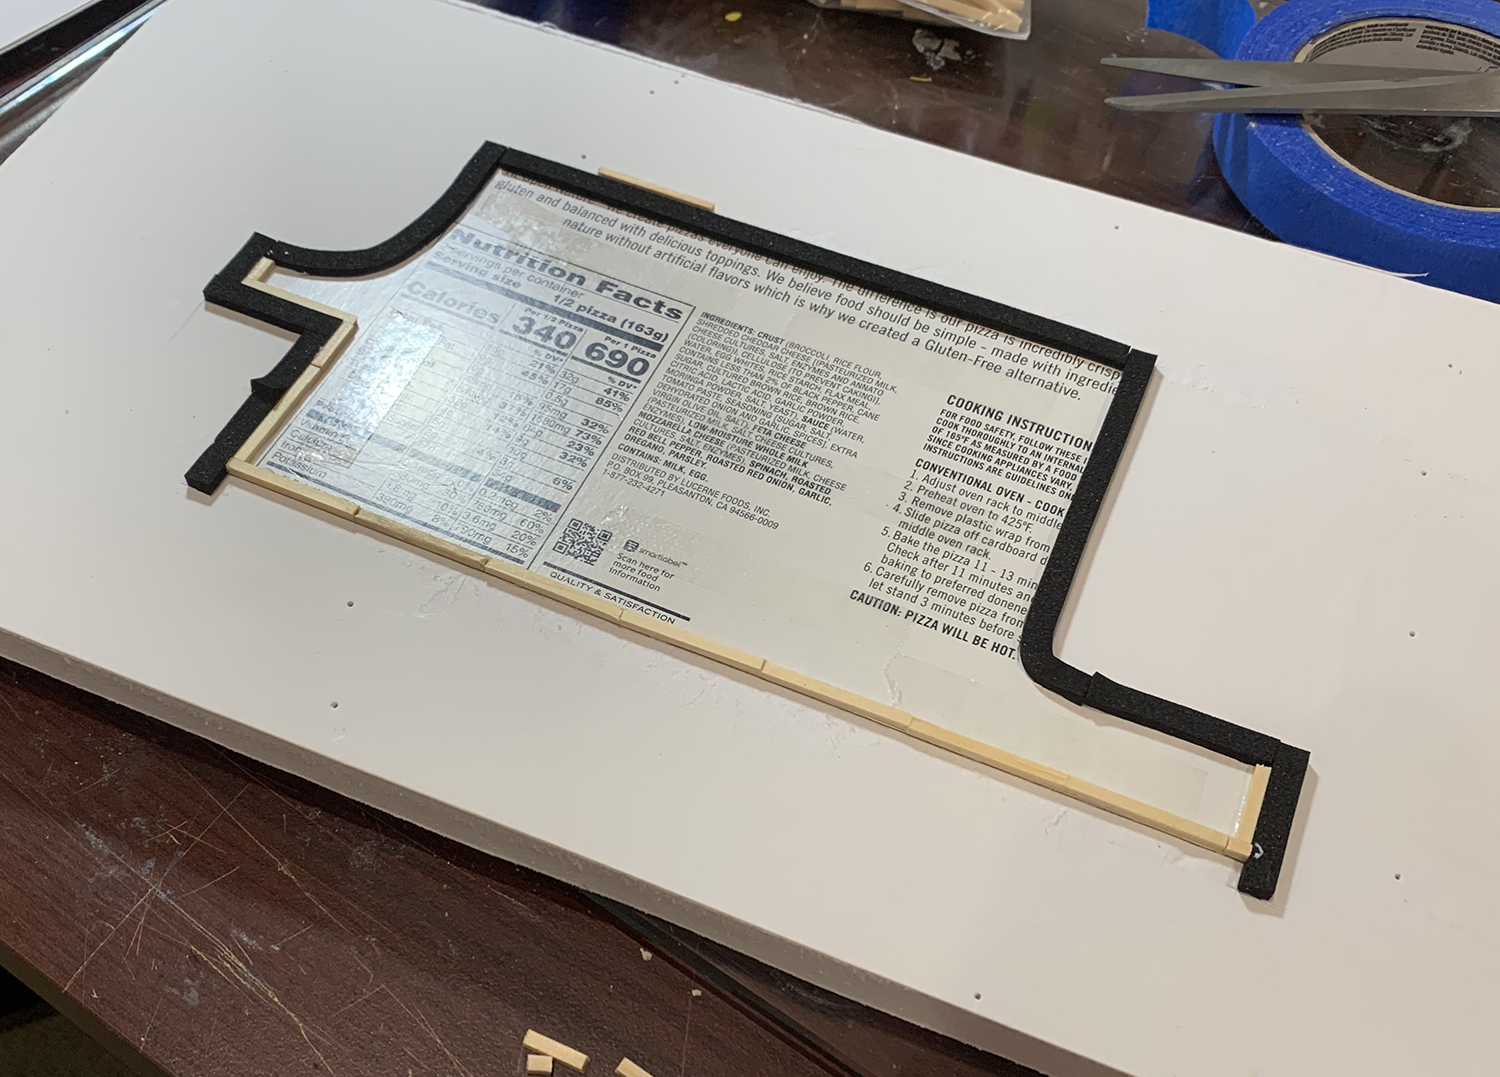
Before starting on the platform I did a quick study of the prototype. I decided that I wanted an asphalt surface with railroad tie edges similar to these photos. This meant that could finally test out my asphalt technique developed last year.The platform is made of two layers: a base to bring the platform up to the level of the parking area and then the platform itself that sits on the base. This ensures that the platform surface and rail tops are at the same height. I used the original planning platform card to create the base and then built a mold around the edges using soundproofing tape.I created a second thin base from thin card and dropped it into the mold. I removed the tape where the ties act as a border. This is not a necessary step but things worked out fine.And into the mold I poured the asphalt mix made from water, Woodland Scenics Foam Putty, and asphalt powder from Arizona Rocks and Minerals.After a couple of days it had dried. I pulled up the platform carefully from the mold and sanded it down.One of the reasons I used the foam putty method was that I wanted to create realistic cracks in the asphalt. The putty that’s sits on a thin card base, when dry, can be bent to create natural cracks. If you run a knife or in this case, pipe cleaners over the cracks and then return to a flat shape the cracks can be made visible. You can then weather the surface further by wiping chalk or dust across it to highlight the slight gap that has been created.This is the result after adding some cracks. All weathering is generally done in layers over time (much like the prototype) so I will continue working on this in finer and finer detail. These are just broad strokes to begin with.The next step will be to glue down the platform but I am happy with progress so far.
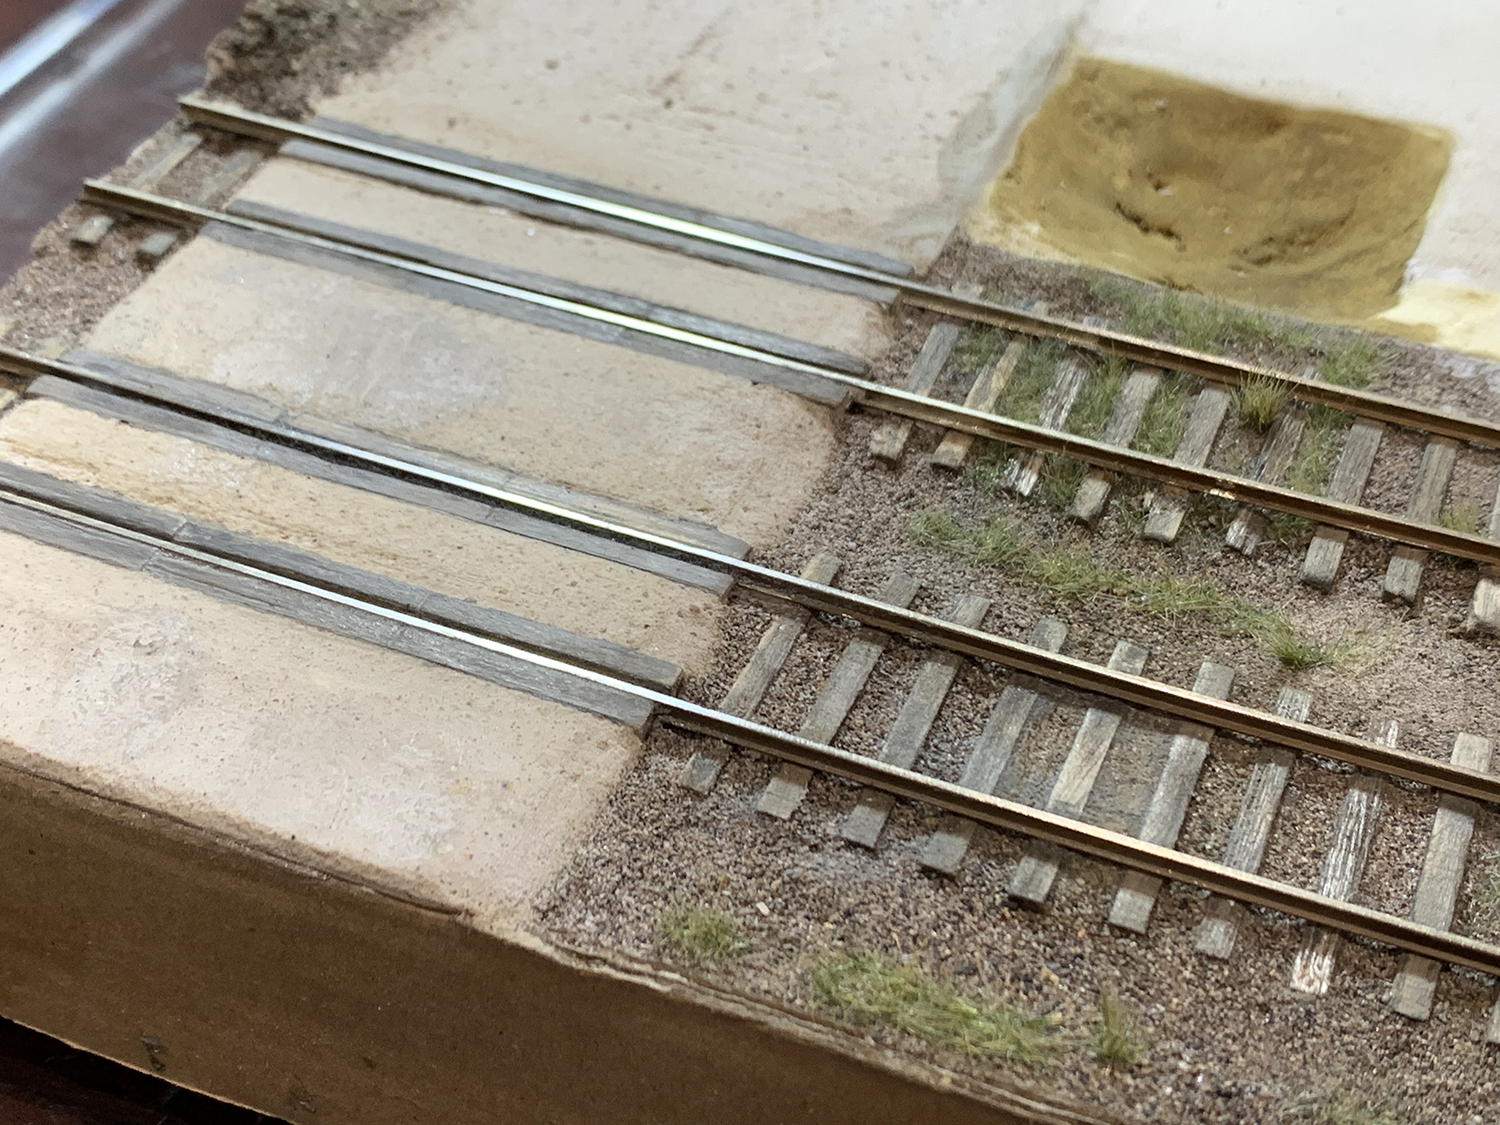
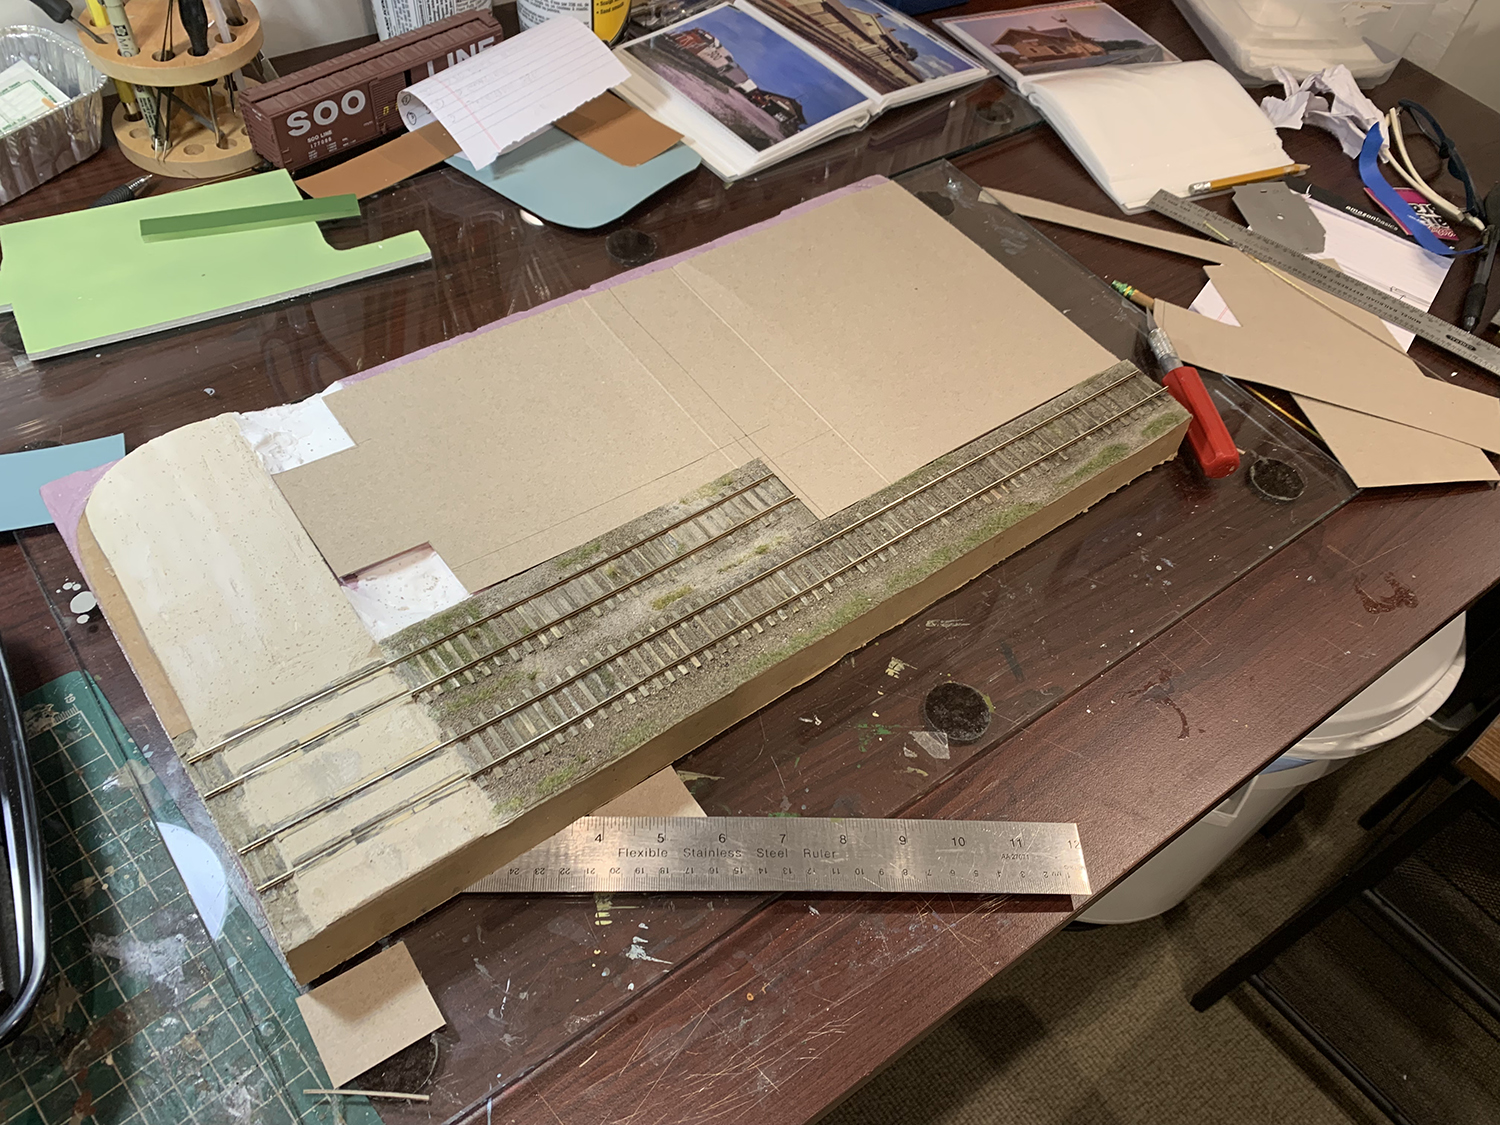
The track laying is mostly done. I’m 70% happy with it. I find that even though natural materials scale very well they tend to be a bit flat and boring. The way to spruce things up would be to use paint or details with color but I’m very reluctant to start messing with the current state of things. I can probably add some color – rusty rails, rust stain across the ties, as well as some details such as trash and leaves around the ties and the edges. I will do this at a later date.
Here are some of the steps:
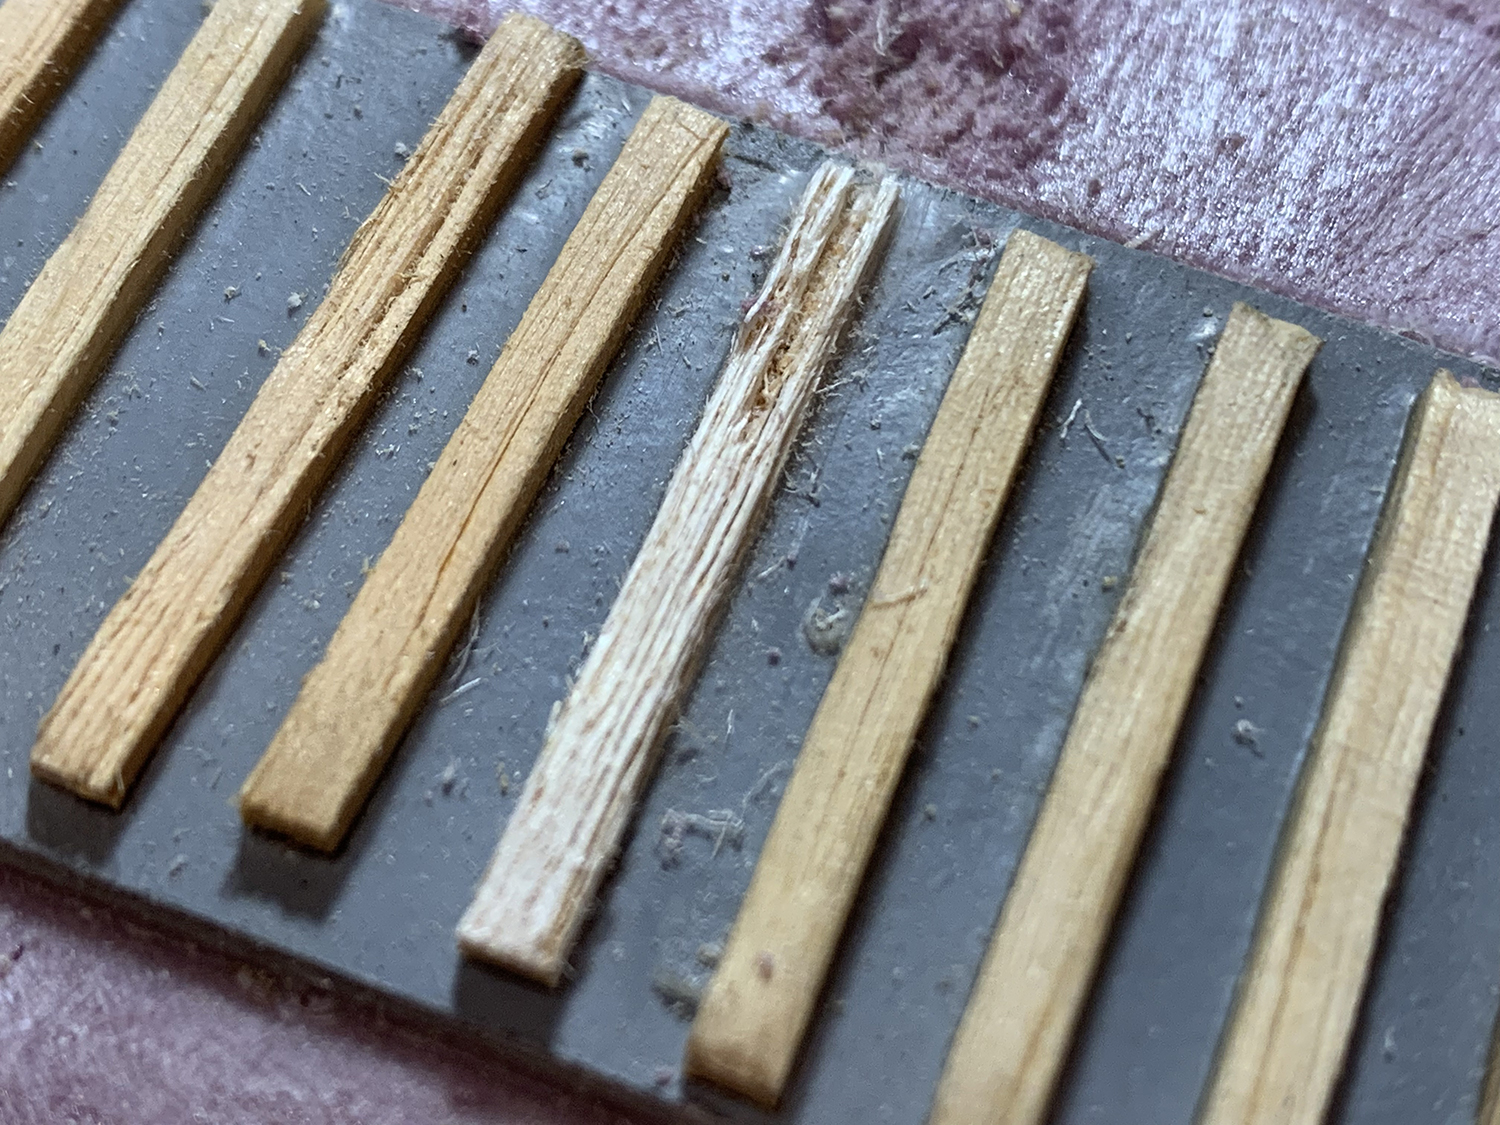
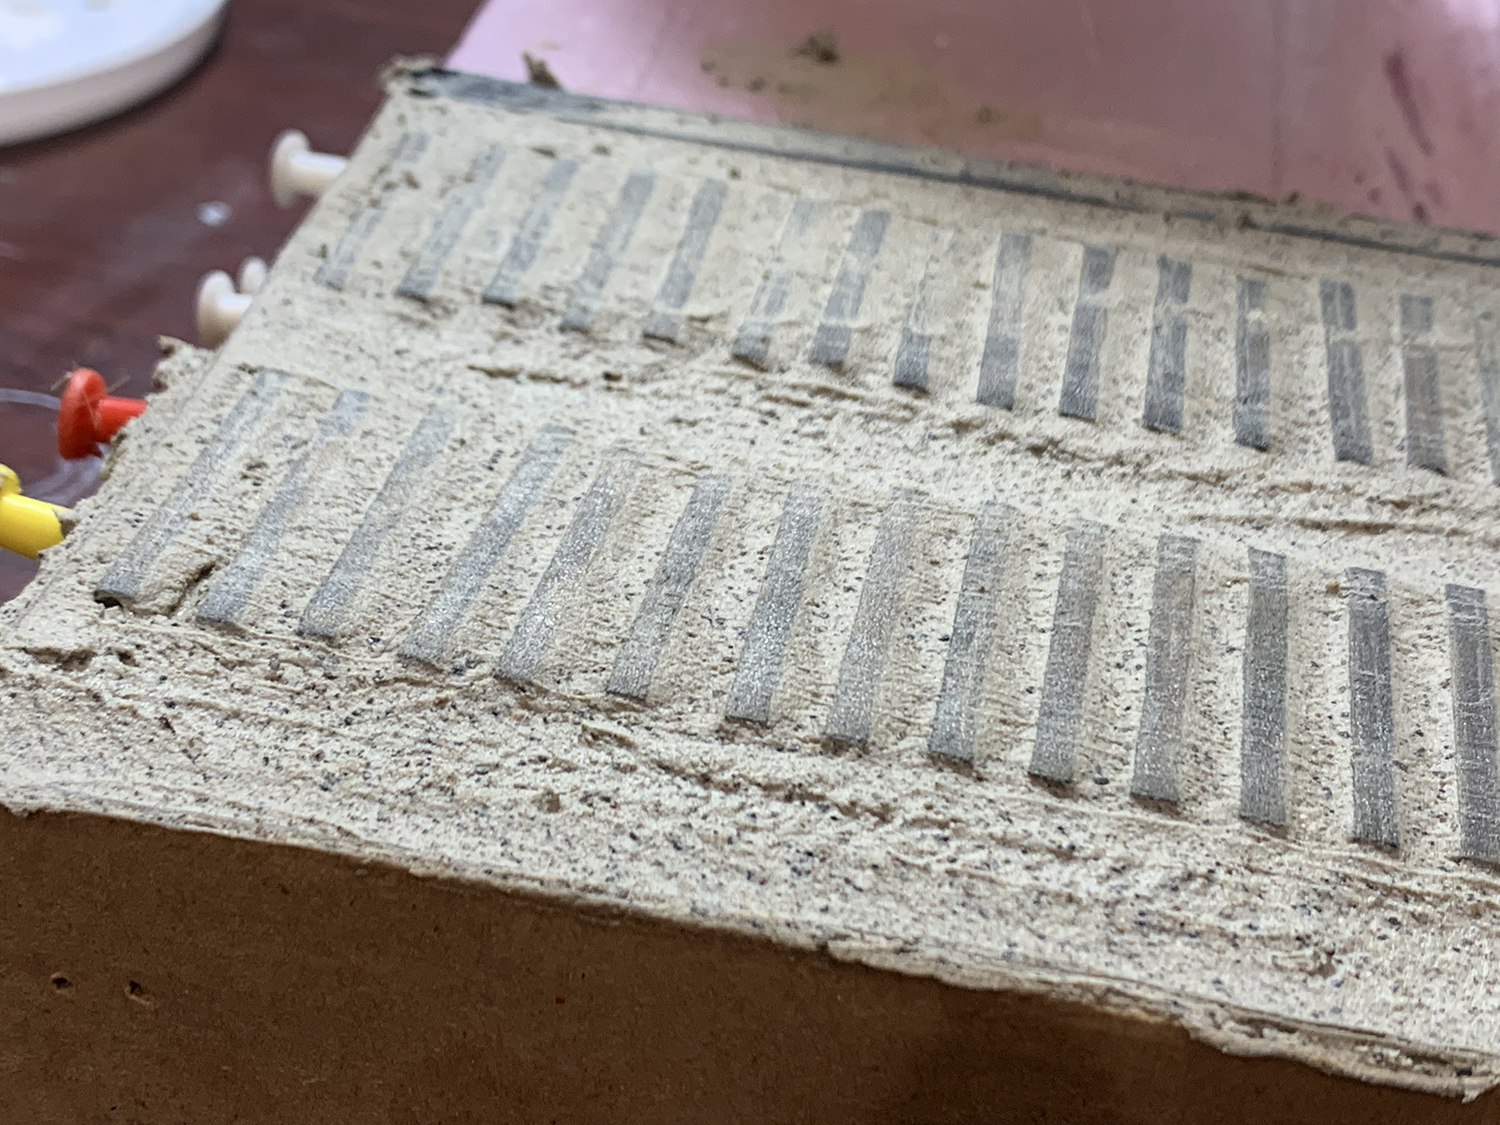
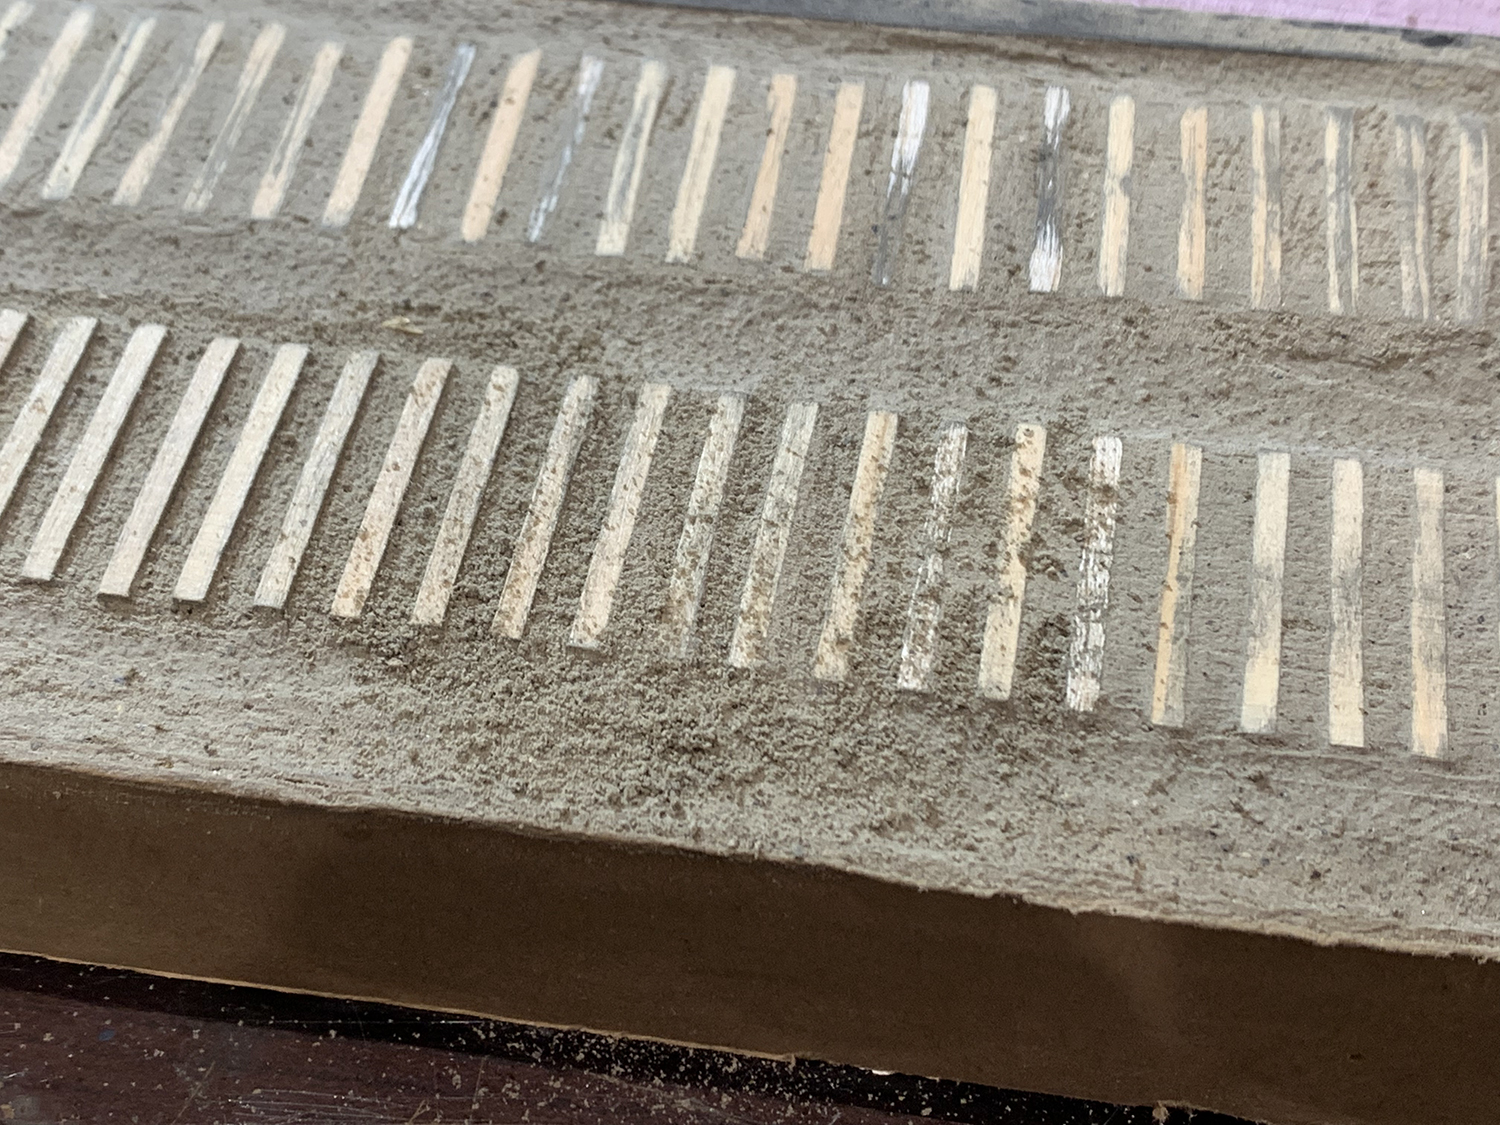
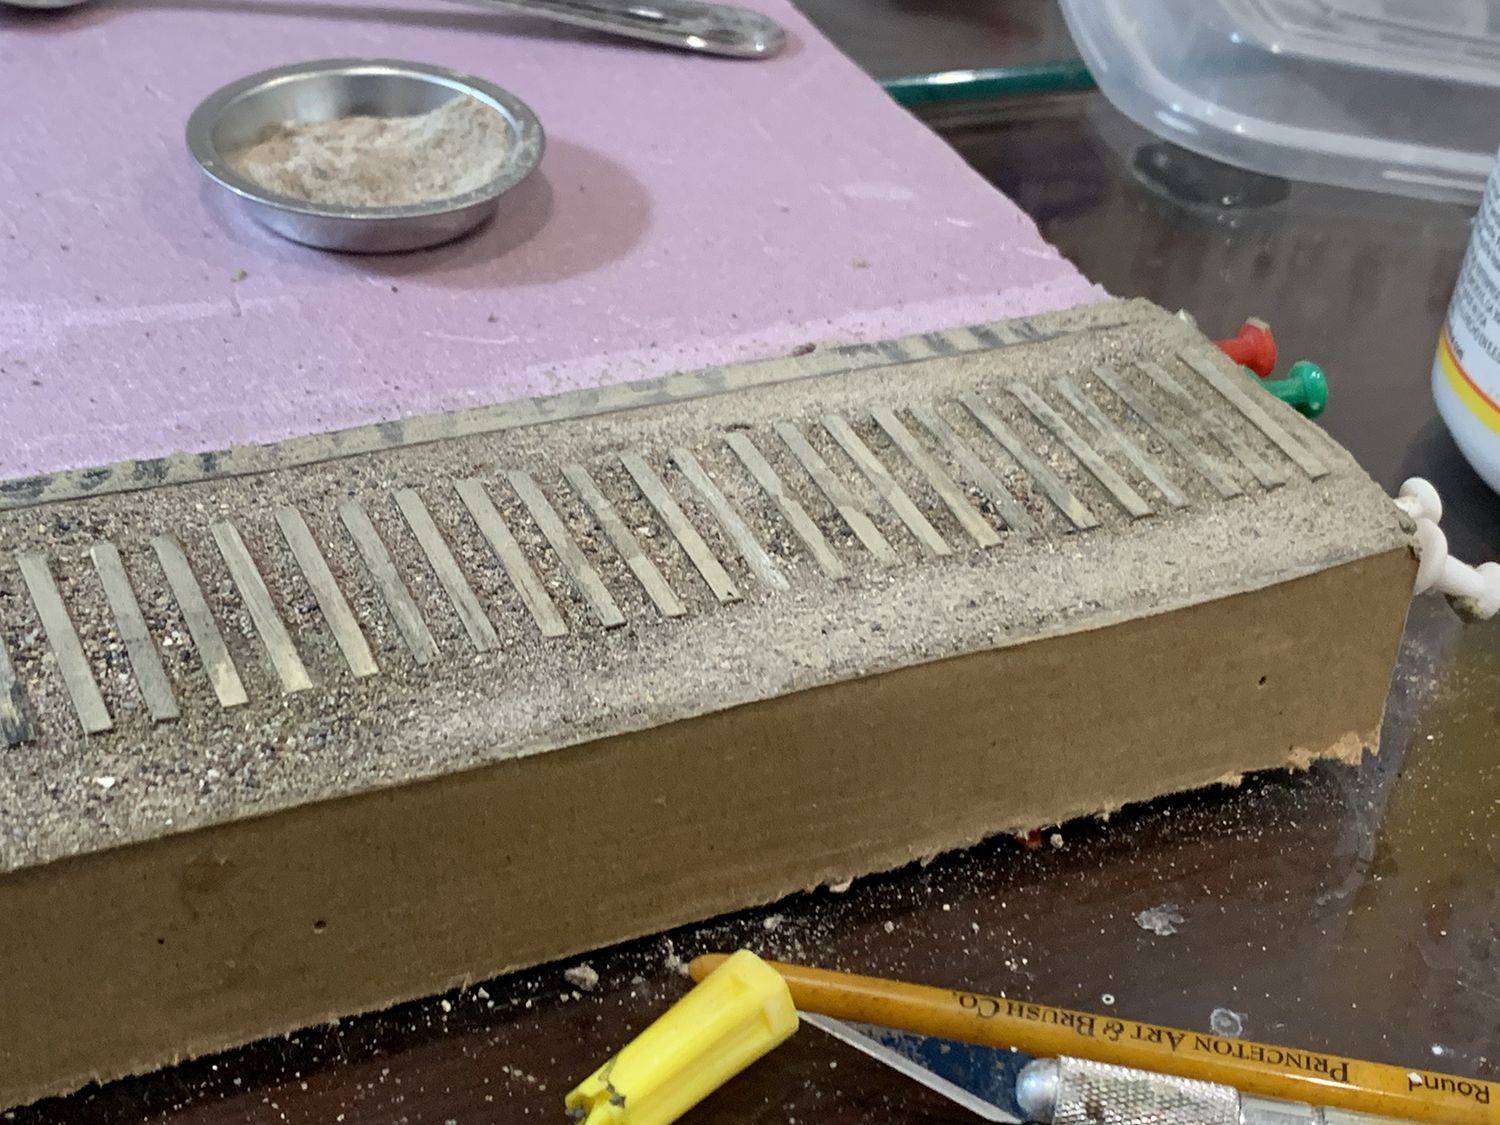
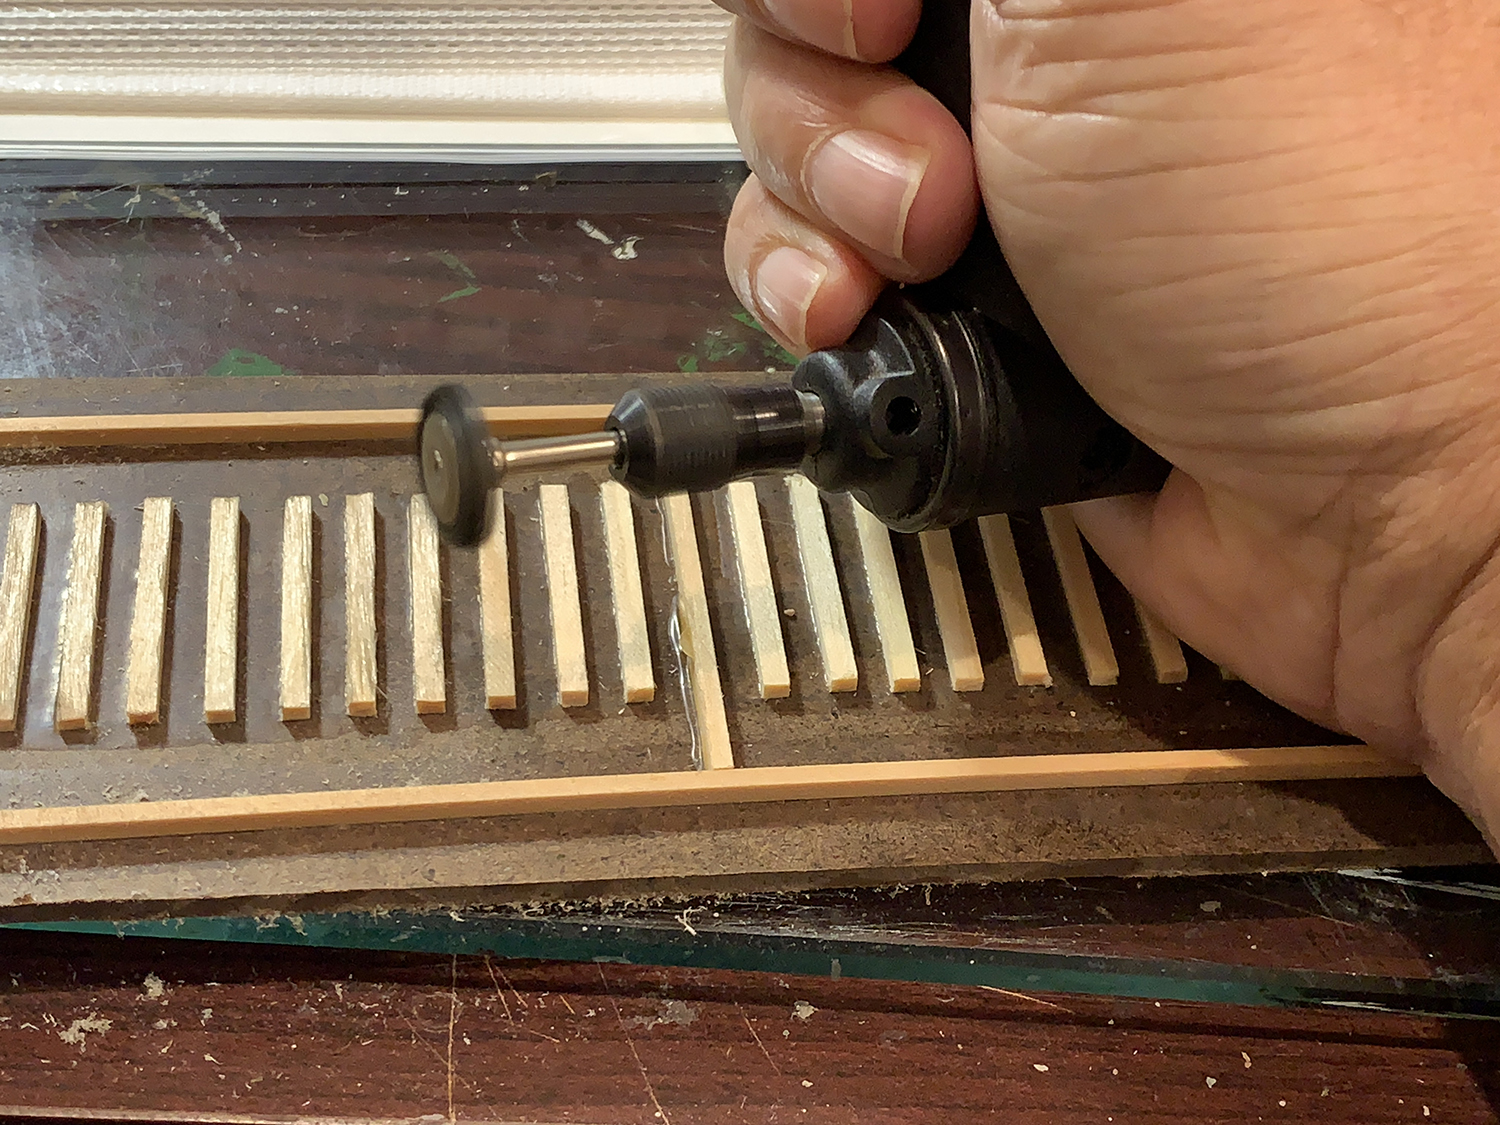
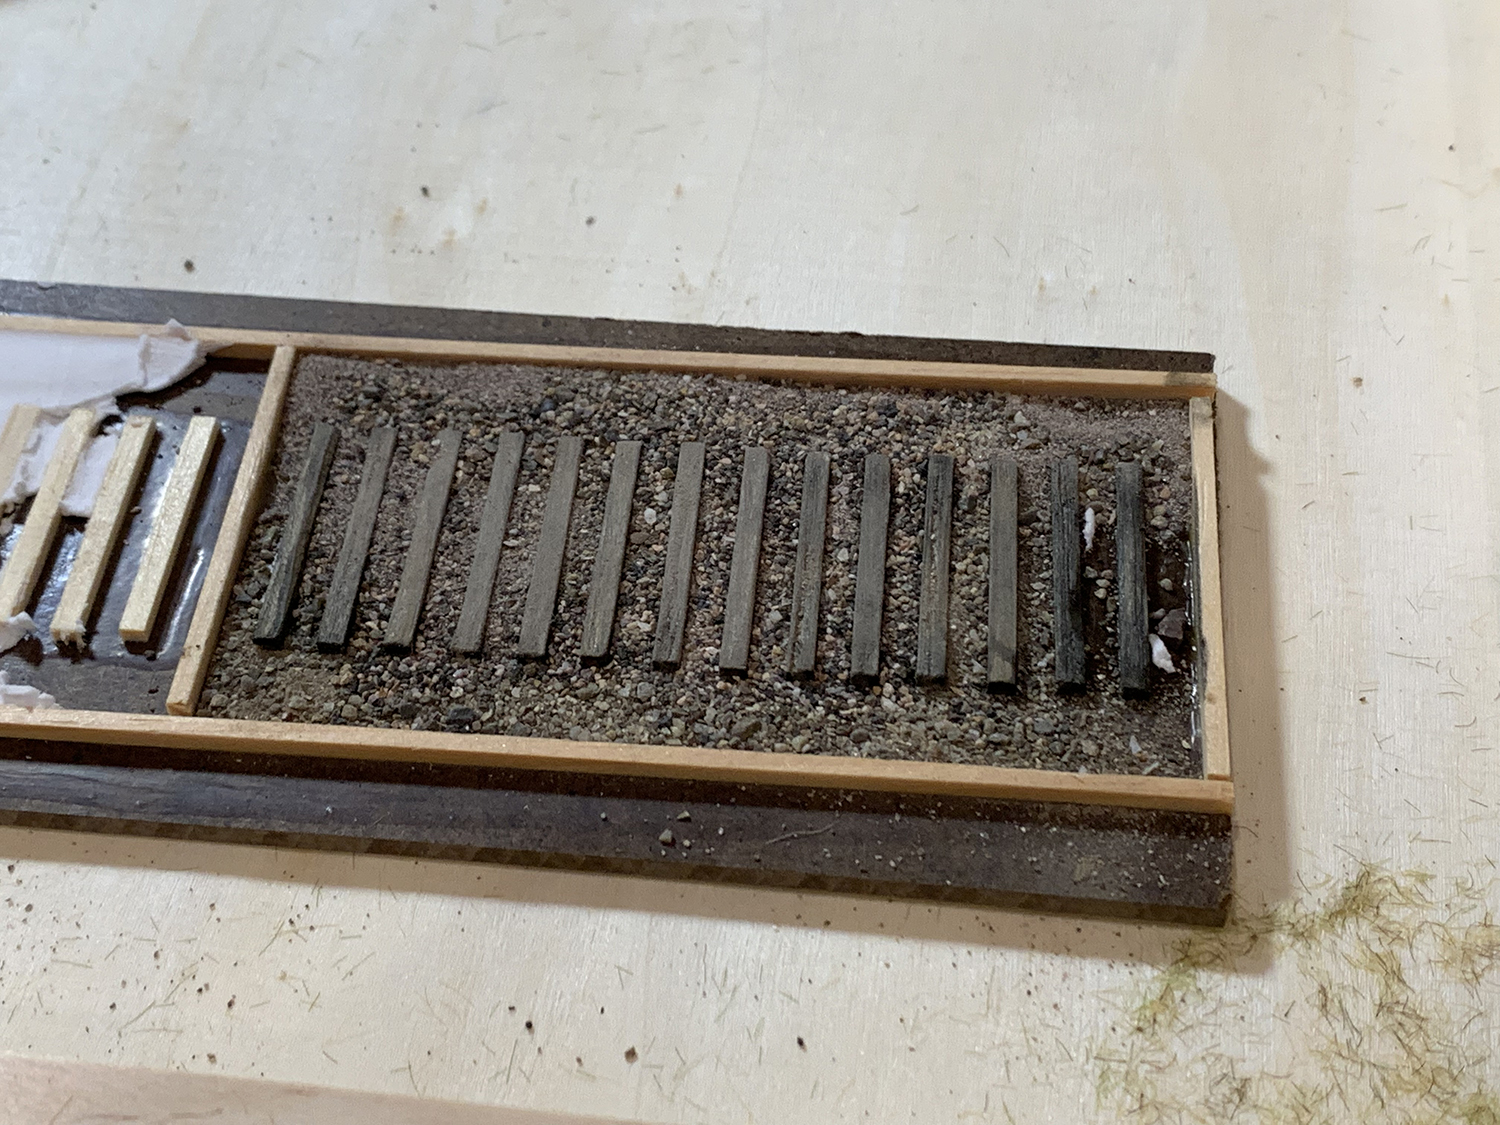
I gave up on the Micro Engineering track and decided to hand lay both sections. I want to be able to landscape the trackbed before the rails are laid down.I kept reference photos close at hand and made notes of the steps. The order of things was important.I used various methods to weather the ties such as a Dremel, weathering pen and knife. I also used balsa wood to represent very rotten ties. The wear and tear scales very nicely on balsa wood.I created a goopy mix from Woodlands Scenic foam putty and various grades of ballast which spread over and around the ties. I was trying to create a surface that I can carve and shape with a knife onto which I will eventually add ballast.After a couple of days drying the surface was ready to work on.I spent time sanding down the fill, cleaning off the ties, digging ties out, creating different levels of ground from tie to tie – sometimes level with the tie surface, other times sunken well below.I ground up three or four grades of gravel taken from one of my jars of stones collected on walks along railroad lines.
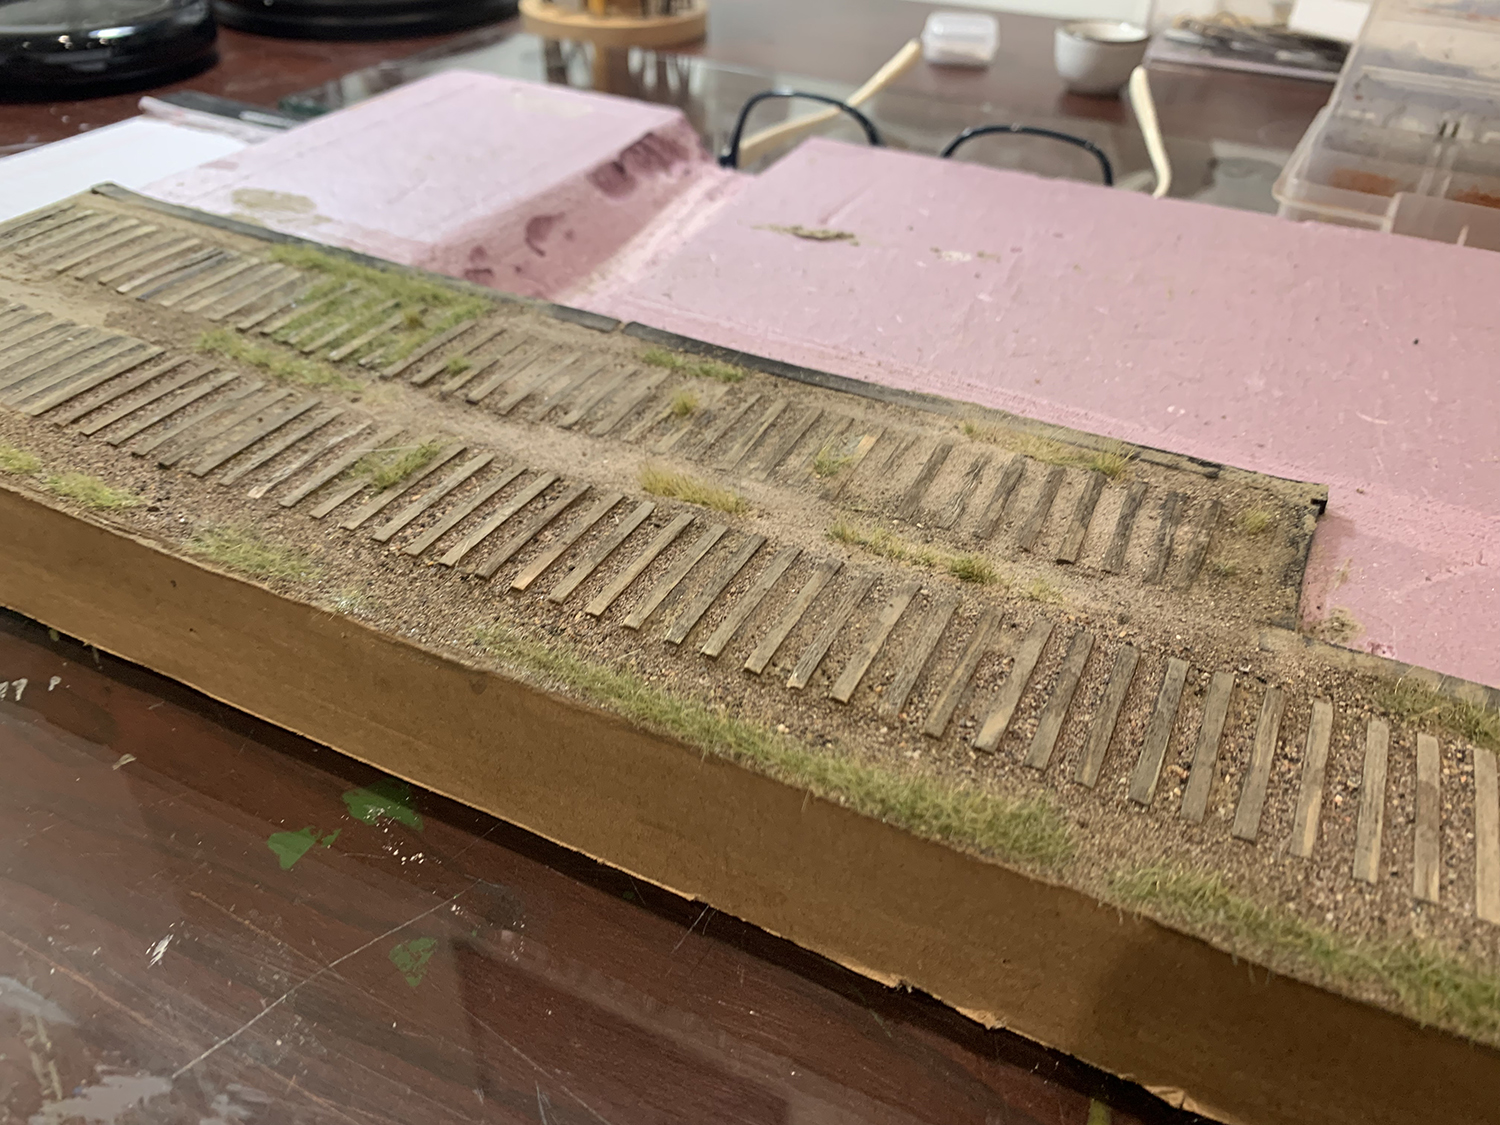
And started laying ballast starting with the finest grade first. The final grade is just a few larger ballast grains dotted here and there. No need to go overboard on that final layer.The ballast is just a base, other colors will be added. This is the view just before gluing down. The profile of the ground and ties are meant to change over the course of several ties.The result after gluing. Time to start the ground cover detailing.I have a jar of fireplace ash taken from the bed of an abandoned railroad (a fire had been started on it). I used the ash to provide some color and texture variation. It really has a nice weathering effect. I will have to re-stain the ties as they have lost much of their original color.Once I was relatively happy with the ground color I started adding some vegetation.Things really started to come together once I had completed the first layer of vegetation. More will be added later.
Laying Rails
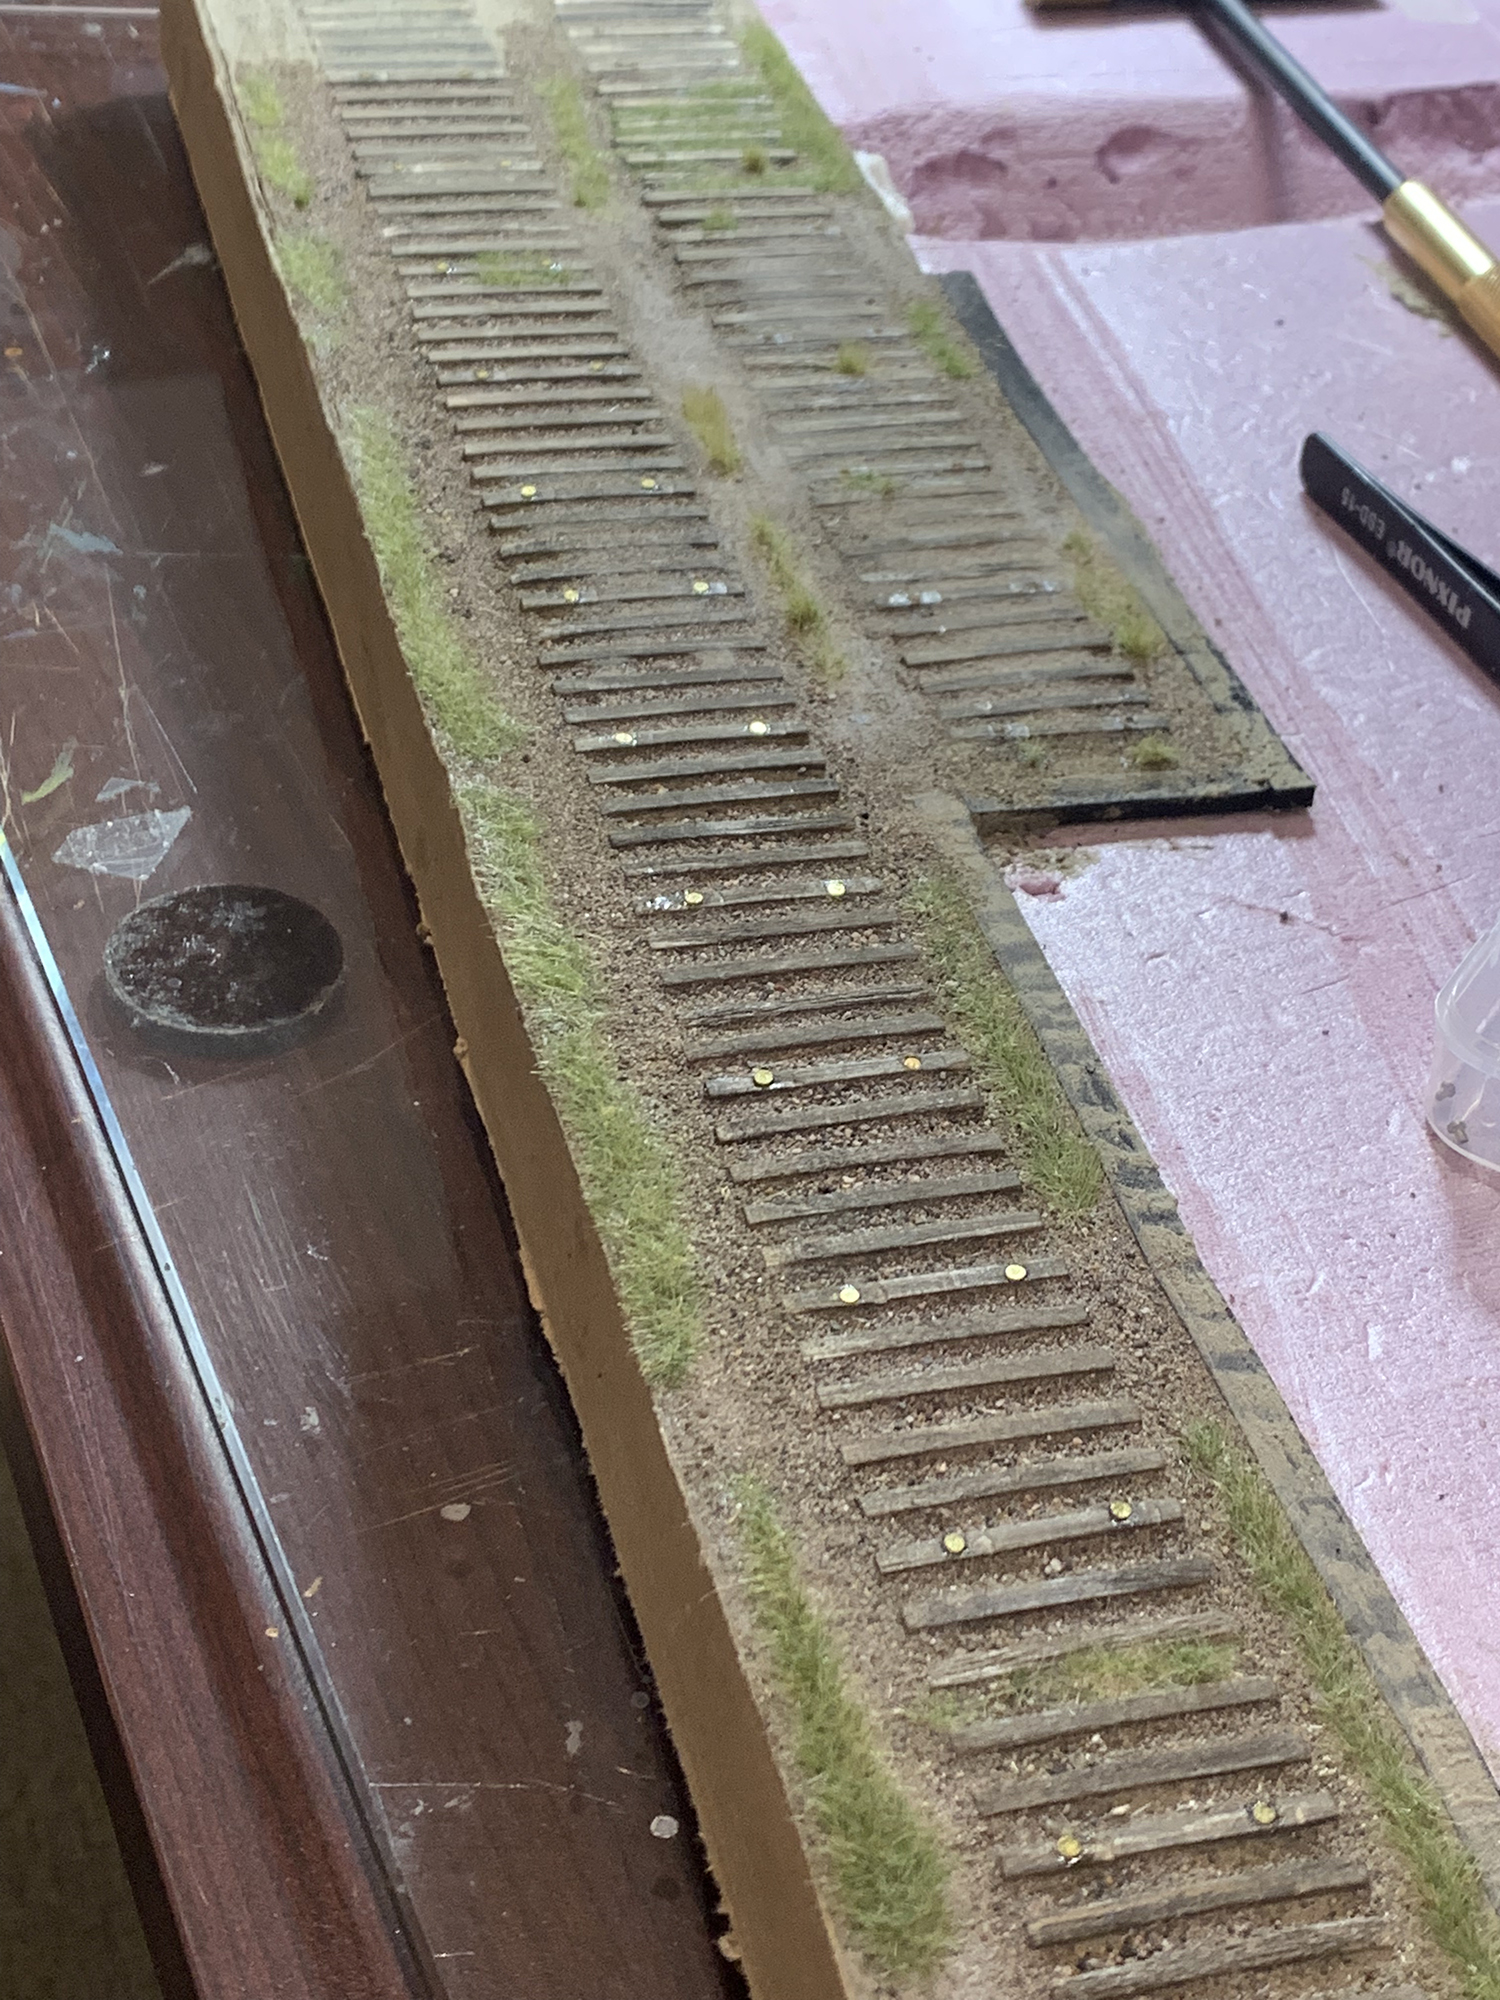
I decided to use the British Brook-Smith method of laying rails. The method was described by Iain Rice in one of his 1980s books on hand laying track. The method involves gluing rivets into the ties onto which the rail is soldered. I had to adapt it to American standards and I would say I only had partial success: it was slow, messy, damaged ties, and it was difficult to keep the rail in a straight line etc. Nevertheless I will continue to use the Brook Smith method and intend to create a bunch of tools to help speed up the track laying process.
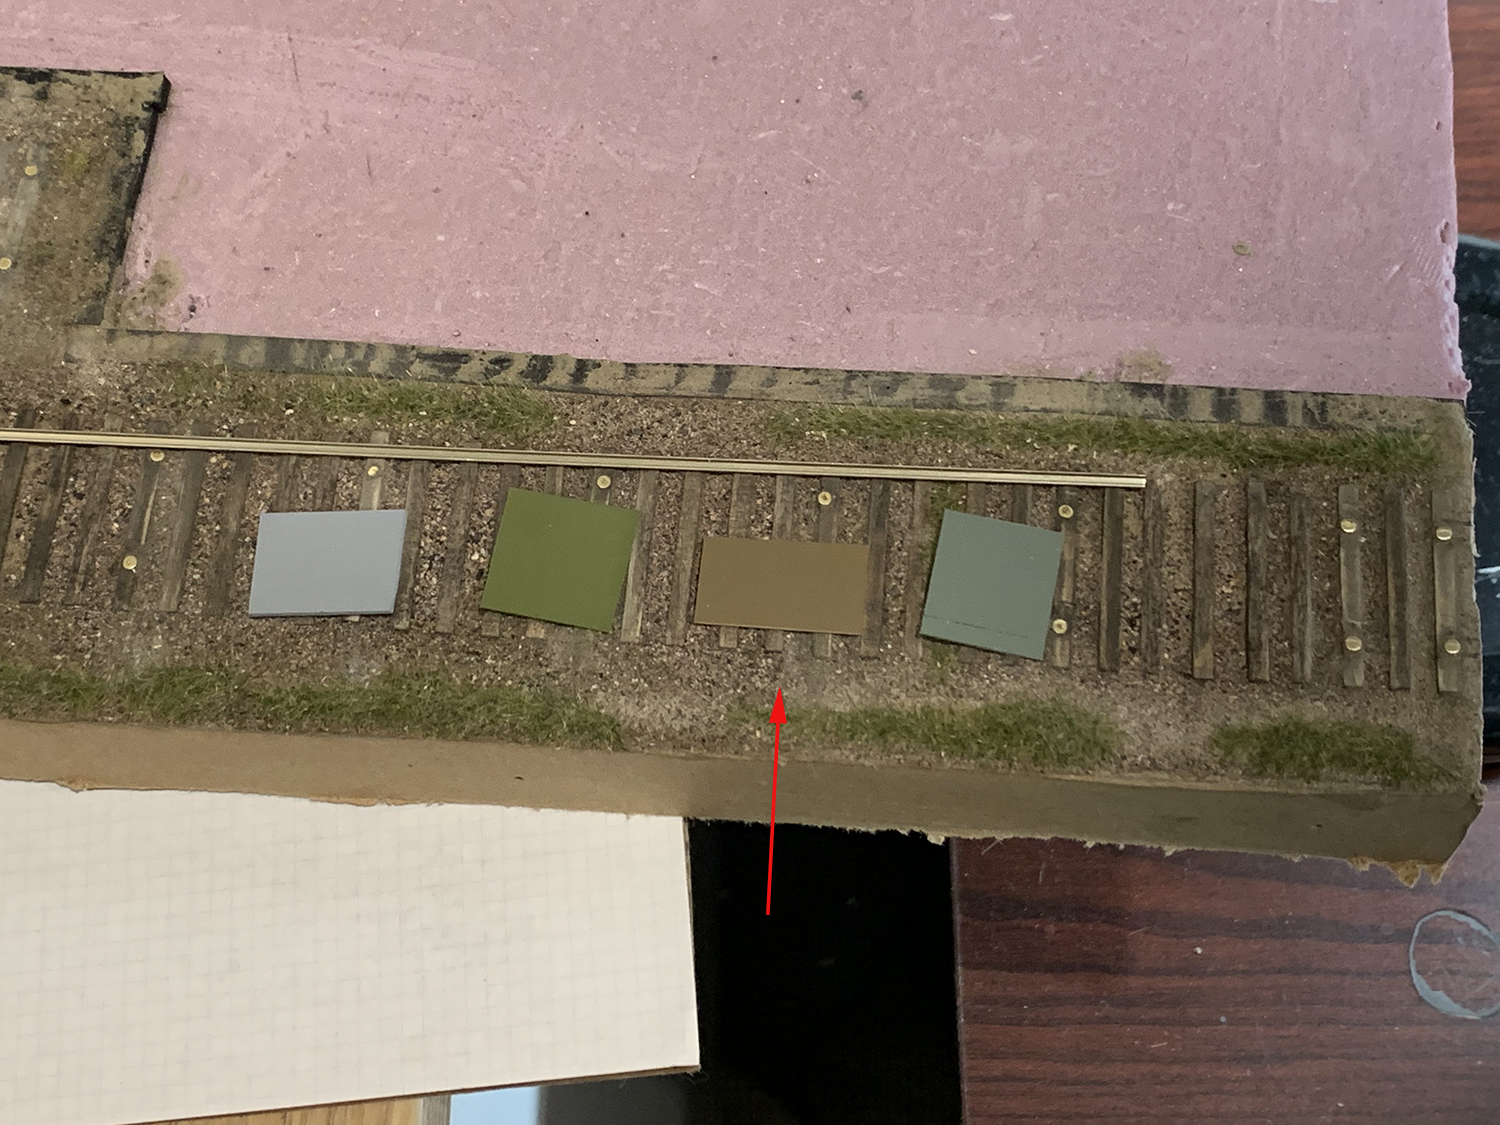
Holes are drilled and rivets are glued with 2-part epoxy every five ties.I decided to pre-paint the rails. I wanted a color as close to the roadbed as possible. In the end painting the rail first turned out to be a mistake: the coat of paint was easily damaged and flaked off as I worked on sticking the rail down. I found it easier to paint the rails once it was stuck down.Nevertheless the first color I chose turned out to be a good base to build additional colors upon – such as rust.I soldered the rail to the rivets and then painted them. The team track is a little more rusty than the main line. I intend to add another coat to both to bring out the color more. I don’t particularly like the tie coloring on the main line. I would have preferred it to be more uniform – it looks very messy. I could redo it but for the sake of keeping going I will leave it as it is and just tinker with it here and there.
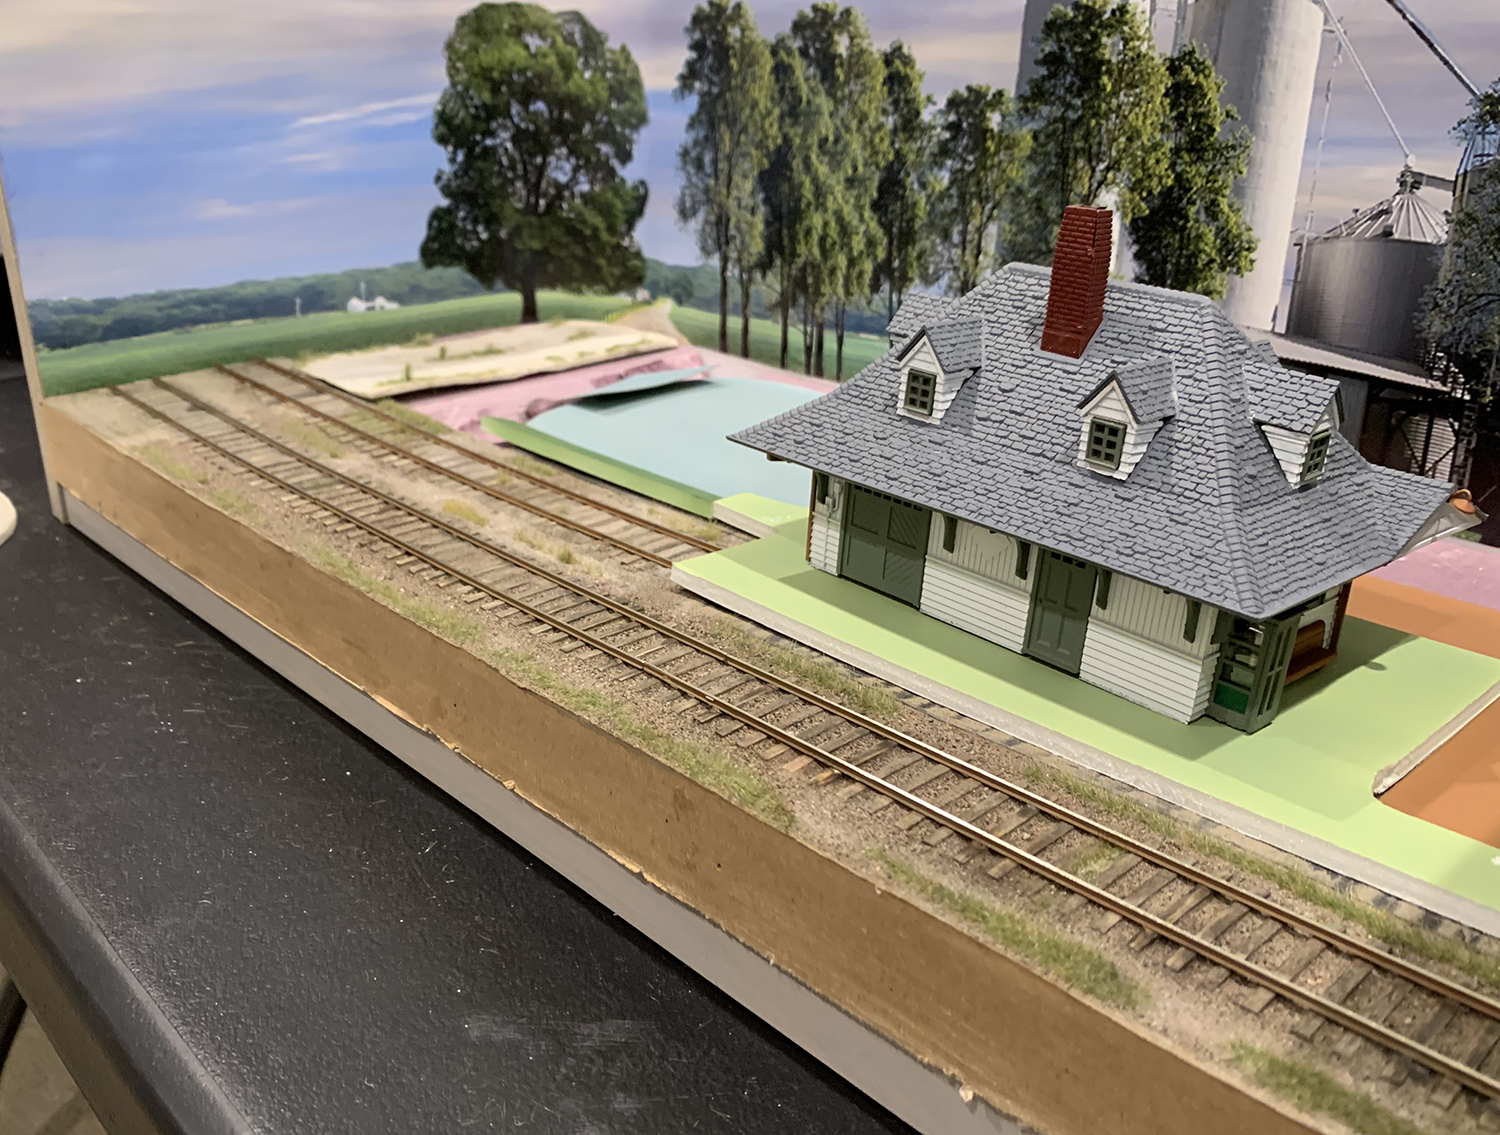
Finished (kind of)
I still have to add details such as rail joiners across the gaps. A glaring omission is the tie plates – something I will add when building the next layout. Also the rail sits a little high above the ties in places. I intend to build various jigs to make the track laying faster and more accurate – this was just a test run of the Brook-Smith method. I’ll add more color via leaves, rust and more vibrant ground cover. I want to see how the diorama develops before adding too much new color.
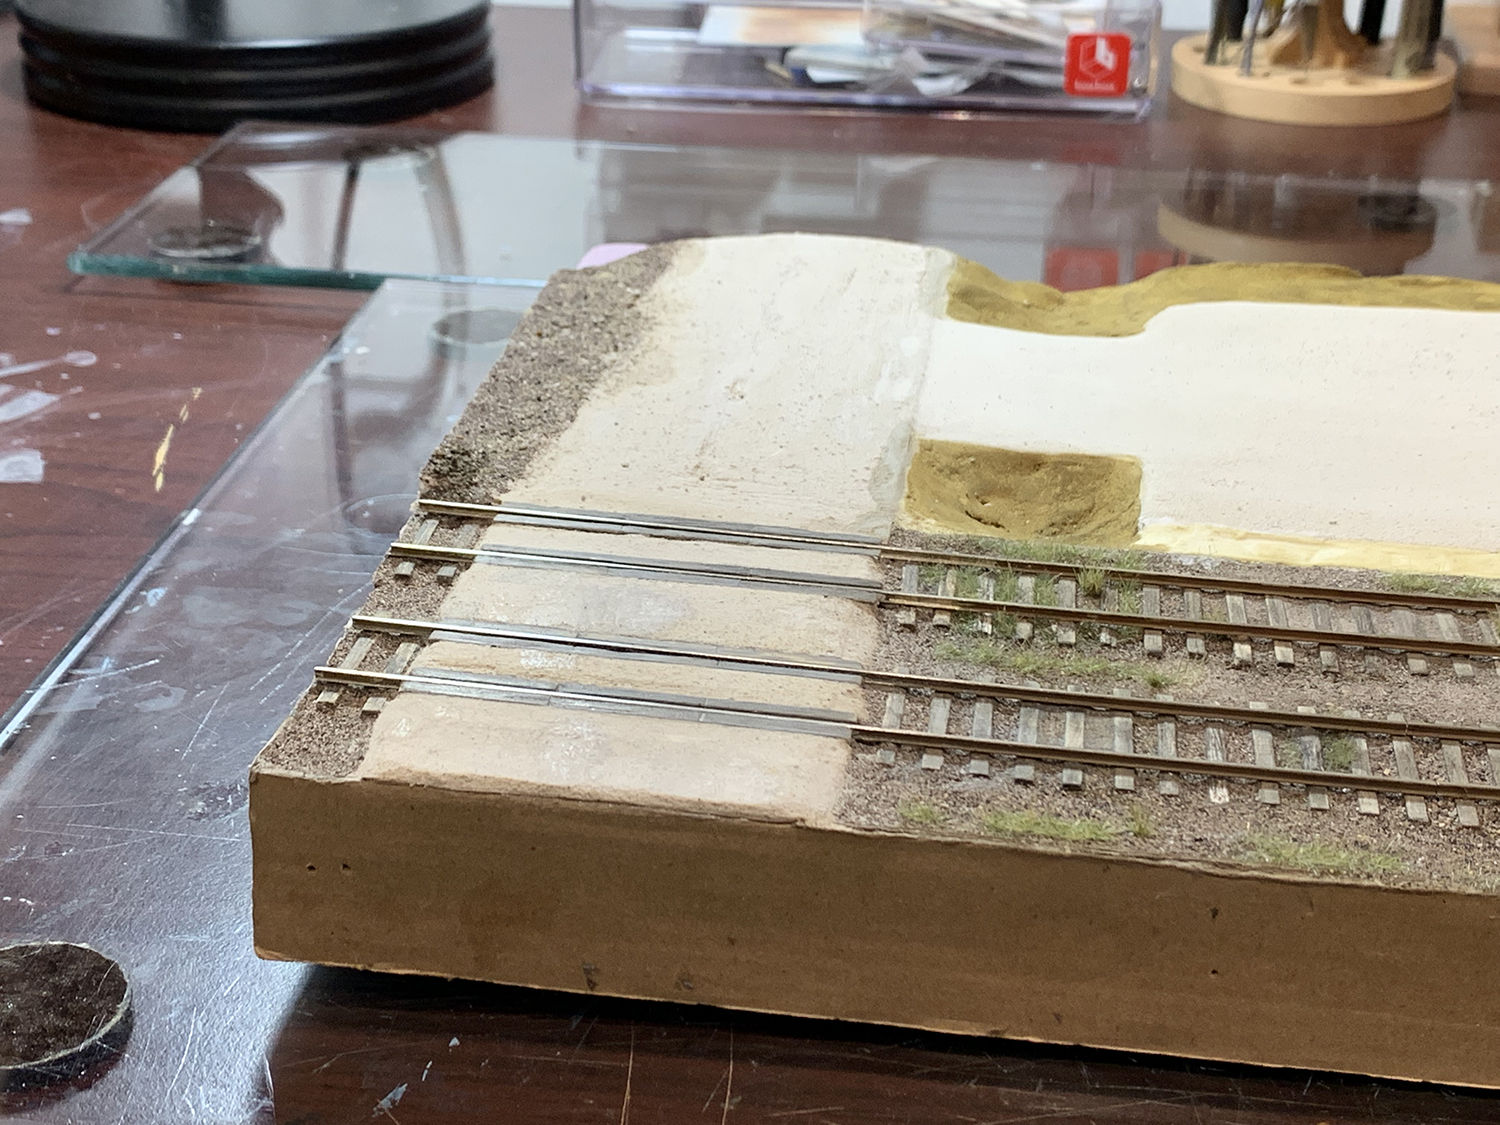
Nice to see things coming together.The ground levels in various places are really important to me. I like ties to be fairly sunken, have no ballast profile and for the surrounding ground to be at the same level as the ballast. The track level serves as a foundation to the levels and heights of all the remaining elements such as the road, the parking area, and the platform.There is going to be a grade crossing at this end. Sadly some of my nicely weathered balsa wood ties are going to be buried.The team track was meant to be code 50 but in my enthusiasm to get it done I completely forgot about it and laid it in code 70. You can see the rail is a little high above the ties here. I have to perfect the Brook-Smith method to lower the rail and incorporate tie plates. That will be the goal for the next project.Still lots to do to make the trackbed pop a little. I need to add colors but will wait until the remainder of the diorama is built before doing that. For now this track work is a good foundation for the rest of the diorama.
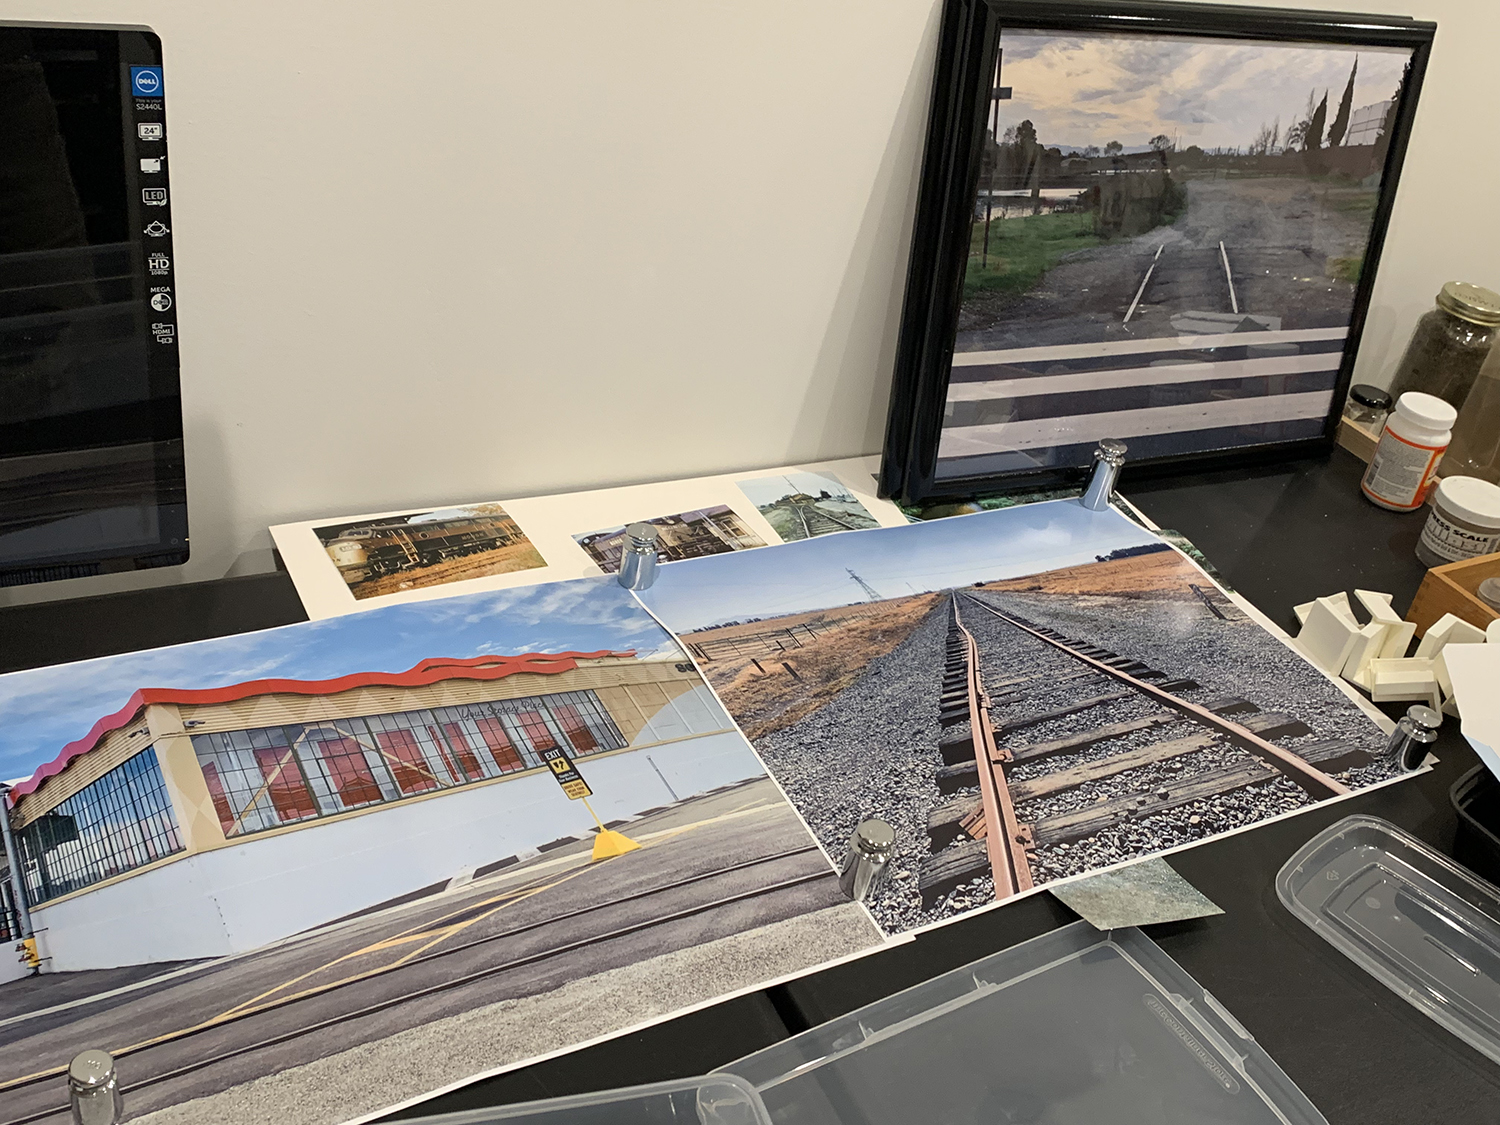
I’m a huge fan of track, trackbeds, track profiles etc. I spent the last few years amassing a huge collection of track pictures (20000+) located here: https://railroad-industrial-bayarea.blogspot.com/?view=sidebar. I don’t really have much interest in modern locomotives or modern railroading – I’m more of late steam, first-generation diesel guy – and generally spend my time browsing Morning Sun books for inspiration. I photo, video and sketch track and for me modeling good trackwork is one of the most important parts of the hobby. For a long time I thought I was the only one on the planet who cared about modeling good looking track but then I discovered Facebooks groups with hundreds of like-minded souls with the same love of track and all attempting to reproduce in model form the wide variety of colors, textures, materials, landscaping, profiles, weathering and technical characteristics of trackwork. I’ve been hugely inspired by the work on these Facebook groups and would like to produce something that matches the quality of the modeling. So with that in mind I spent the last two weeks working on the roadbed of the diorama trackwork trying to figure out how to produce something credible.
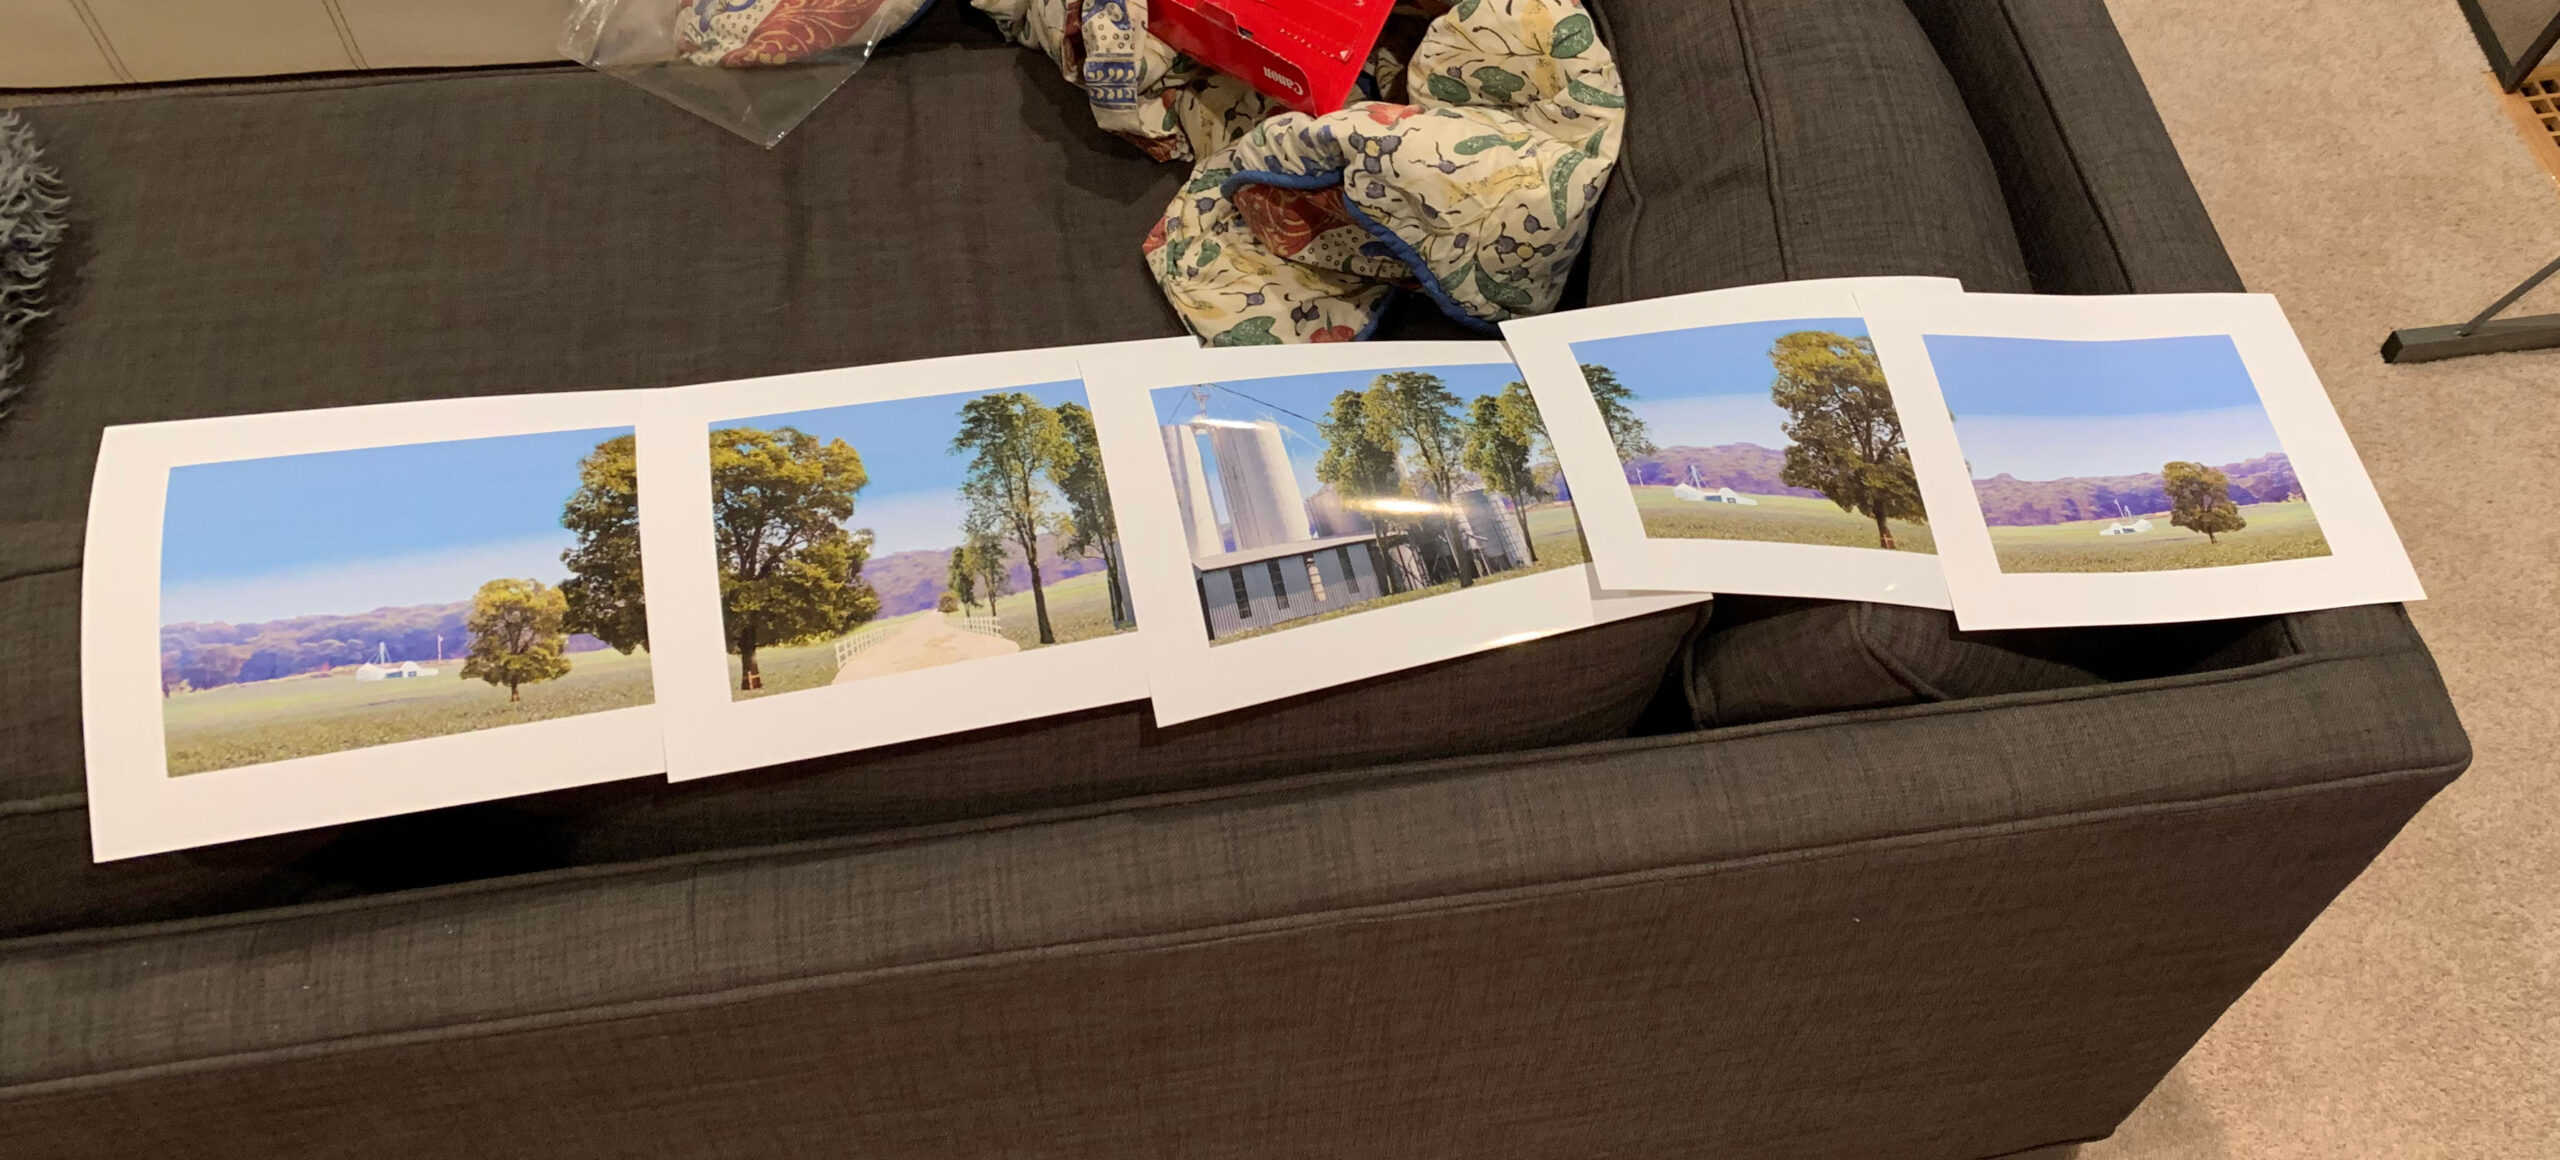
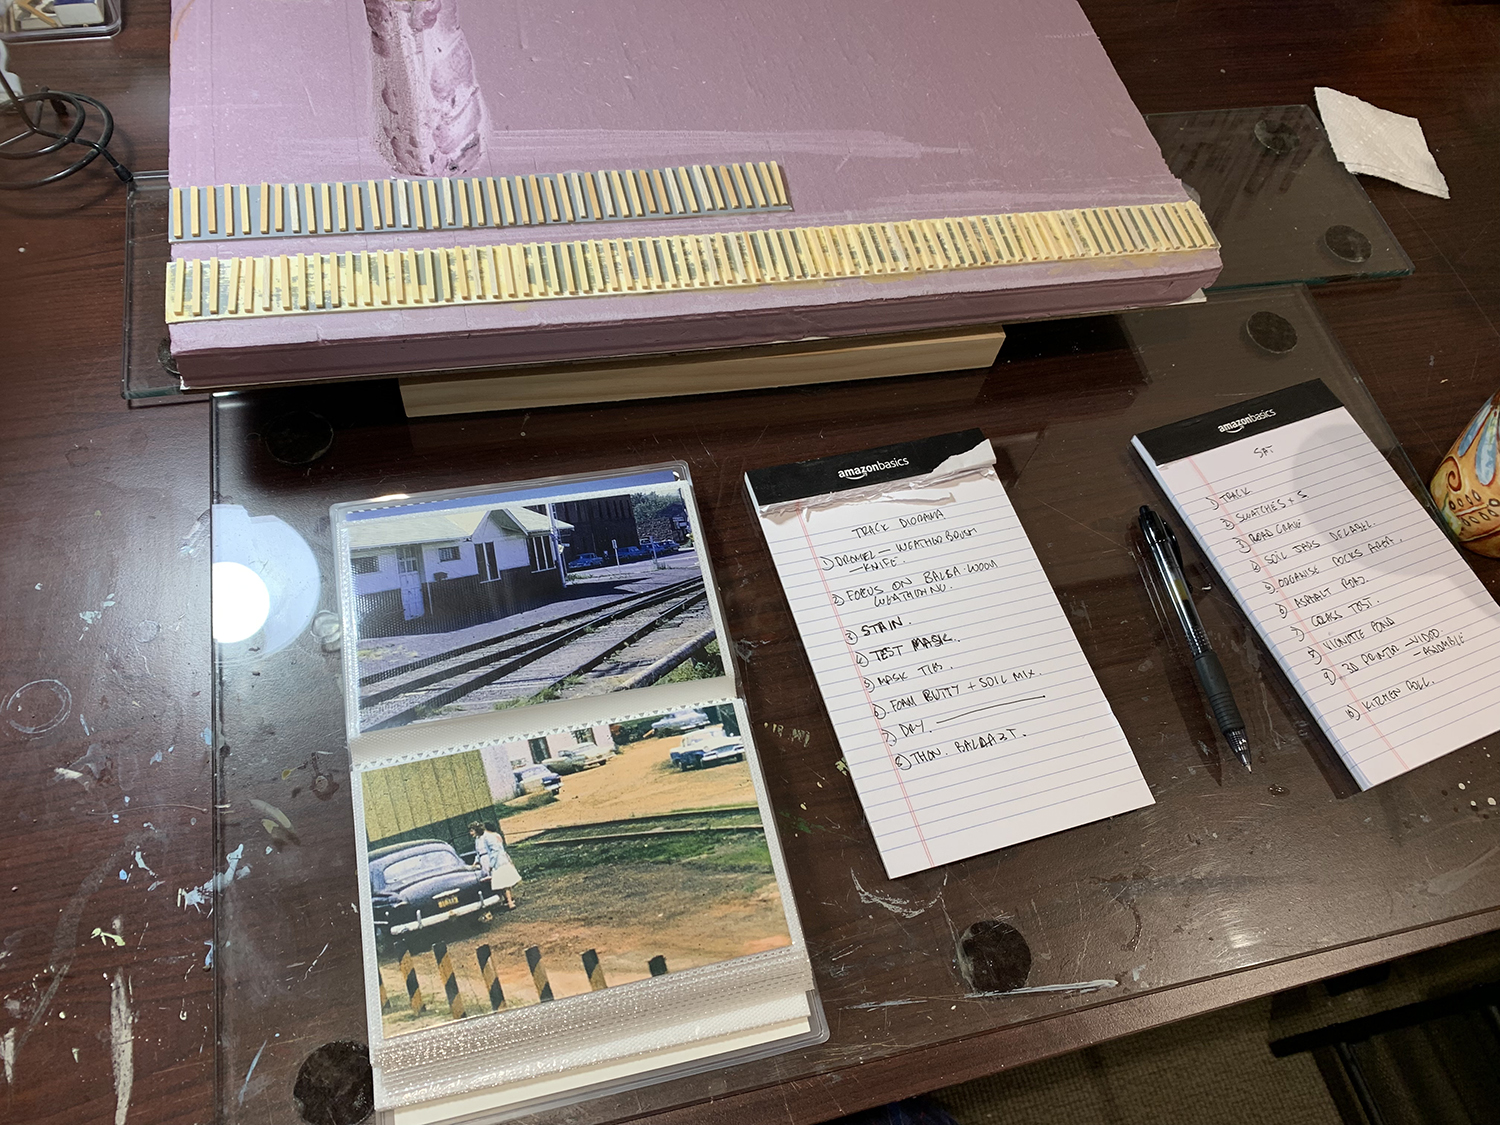
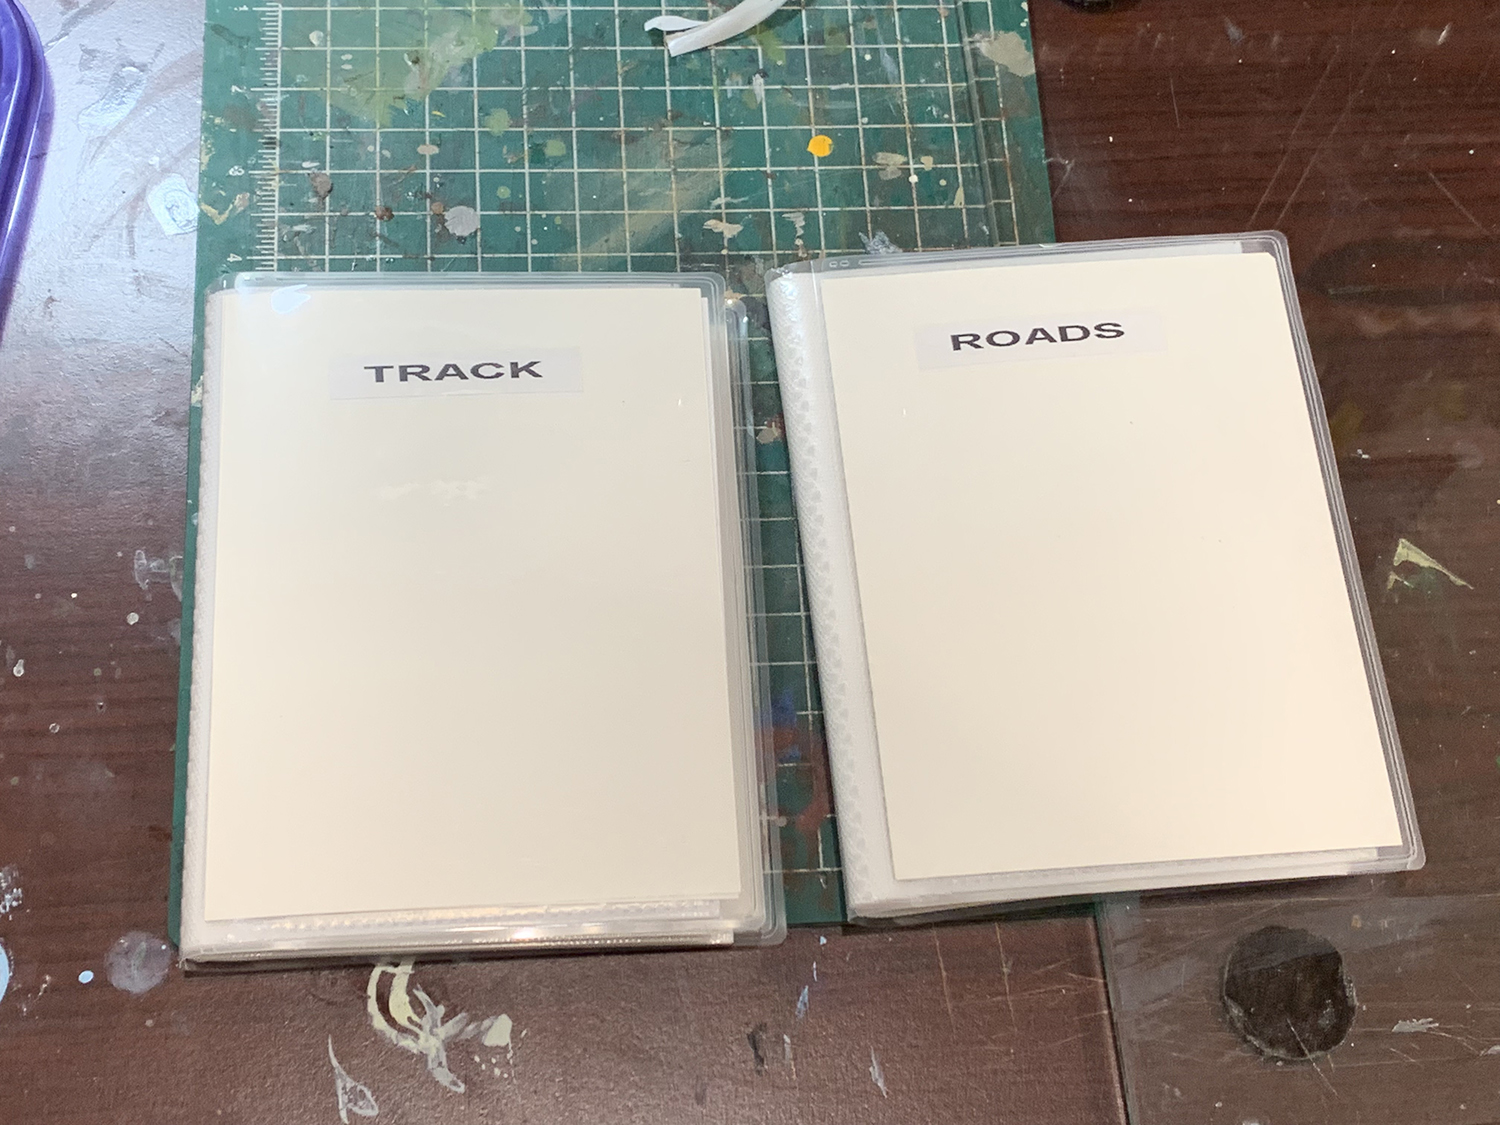
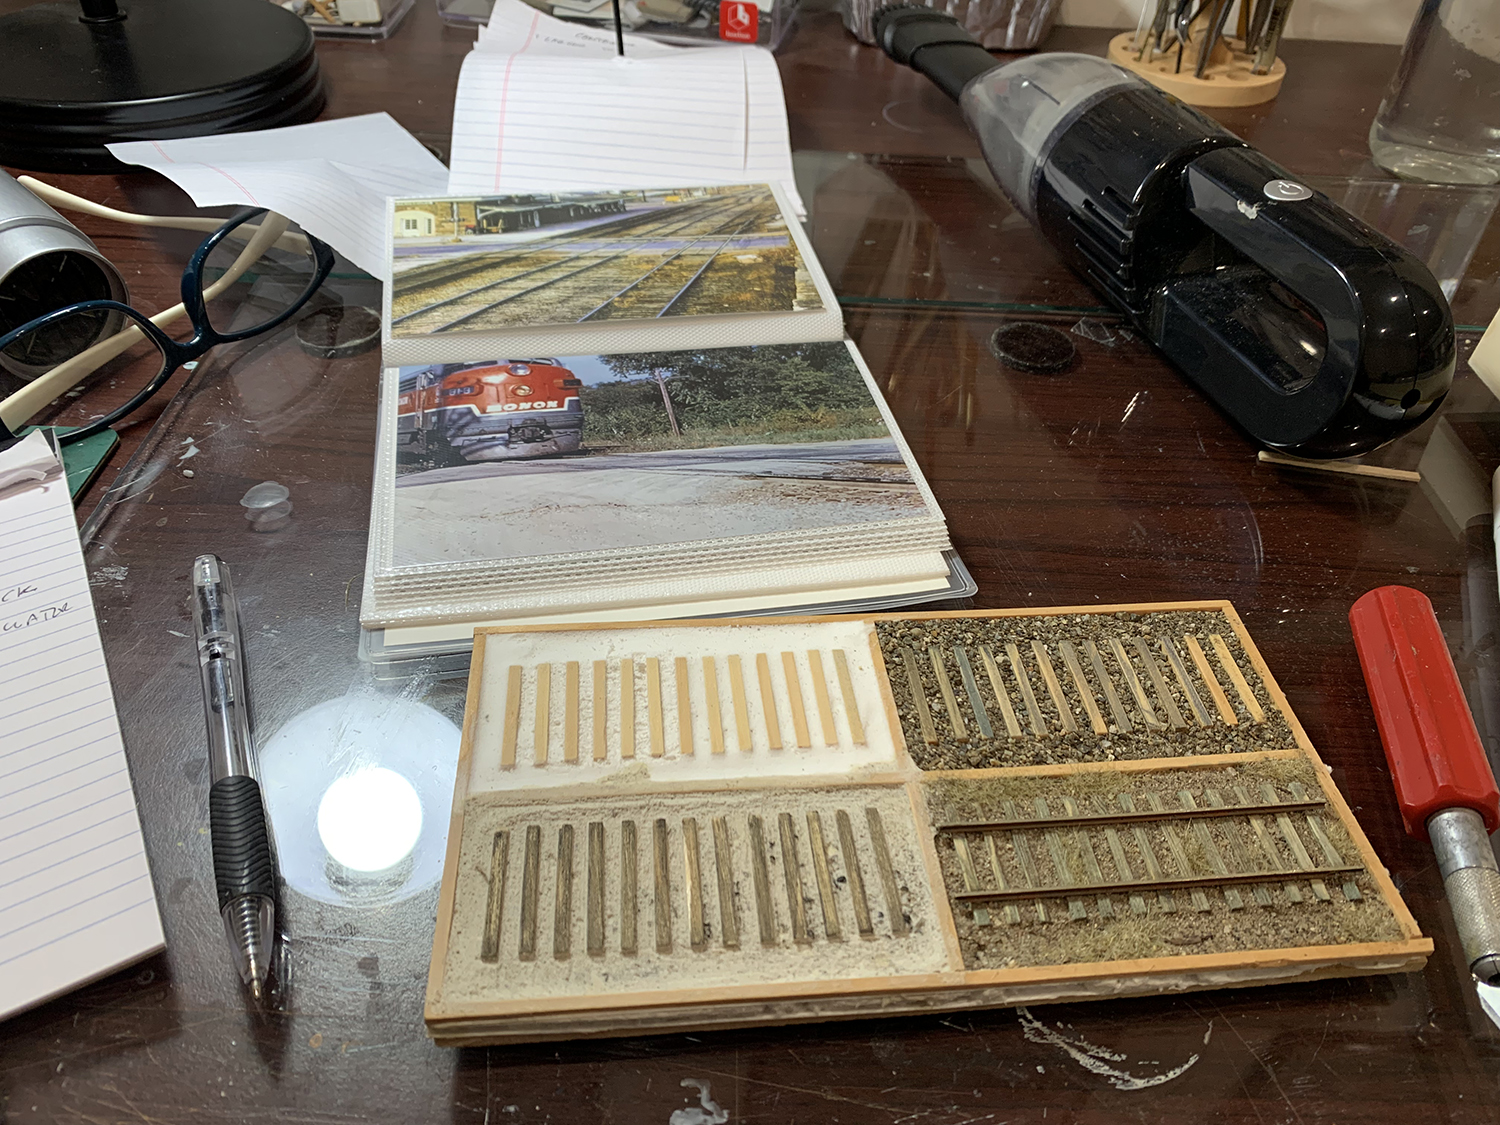
These are a few of my own photos. I have a library online of track photos to work from that are taken from my cycling trips to operational, non-operational and abandoned (but in situ) railroads around the Bay Area. I have an electric bike which allows me to travel wide distances but still get in close to the action. The above photos are some that I have had printed out for framing. They will be mounted on the walls of the modeling room but give you an idea of what I’m generally photographing when I go out.In order to use photos for reference I have them printed out at my local Walgreens – same day printing. I not only use my photos but will also take pictures of Morning Sun illustrations. I find it easier to use small versions on the modeling table than have to prop up a book with the risk it will get damaged or stained in some way.I bought these small photo albums to sit alongside me while I work. They were pretty cheap and can be bought in bulk. (https://www.amazon.com/dp/B07XSKWJ4Q/ref=cm_sw_r_sms_api_glt_i_5AJFA03RAF93FYZNYQYN?_encoding=UTF8&psc=1)I’m slowly organizing my books into categories. As I’m working on roads and track at the moment these two were my first working booklets. I will eventually have other books devoted to bridges, trees, grass etc.
Track Modeling
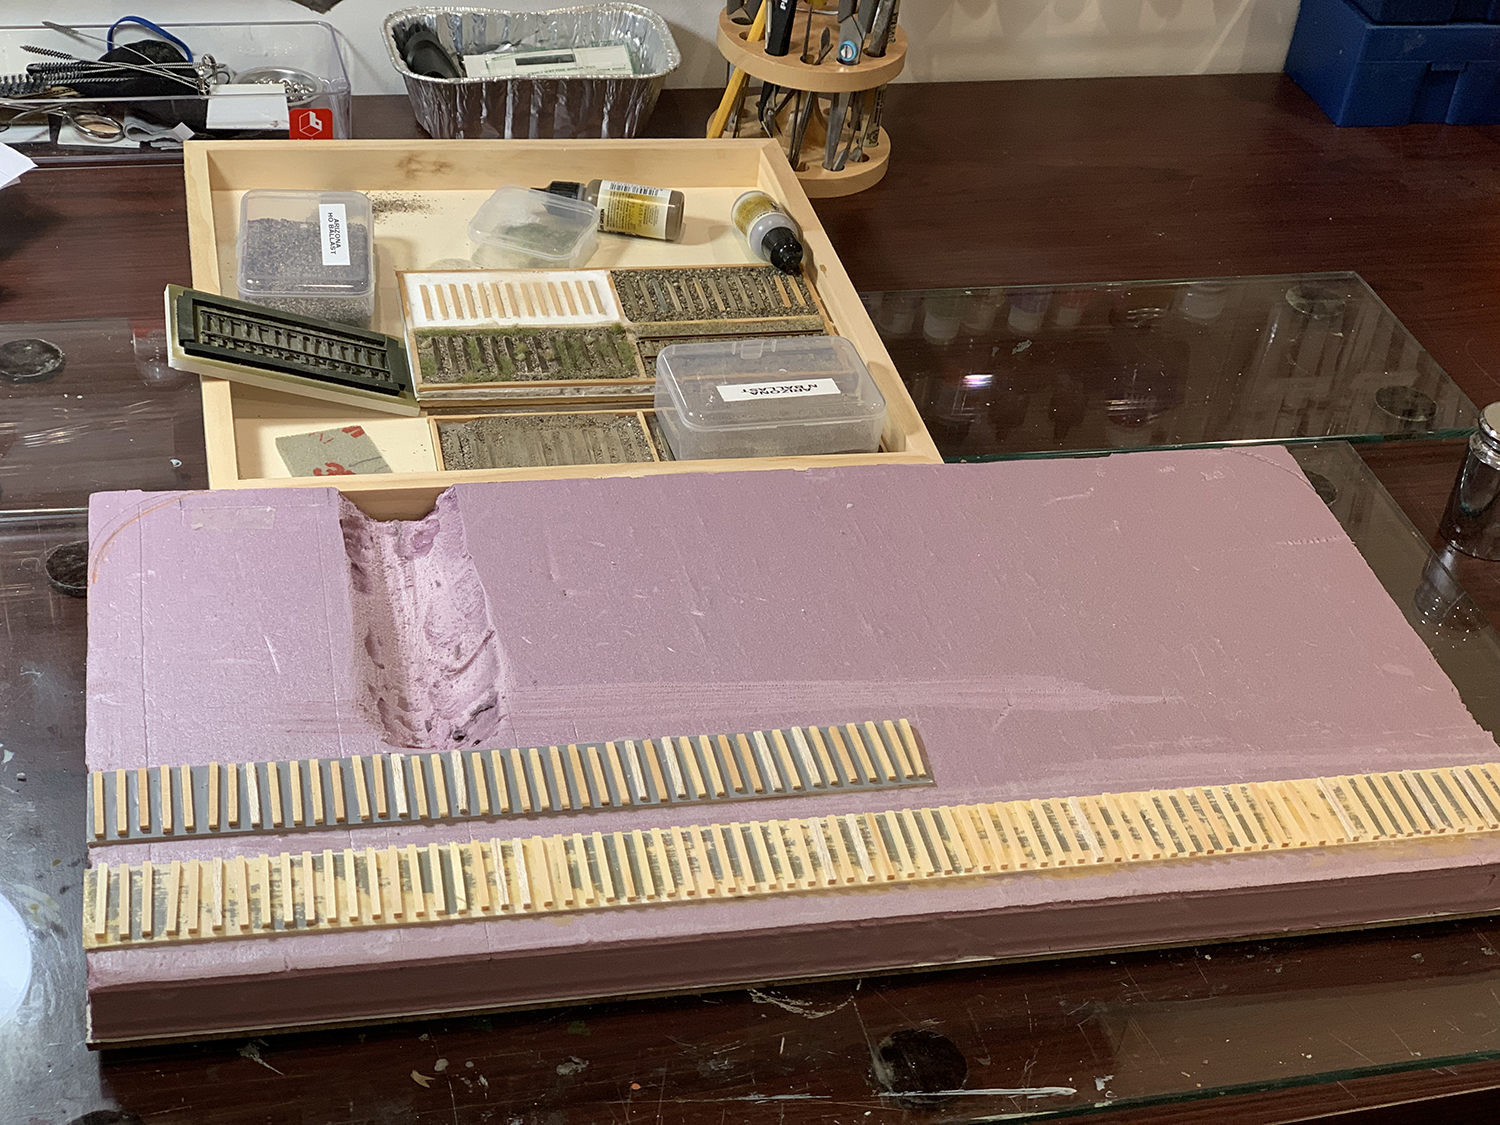
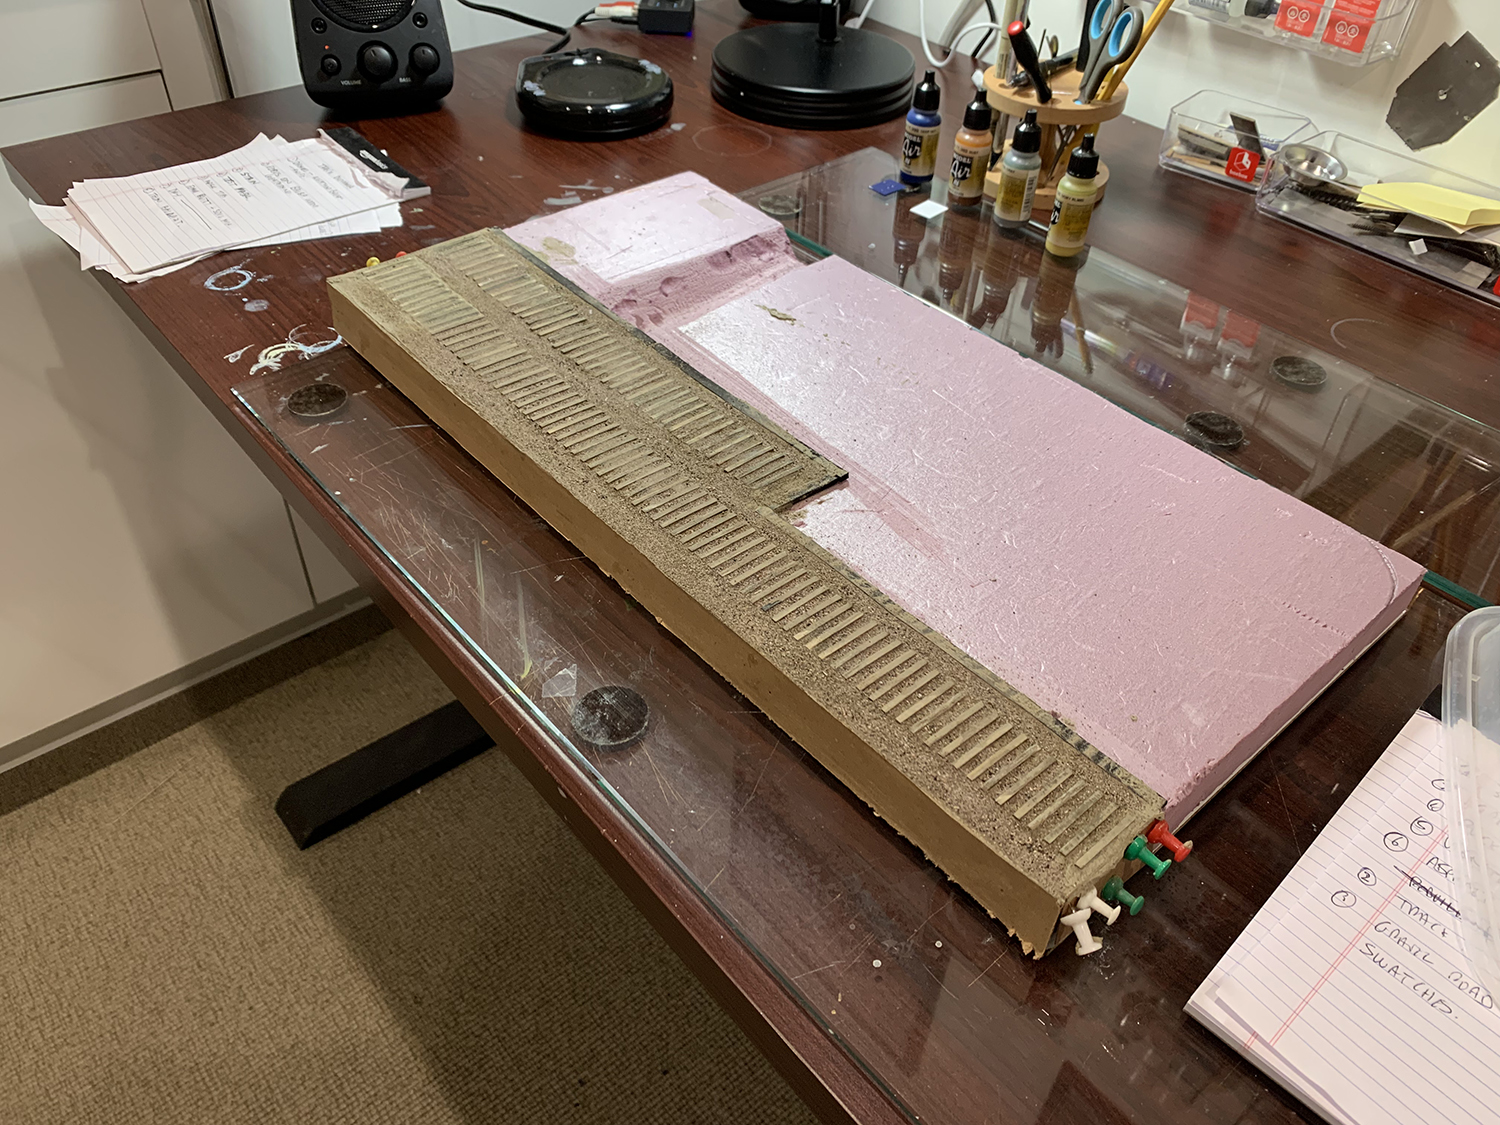
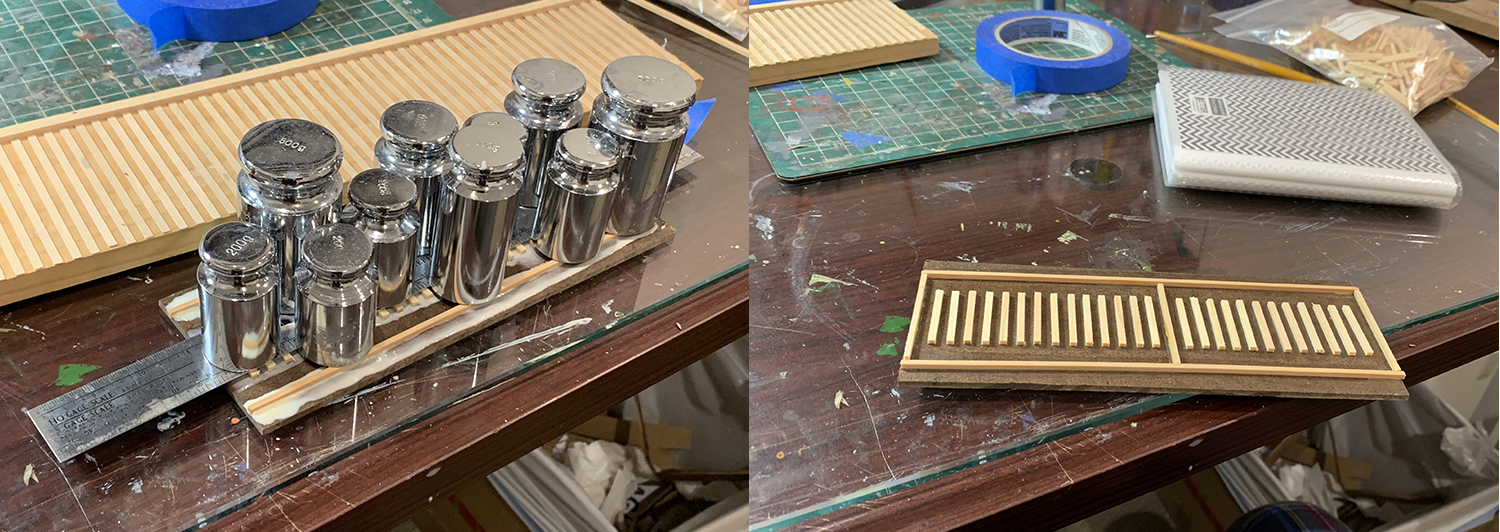
I decided to start with a test to figure out some methods, effects, what works, what doesn’t work. I have various test beds for track and was able to use them to try out various ideas and to provide a modeling road map and modeling destination when I eventually start building the trackbed.
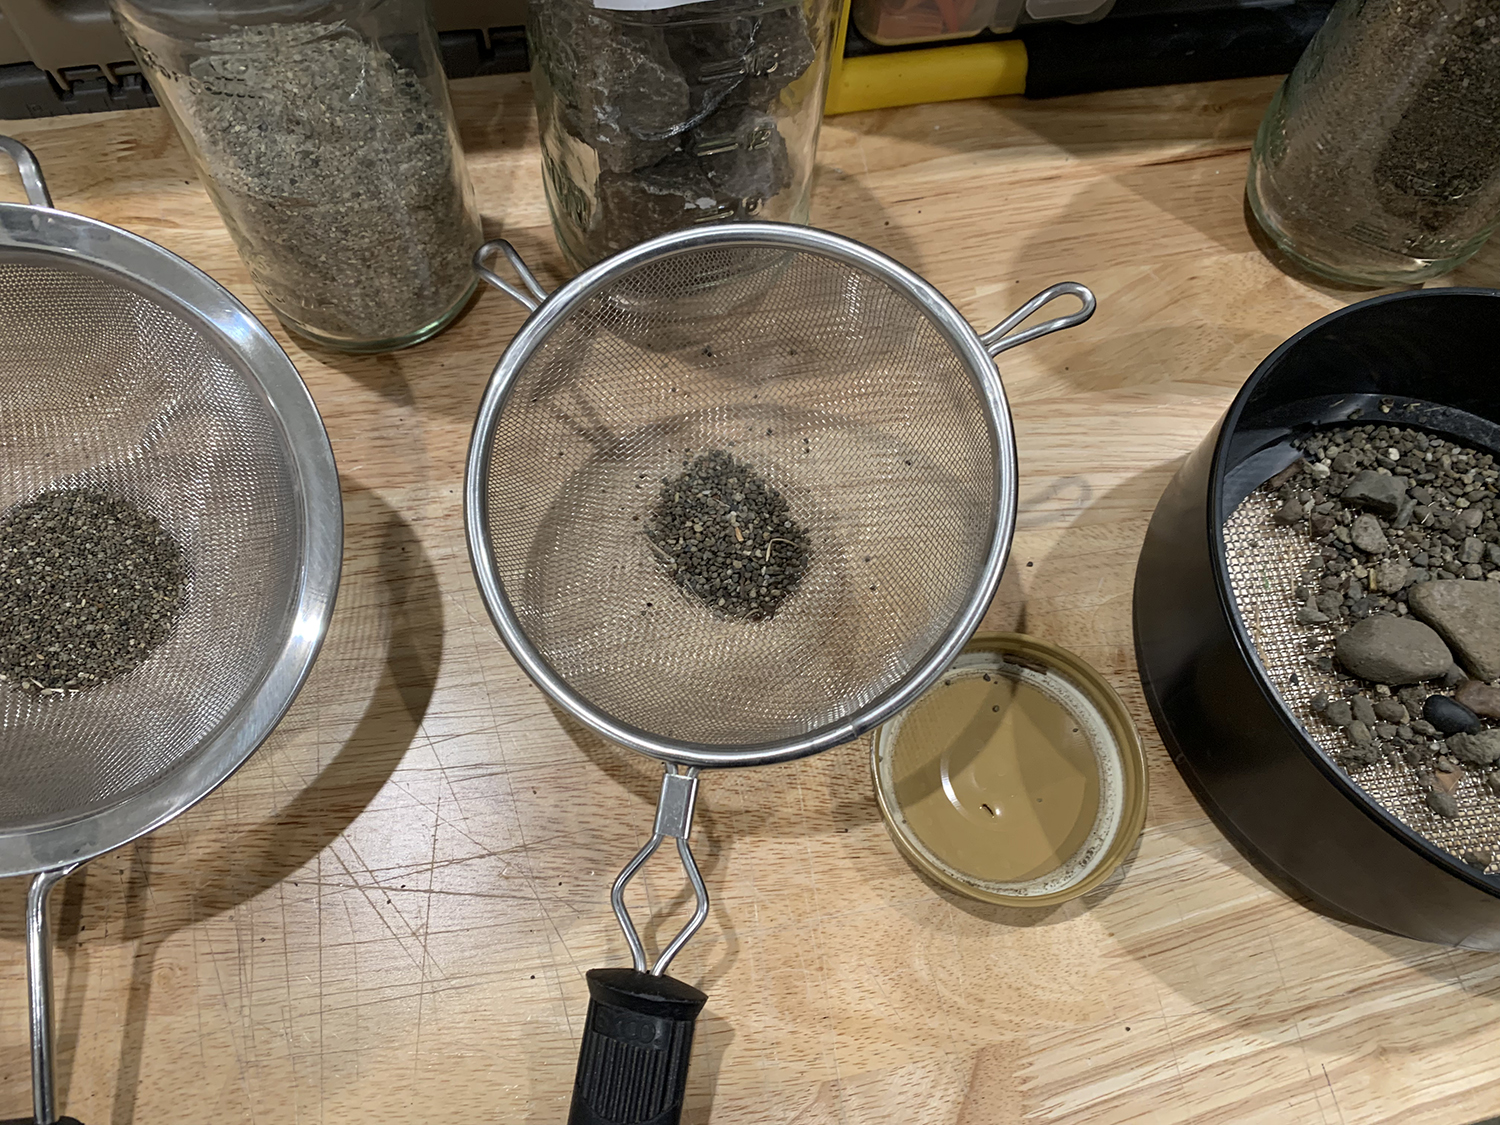
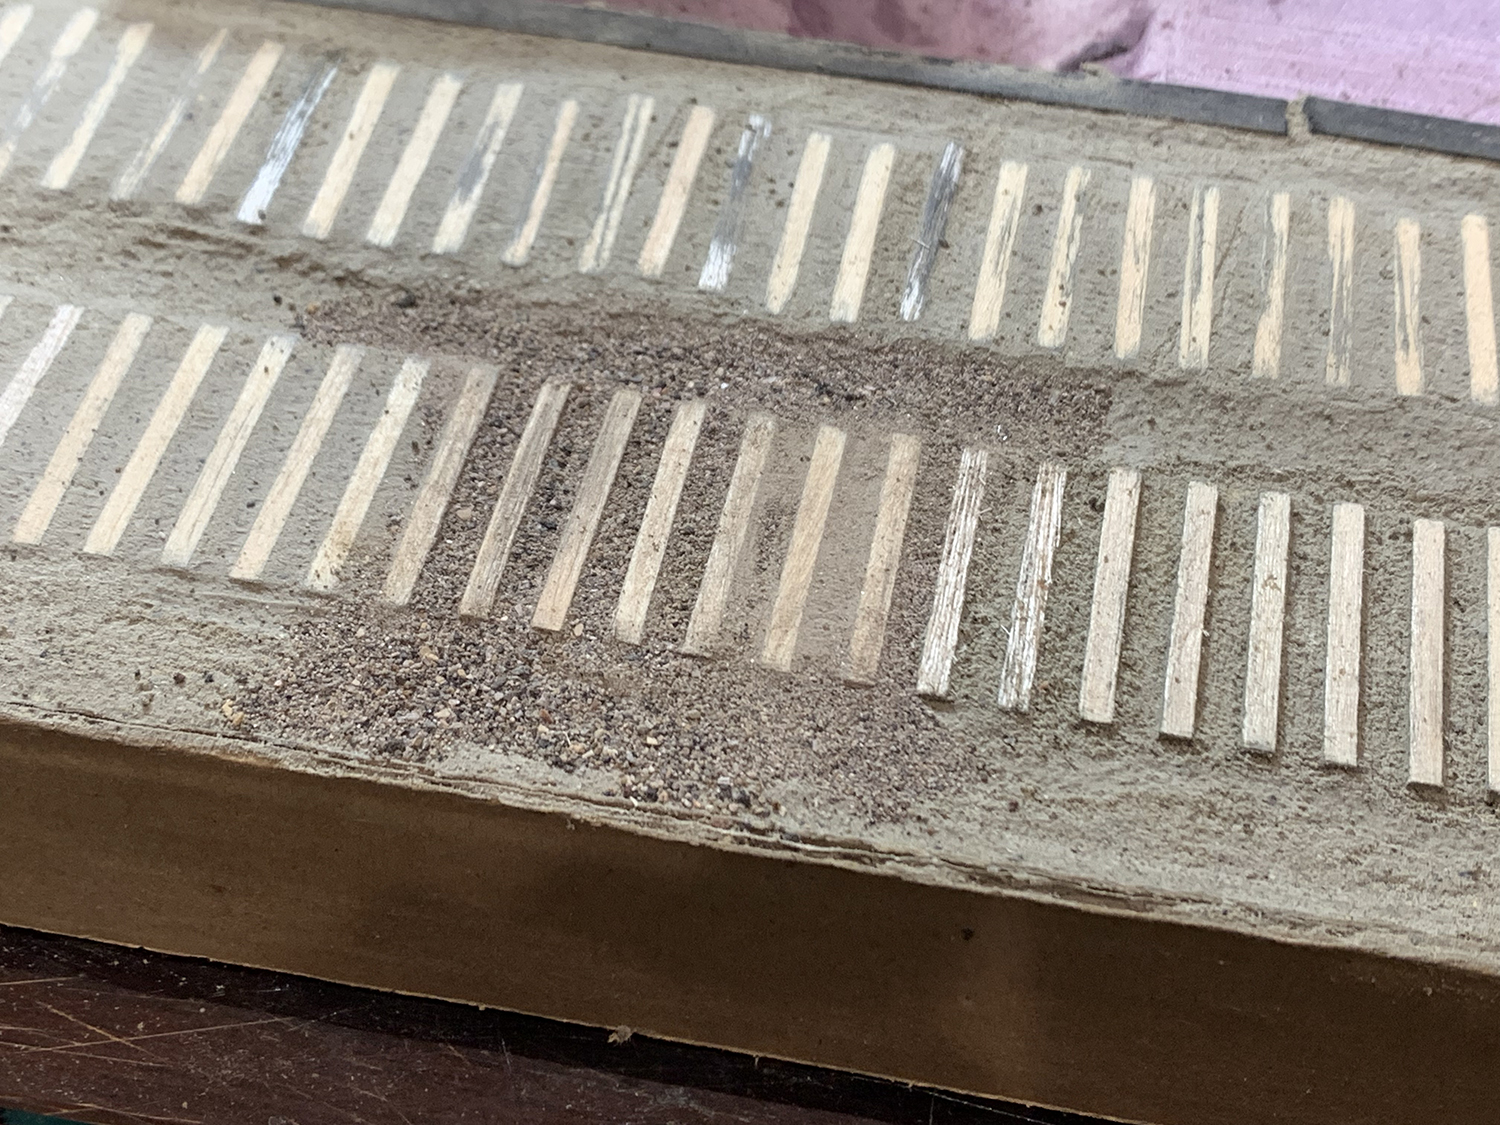
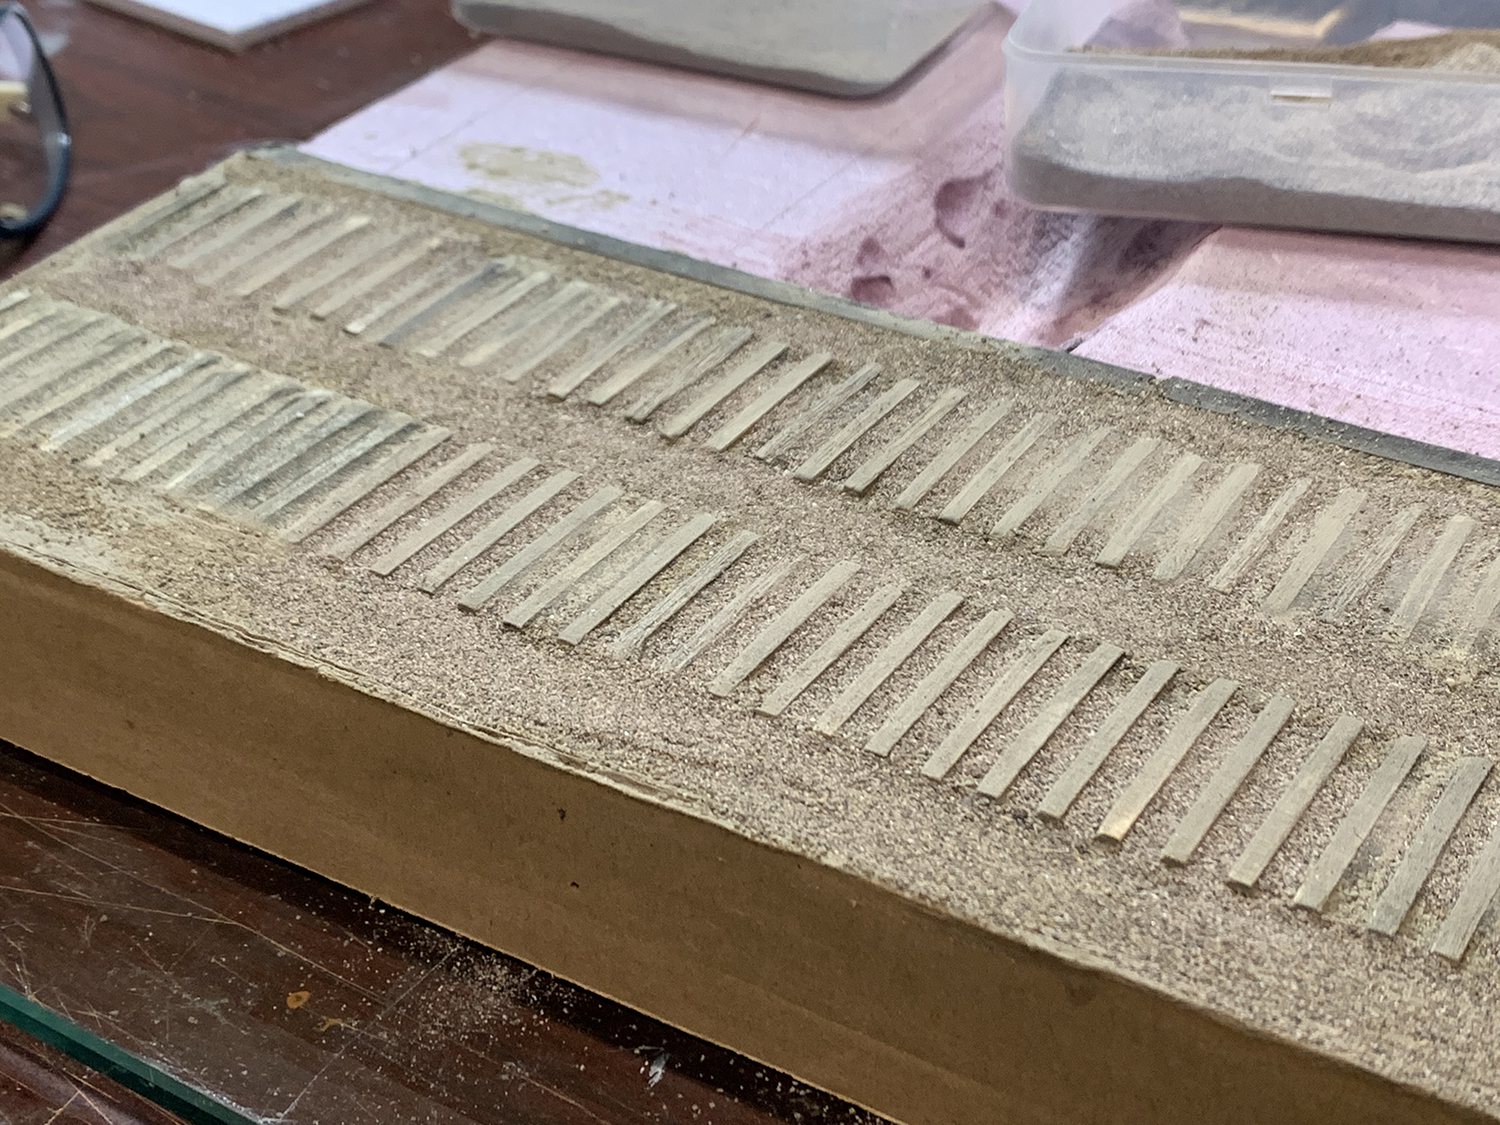
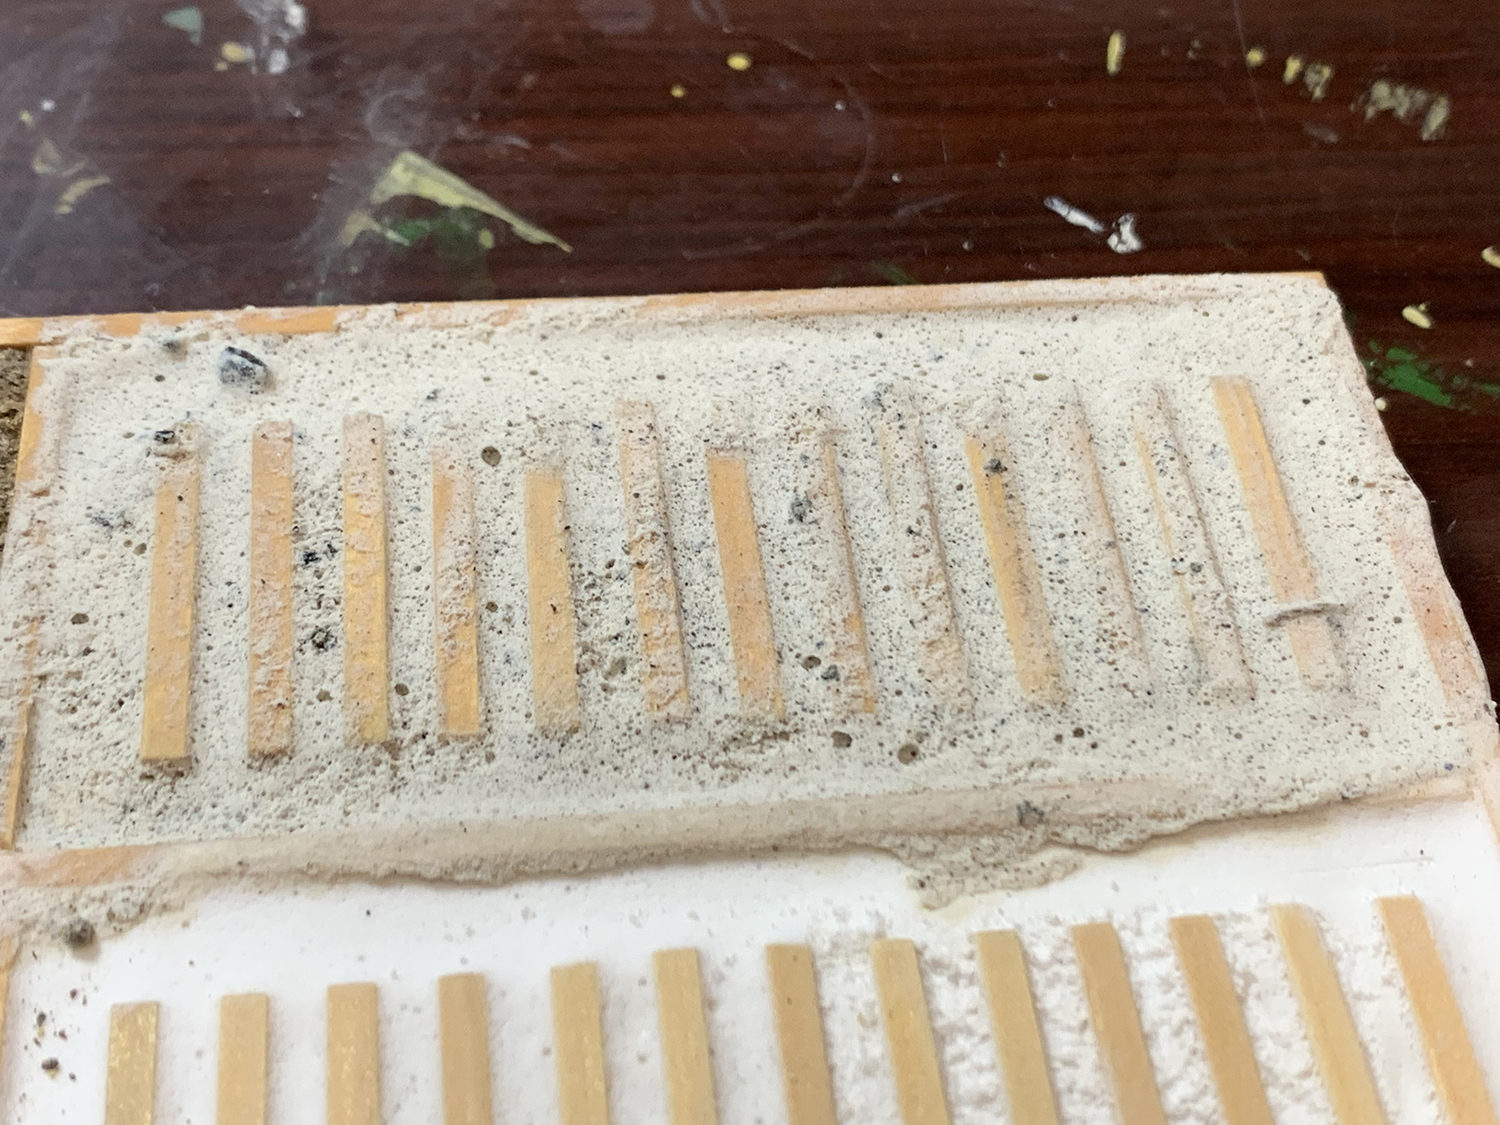
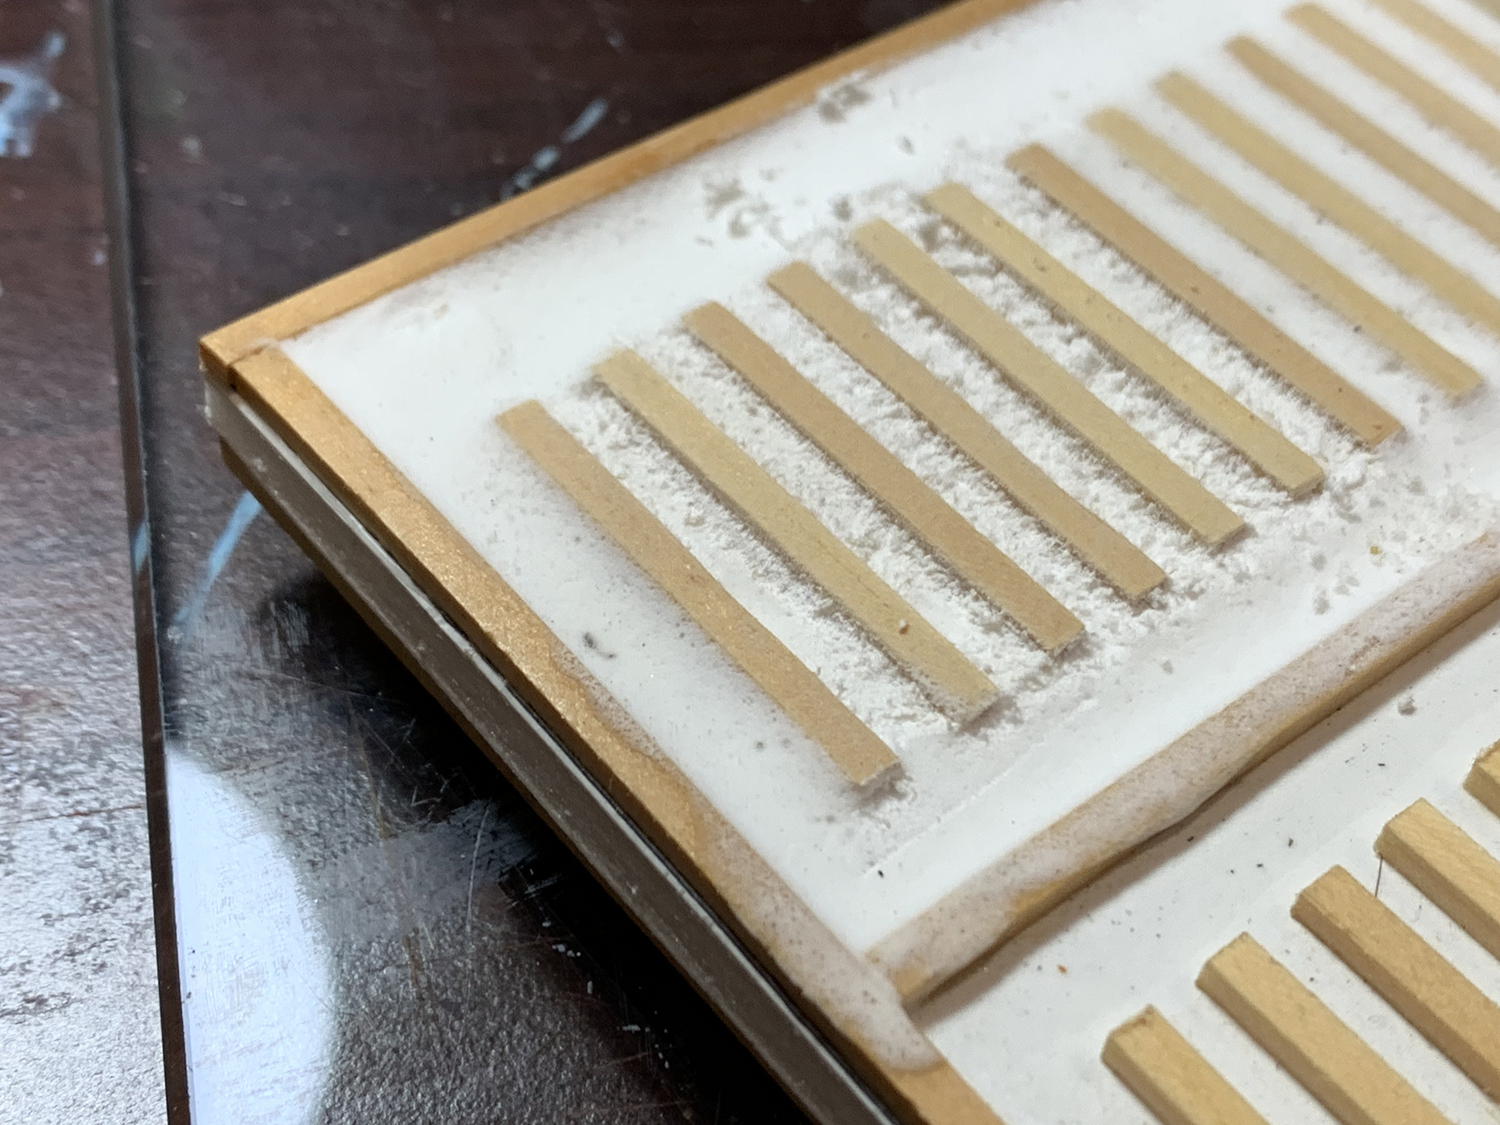
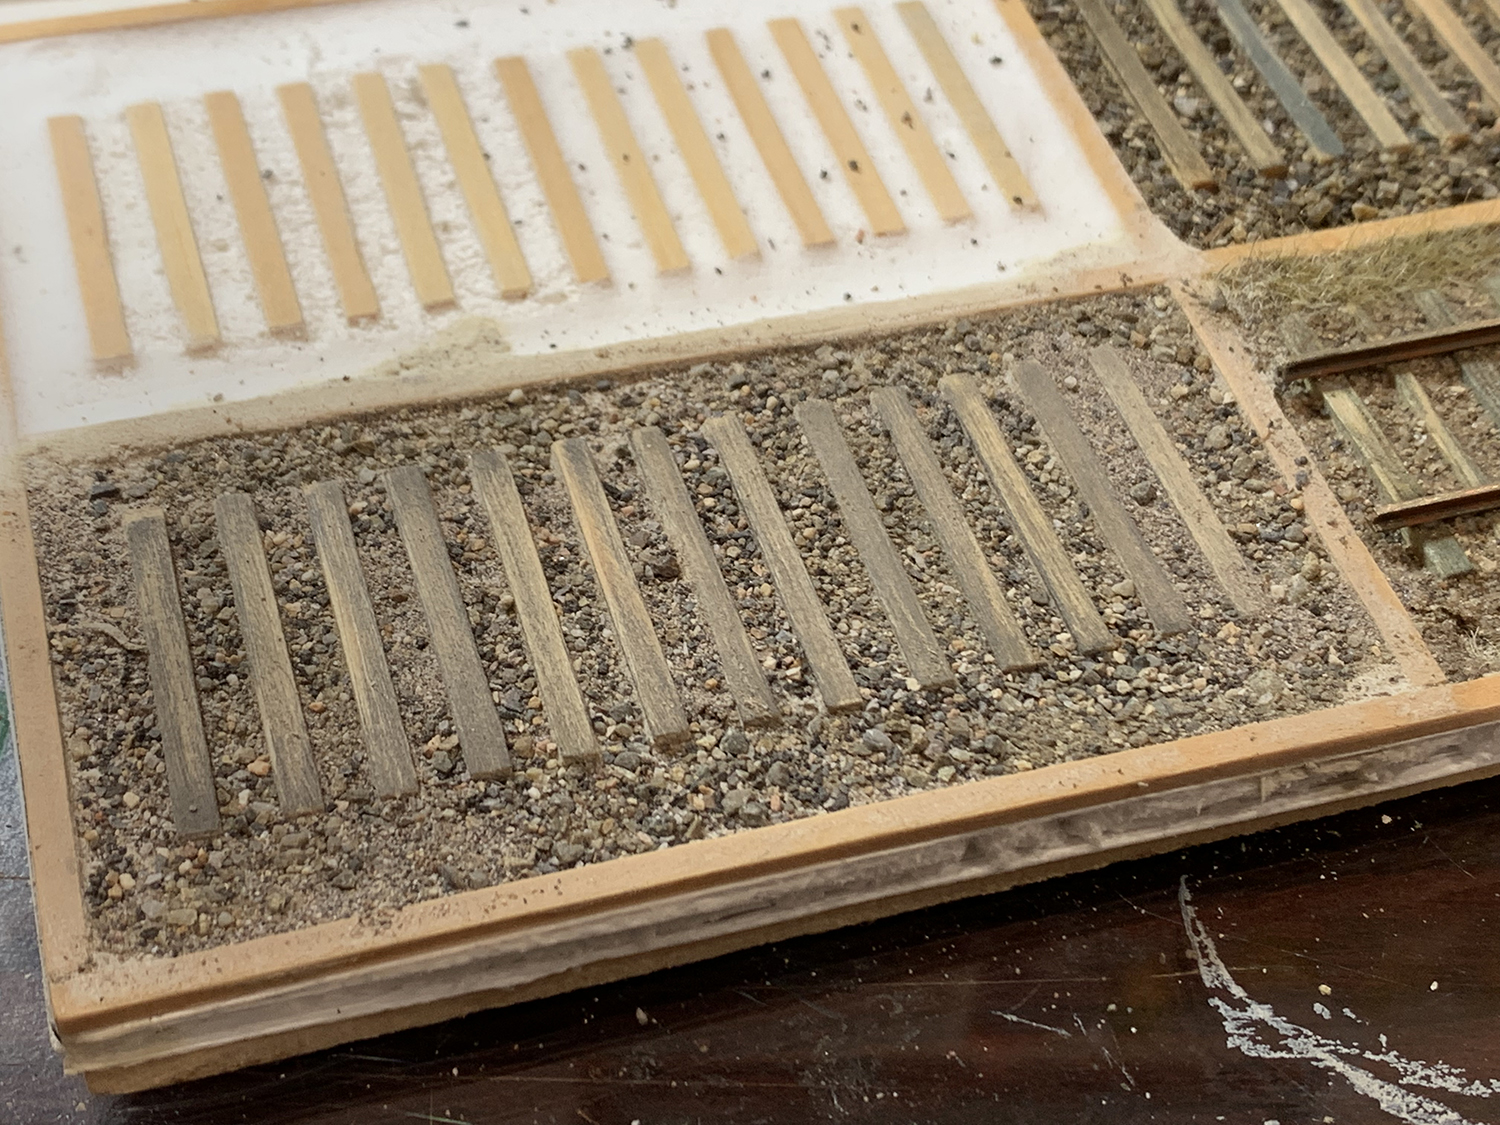
This is an older test platform I built four years ago. Luckily it had a few clean sections for me to try out ideas. This is a good example of the kind of preparation that goes into modeling. I would say that 60% of my time is spent testing ideas away from the main ‘build’. The fact that modeling on the final build is a mostly one-and-done situation I want to be able to get it ‘right’ the first time (no such thing as ‘right’ of course). I’m sure every experienced modeler has had that moment of panic when one’s carefully laid plans go sideways on the final build and days have be spent, first calming down, and then second scraping everything off in order to set up again – which in my case can take days. Test platforms such as these reduce those situations. By the way I’m all for seat-of-pants modeling and there are definitely times when that approach works best.The goals for these tests is to get the ballast line and surrounding ground at the same level as the top of the ties – there should be no ballast shoulder. I’m trying model poorly maintained right-of-way with even less maintenance on the team track. I’m aware that all I have to do is just dump a load of Woodland Scenic’s HO ballast on the model and then level it with a straight edge. but instead I’m trying to create a situation where I can carve the ballast profile in the same way that a sculptor can sculpt a piece of marble. I want to be able to control, from tie to tie, the way the roadbed profile changes. The variety of texture, wear and tear and weathering effects that can be found in trackwork can be quite considerable and is something that I want to model. In this photo I took Woodland Scenics foam putty, dumped some sand and ground-up stone, mixed it with water, and spread it over the ties. When dry I should be able to carve out a credible ballast profile.This is a variation of the above test but this time, I used foam putty heavily diluted with water and just poured it around the ties so that it flowed and then leveled out. It was a really nice effect and one that will use another time. One issue is that the water surface tension ‘pulled’ the foam up the sides of the ties. That was an effect I didn’t want and next time I will add a bit of dishwashing liquid (or use alcohol instead of water?) to reduce surface tension.This test used some ballast that I ground up from stones. I was able to get several grain sizes using a pestle and mortar and filtering the results using a variety of tools including kitchen sieves and sifting pans. Worn road beds tend to be a mixture of different grades of ballast and surrounding soil that has blown or flowed onto the road bed and so I needed different grades of ballast which I mixed with fine dust. It was a pretty good effect. One thing to watch out for is using ballast that is overscale. Standing an HO figure next to the track will help me remove any ballast grains that are too big and I can already see that there are several that are too big in this photo.Sifting stones after they have been ground up in the pestle and mortar. I use gold miners’ sifting pans and kitchen sieves.
Final Test
I decide to take what I had learned from the quick tests (done over several days) and apply them to a final test.
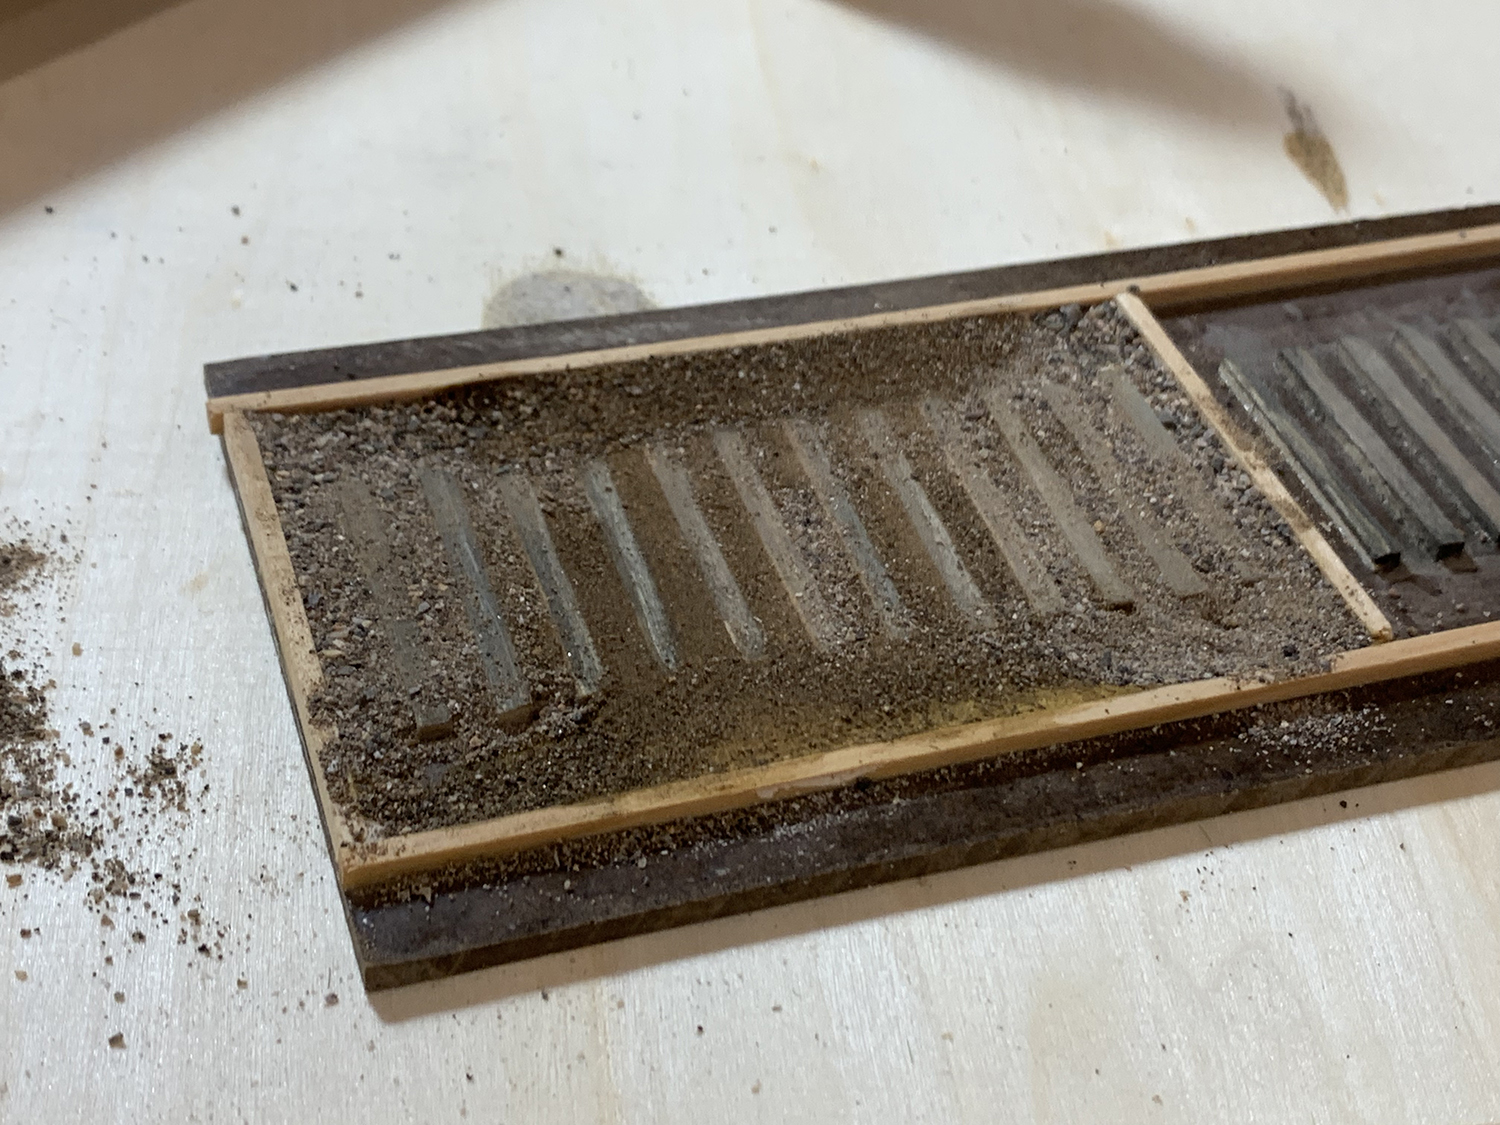
I quickly built a new test platform. Years ago I built a tie-spacing tool that allows me to quickly hand-lay ties. I have since bought the Fast Tracks tie jigs as they have a range of spaces that match mainline, secondary and branch tie spacings.Weathering ties once glued is much easier after they have been glued. It is a multi-part process – Dremel, knife, weathering pen, hand-carving, and sanding. This is the first time I used my Dremel to wear down the wood – much easier than doing it by hand – and I was very pleased with the results. One has to be careful not to overdo it – one only needs a gentle treatment to begin with. The wood grain should be as fine as possible otherwise the weathering starts to look over-scale. Hand-weathering and carving is next followed by a little sanding to remove burrs and blend in the worn grain effects.There are two types of test that I use: dry tests (no glue) and wet tests (glued). This is a dry test where I just dumped some ballast mixture on the test and added some color to the ties just to see how the weathering would come out. Looked pretty good: the weathering was not overdone and wood grain and carving came out nice. I didn’t glue this down and once done I just tipped out the ballast.This is the start of the wet test. The method involves spreading Woodland Scenics Foam Putty over and around the ties so that ties are more or less buried. I’ll sand the top surface once dry and then start carving out the profile. Once the profile is carved I’ll color it and then add layers of different grades of ballast.This is result. I used three grades of ballast starting with the finest (almost dust) and then gently added larger grades. I also colored the ties using some marker pens and let the dirt add another layer of weathering to the wood. I felt that was heading in the right direction and decided to use this technique for the diorama. There is still plenty to do such as add vegetation, dig out ties, create pot holes but for the moment this was a good foundation to build upon.
I will post on the final diorama version in a few of days. I’ve almost completed it and it’s worth writing up a full post on that build alone.