New tests, old tests.

I have a testing schedule which I will work through over the next weeks:

  1. Road surfaces – working on this now – see below.
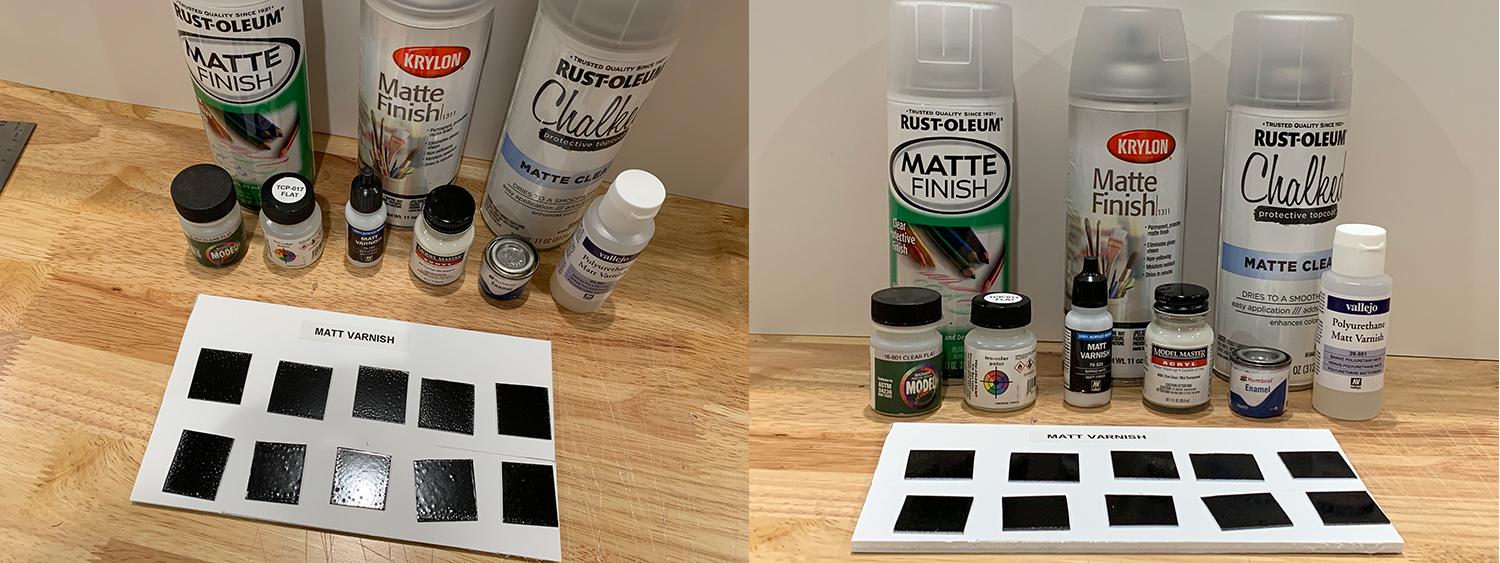
  2. Matt varnish –  I’m looking for the perfect matte varnish – one with no sheen! working on this now – see below.
  3. Trackbeds – I’m going build some more railroad trackbeds to test different grassing and track weathering ideas.
  4. Ammo oil brusher –  New product test. I’ve been watching military modeler videos on weathering and they recommended this product.
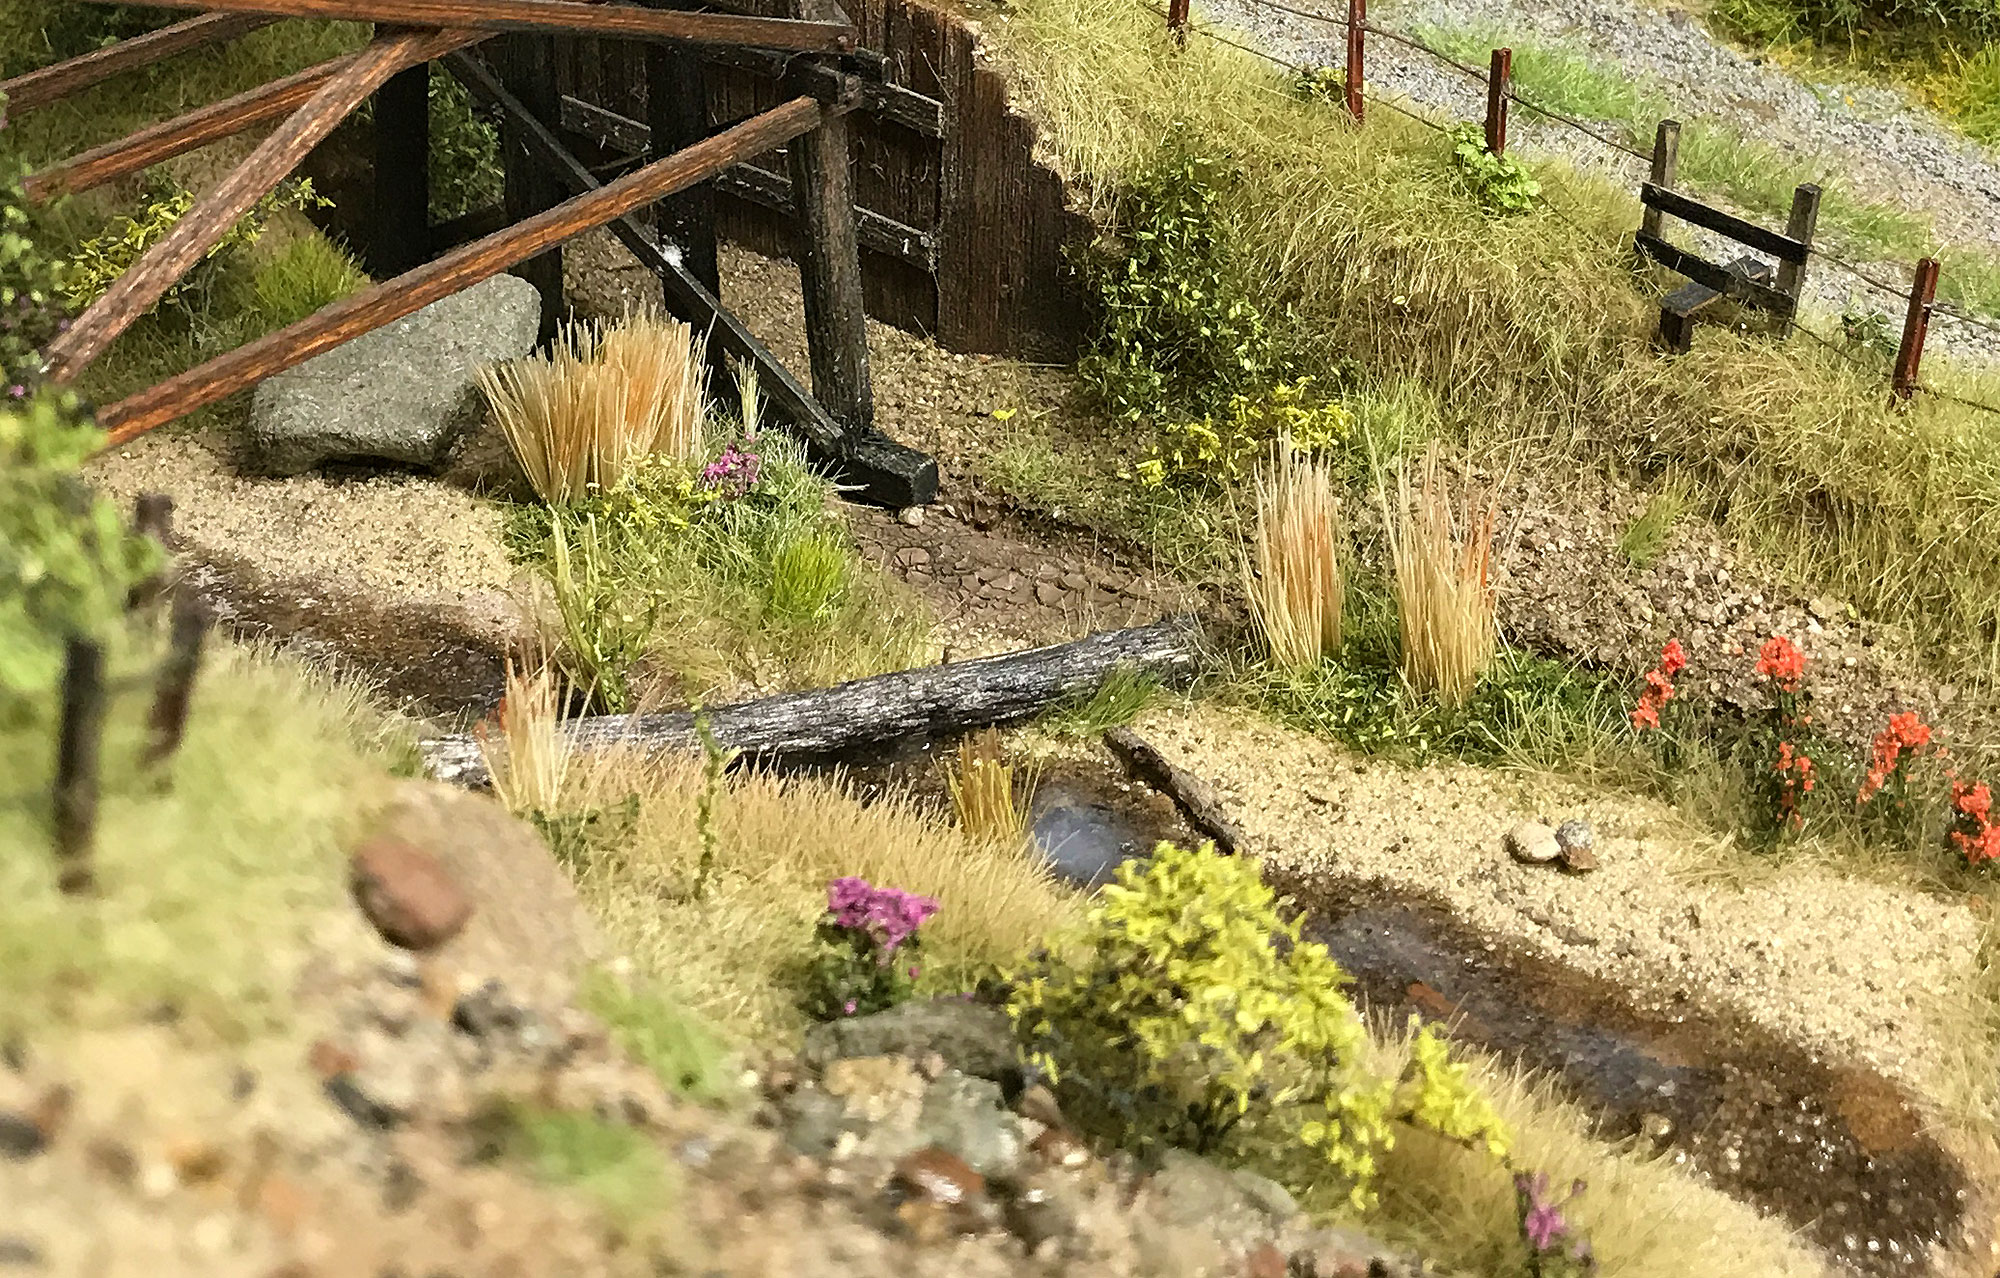
  5. Grass static applicator – I need to get better at using my static grass applicator. I’ve seen so many fantastic example of grass on model railroads and want to try to do better job myself.

Old tests either completed or nearly completed:

Crackle test is done, see other post on this. Weather-It is done – I found the product to be no better than the alcohol and ink method. Winsor & Newton Pigment markers – still have to purchase and test the missing shades of grey but so far they have been fantastic and I look forward to using them in my modeling.

New tests currently been conducted:

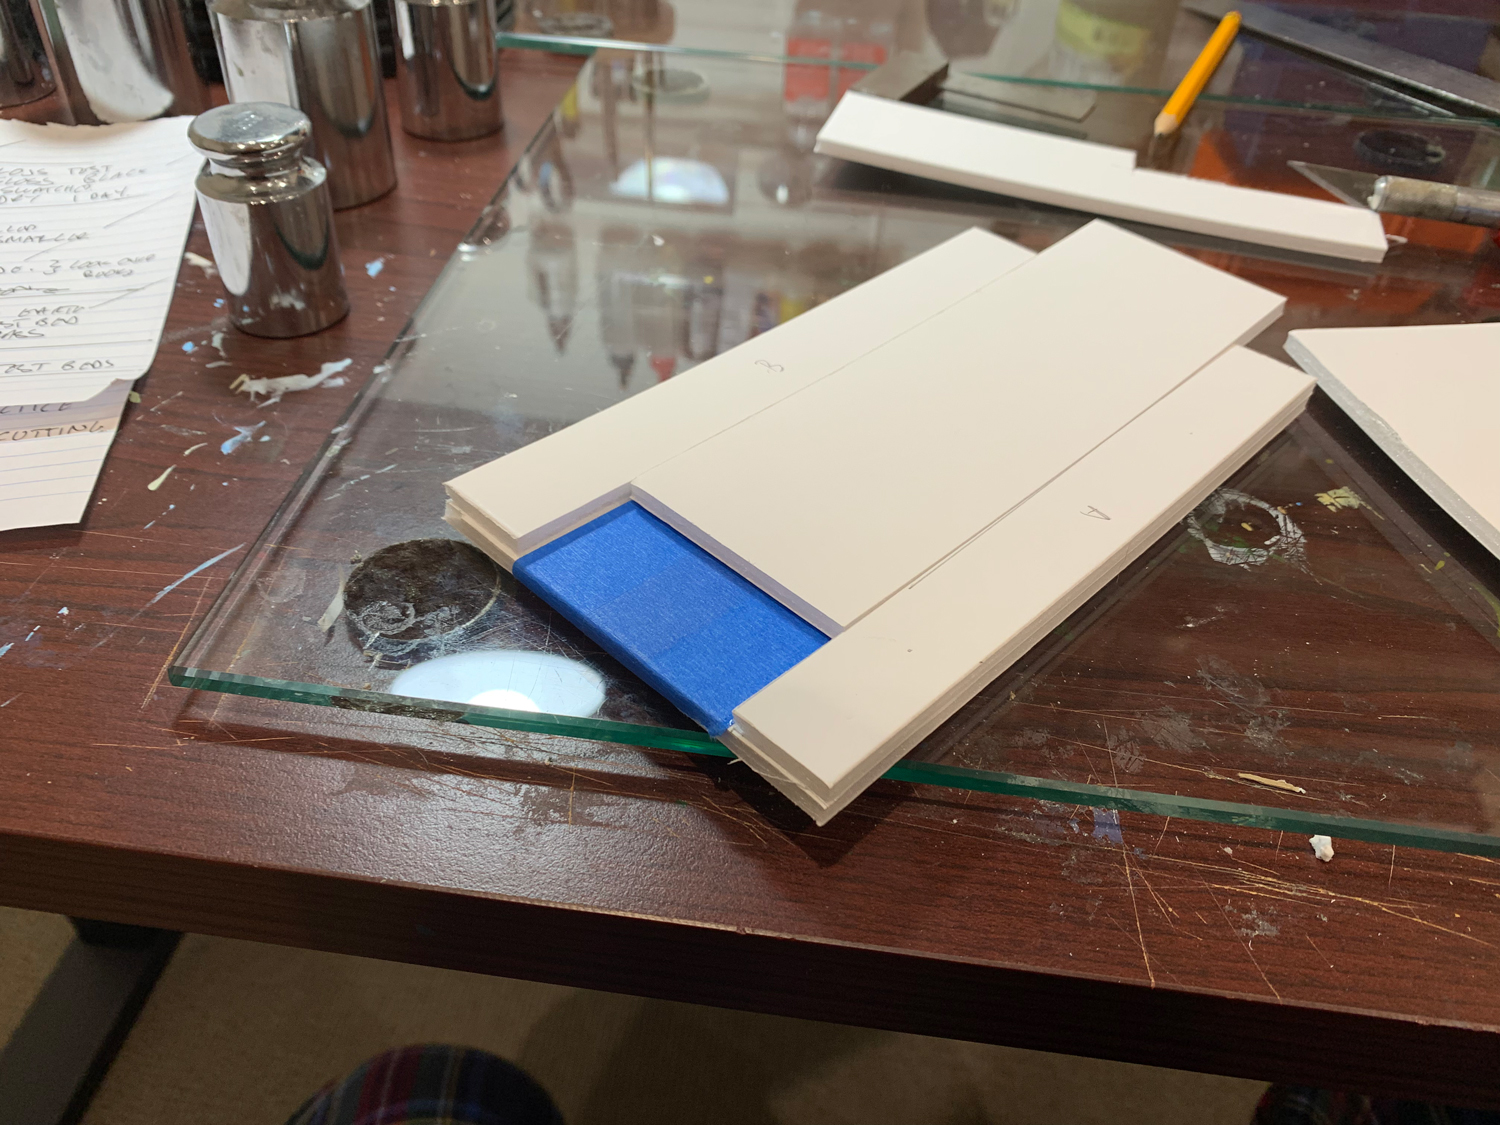
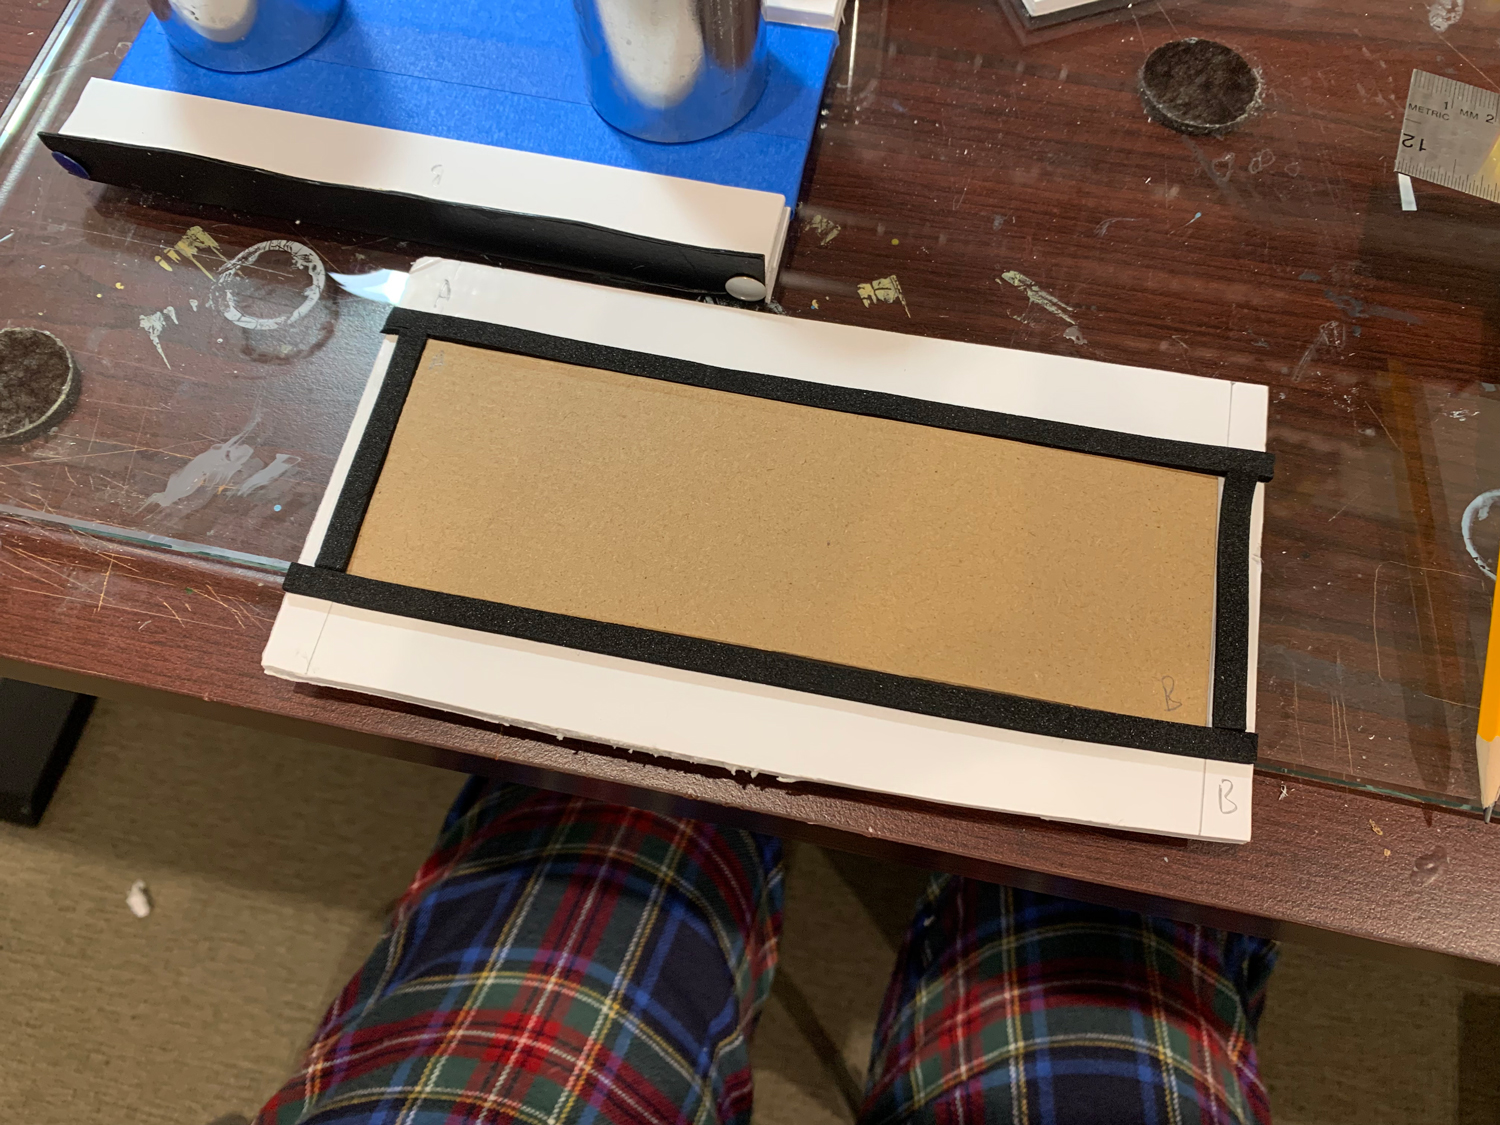
Asphalt road surfaces

Yes I have begun. I am glad I waited a couple of weeks as it gave me time to think things through. The test is the first step to creating a roadway surface for the model. As I want to build, color and weather the roadway on my desktop and then move the final result to the diorama I wanted to split the test into two parts.

  1. A test bed into which I can slip different road surfaces to give me an idea of how things are looking. This will have a grassy side to replicate the grassy side of the diorama (and generally a road in country).
  2. A reusable road-surface jig into which I can pour the road surface mixture. I want to create lots of variations of road surface and this jig will allow me to create one after the other.
The test bed. I want to be able to slide in road surfaces that have been created in the jig. The sides will act as grassy borders to the road surface.
The road surface jig. I’ll be able to reuse this to create as many road surfaces as needed. The jig allow me to pour in a road mixture, let it dry, extract the result to then color and weather. Note my pajamas  – it’s around 6am.

I’ll post the step-by-step methods of the test when finished.
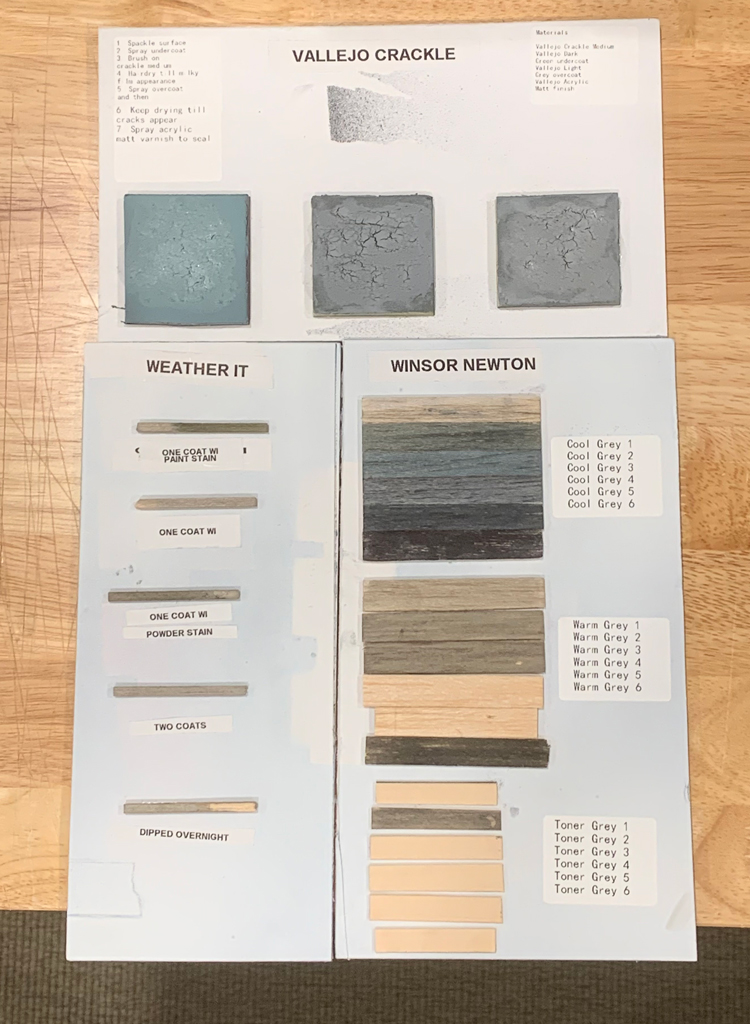
Matte Varnish

I’ve been very disappointed with the various matte varnishes on offer and wanted to spend some time trying out various products until I strike gold and find a matte varnish that does not have any sheen. I find that in photographs of models, most that have been given a coat of matte varnish have a slight unrealistic glow. That’s what I want to avoid. I’ll be working on this test this week.

These are what I have on hand. If I am unable to find a varnish without a sheen I’ll continue looking.


Testing

Testing is going to be an important part of modeling for me moving forward. I don’t want to experiment on the final model or layout and would rather have a method figured out and practiced before applying it. In the past my impatience to see the final result tripped me up again and again. A method would be tried and I hoped that I got it right the first time. However that usually was not the case and I found that I would have to backtrack and start over. Sometimes after days of preparation the result would have to be scrapped leaving a messy stage on which to build the next attempt.

Most tests are simply preliminary stages of a build. I will practice making roads and then build a road. The tests simply help me work out the method. Other tests are standalone and not related to any particular build and would include trying new products, tools, and methods. I would write the steps or results down and store them with the test to refer to then in the future thus saving time down the road when I came to actually apply the test to the layout.

A typical test not related to any particular build. In this case I’m testing the three ranges of grey marker offered by Winsor and Newton. The markers are actually no longer being produced which is shame because they stain wood beautifully. I’m still in the process of collecting the remaining shades of grey. Also I purchased a label maker to make keeping notes a much more organized and easier task. I used it to print out the labels on the side. This card will be used for reference moving forward.


This is another product test. In this case Vallejo Crackle Medium. I’m working out steps and variations. I’m hoping to use it on the diorama in some capacity. I have a few more steps to go before this test is complete. Once again I will print out the steps using my label printer and store the results on a reference card.


This is a method test. These are the results of the first round of roadbed tests I built a few weeks ago. I’m about to start over in a much more organized way, keeping notes on materials, ingredients, steps, and particular methods employed. They will eventually be stuck onto a reference board/card and at some point a final version/test will be used on the diorama.


Tests need space and the more space I have the more tests I can run simultaneously. Here are the three main tests for this week. I’m working out the next set of tests right now.


Workspace

Loving my new workspace. It’s really nice to have tools and materials at arms length. I still move around the whole room quite a bit while modeling and one of the nice side effects is that I’m losing weight because I’m so much more active. The other day my wife mentioned that my face looked thinner!!

The space around me is mainly for what you can see – paint, mainly Vallejo, and I’m buying at least 10 Vallejo Air paints each month till I have the full set. After that I will start collecting their Model range.

Other shelves have glues, decal liquids, thinners, undercoats, markers and paint brushes. I have also bought a small tool holder for those most often used tools such as knives, tweezers and rulers.

I’m really enjoying watching this space come together.

DC Wiring Part 1 – Lay track and isolate sections

Now that the control panel has been designed and fitted I have begun the wiring. The steps are basically:

  1. Lay missing sections of track.
  2. Isolate rails .
  3. Connect sections to the control panel.
  4. Wire up the crossovers and connect them to the control panel.
  5. Add the turnout motors and connect them to the control panel.
  6. Add three docks to the exit points for the removable cassettes.
I had previously left several sections to be laid with rail while I focused on the turnouts and the crossovers. I have begun to lay those sections. It sometimes has meant removing rail and adding new ties but the goal is to lay the rail in complete and isolated sections wherever possible. The various tracks that will comprise a single wiring section will be powered by a single bus connected to an on/off (SPST) switch.

Continue reading “DC Wiring Part 1 – Lay track and isolate sections”

Tool roundup – Part one

Hi all.

A bit of a long break but now just getting back to normal. I took a couple of days off and drove around the northwestern part of Nevada tracing some of the route of the abandoned Modoc railroad. I have a post coming up about that trip. I also got a little sick and have been out of modeling action for a couple of weeks and only now am I getting back to normal.

In the meantime wanted to post something about tools. I like to make tools and I like to collect tools. Some tools get plenty of use while others not so much. Some tools are purchased and then sit in their boxes for years before I can find a use for them.

Continue reading “Tool roundup – Part one”

Calibration weights

One of the most useful tools I’ve purchased recently are calibration weights. I briefly mentioned them on the Railroad Line Forum but want to give a little more info about them here. Up till now I’ve been weighing things down using whatever I can lay my hands on around the workspace. Not only is it inconvenient, it is dangerous and time consuming. Inconvenient because often I need a weight right in front of me to grab, dangerous because I ended up using whatever I can lay my hands on without thinking how stable the objects might be, and time consuming because it takes time to find the right combination of paint pots, metal objects, and glass jars.

Continue reading “Calibration weights”

Scenery scratch pads

On a trip to the UK over the holidays I finally managed to purchase some Gordon Gravett books on grass and trees. I’ll say more about Gordon Gravett another time but in the meantime I’ve been wanting to get hold of these books for a while now. Unfortunately to have them sent to the States puts them in the $70 a piece range whereas I got them for about $30 a piece in the UK – affordable and well worth the price.

Continue reading “Scenery scratch pads”

Peco Static Grass Applicator

My Peco Static Grass Applicator arrived over the weekend. This is my first branded applicator as opposed to my hand-made (not by me) applicator.

The original Noch applicator (that introduced the static grass method a few years ago) is nearly $200 which is a crazy amount of money to spend on such a small and simple tool. Even though I could afford it I could never justify spending that kind of money and therefore via Ebay (and Australia and $30) I bought my hand-made flour-sifter version. It has served me well for several years now.

Continue reading “Peco Static Grass Applicator”