Click on any image to see the full-size version. Most of these images were taken over the last couple of years and have been posted on the Railroad Line Forum. However I’m planning another photo session at some point in the near future so hopefully we’ll get a whole new set of images in here soon.
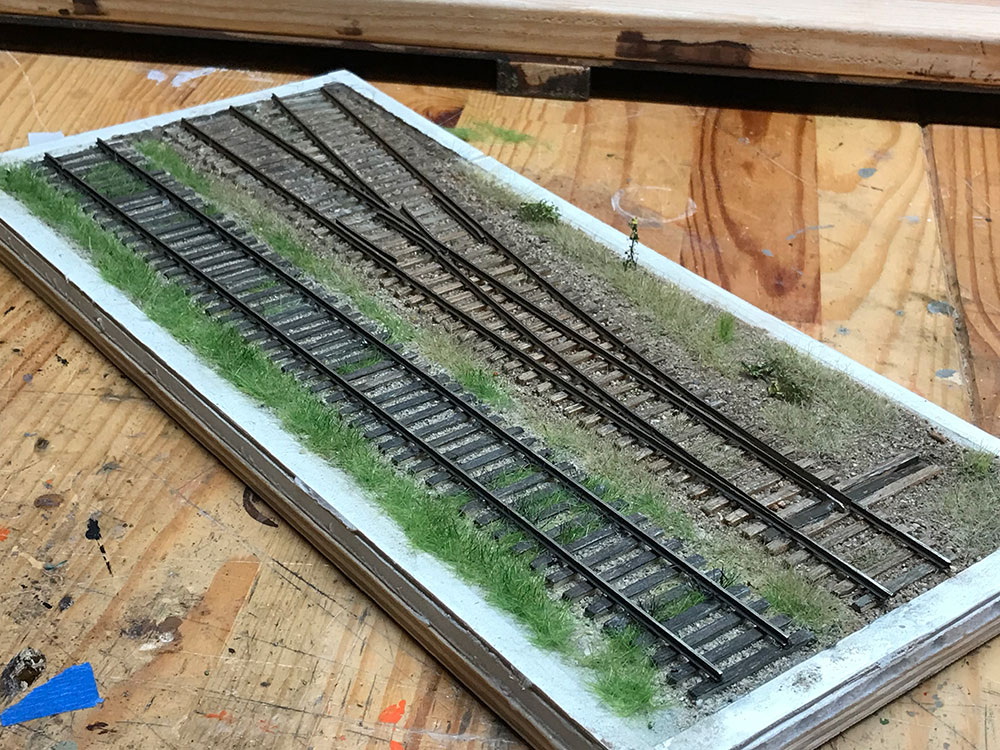
Brook Smith Turnout
This is a test of the Brook Smith method for turnout construction. I used rivets from the Scalefour society in London along with Fast Tracks rail and ties. My next task is to incorporate track details such as tie bars, tie plates, rail joiners and rivet strips. The construction diary for the Brook Smith method is here: http://thedepotonline.com/currentprojects/the-brook-smith-tracklaying-method-for-usa-track/
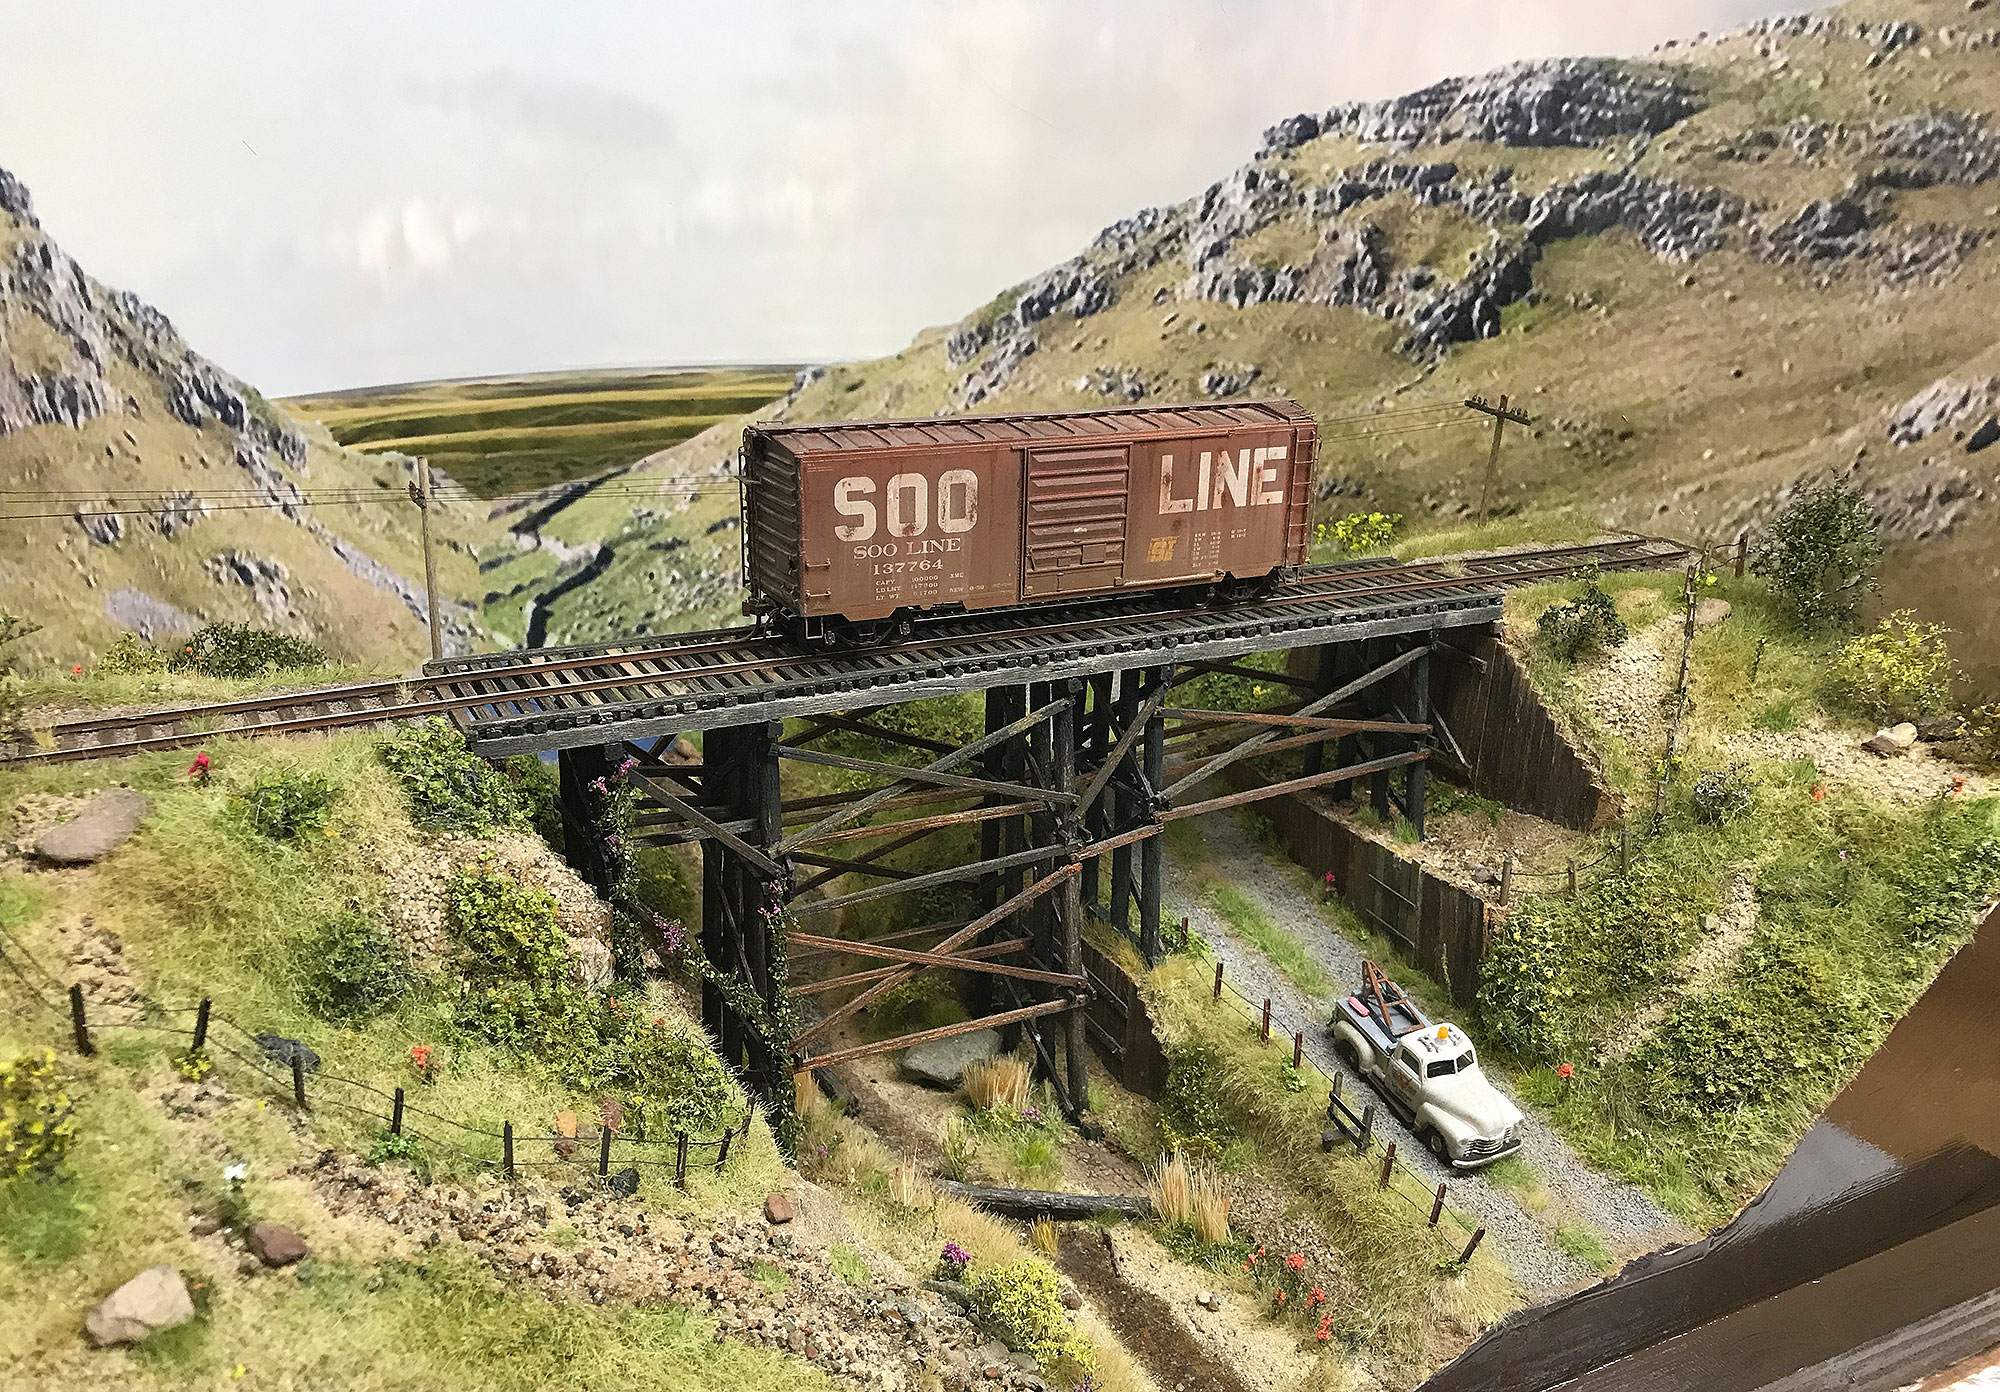
The Trestle
Ten months work but then I wanted to do a good job. I was really trying to figure it all out. I had my head buried in the Scenic Express catalog for most of that time looking for materials that still looked good while the camera (iPhone) was close up. Can’t wait to do another scenery project. Here’s the full construction diary for the project: http://thedepotonline.com/currentprojects/the-trestle/
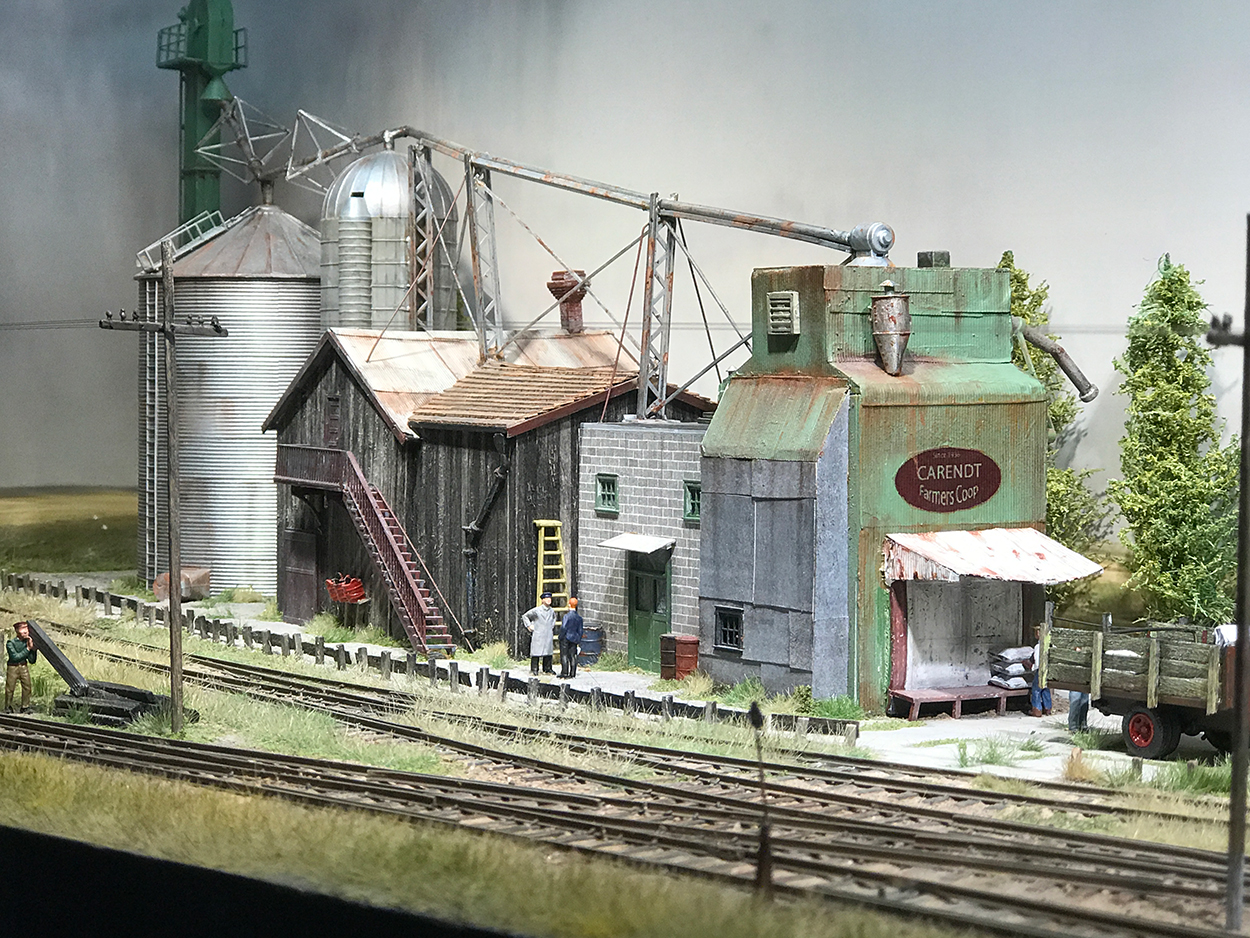
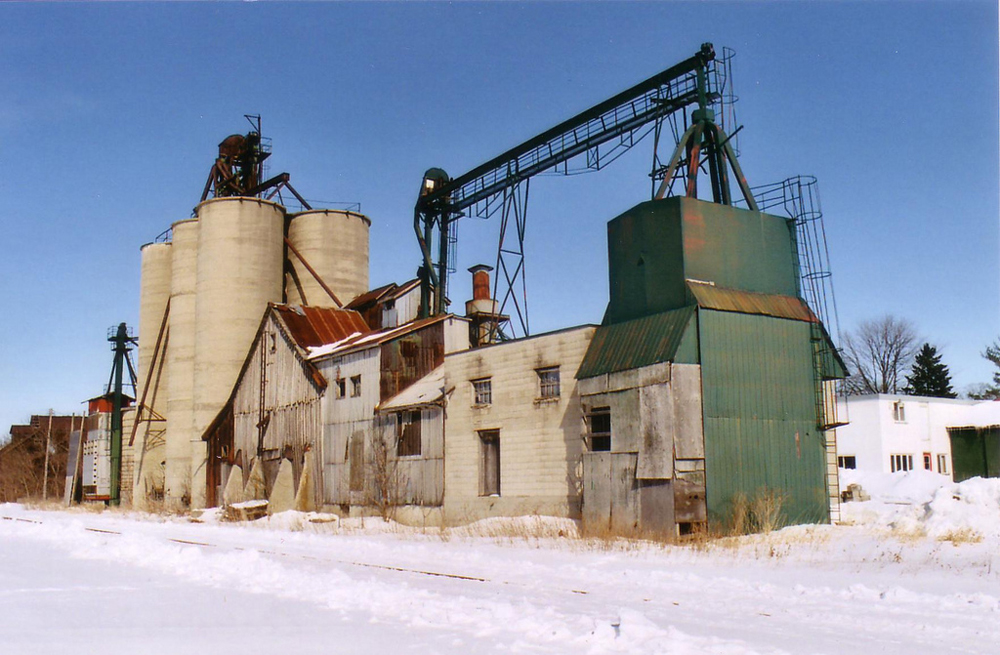
The Grain Elevator
Mostly scratch-built, the grain elevator was based on a Canadian prototype. I wanted something with a lower profile/height than the more traditional tall elevators. It’s made from styrene and basswood. The piping probably makes no sense to anyone who knows how these things work. I did a little research but ended up throwing the installation together based on what I thought looked plausible. I’ve since read Jeff Wilson’s book on the railroad grain business and it has brought me up to speed on the inner workings of grain elevators. The next version of this group of buildings will hopefully portray things more accurately.I based it loosely on this picture. I really like the ramshackle feel and the range of buildings strung together over time to get the basic job done. I want to rebuild the elevator and base it much more closely on this image.
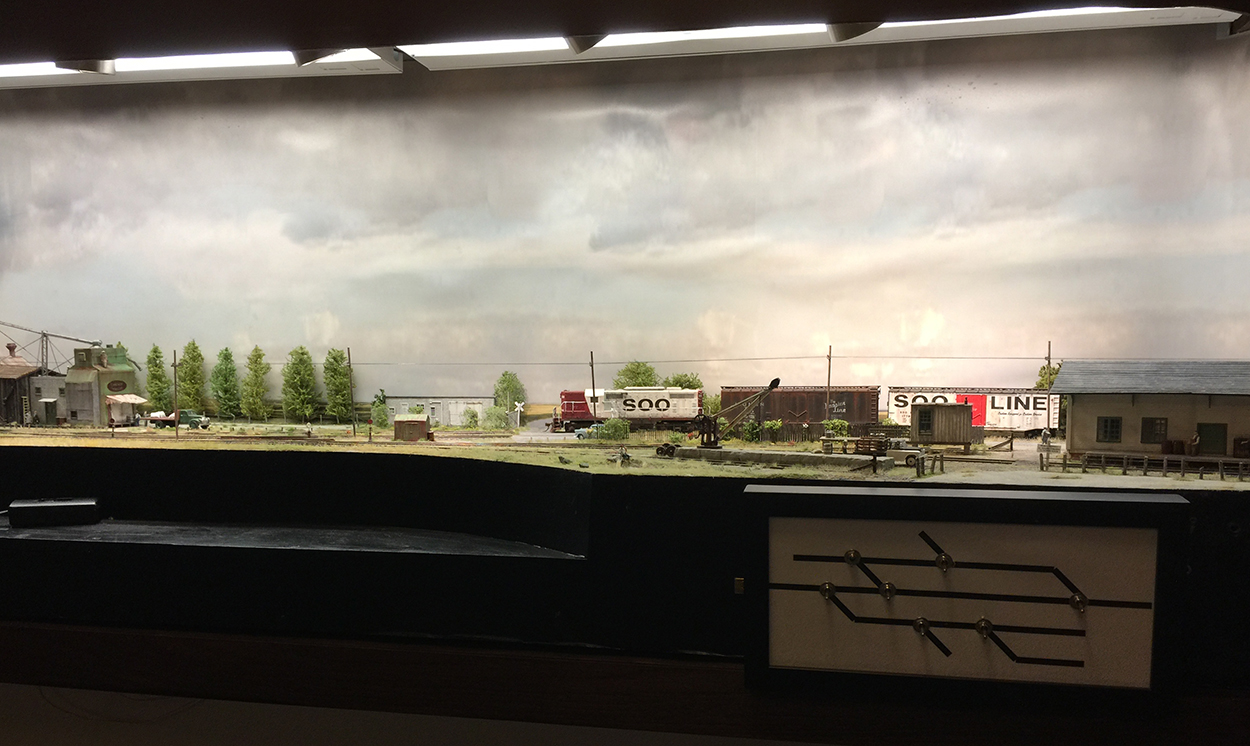
Wide view
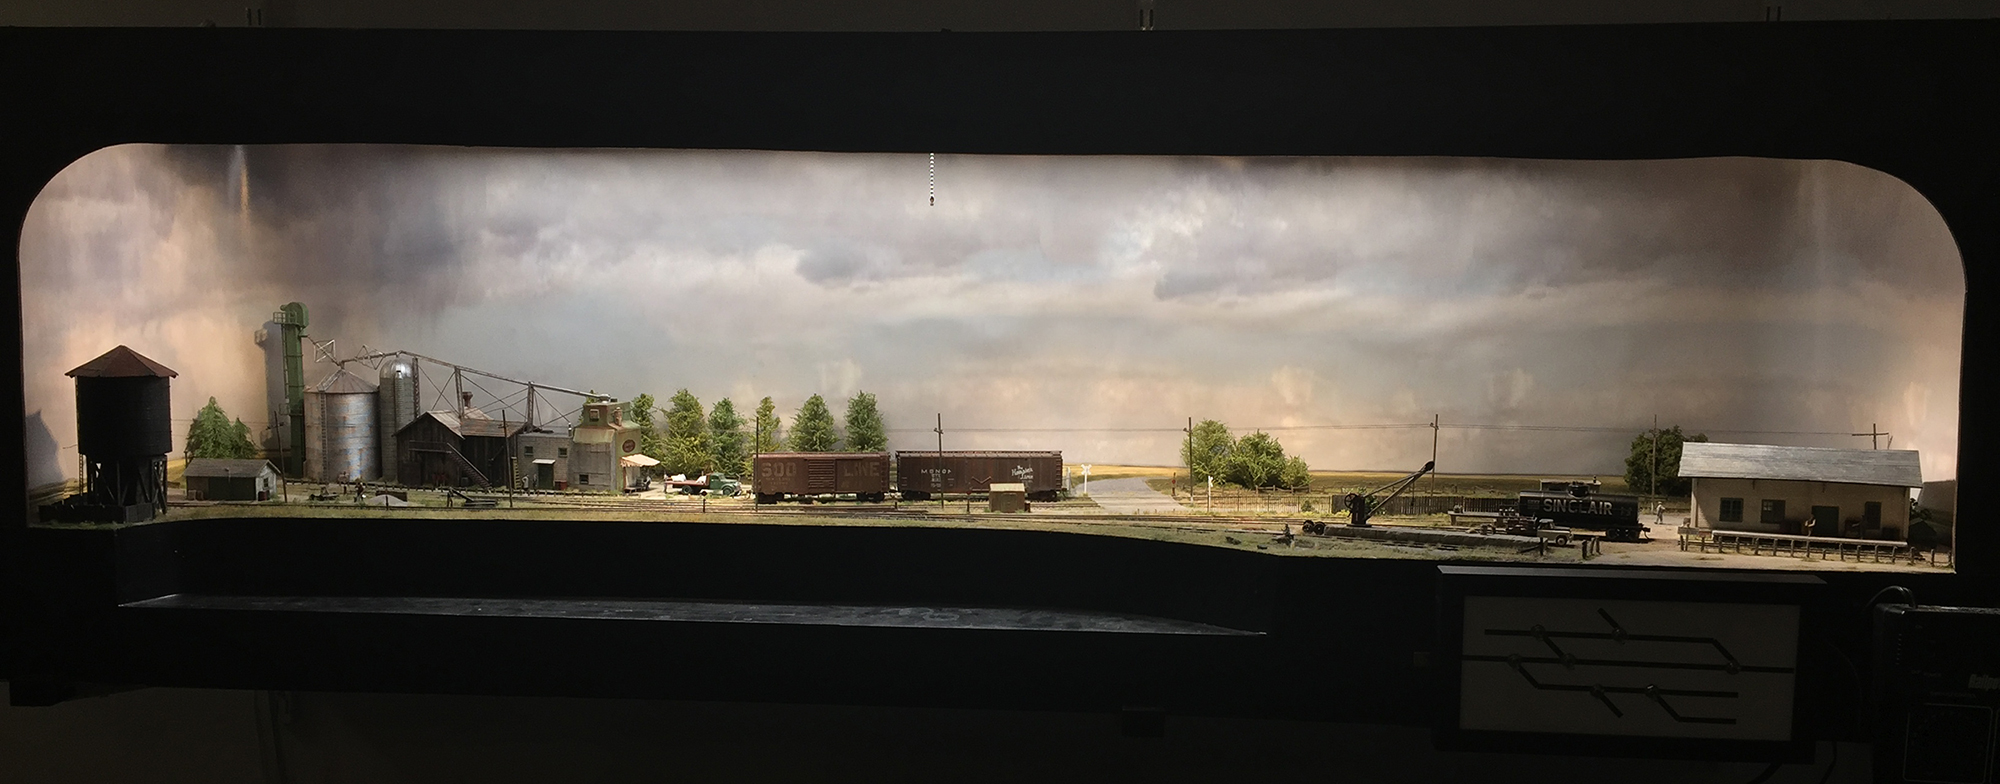
A ground level view from distance showing the lighting. The fluorescent lights are the second set fitted in the last two years and cast a much more even range of light across the module. The only remaining issue with lighting is with on the depot itself: it has shadows along the front and needs a separate light.
Roadway fade
The backdrop took several attempts to get right. I had just installed the new backdrop with the roadway fade when I took this picture.
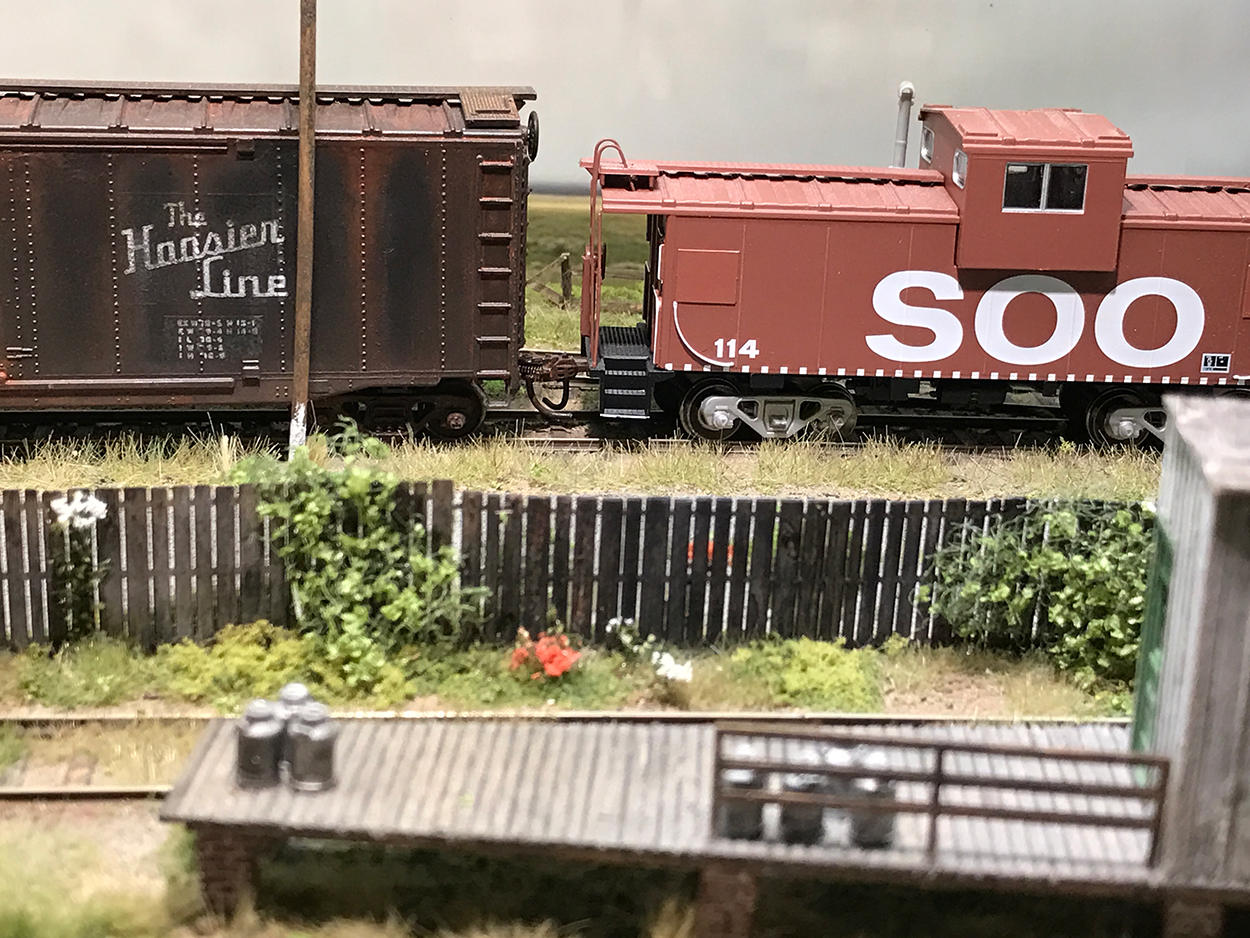
Caboose
I have a weathering project coming up and this caboose is top of the list for a redo.
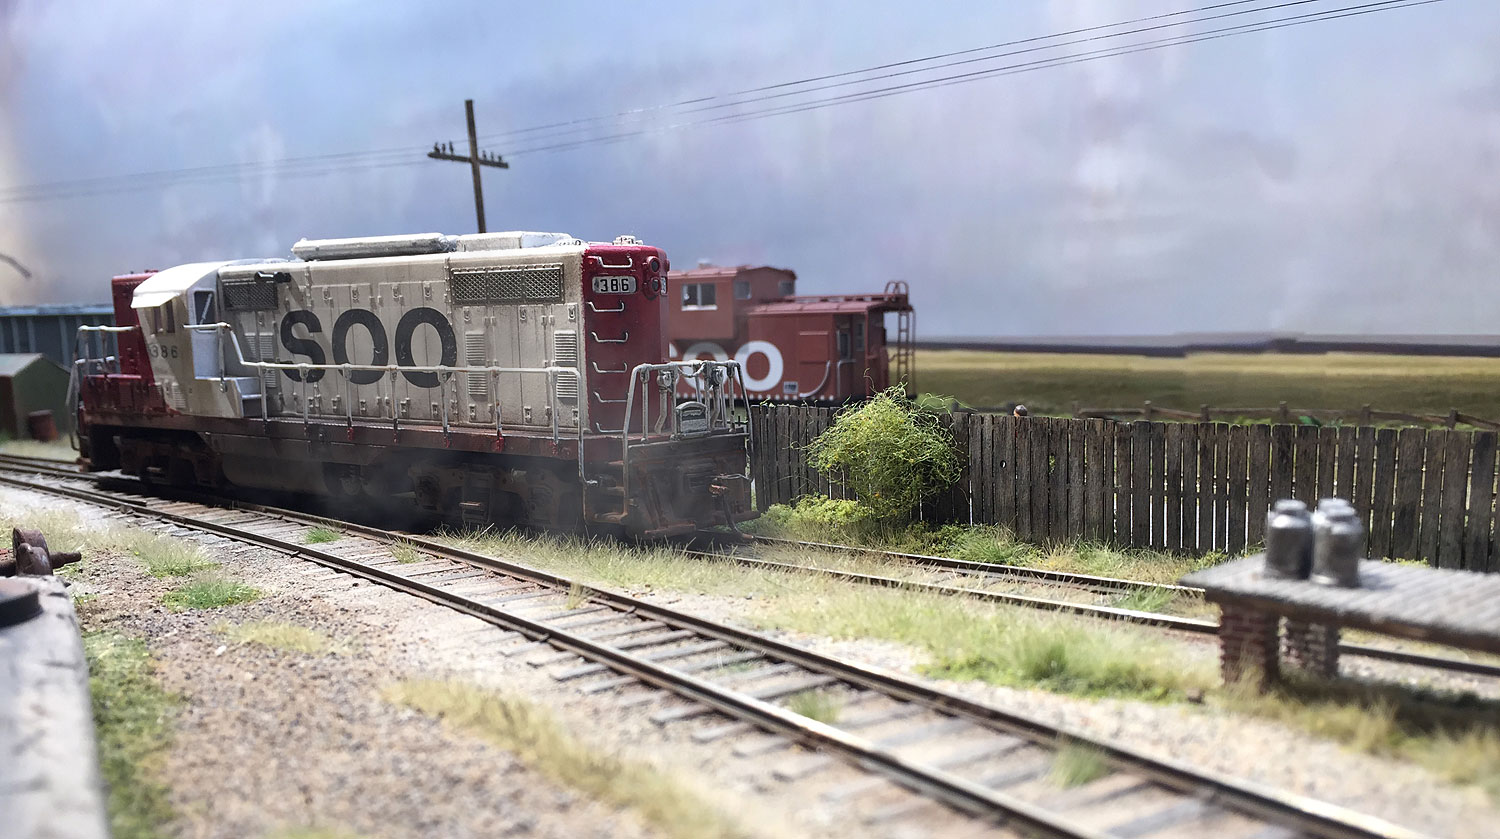
Switching
The local has arrived and is switching cars. Storm clouds are on the horizon.
The loading dock
The loading dock as made from polystyrene. The crane was an OO scale Wills kit sent from the UK.
Evening time
The evening sunset over the depot. Eric (on the bike) sets off home to his supper.
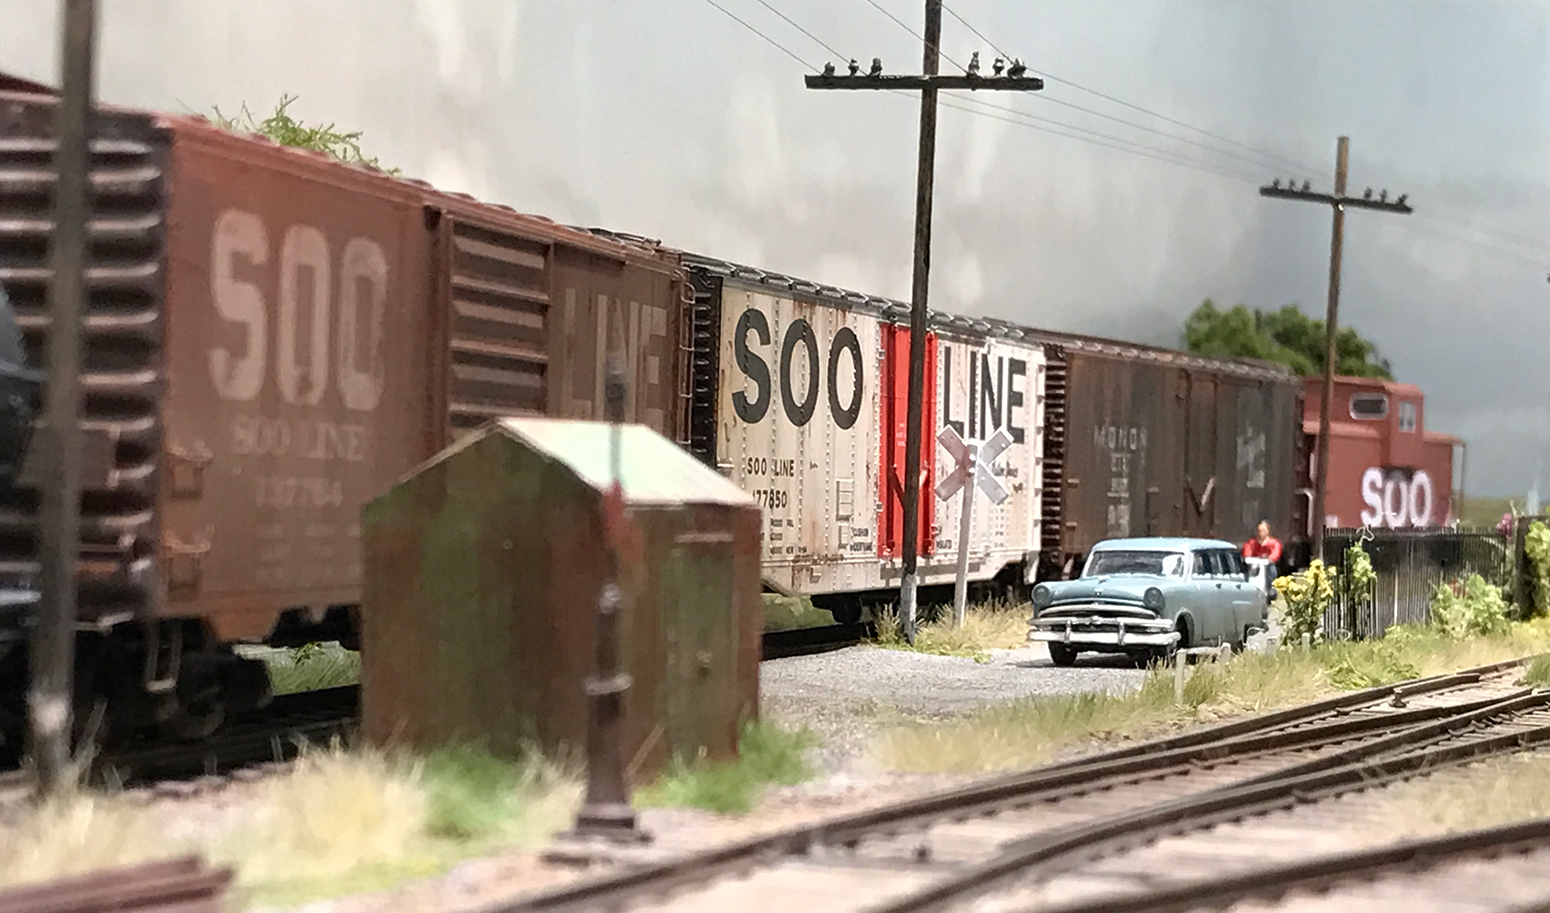
Supper is over, time to get back on the road
Our Soo Line crew have now finished supper and move off to rejoin the train for the final leg of their journey.
The freight yard area
This scene has changed since I took this picture a year ago. There are more trees added to the backdrop, a weigh house and a proper roadway fade.
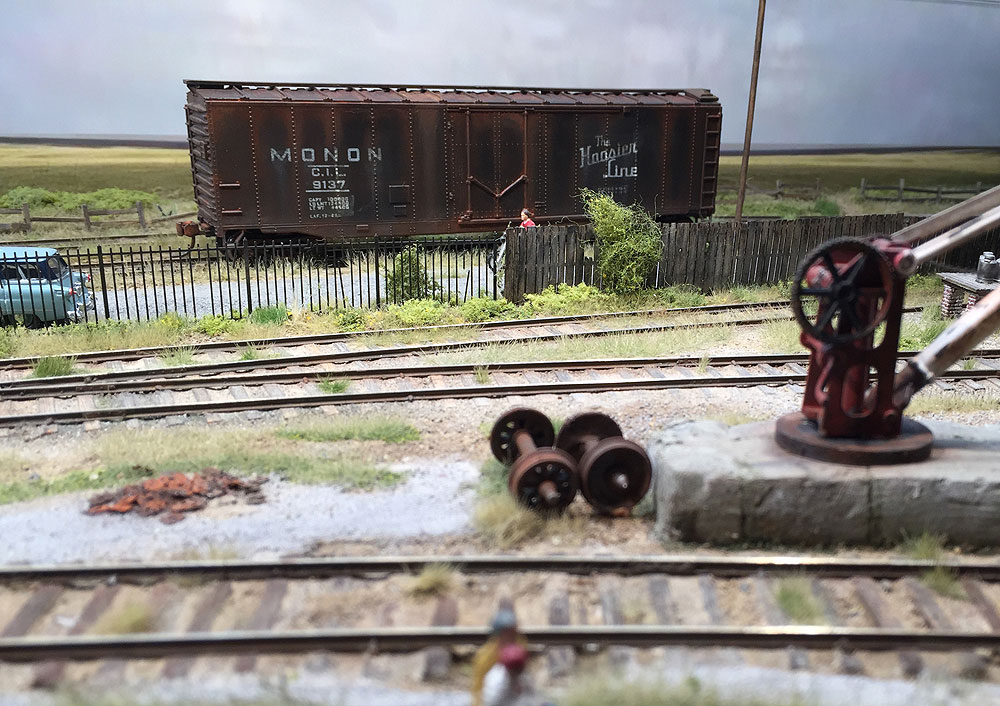
Monon boxcar
I like Monon boxcars. I think it is the name ‘Monon’. There is just something about that name that I find interesting. This was just an experiment to get some practice weathering with powders (instead of only paint). It started of as a bright orange Athearn boxcar. I spray painted it, added decals and did a basic weathering job on it. Not bad for an early weathering attempt. I have more Monon boxcars planned later this year, hopefully better painted, weathered and detailed.
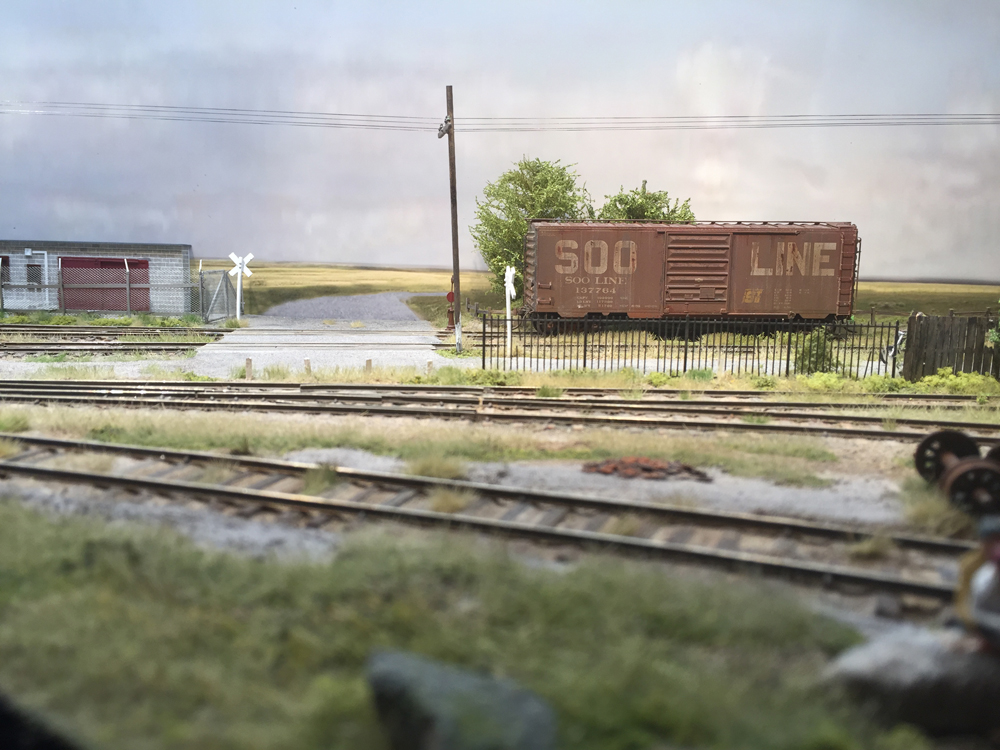
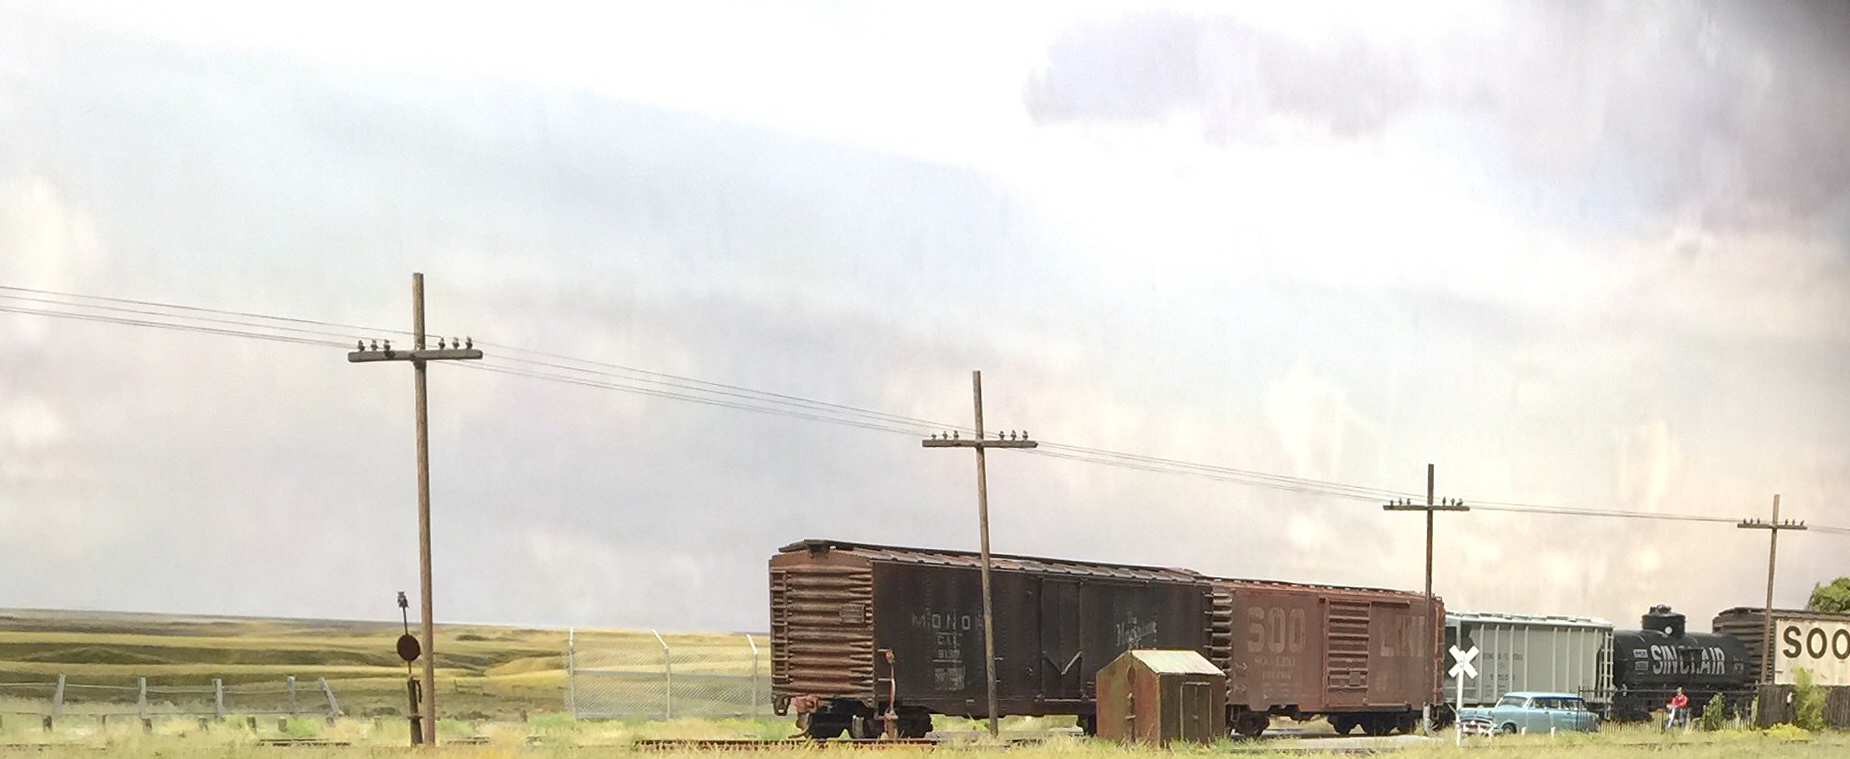
Boxcars in the distance
Even though the Monon boxcar is not finished I couldn’t resist this picture. I’ve always had a thing for boxcars sitting quietly on a spur in the middle of nowhere. I remember driving across the Central Valley of California a few years ago and seeing a grain hopper sitting by itself in a field in the far distance. It took me a while to realize there was a railway line running through there as the rails were hidden behind the grass. That’s kind of the feel I wanted for The Depot and one that I’ve tried to capture in this little scene.
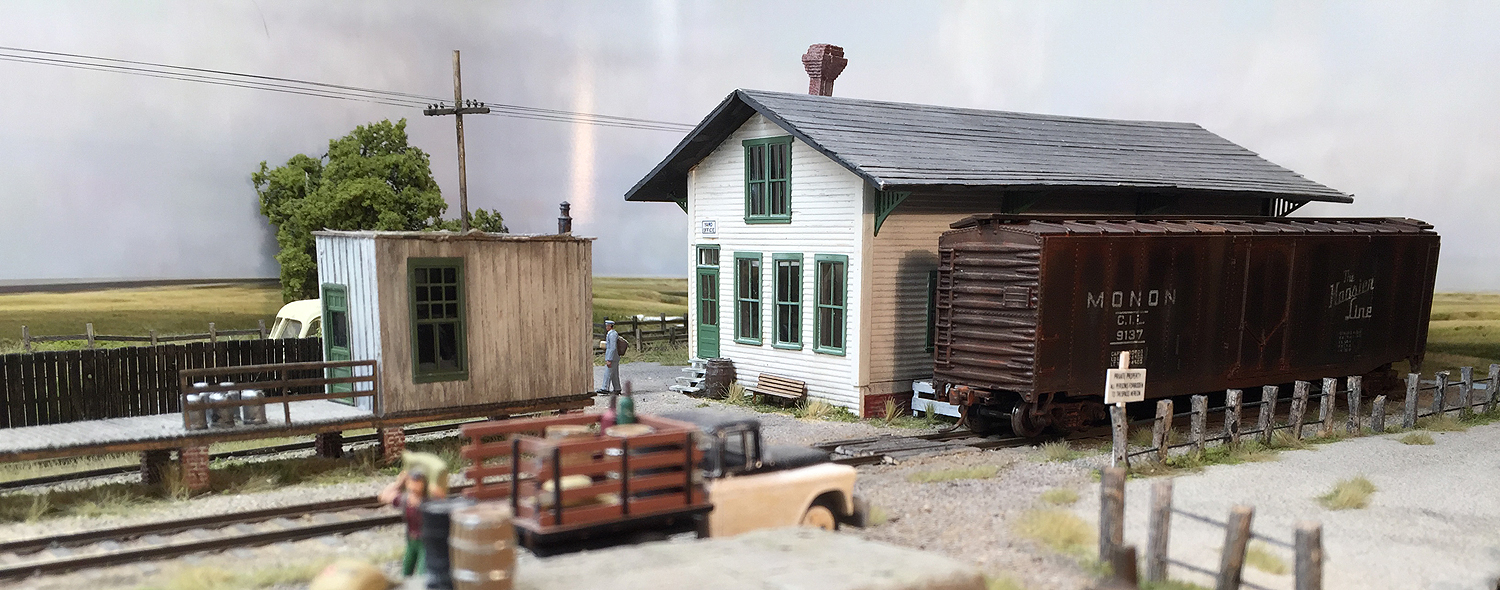
The depot
The first structure that I scratch-built for the module. It lacks an interior and other details but considering that it was an early scratch-building attempt I’m pleased enough with it. It is scheduled for an upgrade next year. My scratch-building skills have improved and I would like build a better version – maybe I’ll base the new one on a true Soo Line prototype.
The Depot module
There will be four main modules and a series of dioramas portraying this branchline. I’m currently building another module and the first diorama. Each module is 6 feet long by 18 inches wide and 18 inches tall and is housed in a specially built cabinet.
Onwards and westwards
The daily freight heads off into the west.
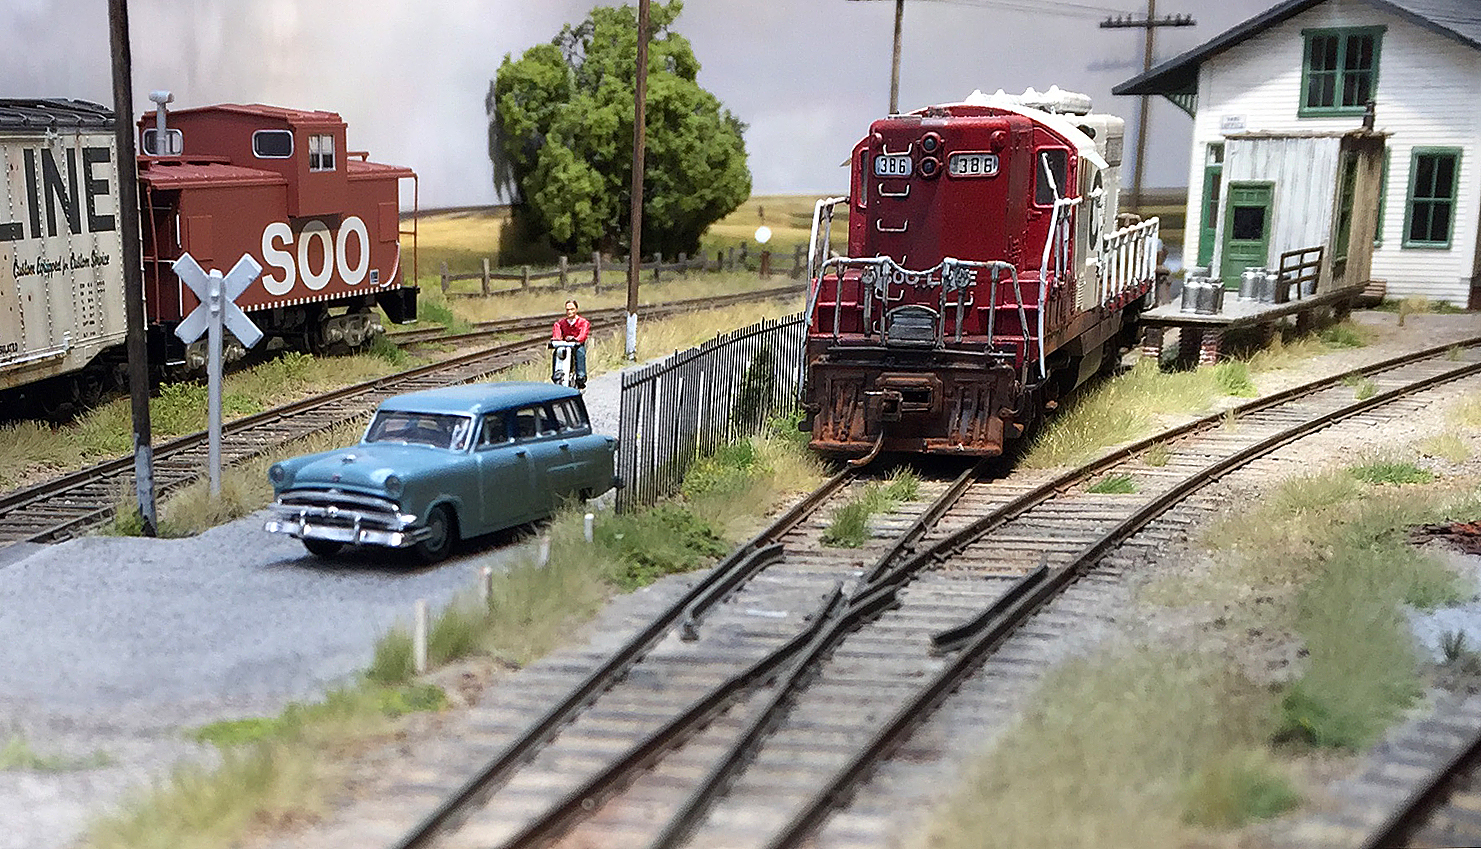
5pm arrival of the daily freight
It’s 5pm and the westbound local has just arrived. The crew still has a way to go to reach the end of the line. The train will arrive at its destination around midnight.
The daily freight
The local freight alternates east and west each weekday. Heading west Mondays, Wednesday and Fridays and returns Tuesday, Thursday and Saturday. The westbound freight arrives at 5pm. The eastbound freight arrives 10am.
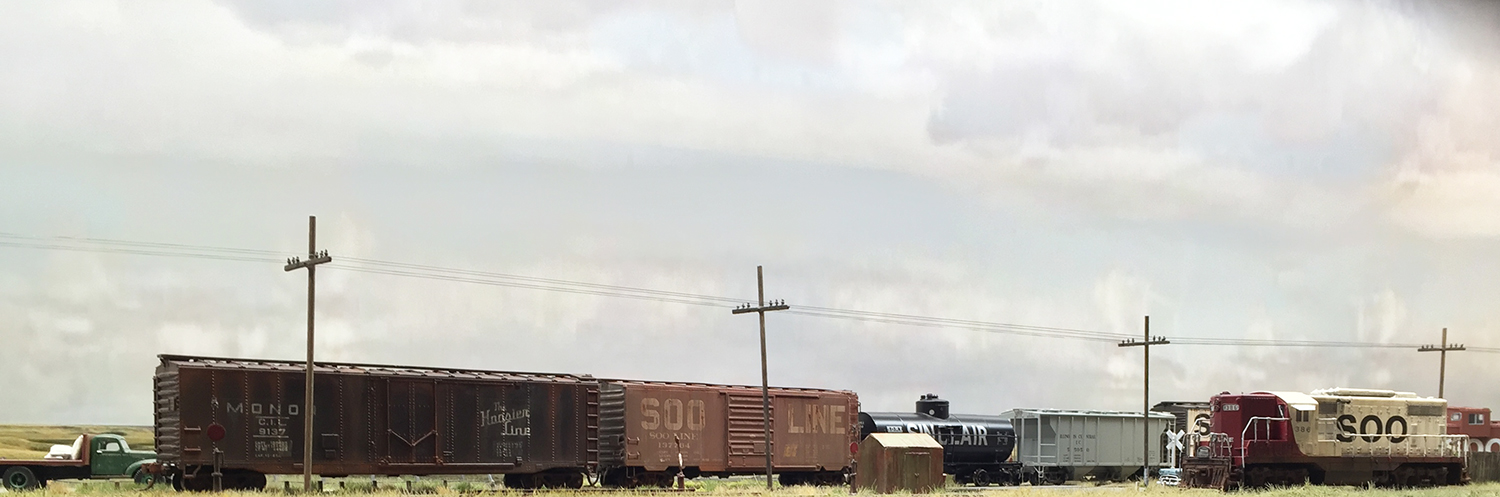
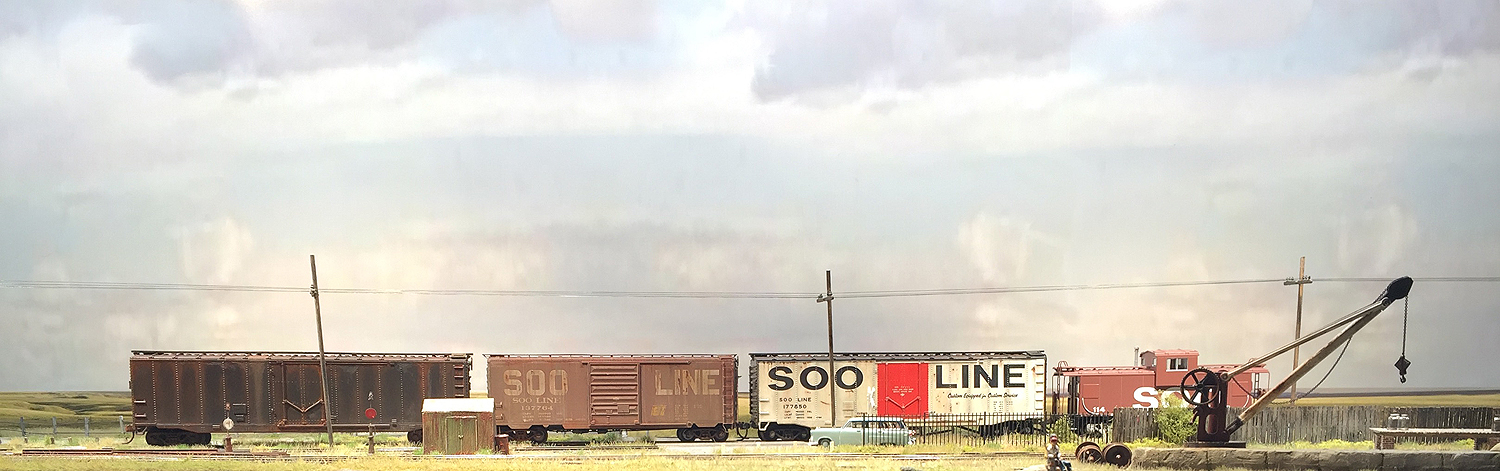
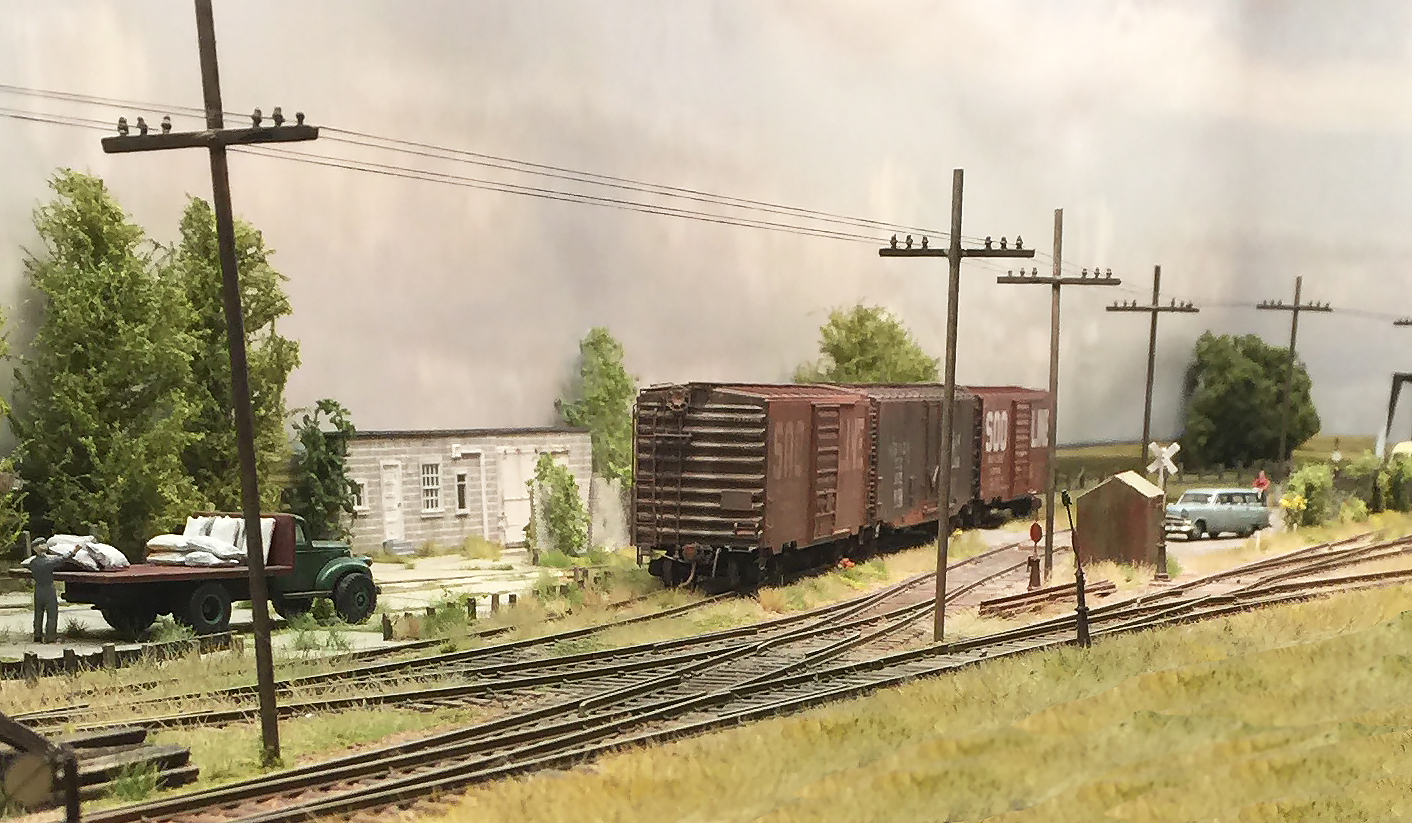
Grain season
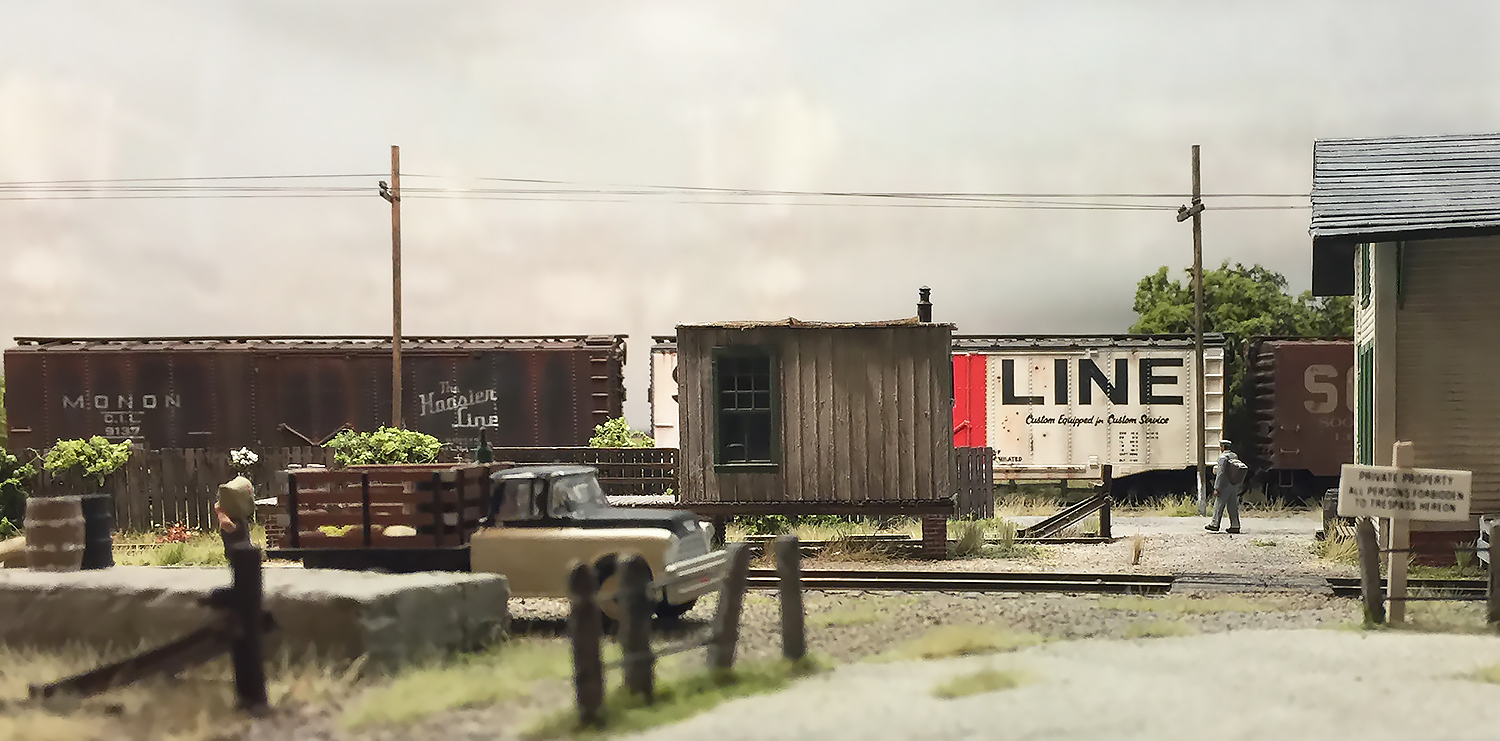
It’s grain season on the branch. The daily freight has passed having left these three boxcars for the grain elevator. It will return in a few days to pick up the cars and head back east to forward them onto the mainline.
Evening supper
The crew have parked their locomotive on this disused milk platform and are having their evening supper with the depot staff.
Birds sing and wires whistle
A quiet moment at The Depot.
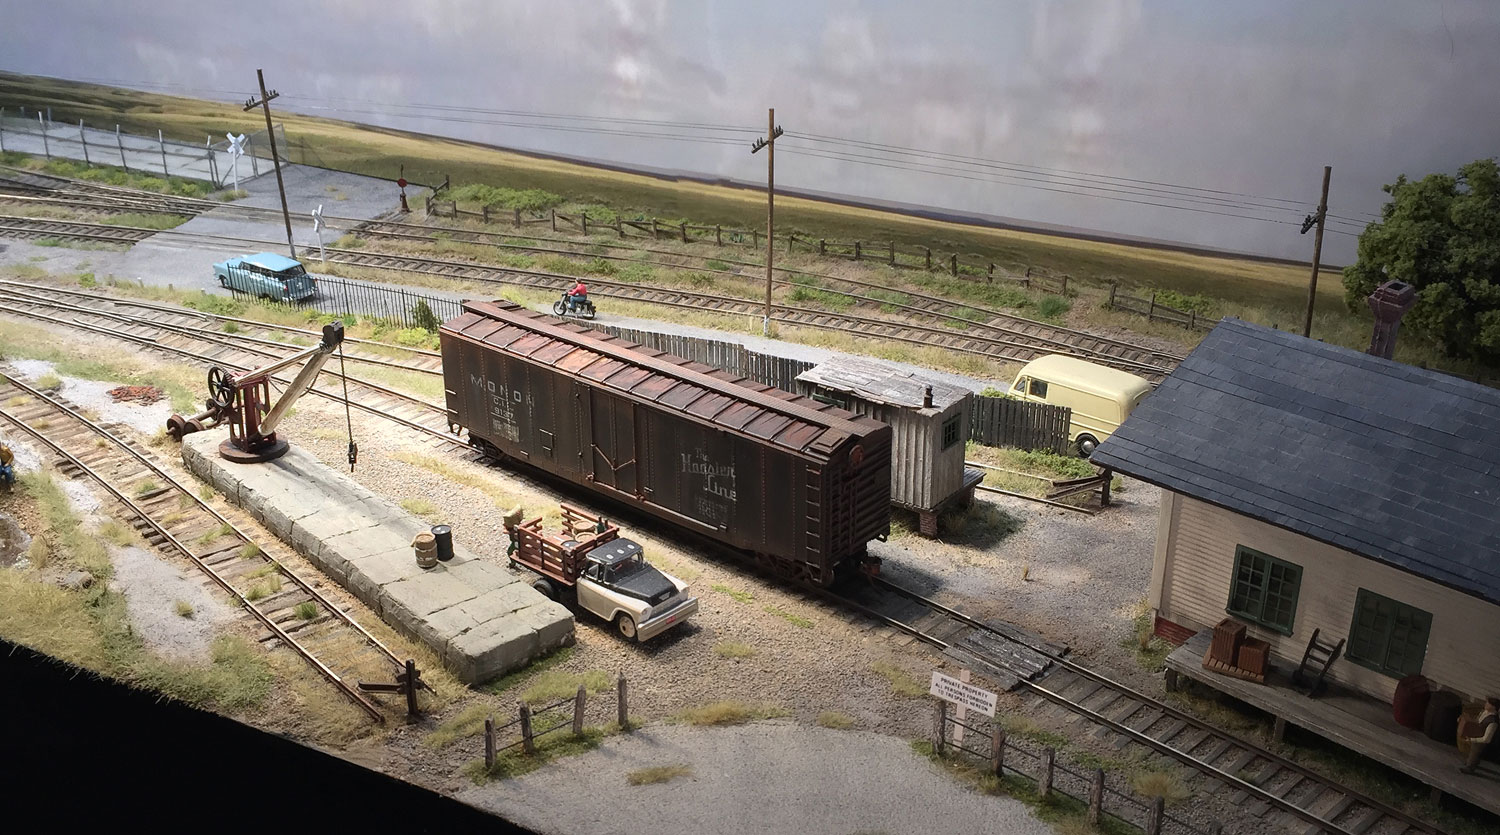
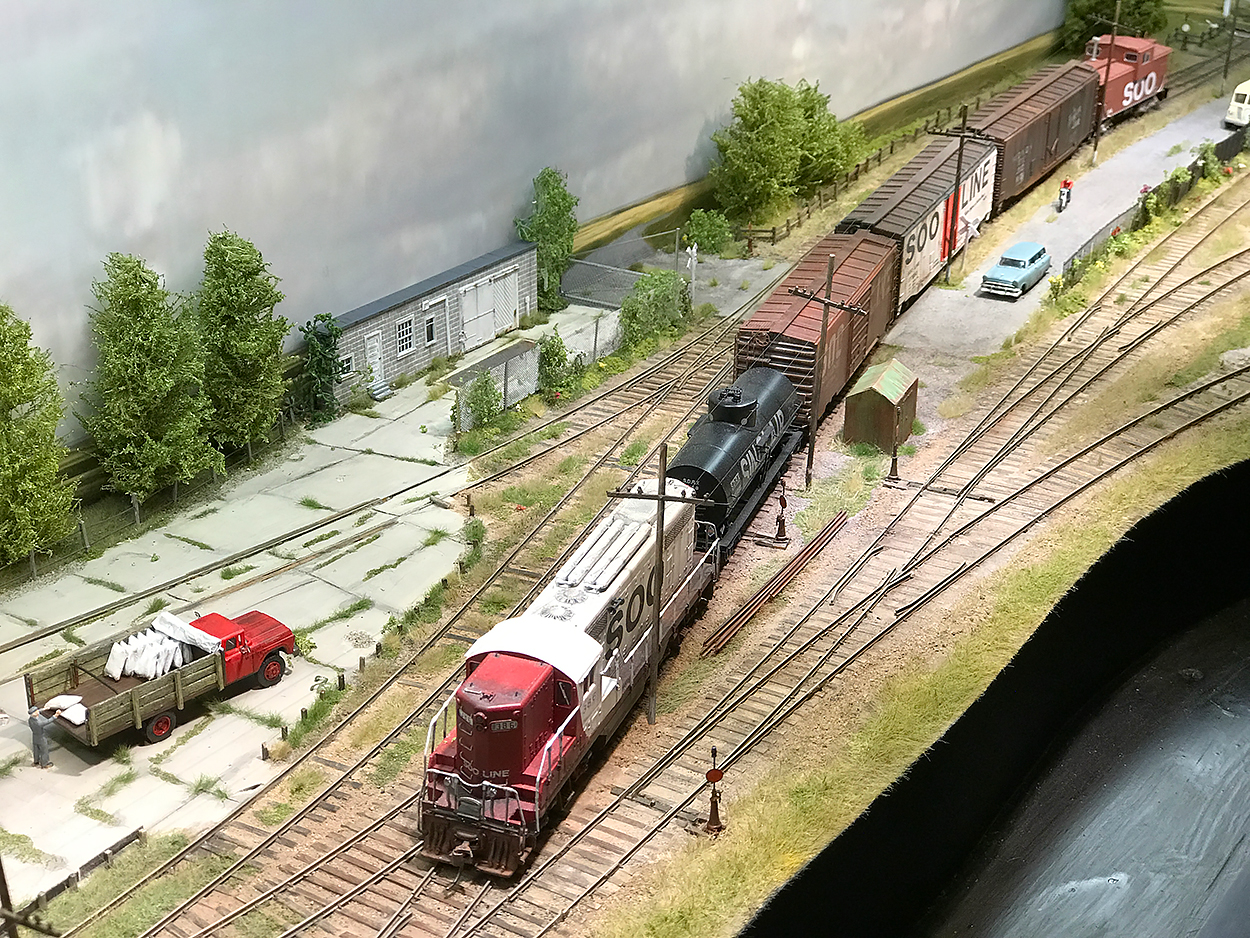
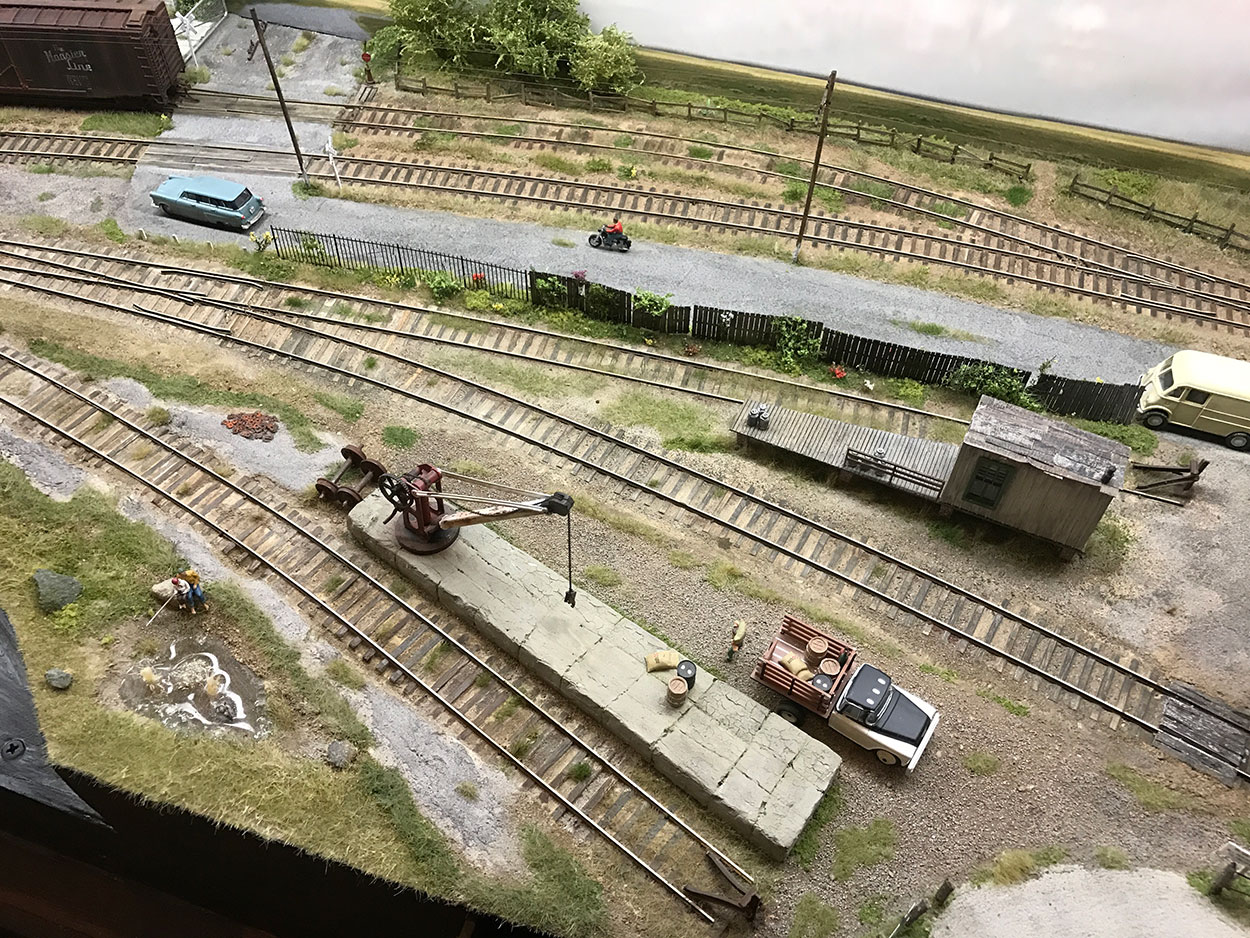
Birds Eye View of the Depot track area
Weathering track and landscaping track is an important part of creating a realistic scene and is as much a part of the landscape as buildings, bridges, embankments and cuttings etc. A realistic model should reflect the wear and tear of the track as well as the effects of weather and surrounding geography. With that in mind I tried to use color books to study the full range of colors and weathering that can occur to track in certain areas and under certain weather conditions as well as what kind of use the track was getting. Branches and sidings/spurs are obviously less well maintained and I tried to reflect that as much as possible.