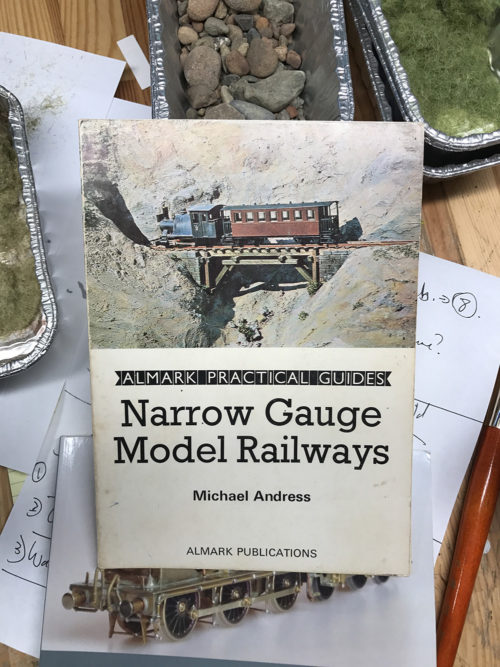
The first book on model narrow gauge railways that I ever read. It had an enormous impact on me as a 11 year old boy. I have yet to model in the narrow gauge but I'll get around to it eventually.
by Kumar Desai
The diorama is the first part of my weathering project. I want to improve my weathering skills but have decided that weathered models are best seen and photographed within a railroad setting. As such I decided to build a diorama photobox where I could have better control of the lighting. This ‘photobox’ also continues the story of the branchline and the trestle is set within some hills close to the end-of-the-line.

This little project includes a trestle bridge, a road and a dramatic backdrop. Both The Depot and The Town are flat - there are no bridges, hills or tunnels - and I realized that it's going to be several years before I get to build a layout with those elements. Also, I live in the middle of nature close to a national park (Muir Woods) and often spend my weekends hiking around the area. This diorama has given me a chance to model the scenery around me and get some practice landscaping in miniature.
The choice of subject – a trestle set within some hills - originated in a favorite book of mine: Narrow Gauge Model Railways by Michael Andress (1971). As a very young boy I became fixated on the cover and always wanted to try something similar with the diorama. I recently acquired a used copy of the book which brought back a flood of memories of that time.

The first book on model narrow gauge railways that I ever read. It had an enormous impact on me as a 11 year old boy. I have yet to model in the narrow gauge but I'll get around to it eventually.
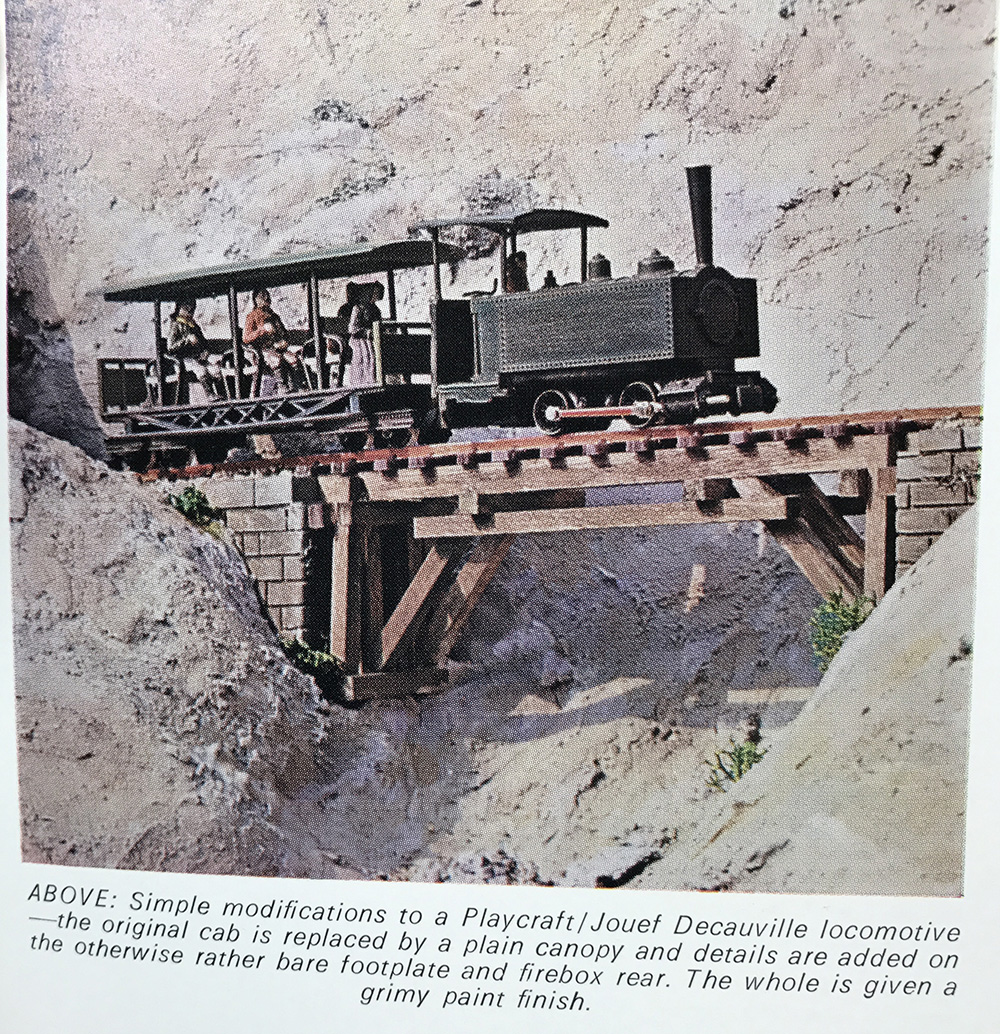
Scenes like this diorama that Mr Andress built to illustrate the book were a big influence on my own diorama.
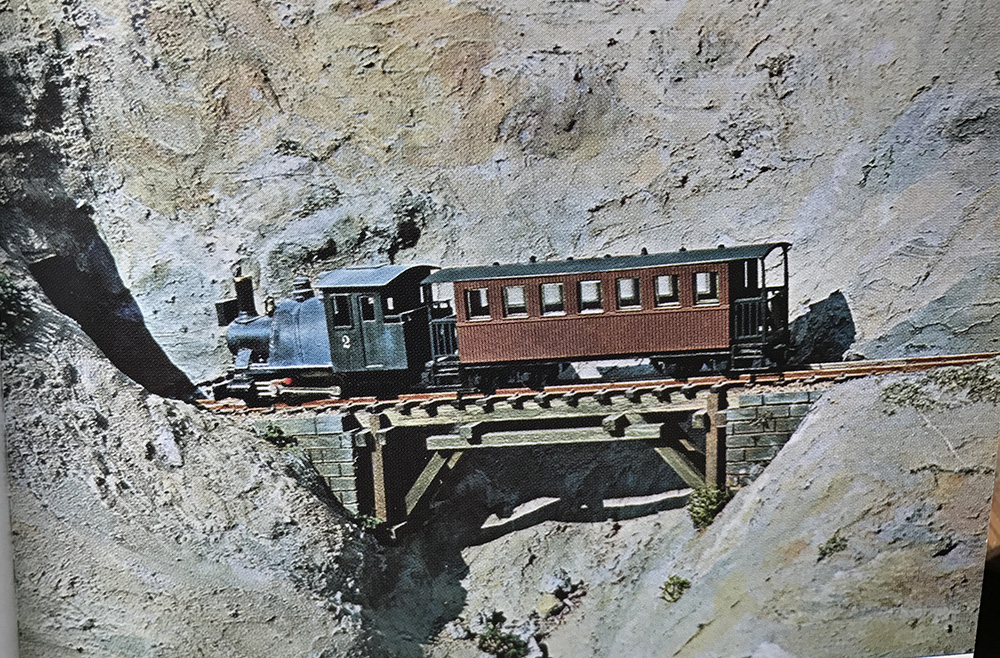
The rolling stock seen in this picture can still be purchased on Ebay even though it dates from the 1960s.

Another diorama created for the book. A simple but atmospheric scene.

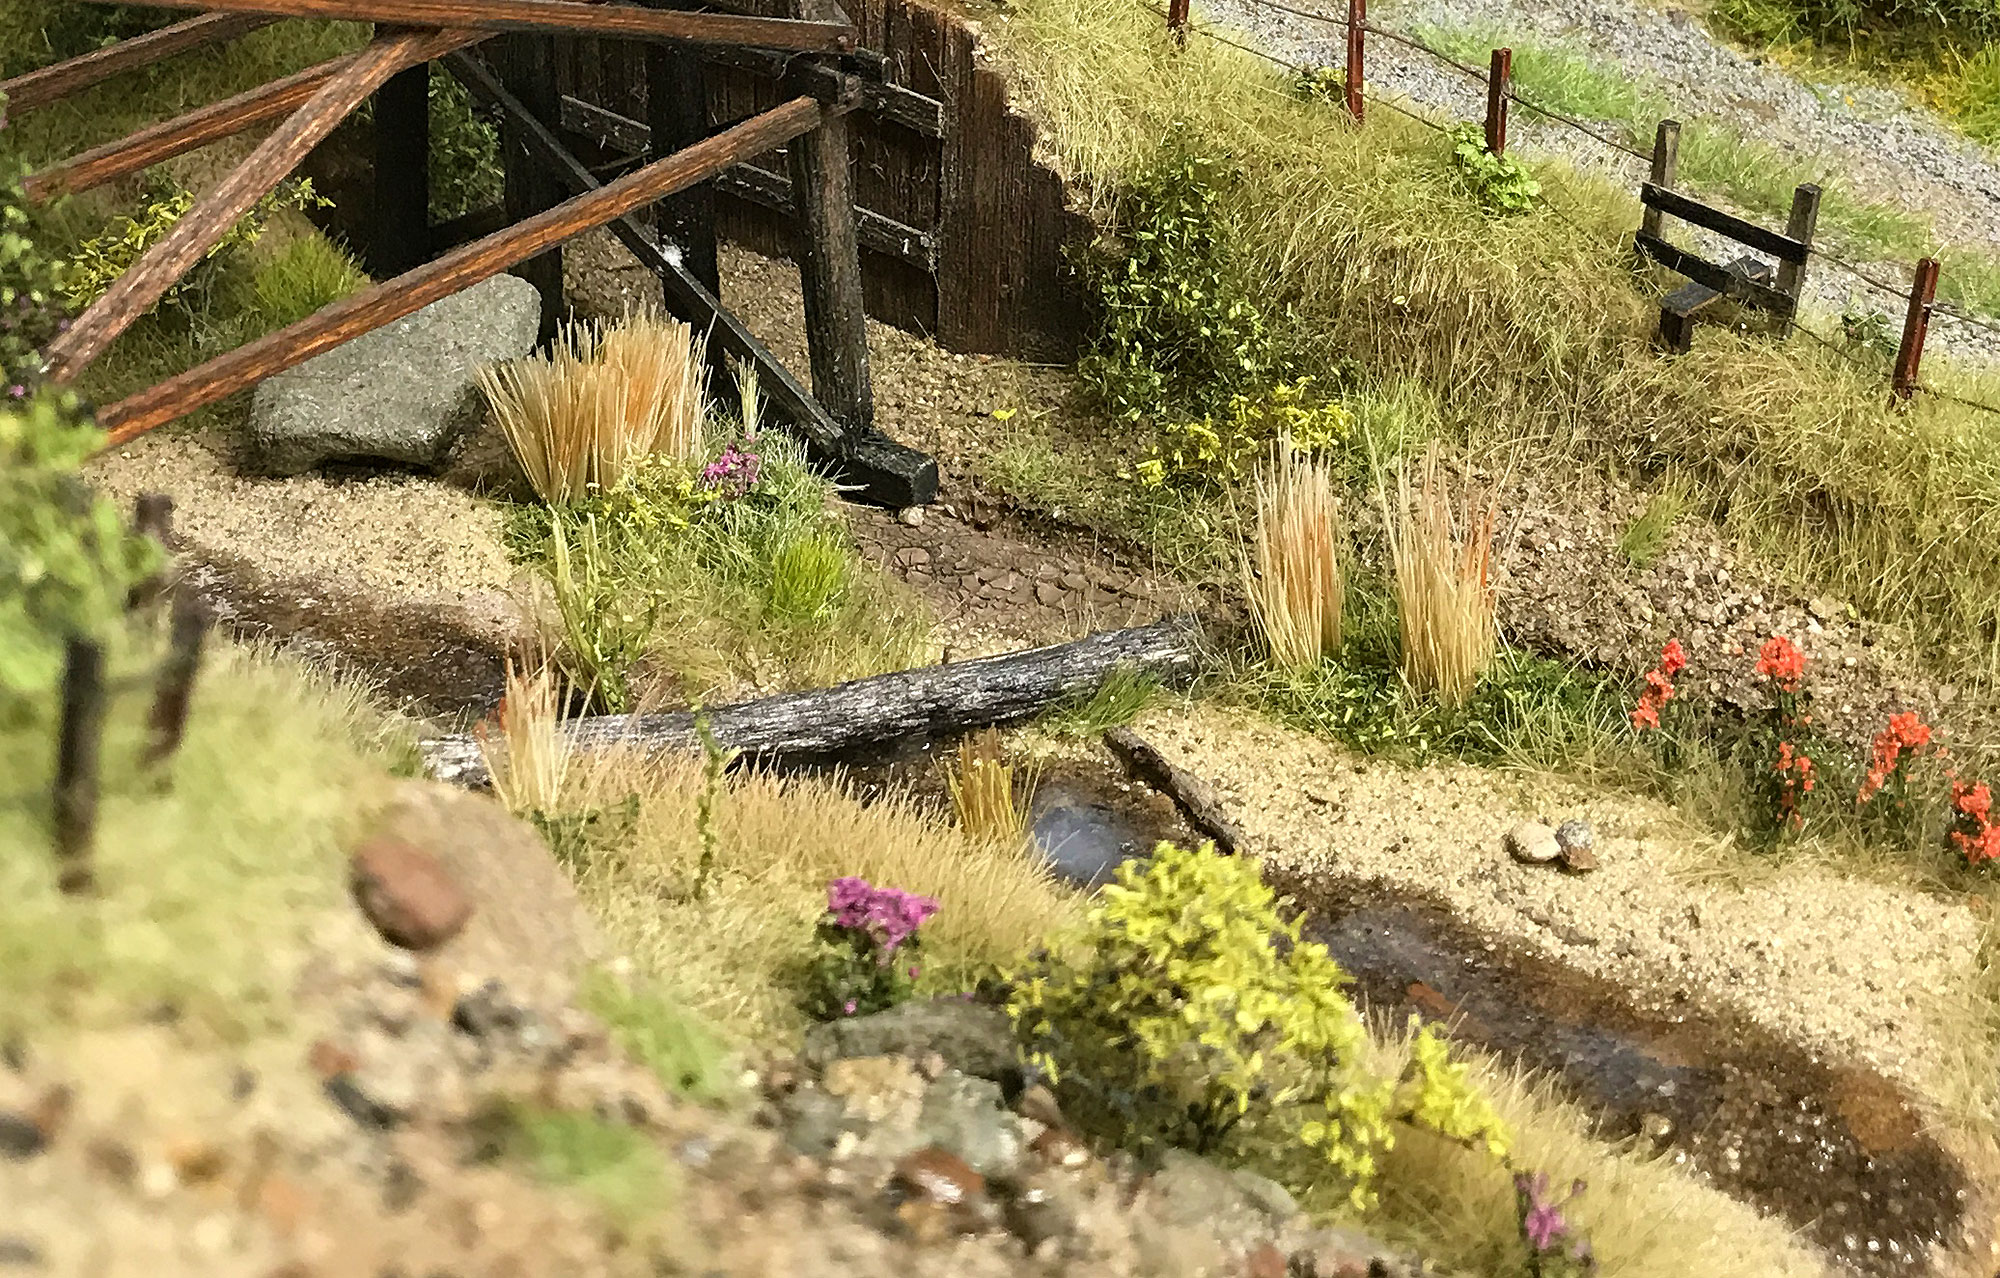
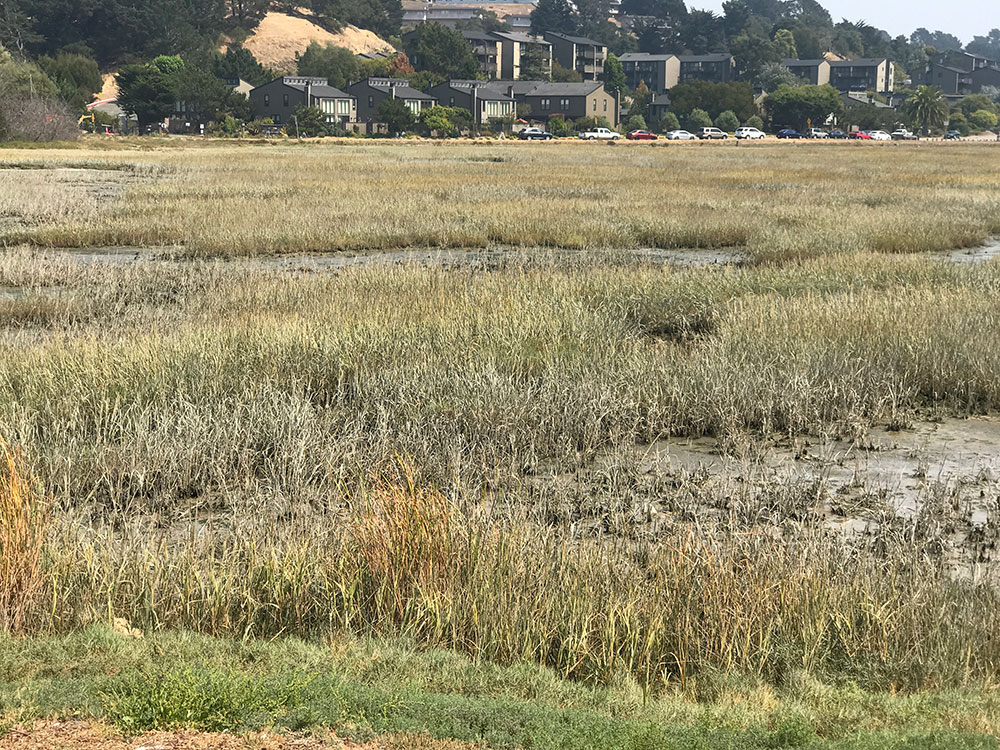
Some of the nature in the area that I live. I often wonder how to model it. I am currently experimenting with dried grass to try model a scene like this.
I used Sketchup to design the basic framework.
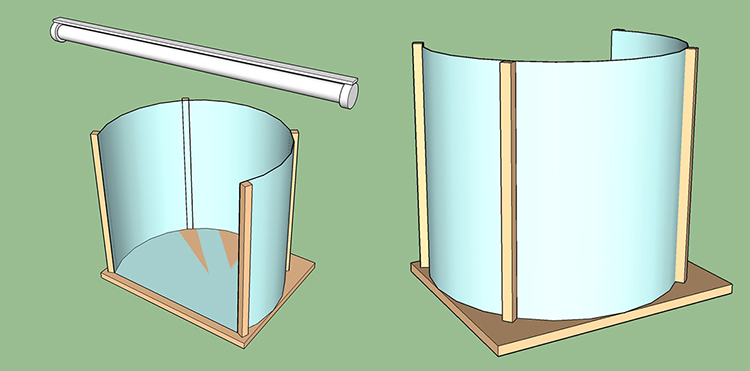
I made the sides really tall since I wanted to be able to point the camera upwards and still see some of the backdrop sky.
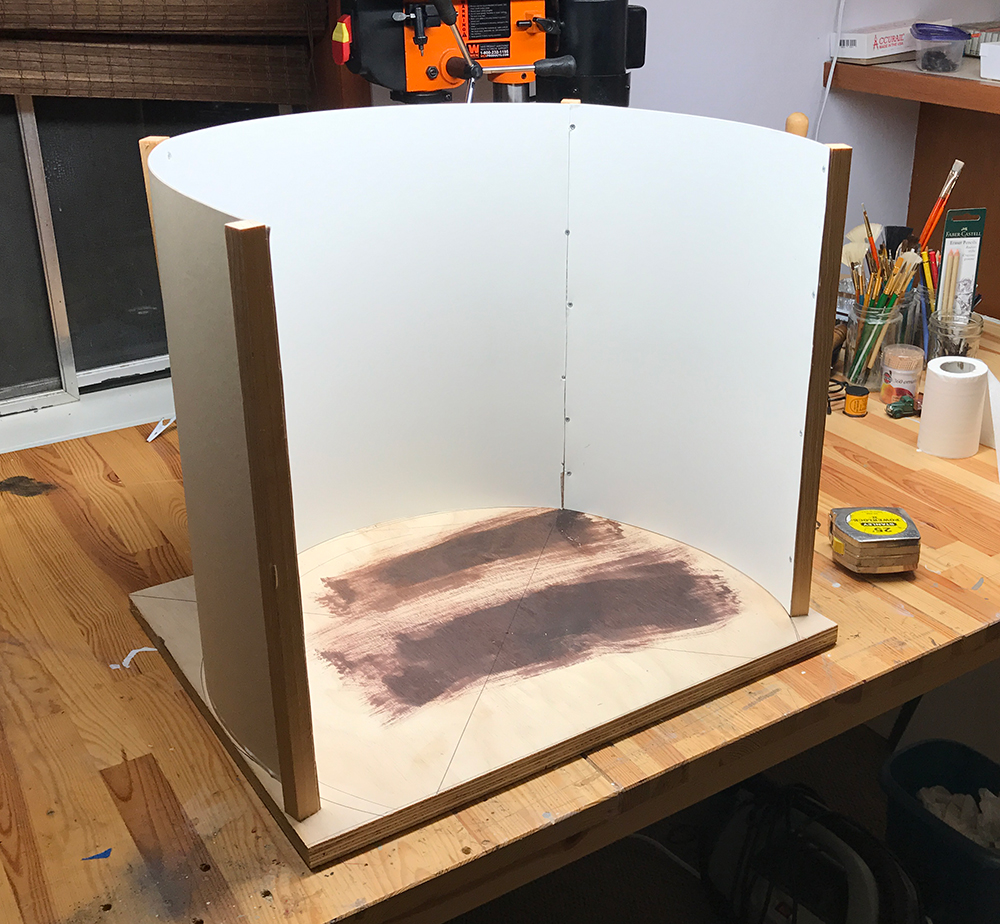
The starting point. I now need to stain the unit and can begin with the backdrop.
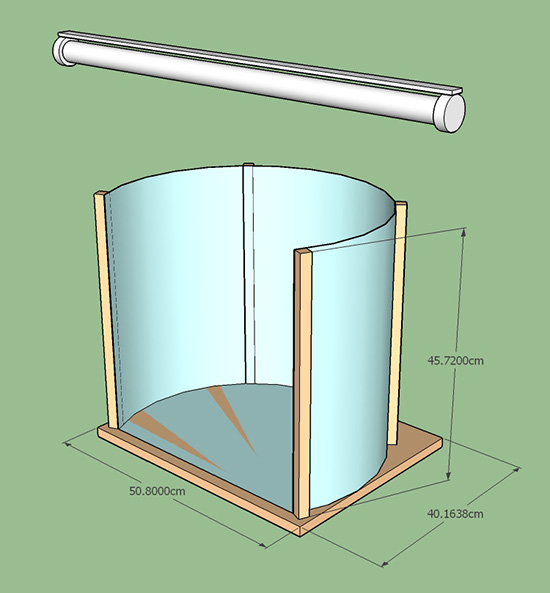
Some dimensions
It took a little thought to settle on a dramatic hilly setting. The branch line travels through some hills near to its final destination and so a few bridges are necessary to traverse the landscape. The branch is a low cost operation so a poorly maintained trestle suffices to cross this little creek.
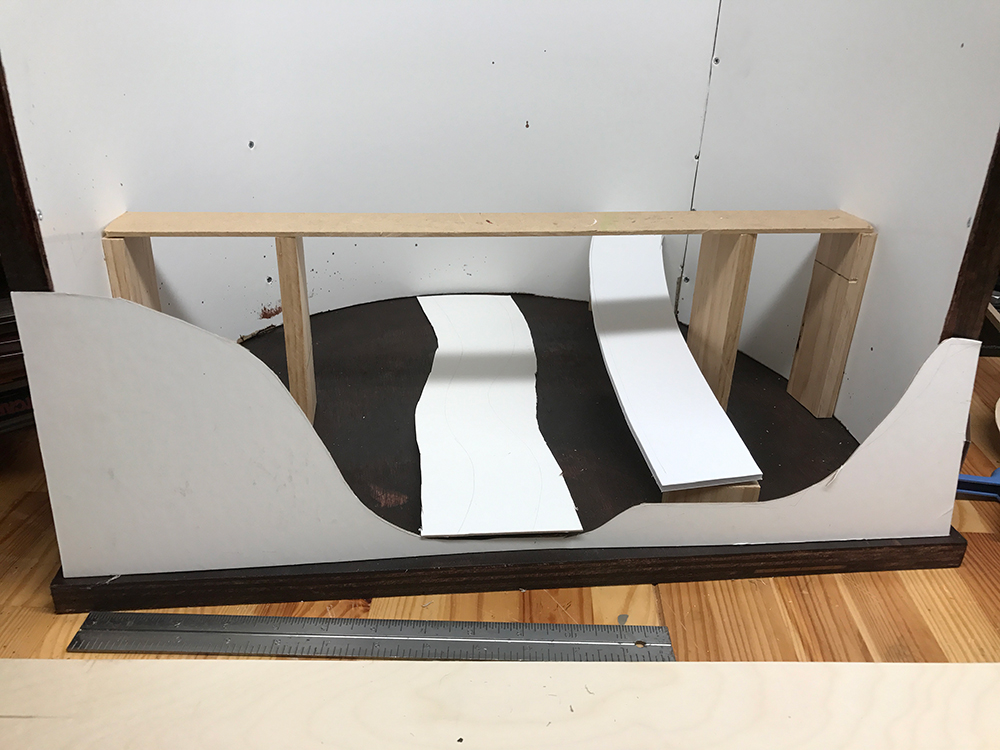
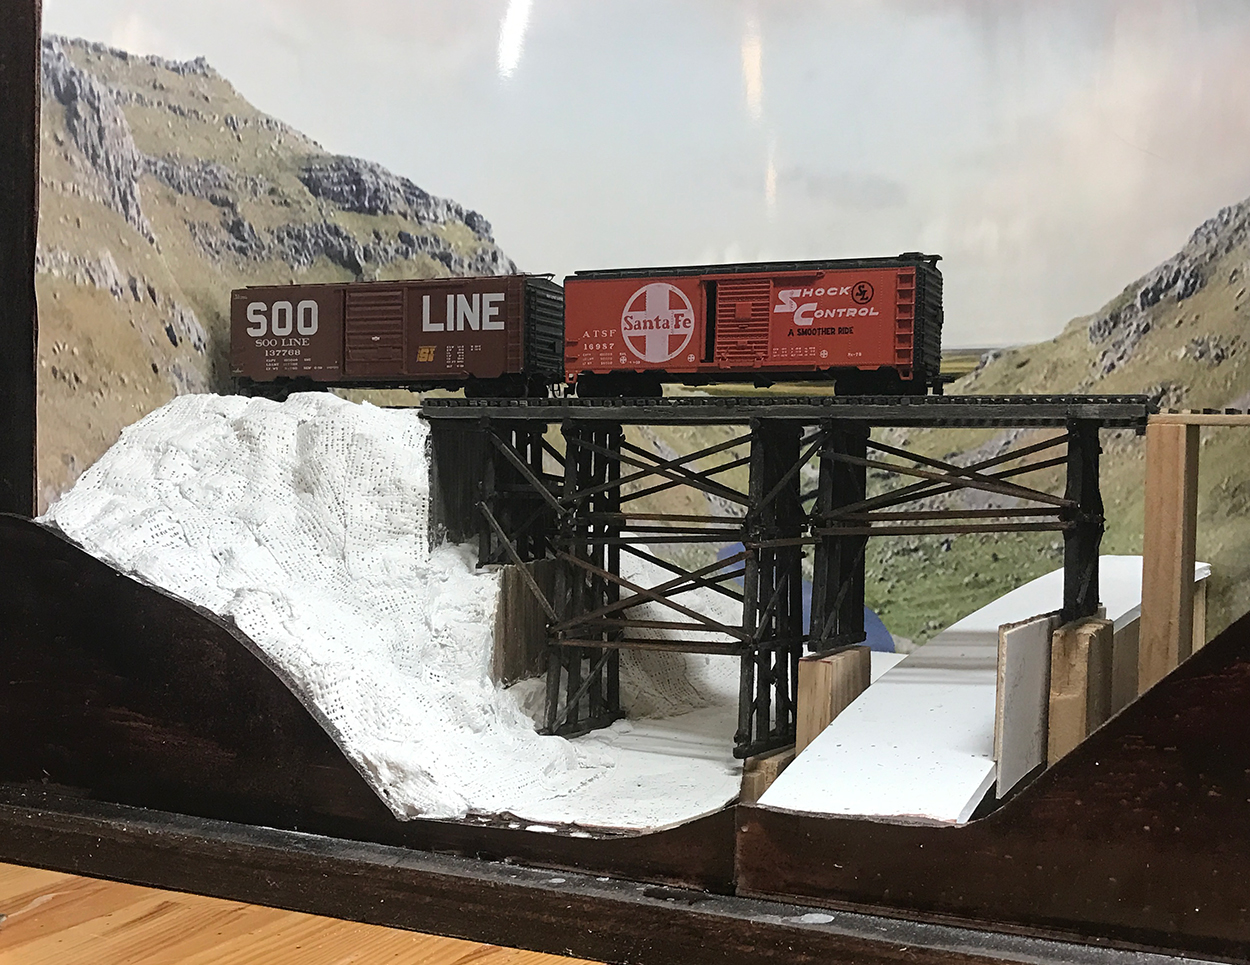
I've decided to expand a little on the basic bridge concept by making the bridge much taller and by adding a roadway underneath. Here's a loose fitting of some of the elements.
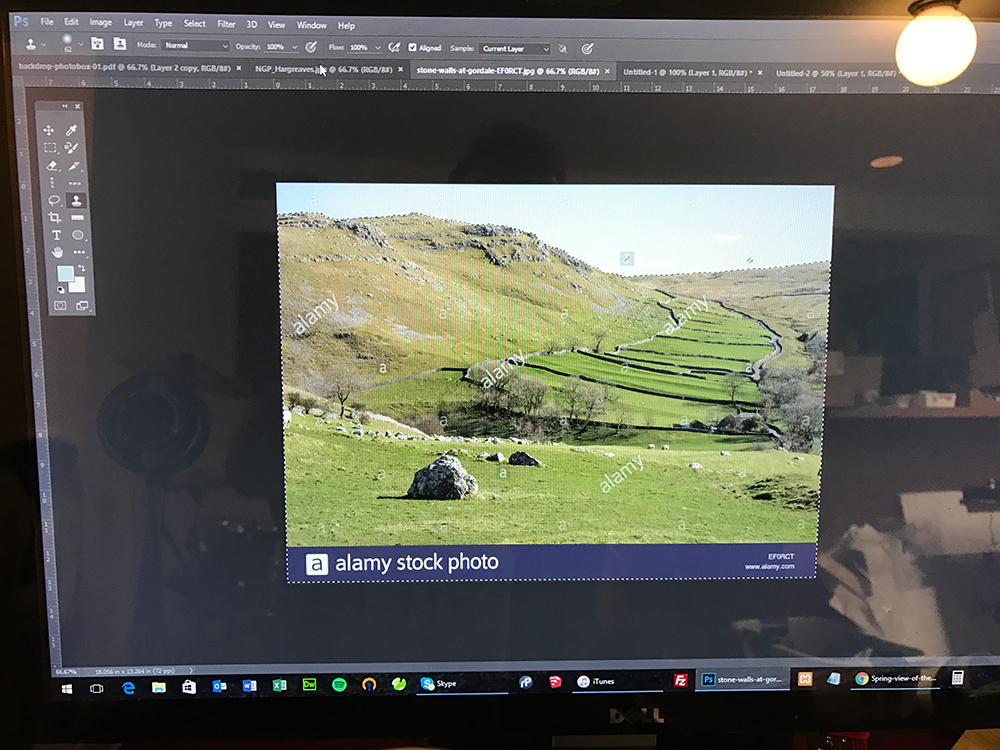
I found this picture online and decided to use it as the basis for a collage.
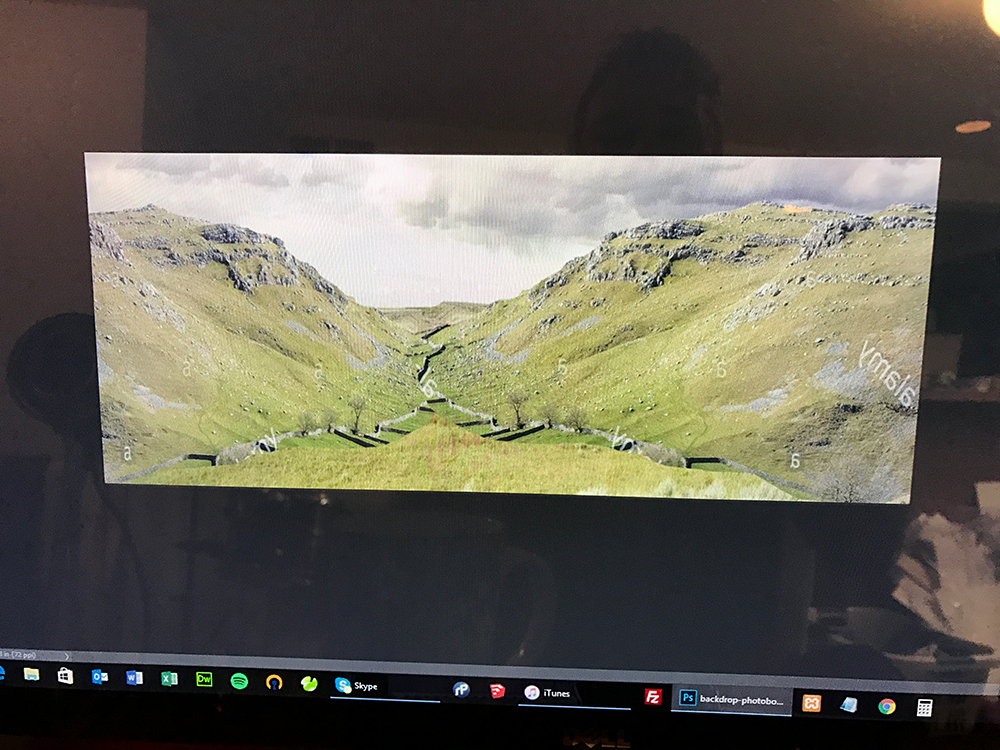
I extracted the area I wanted and cleaned it up. I then duplicated and reversed it to create two valley sides. I added some of the backdrop clouds from The Depot.
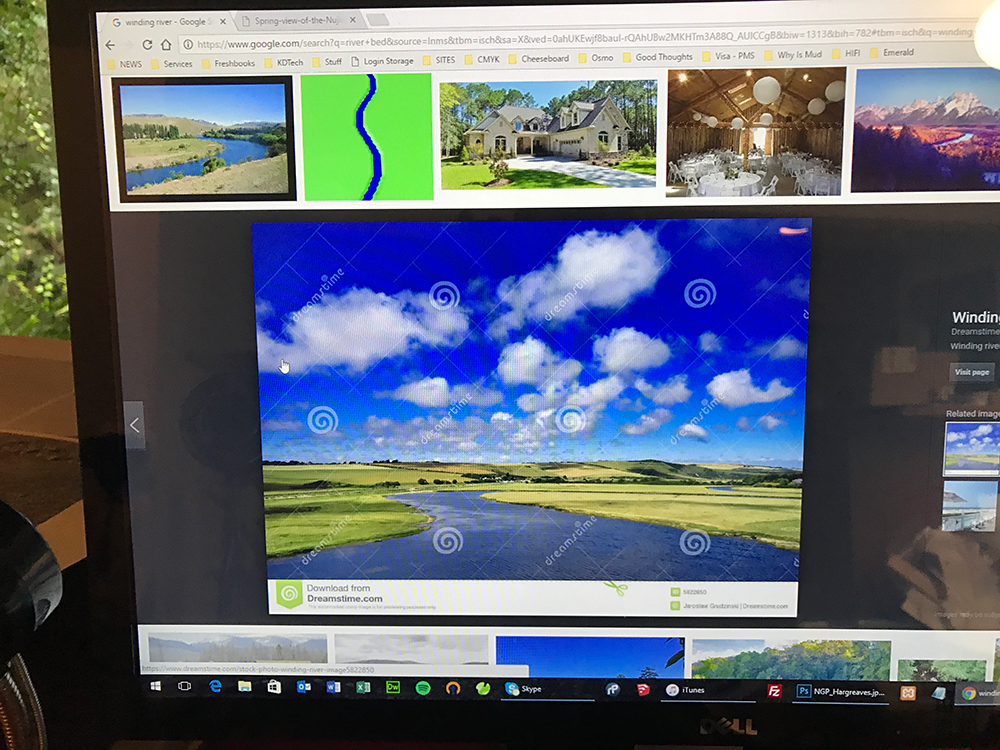
Then I looked around for a river that I could add. I found this image and extracted the river.
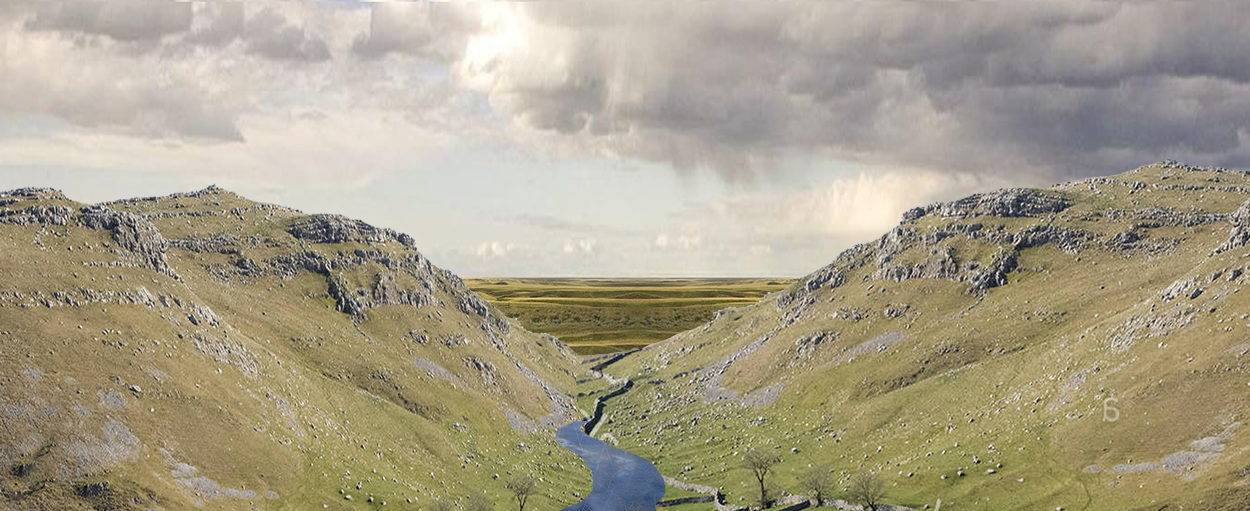
Then I added the river to the other elements and ended up with this image. I could have gone much further and created a much more realistic scene but I don't have the time or patience and so this will have to do for now.
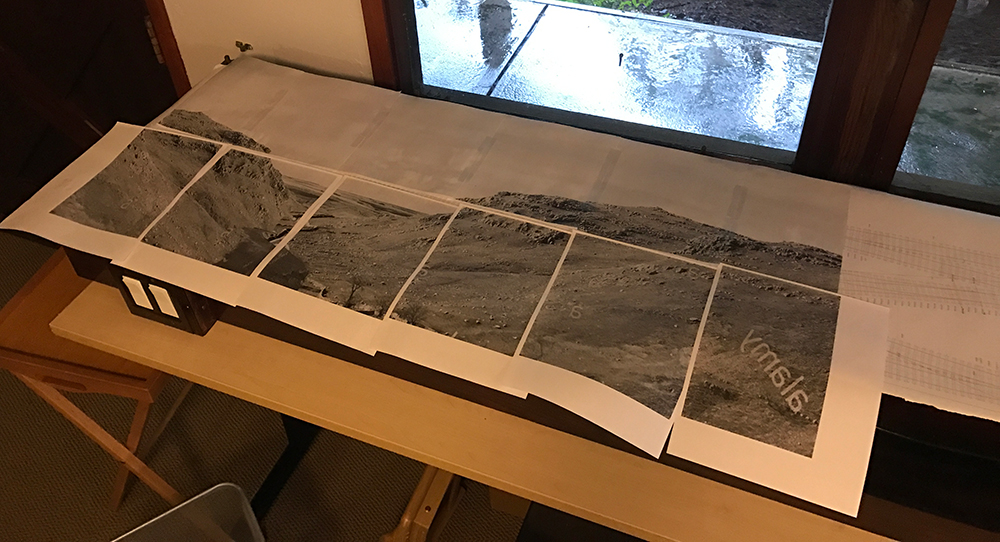
I printed out a black and white version of the full size backdrop and taped it together and fitted it loosely to the diorama.

It took a couple of attempts and adjustments to get the elements placed correctly and here's where I ended up.
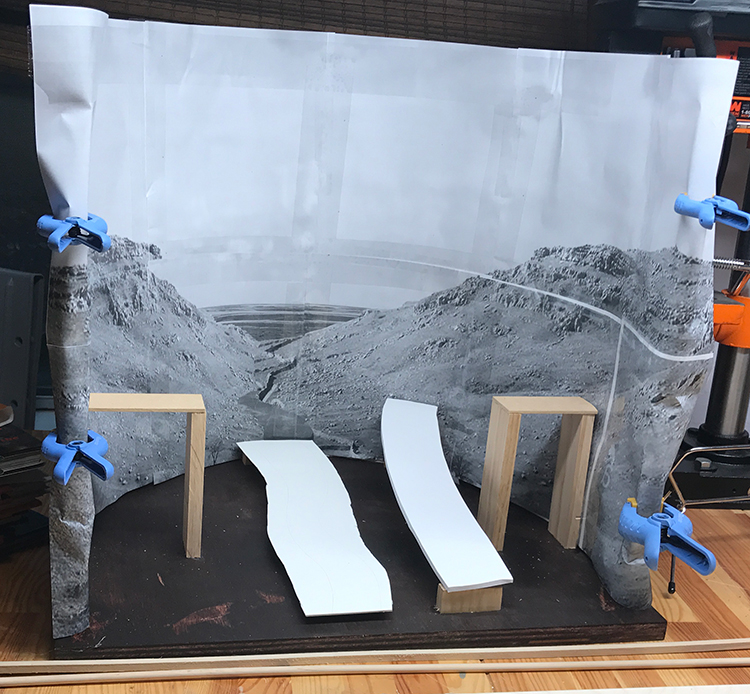
I sat with this backdrop for a week and added elements before sending it to the printers.

The image arrived a couple of weeks later. I fitted it and will build the rest of the diorama around it. I may go back and make changes to the creek area and remove that blue and replace it with something more appropriate.
The first item to build was the trestle deck. I decided to purchase Jeff Wilson's book 'Bridges and Trestles'. This was a wise decision. Not only did it have diagrams and pictures of trestles but it also listed dimensions of the the various components.

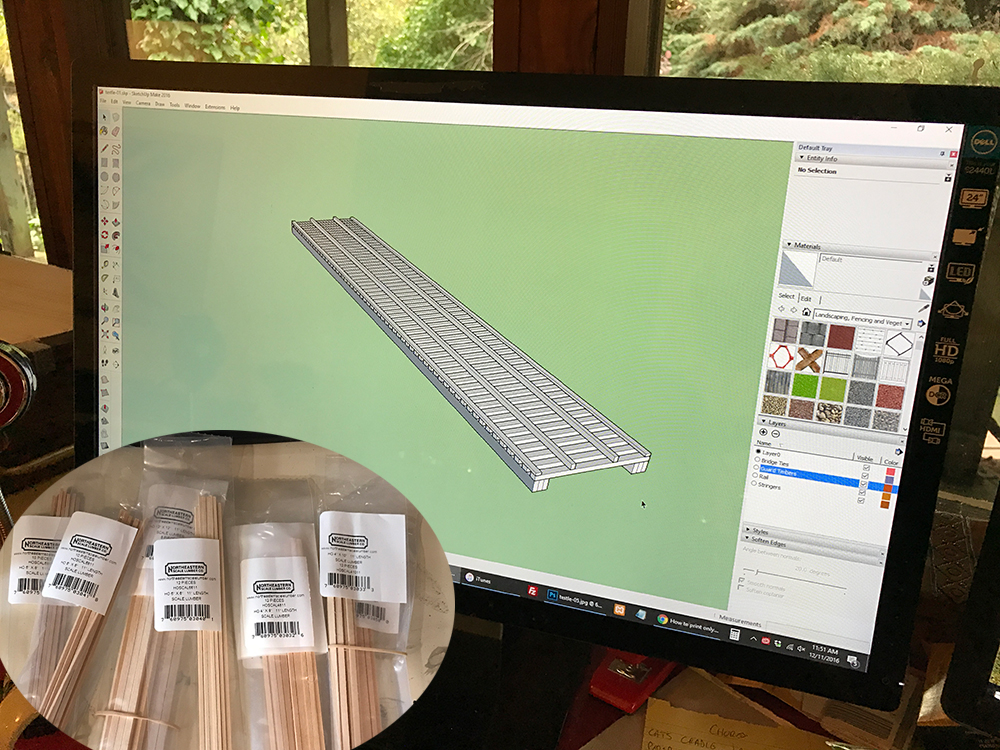
I was able to take those dimensions and create a working drawing in SketchUp as well as purchase correctly-sized lumber (from NorthEastern Scale Lumber)
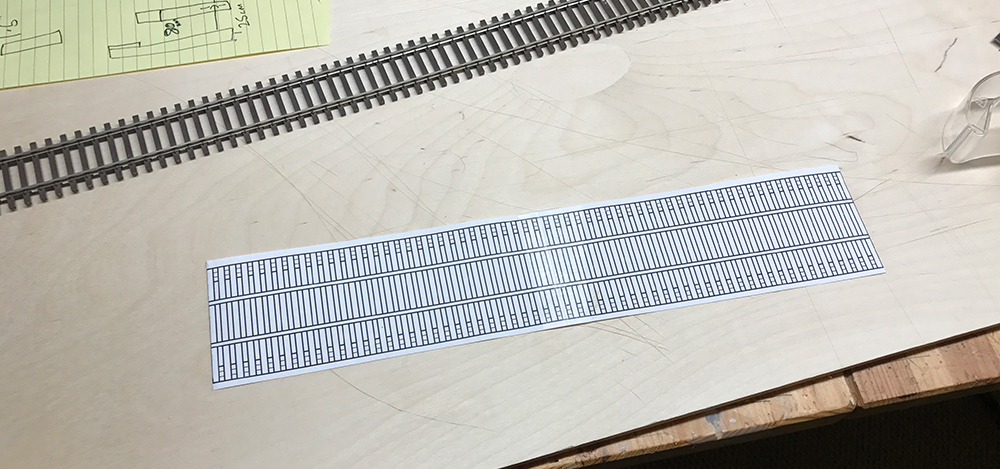
I printed out a flat 2D version of the plan on top of which I built the deck
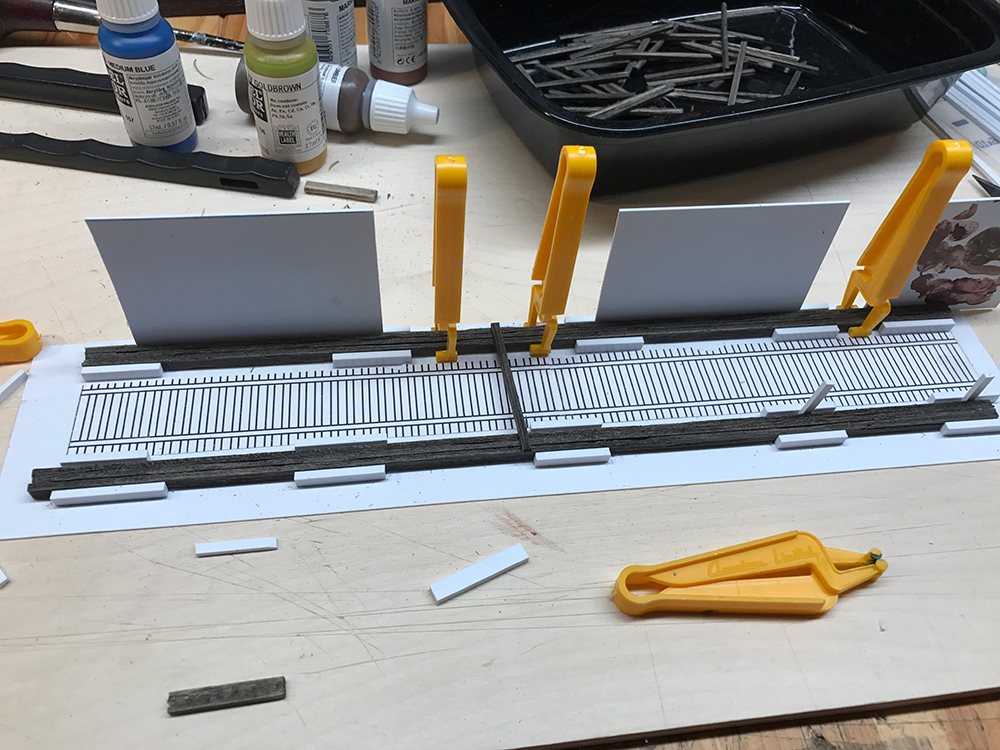
I stained the wood in ink and alcolol and then created a styrene jig to hold the wood in place while I glued it down.
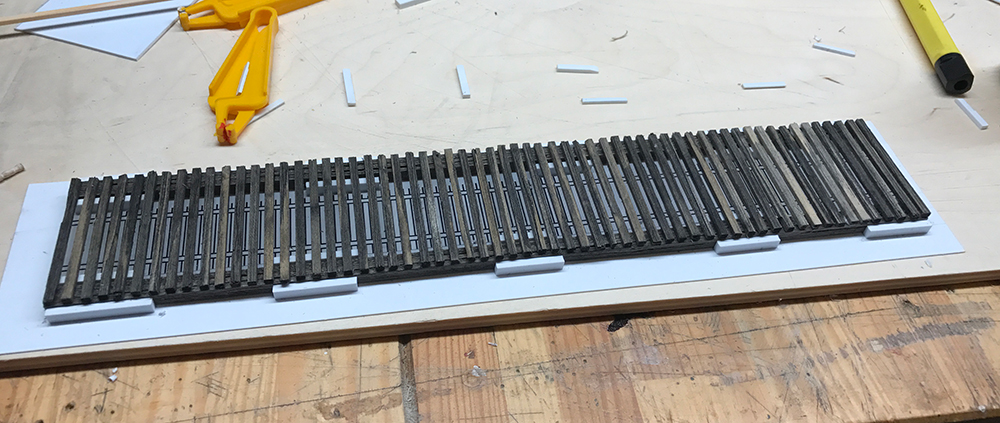
Once the 'stringers' were in place I added the bridge ties. I just eyeballed the placement of the ties over the diagram and figured that any imperfections in spacing or angle just added to the character.
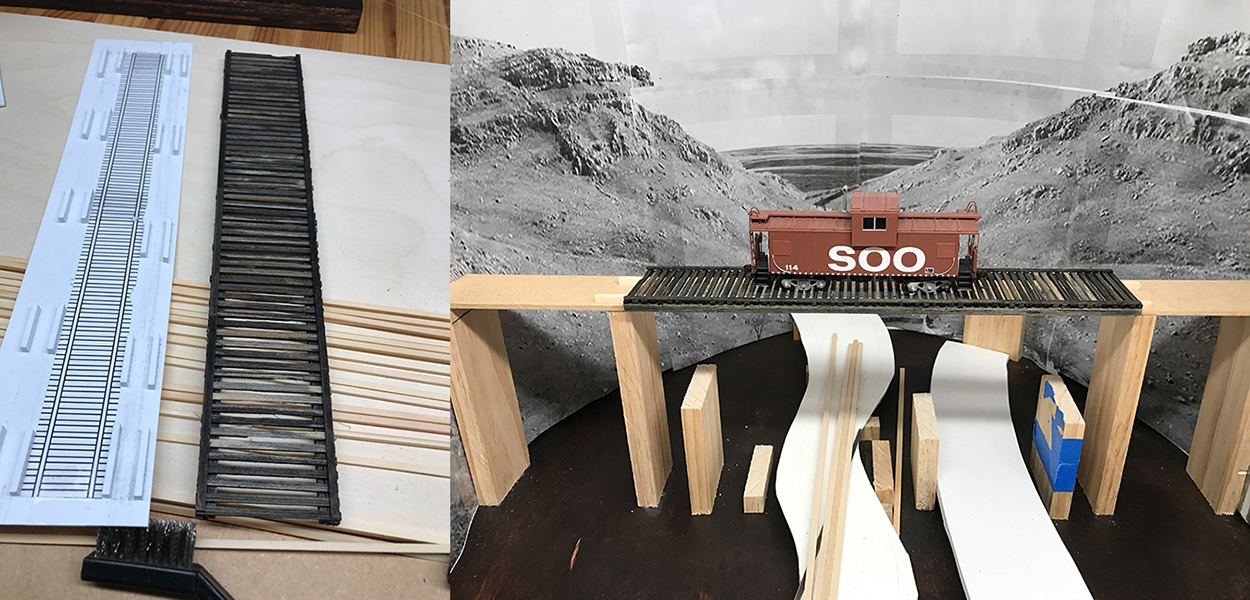
So the first part is done. I have the deck and I am now working on the trestle legs. I'm creating the leg plan in SketchUp but because of another upcoming European trip I won't be able to build them until mid-January.
The latest set of work involved mainly building the trestle legs. I had some 5mm pine dowel which was a little over-sized (posts are supposed to be 12"/3.5mm in diameter) but I really liked this size, - it seemed alot sturdier. I figured that once I weathered the wood it would reduce in size anyway.
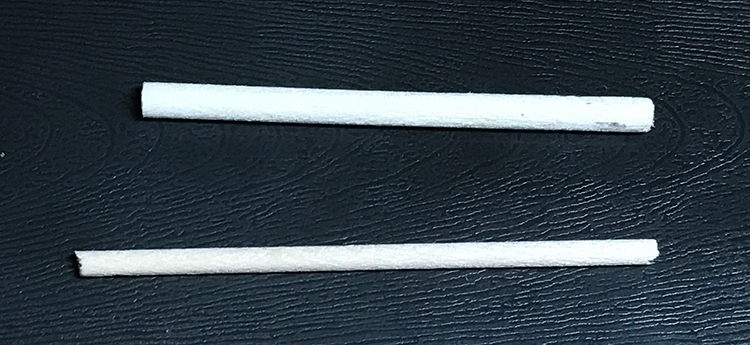
Before going ahead with the pine I ordered balsa wood dowels to compare with the pine. I figured that balsa would be much easier to weather than pine. I had it sent from the UK since I could not find balsa wood dowels in the USA.
The picture above shows the size difference between 5mm and 3.5mm dowels. It's quite a difference.
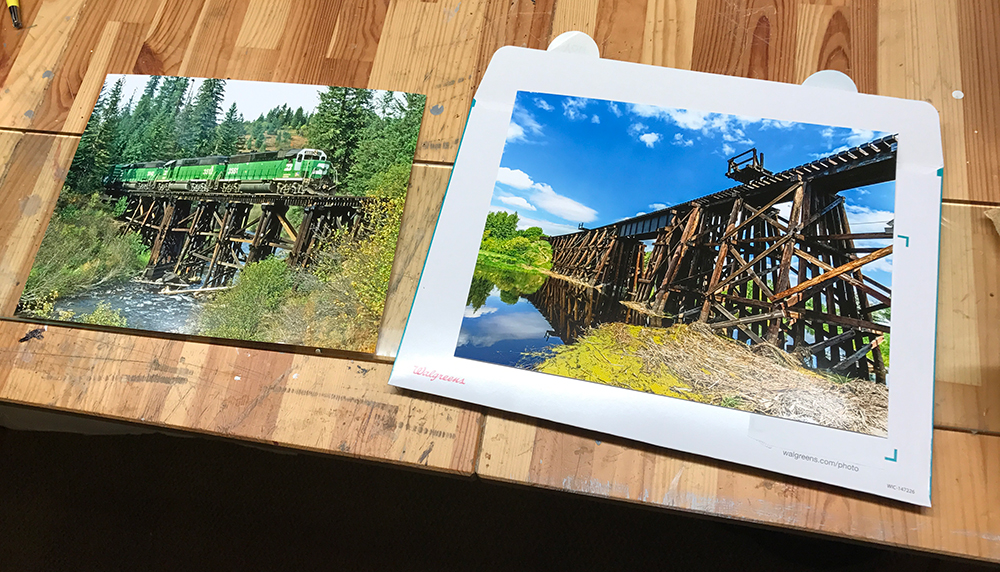
As mention in my notes on The Town project, I'm trying to work from photos as much as possible - especially when it comes to weathering. As such I found these two wonderful pictures of trestles that I had enlarged and printed by my local Walgreens. They stayed in front of me while I worked on the trestle.
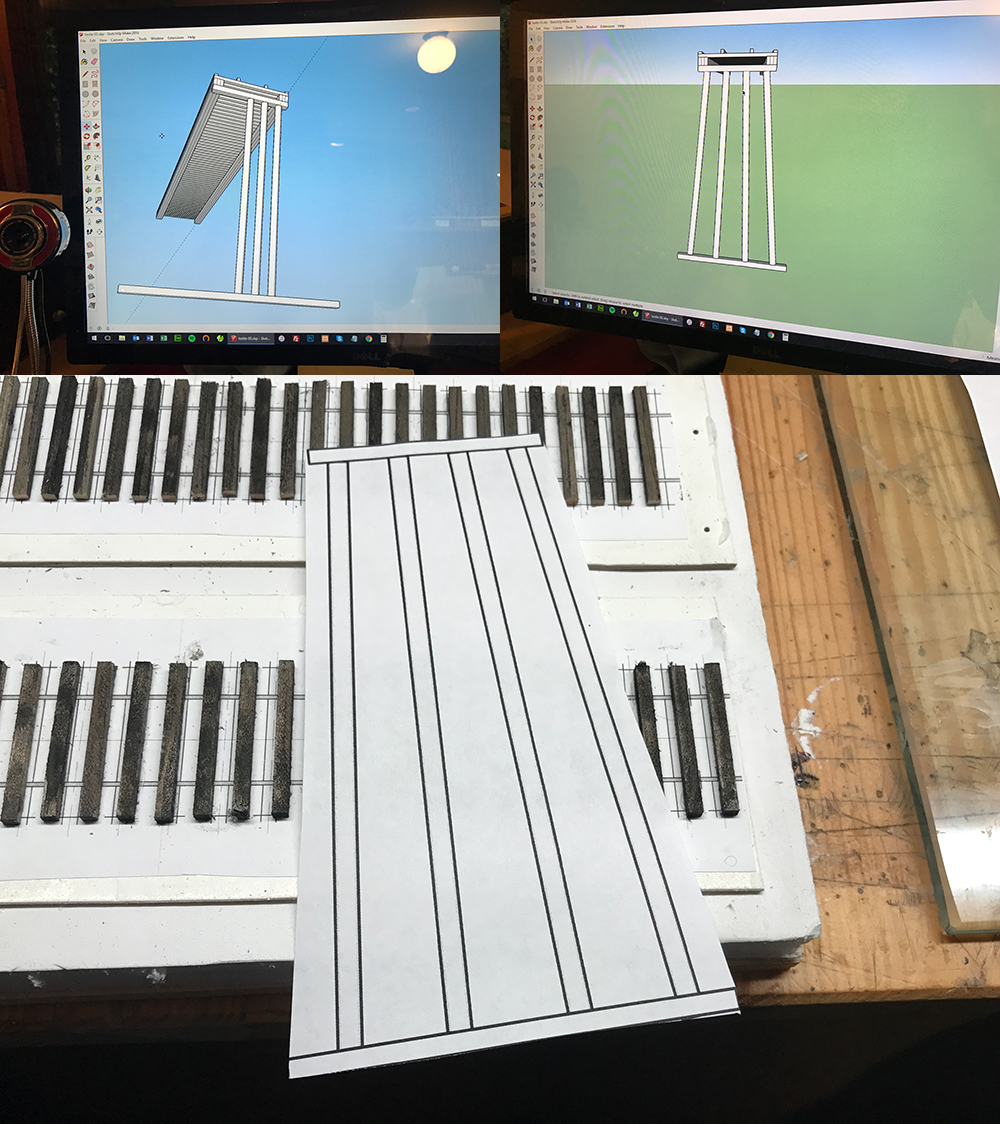
And so to the legs.... I used SketchUp to design the leg plan from which I was going to build the jig.
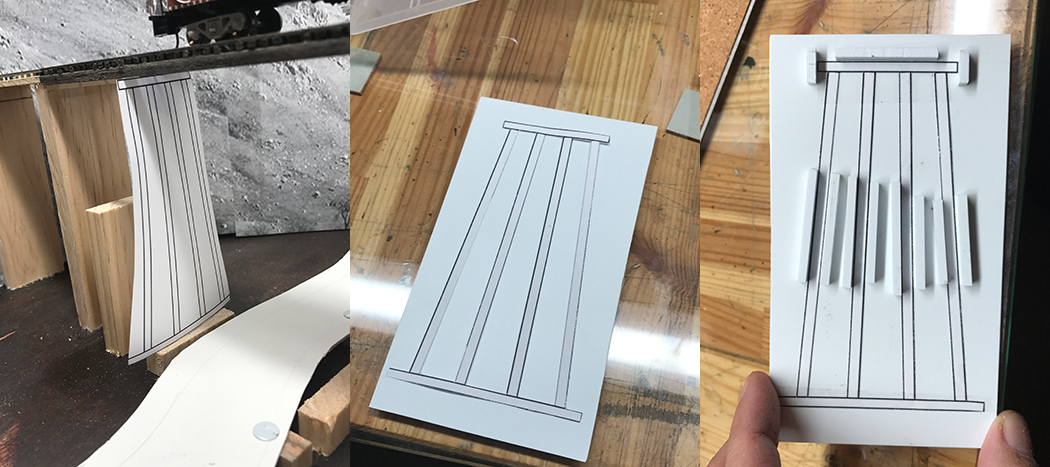
I built the jig from styrene. The jig idea came from Jeff Wilson's book on trestles and bridges and was a perfect tool for this sort of work.

The construction of the trestle was pretty straightforward. I used Jeff Wilson's book for guidance on wood sizes and referred to my photos for weathering and color information.
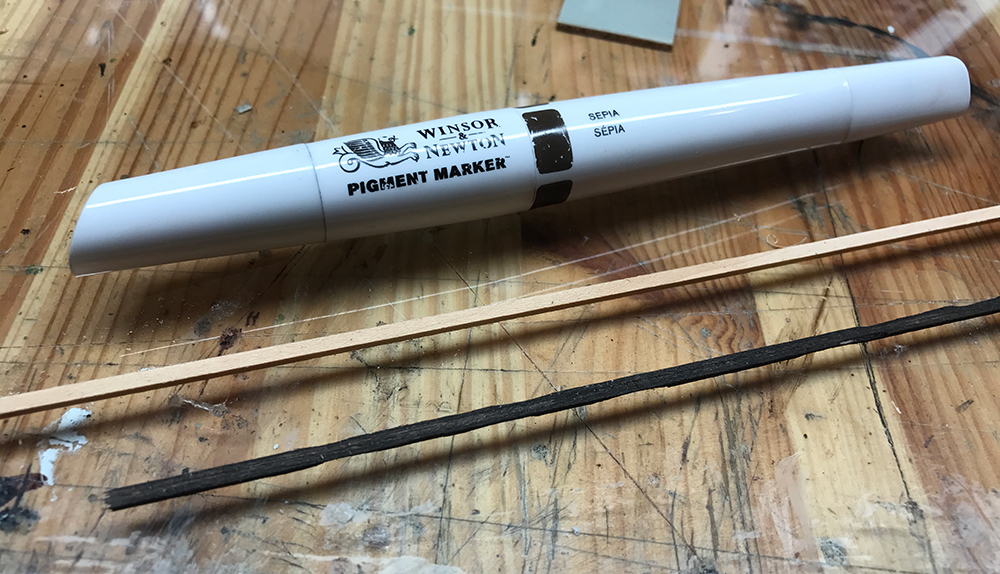
The star tool of the project ended up being this Winsor and Newton marker. I found it in an art shop a few months ago. I purchased it and then forgot about it until I needed to make some small adjustments to the color of the trestle. I realized that I could use it to color/stain the whole trestle! I zipped through this project as a result. I would cut the wood, color it and boom! DONE!
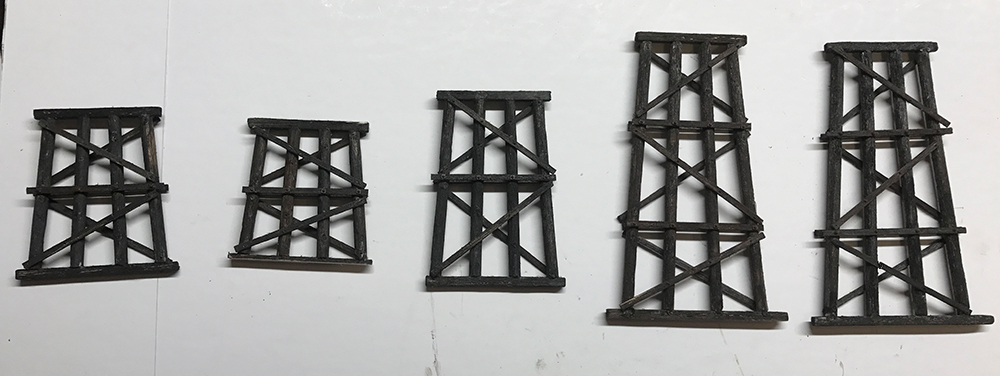
The legs came together quickly and painlessly. I used the same jig for each set by moving the base nearer the top as they got smaller.
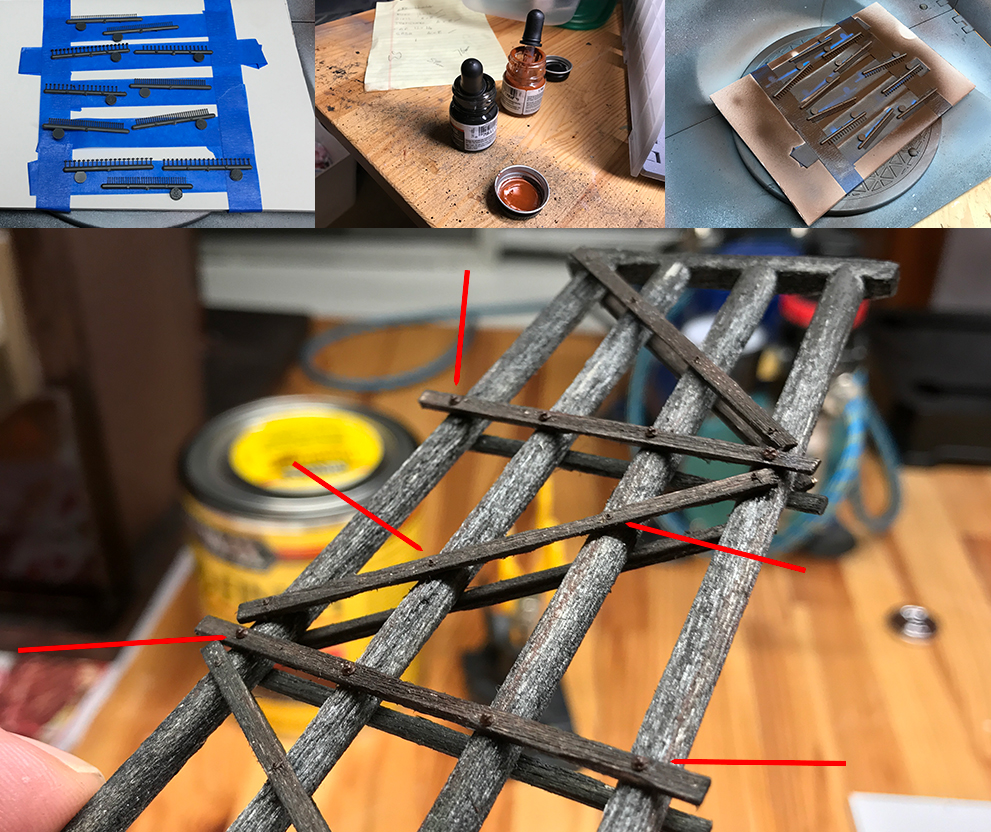
I decided to add some eye bolts throughout. They are the kind of detail that really make a difference in close up shots. I sprayed them dark rust before fitting them.

I fitted the legs to the deck using white glue. I held the legs in place using pins.

So the glue is drying. I still have to add the side bracing and more eye bolts. I'll be starting the landscaping this week and will remove the bridge until that is completed.
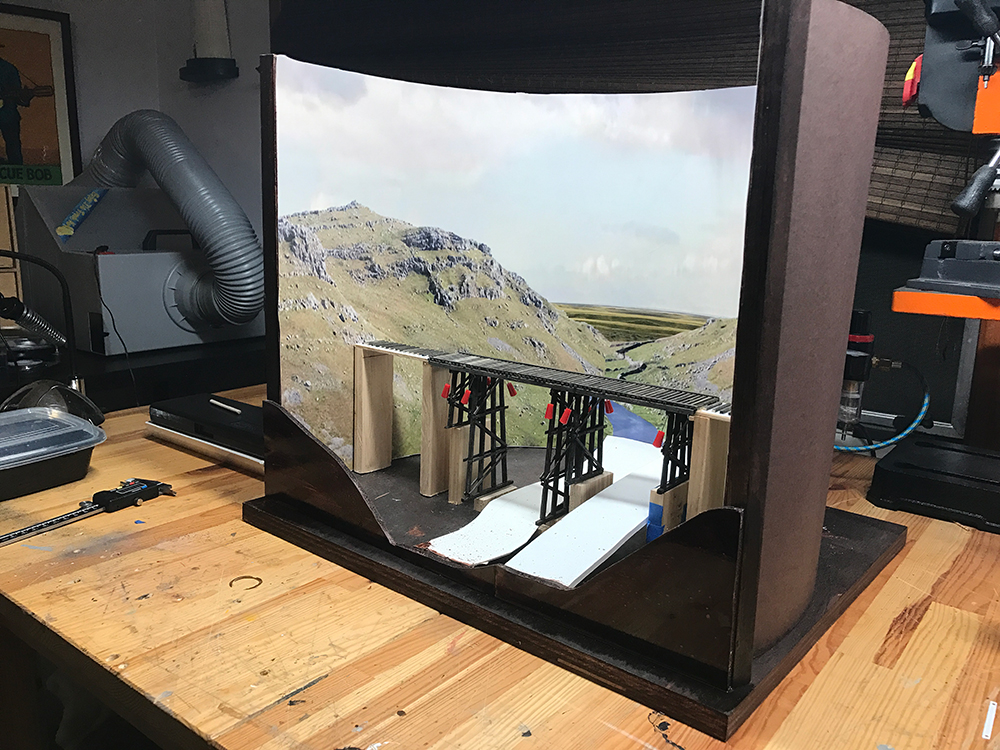
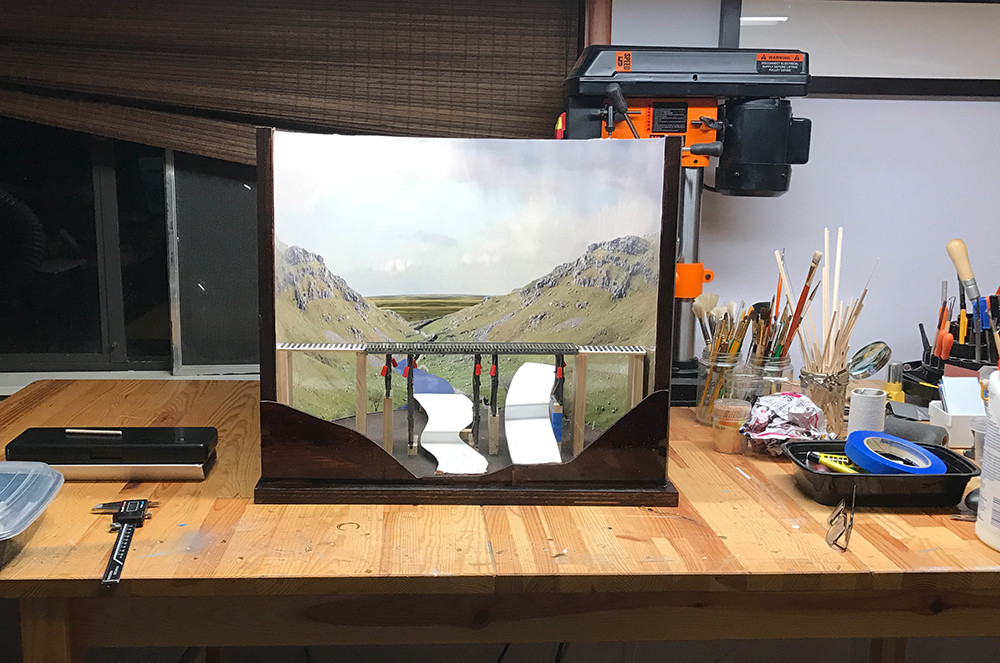

I kept placing the bridge back to make sure it still fit the space. I may have to adjust the the block wood supports beneath each leg.
I added the some support beams to the trestle legs. I tried to guess how a railroad civil engineer would solve the problem of putting a trestle over a small creek such as this and I refered to my postcards of trestles. I suspect my own minature engineering efforts would be looked dimly upon by the engineering community but I just did the best I could and added beams and supports where I thought they ought to go. I followed a rough plan for the beams and I just hope it all looks plausible enough in the end.
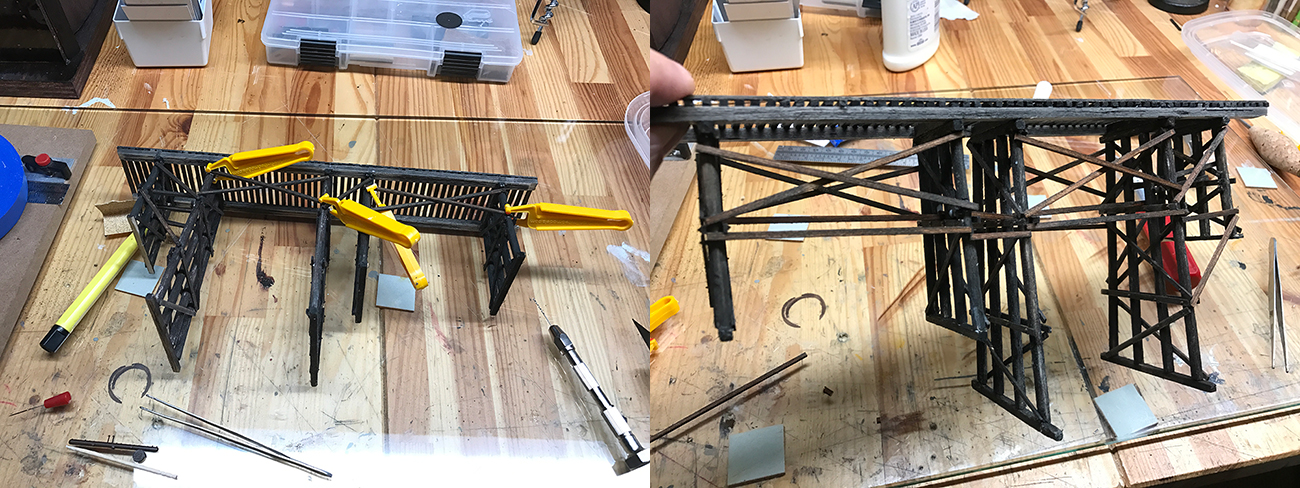
I used my marker pens mentioned previously to color the wood. No more waiting 12 hours for the wood to stain.
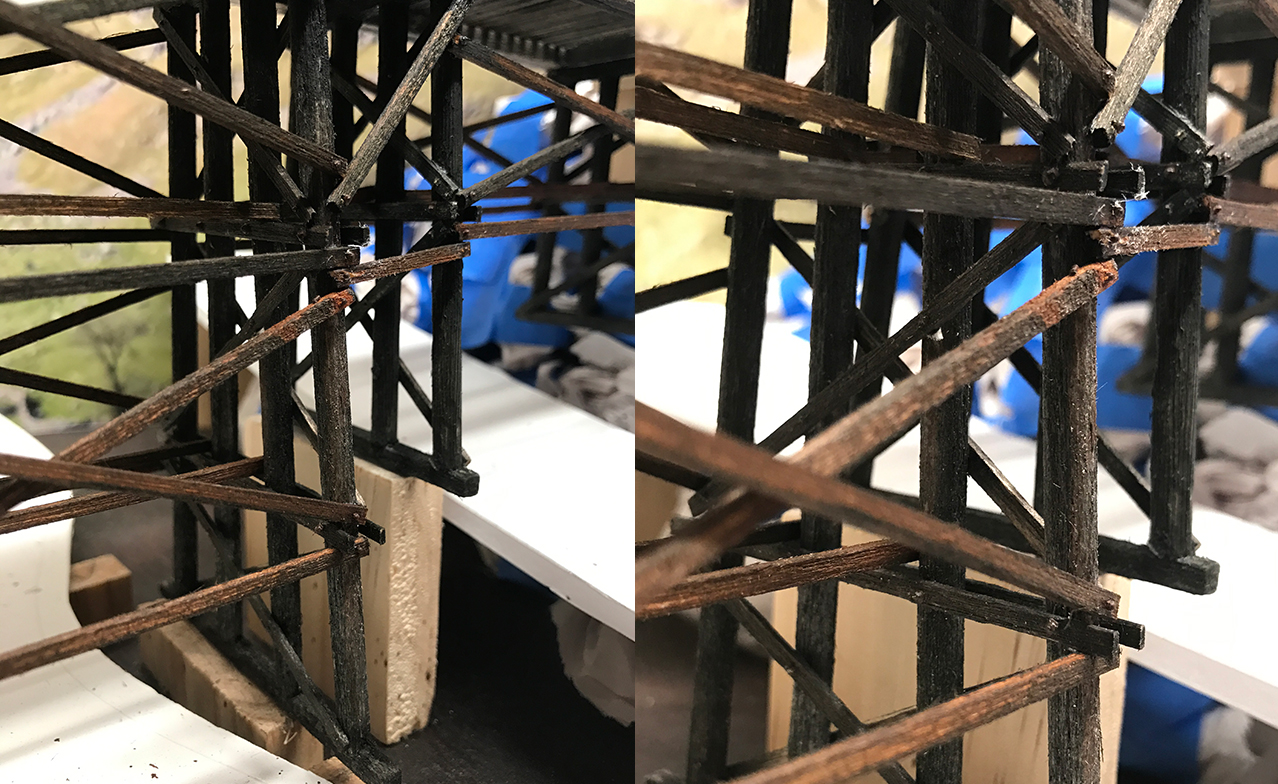
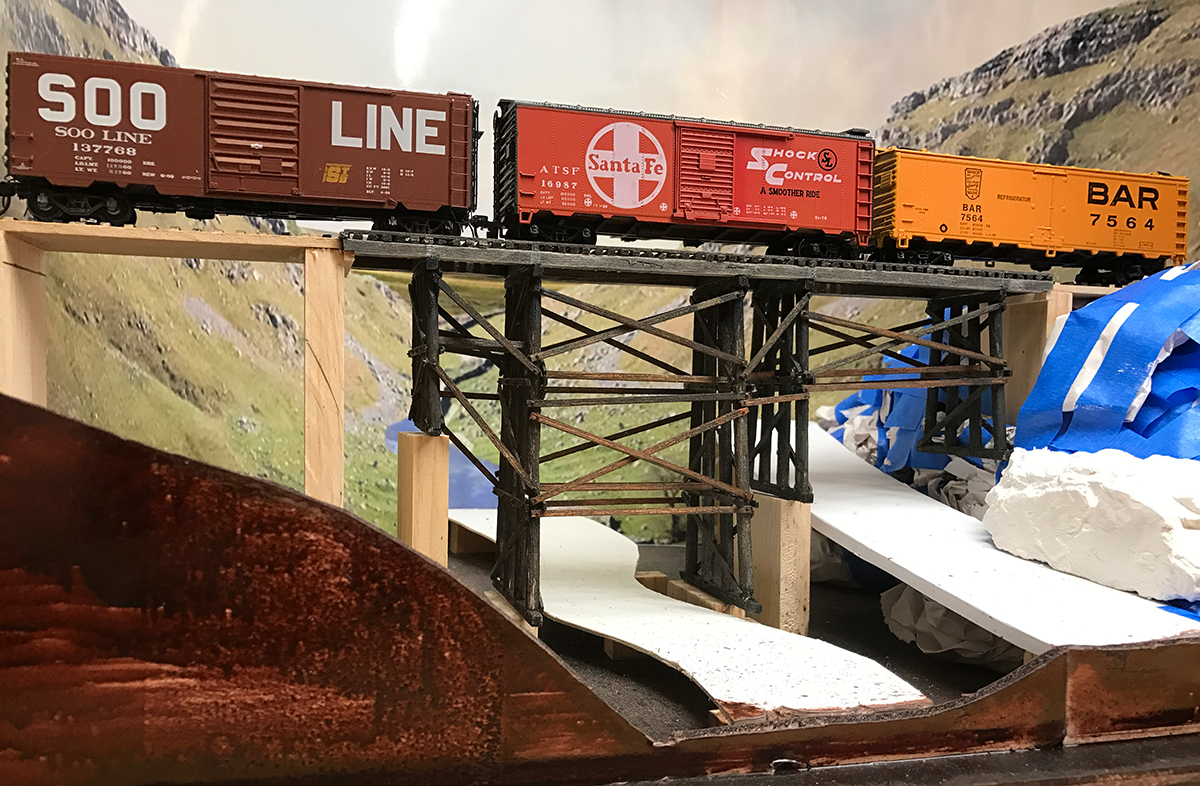
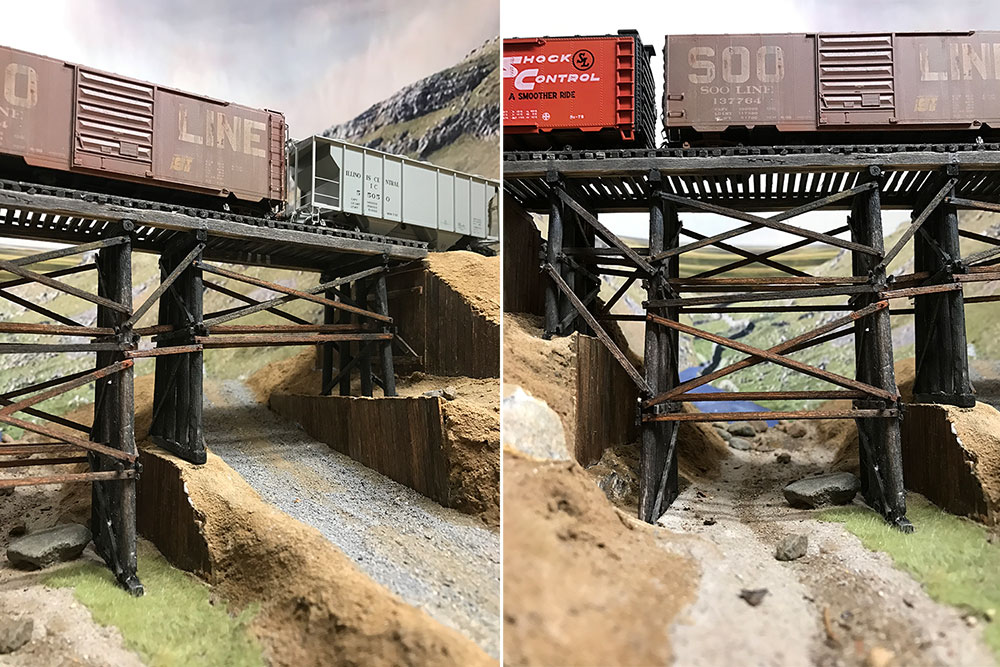
Here's the bridge so far. My very first bridge. Needs a little more work but generally I'm pleased with it and it should make a nice setting for the upcoming photography
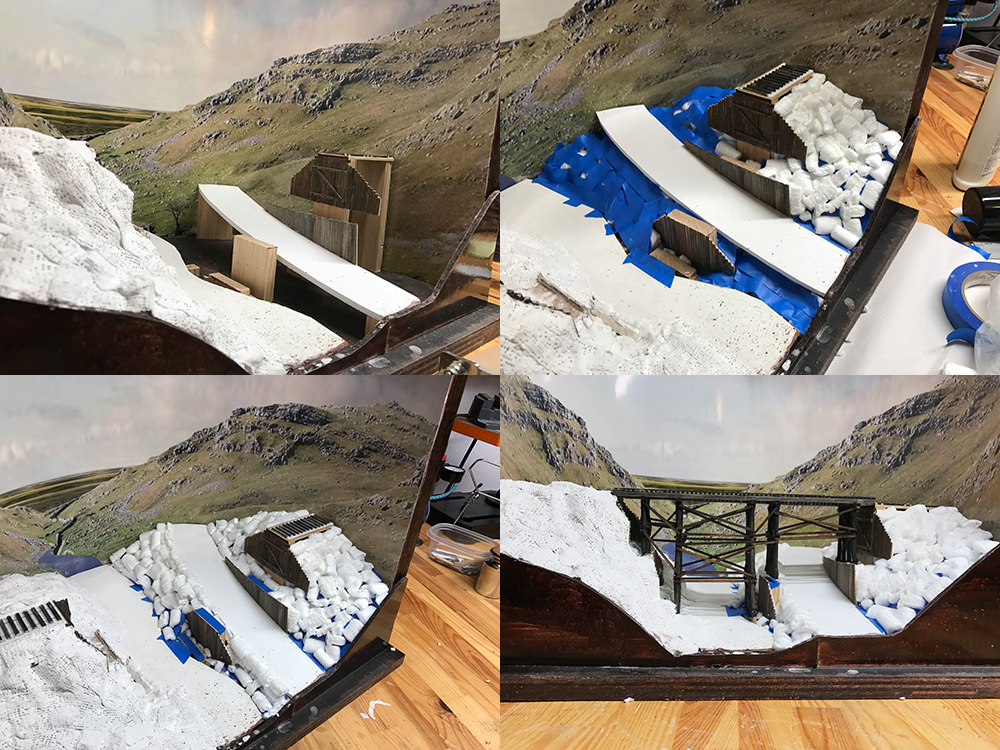
I wanted a more 'granular' control over the area whereby I controlled the location of the contours and every little bump, knook and cranny. After giving the problem some thought I decided to use packing peanuts to build up the landscape. This is a quick test to see if I was on the right track. Before building the embankment with peanuts I needed to add some retaining walls. I built them very quickly but broke a rule of mine which was to refer to photographs before building any structure. However I was impatient and just threw this wall together quickly so that I could start building up the landscape.
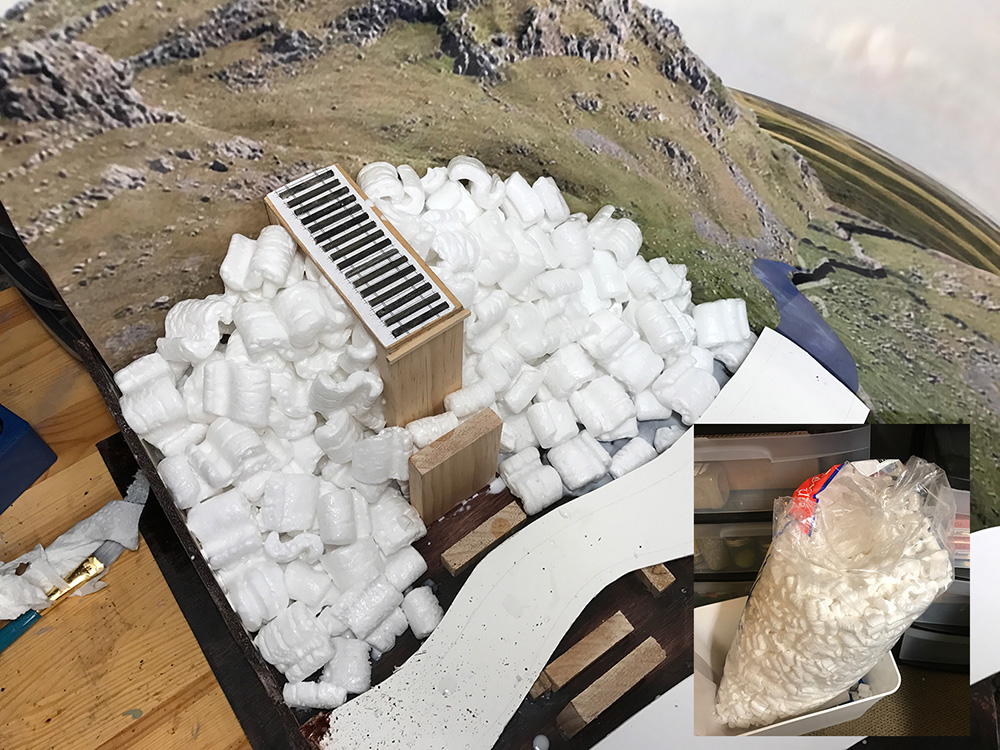
A quick test to see if I was on the right track.
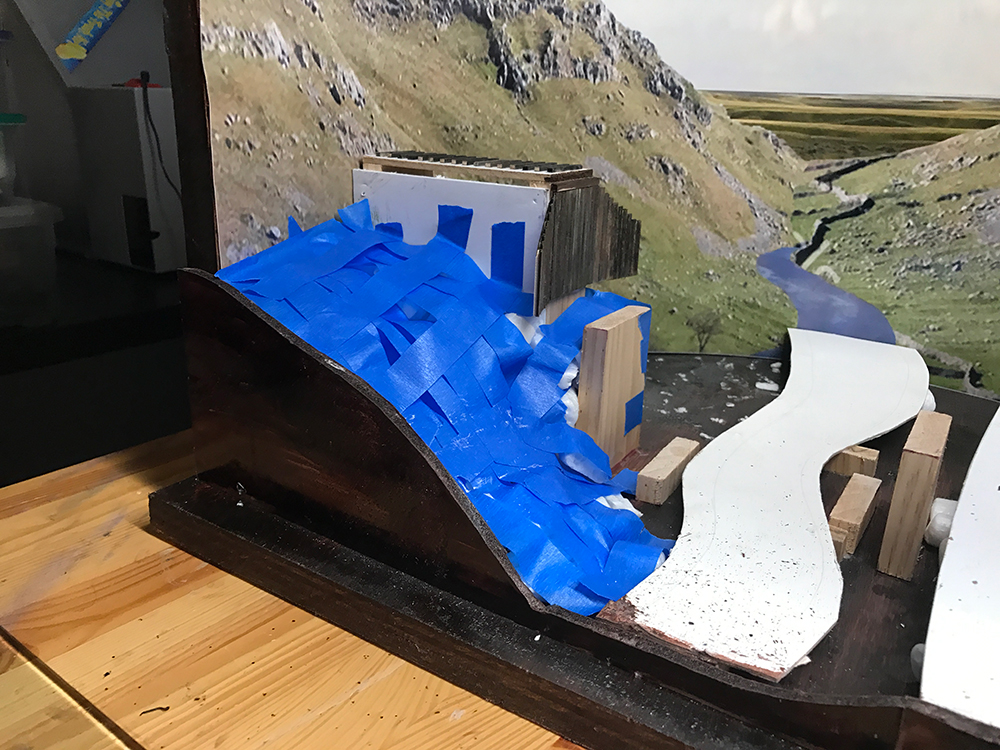
I added the first layer of peanuts. I taped them down in place. This layer was put in place as a foundation.
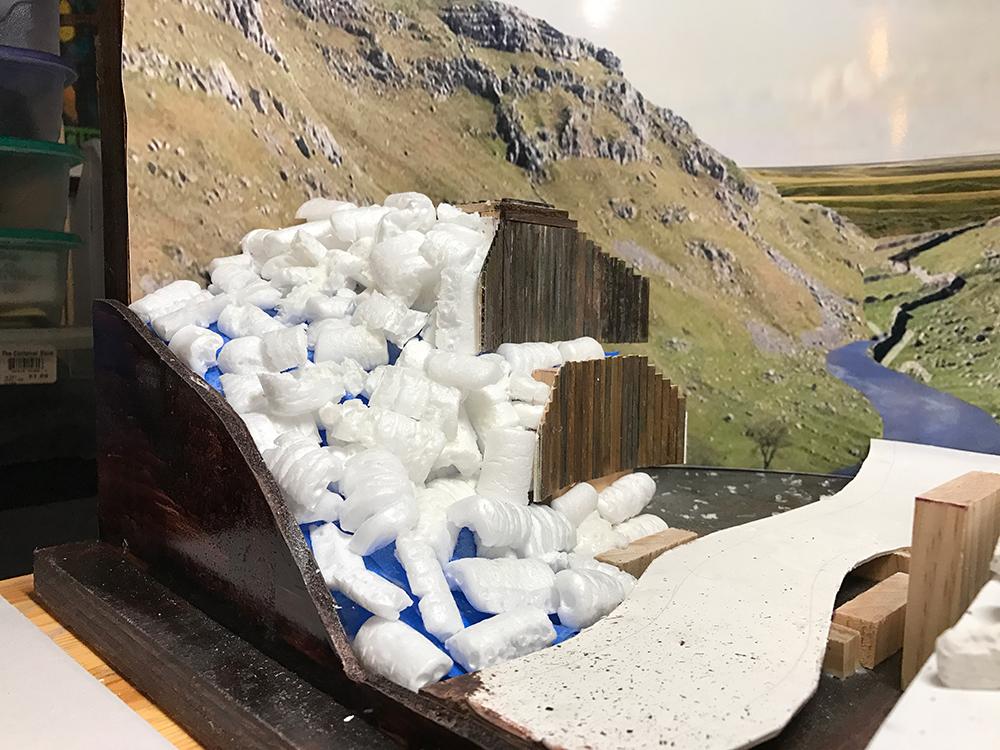
With a second retaining wall in place I added the second layer of peanuts. I broke them into smaller pieces and used spray glue to hold them in place. The smaller the pieces the more control you have over the lumps and bumps.
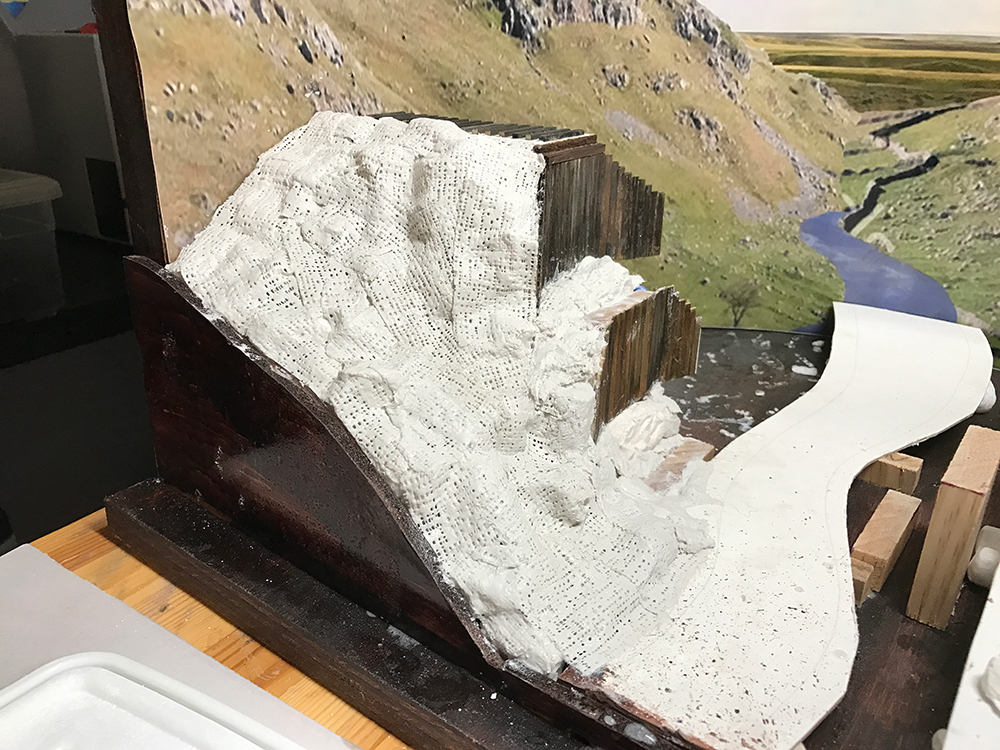
Once enough peanuts were in place I covered them with plaster-of-paris bandages. This is the ground cover shell and there will be soil layer added at some point.
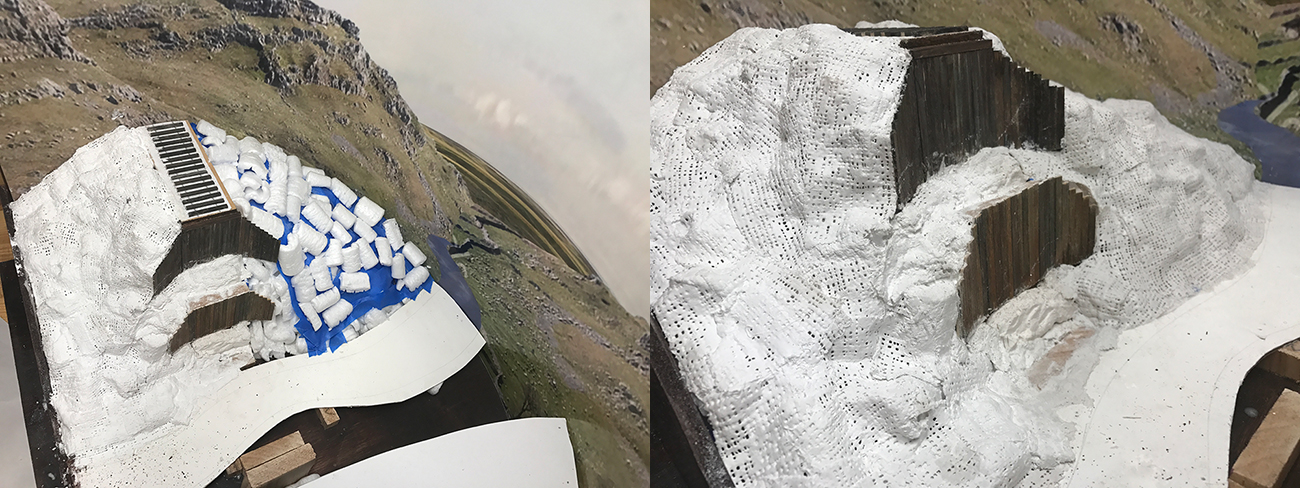
I'm working around the diorama corner by corner. Here's the back left of the diorama.
So here's where I'm at. I'll work on the other side this week and then start focusing on the road and river bed. I'm having a ton of fun with this project since it is so different from what I've been doing over the last few years.
I finished laying down the opposite side of the valley in the same way as before: starting with a layers of packing peanuts.
I added a layer of plaster bandages. Plaster has managed to get over some of the nicely finished wood. I'll go back and with my marker pens re-stain the wood where necessary.
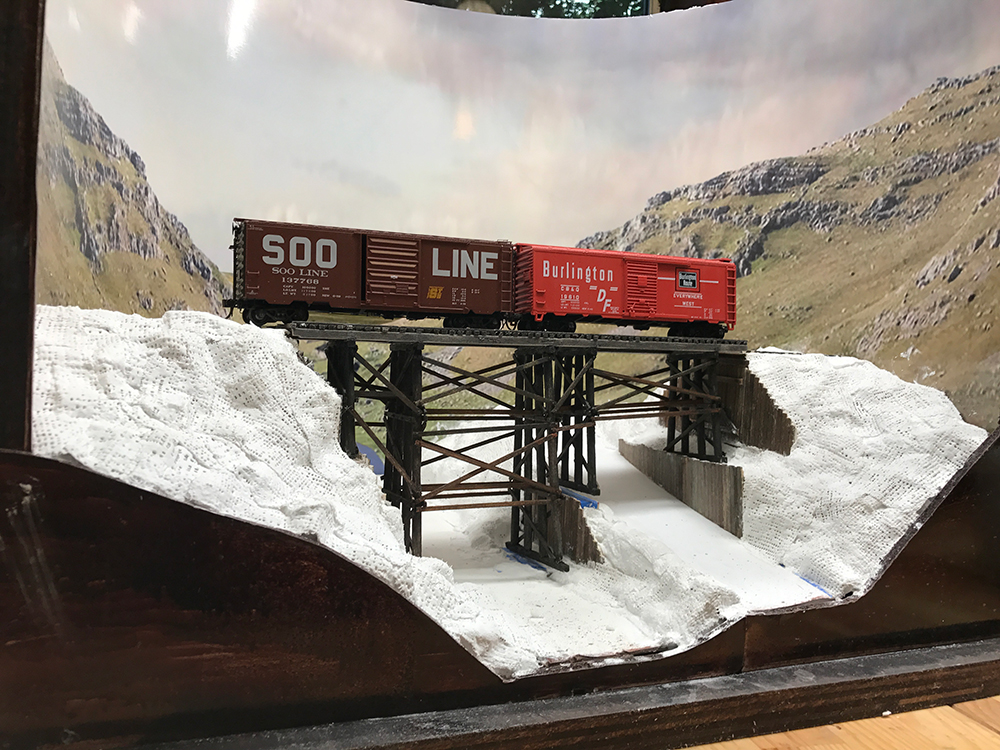
I continued to add back the trestle just to make sure that it still fit the space and made adjustments where necessary.
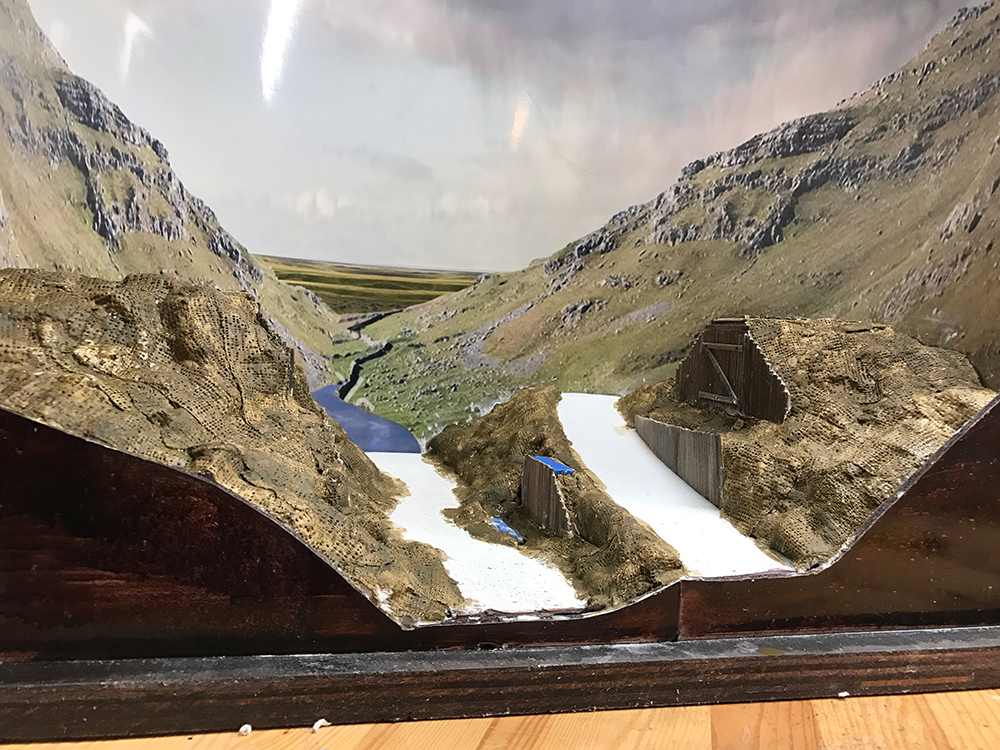
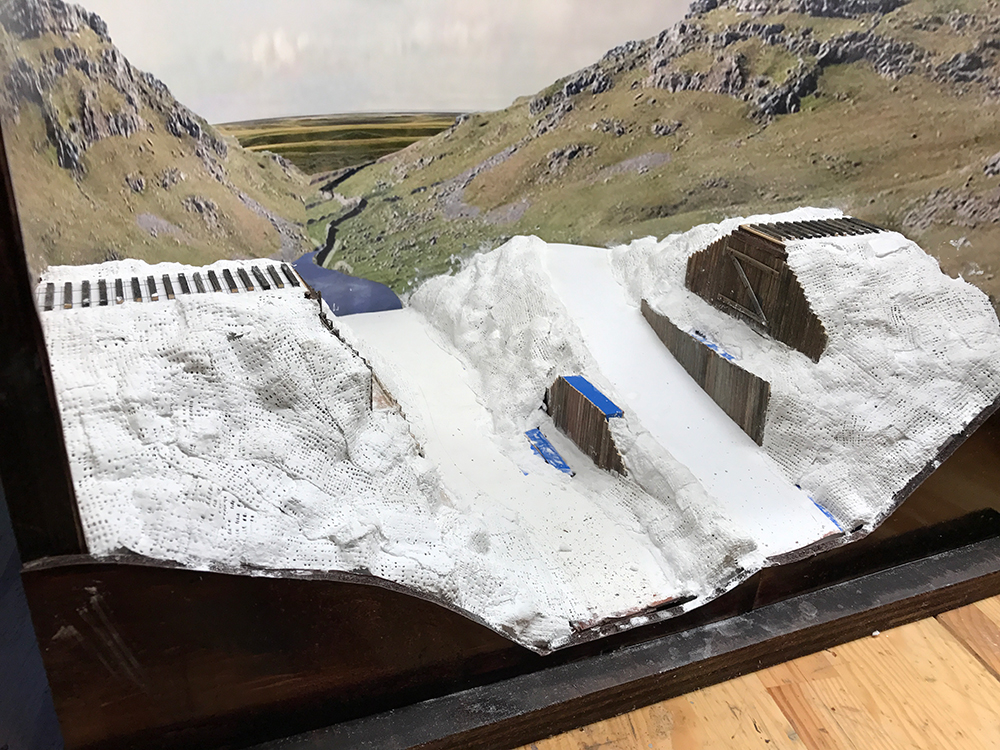
And finally before starting work on the road and the river bed I colored the plaster. I will be adding a soil layer over the plaster which will hide the remaining white specs.
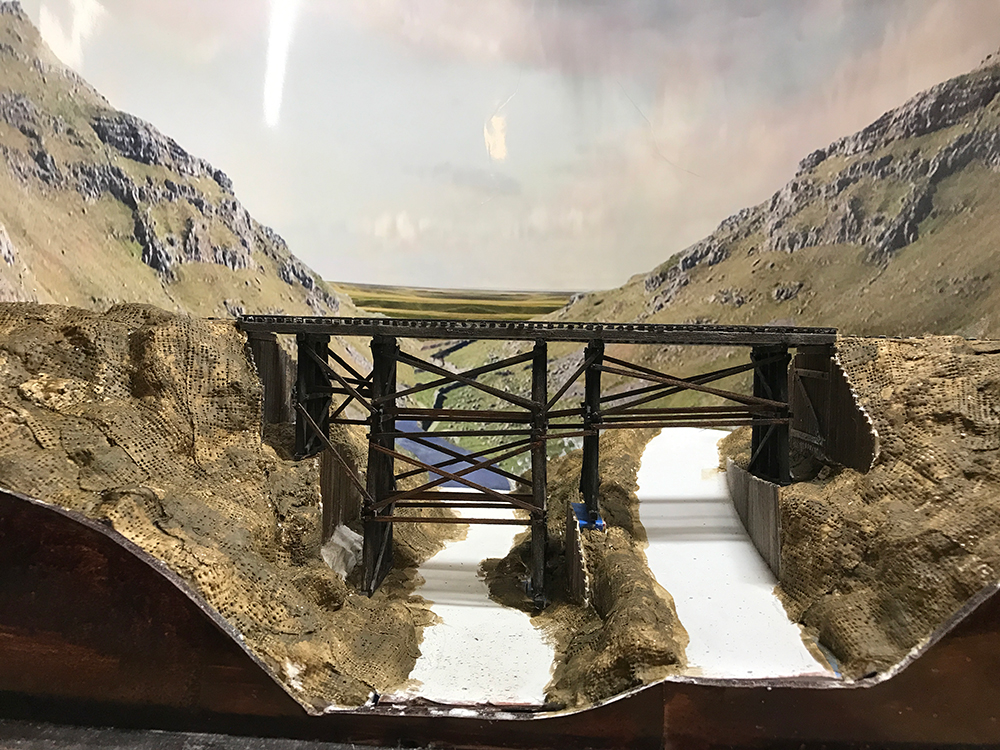

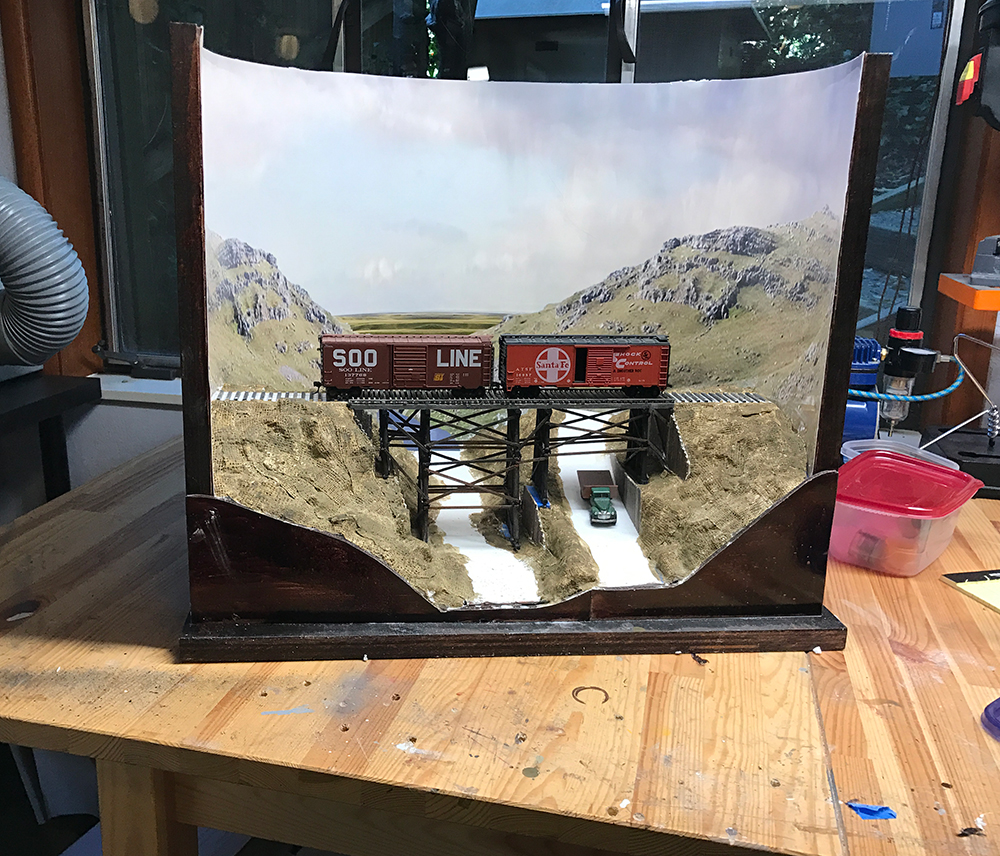
The diorama ready for soil.
After finishing the building up of the valley sides it was time to cover the surface with a soil layer. I've heard some various names for it including 'goop' and I downloaded a quick recipe from the net.
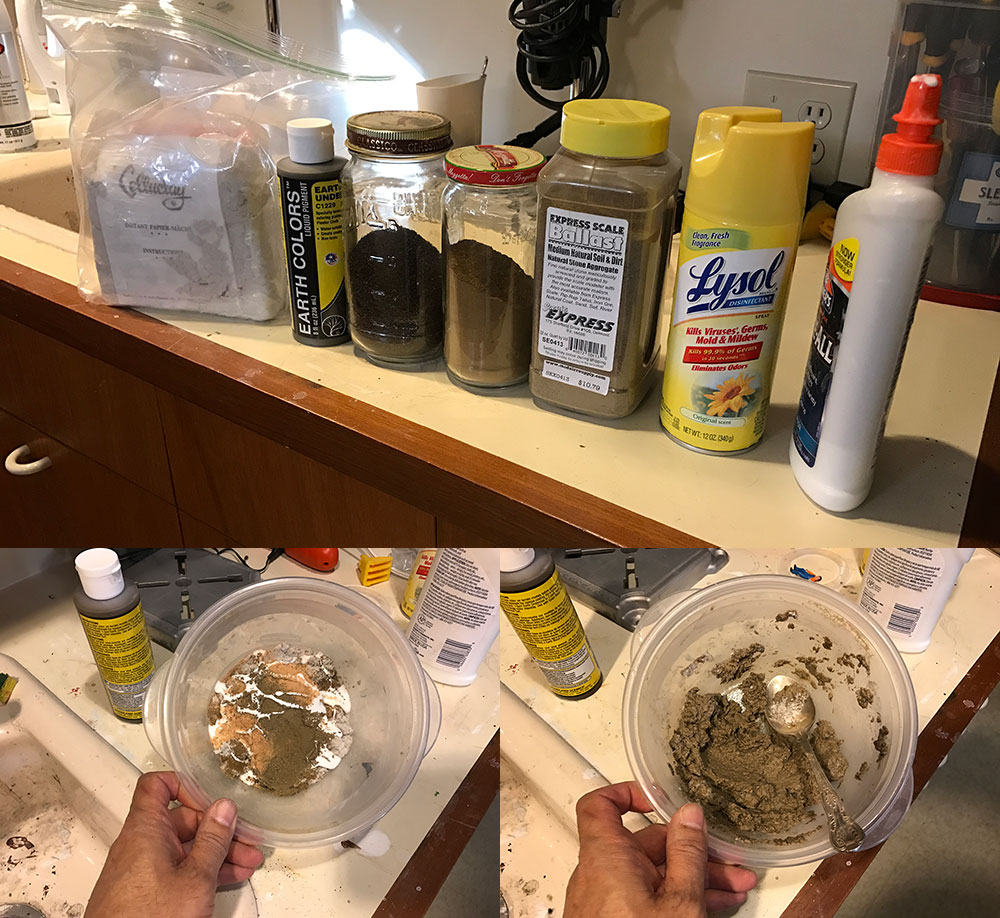
The soil layer is made up of Celluclay paper mache, sawdust, real sifted soil, Woodland Scenics earth paint, PVA glue and water with a splash of Lysol to kill germs. Once mixed it looks very unpleasant but covers the surface very nicely.
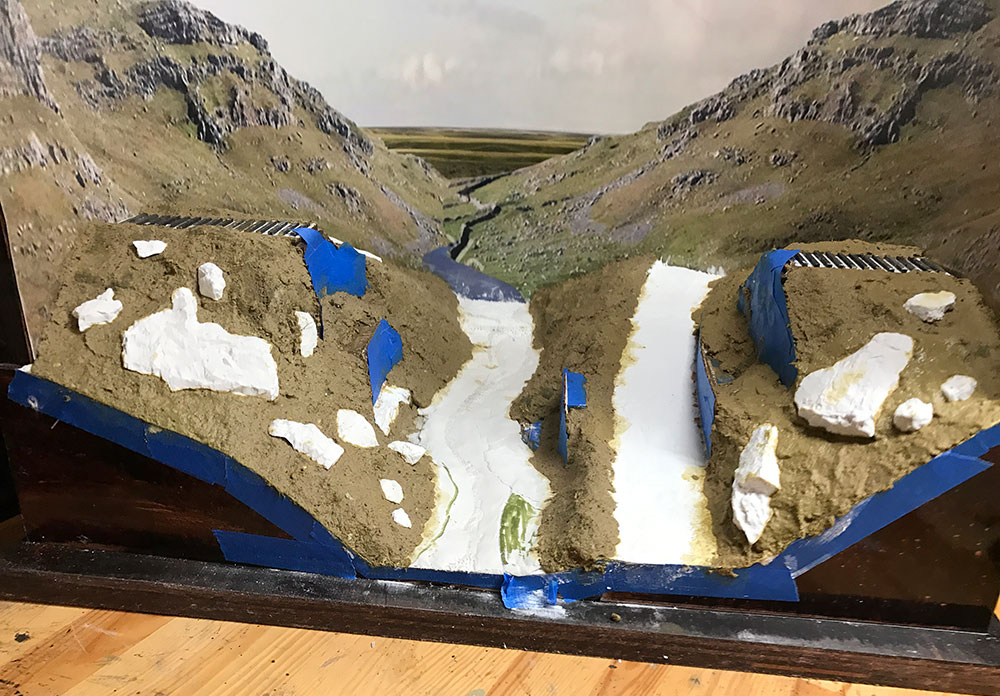
I added some hydrocal rocks to the soil while it was still wet but I felt that they didn't look good. I attempted to color them but it ended up looking very unrealistic. I watched a couple of videos online on how to color rocks and will save them for another project. I filled in the rock holes with more soil.
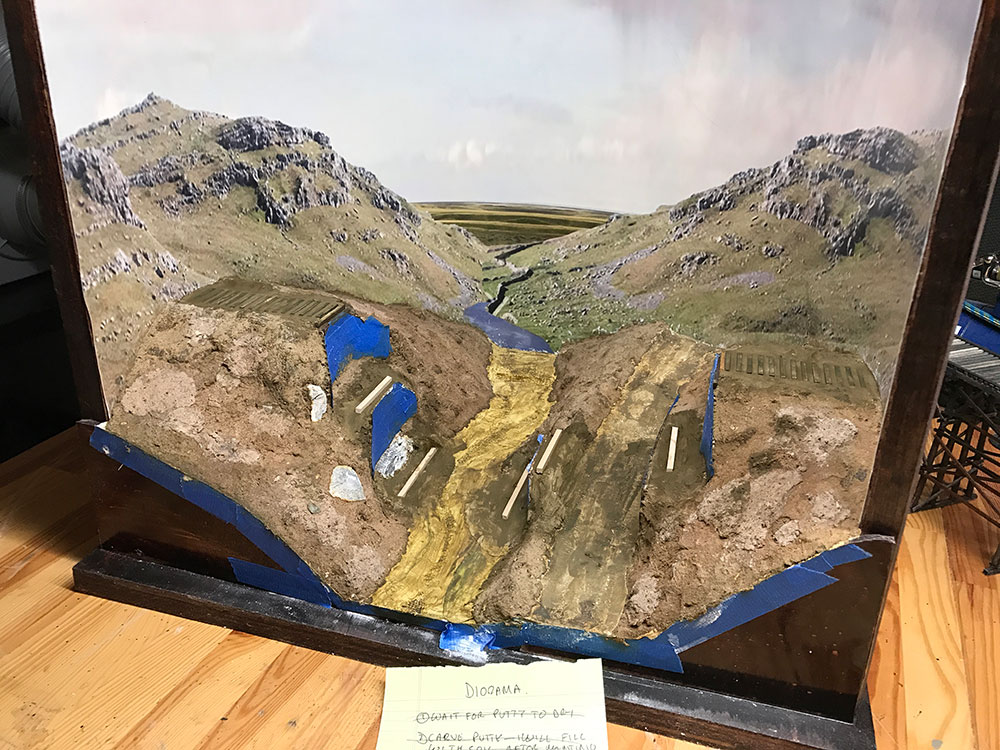
I removed the rocks and filled the holes.
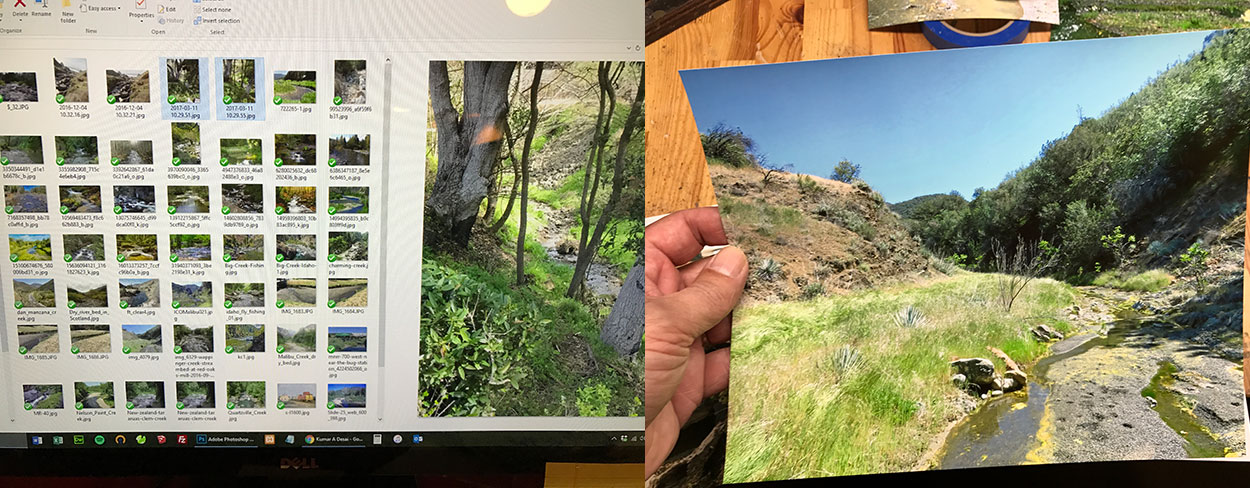
I spent some time looking at images of river beds and then drew a quick diagram of features and placement of rocks and sand etc.
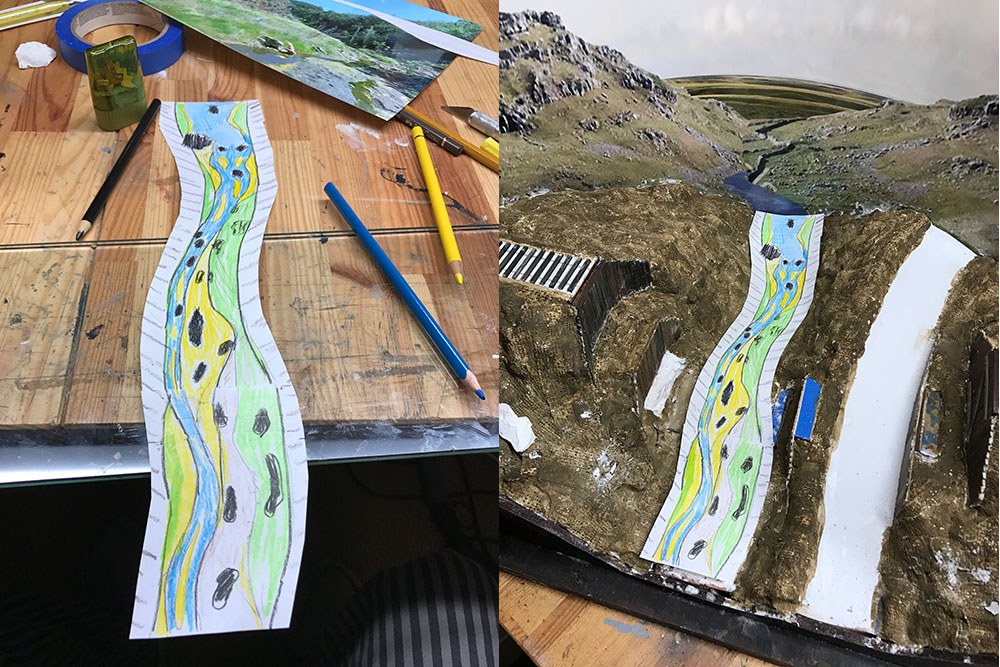
I created a plan that outline features I wanted to include in the river bed.
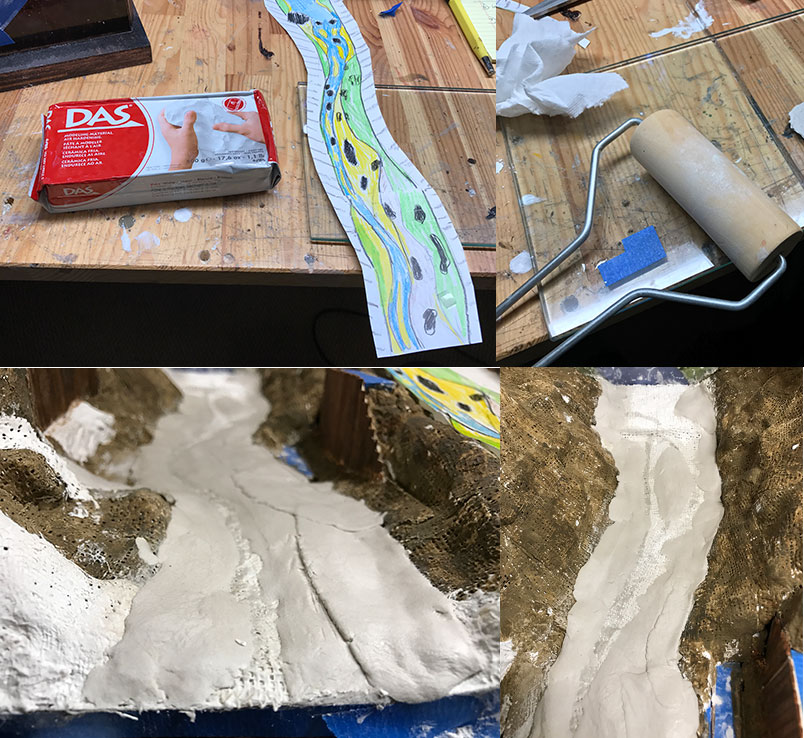
I used DAS clay to mark out the various layers of the river bed. I like the control clay gives you over contours, slopes and surfaces. I made the mistake later of covering this with a dust layer which caused much of this work to be lost.
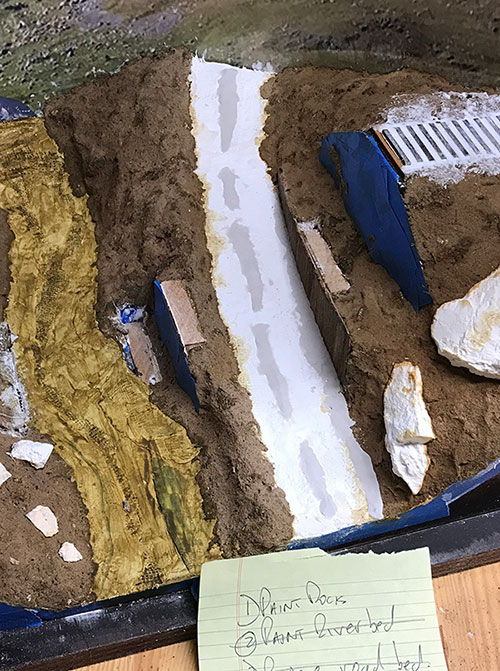
I also used the clay to lay out some of the road surface.
I needed to give the area around each leg base more attention.

I used Woodland Scenics Foam Putty into which I pushed each leg. The putty is soft enough to begin with and an indentation was created for each leg. I removed the legs and let foam dry solid. I then carved and sanded the foam to match the profile of the surrounding area.
I added a of dust/dirt/real soil over the whole area. The mistake was that I covered the river and road. Not a big mistake but I lost their profiles. Lesson learned.
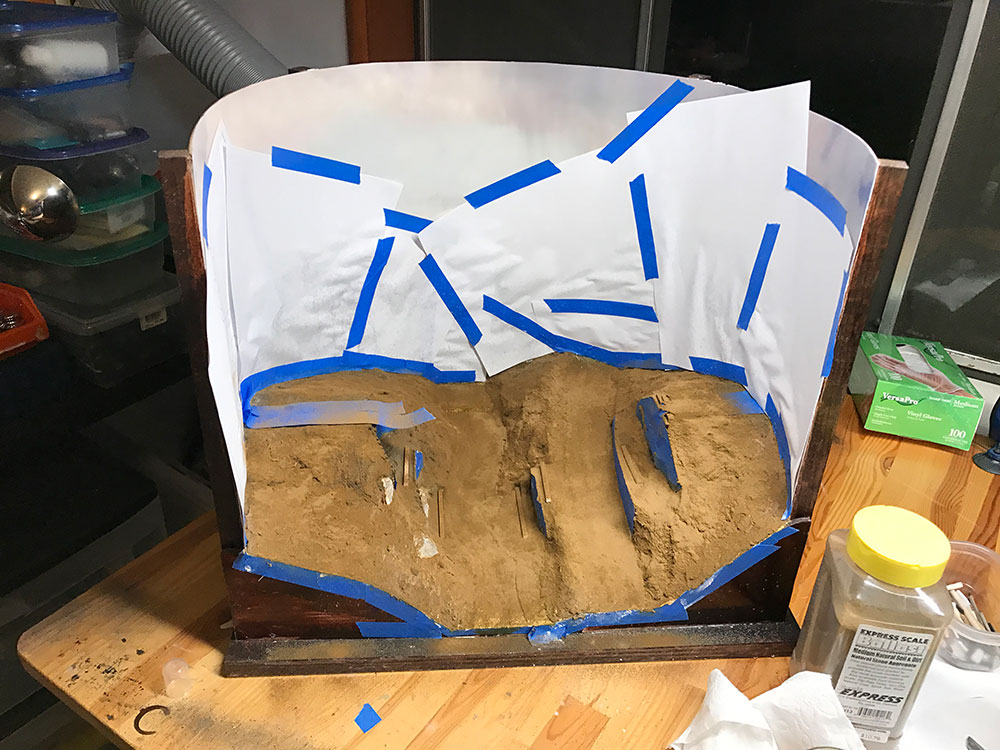
The dust is just finely sifted soil. I used natural materials as much as possible.
I used natural materials for the river bed: real sand, real stones. I used gravel for the road mixed with dirt.
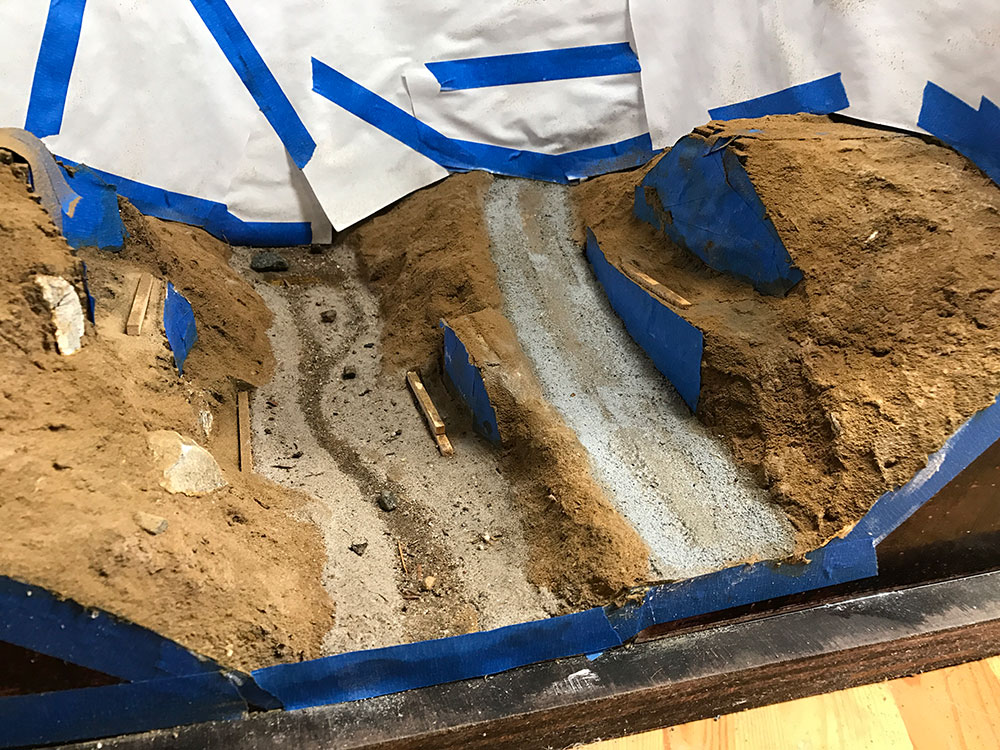
Natural materials scale very nicely and reveal a variety of colors at granular level.
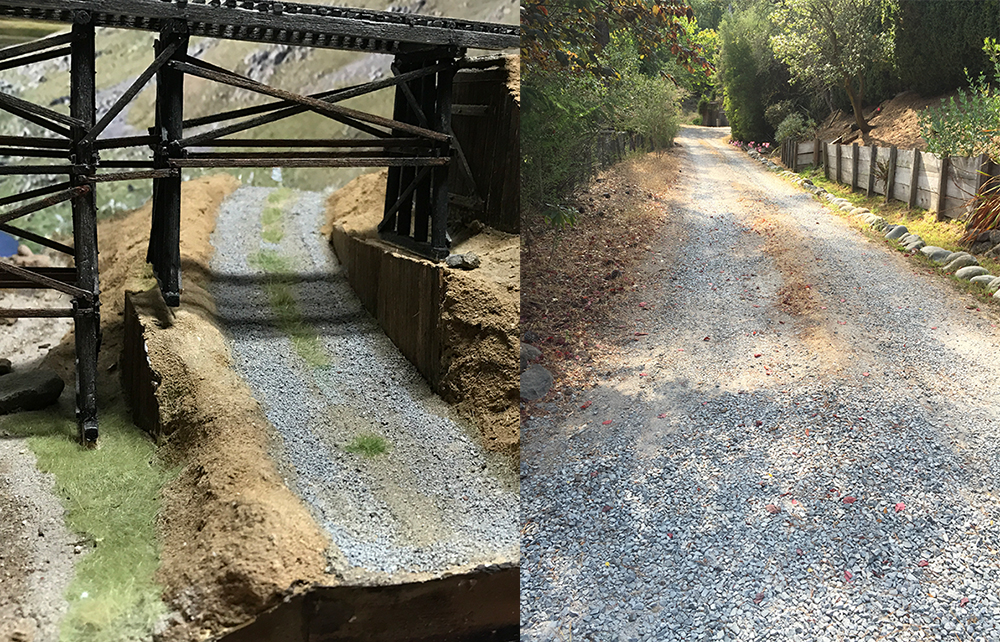
Here's some grass on the road. its needs a little more work but it looks good to me for the moment. I'm using the road next to my house as my guide and as you can see there are plenty more details to add to it.
I've started adding grass.
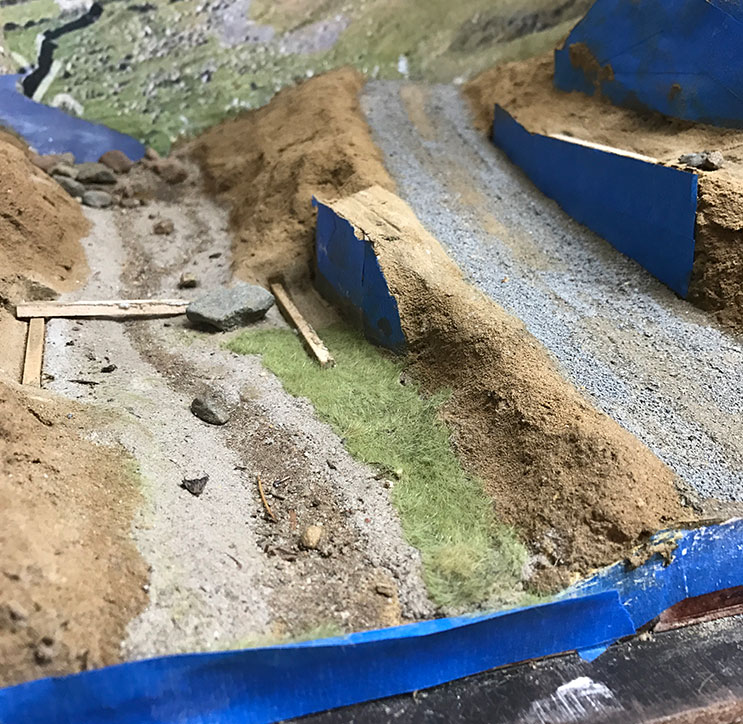
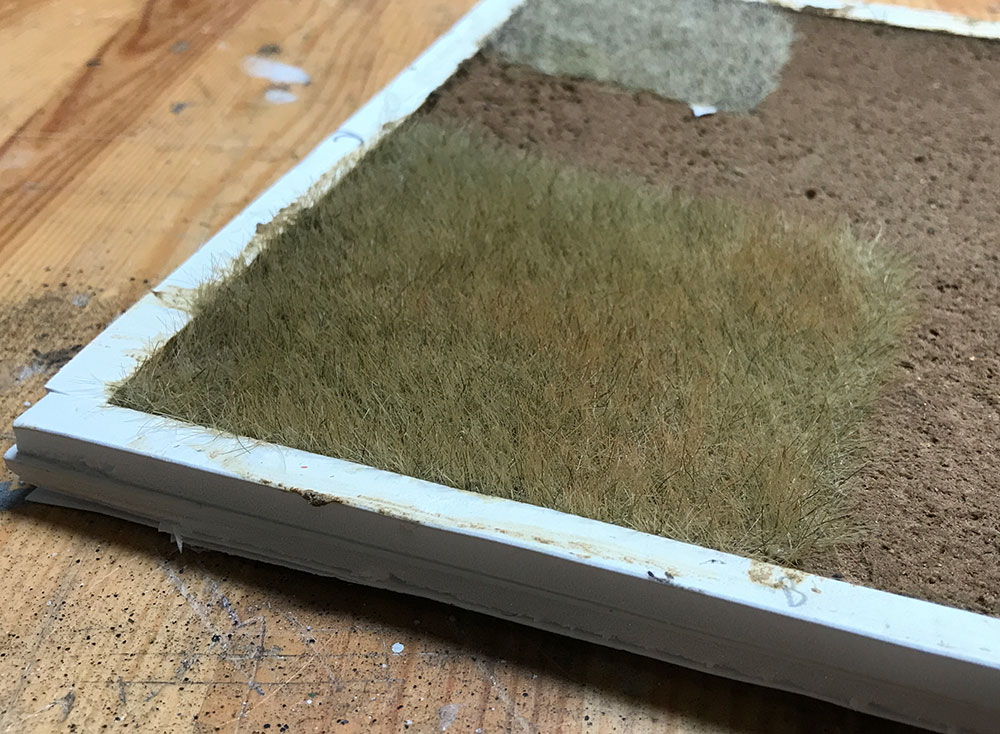
Doesn't look good. I don't have much experience with grass. I need to purchase a new static grass applicator.
My first attempt did not go well (the grass is too short) and I'll have strip it off and start again. Luckily it's a small area.
Since the diorama has to live on the bottom shelf of the module cabinet I thought I would start by testing the lighting. I still had only a rudimentary understanding of lighting - especially fluorescent lighting - so working on this brought me a little more up to speed. The bottom shelf will be lit in order to display the dioramas and eventually I'll have two 33 inch lights straddle the ceiling of the bottom shelf. Until then I bought a standalone light to sit above the diorama.
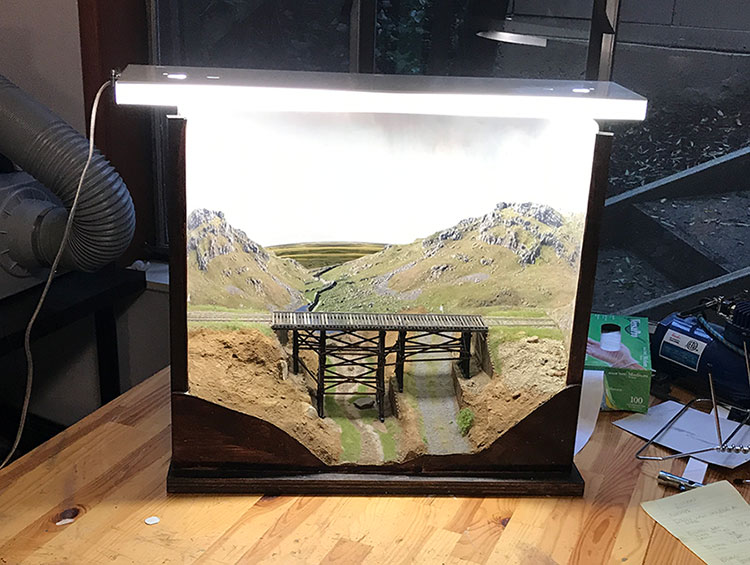
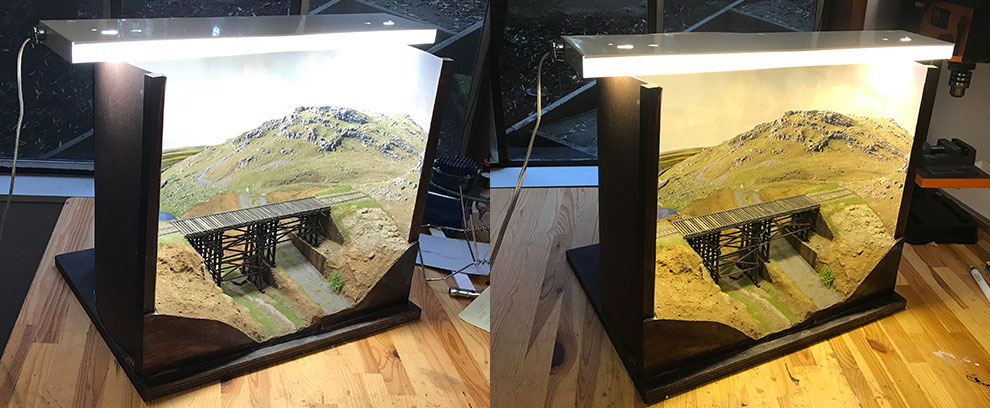
The next thing I wanted to examine was lighting color especially warm vs cool. The light came with two cool white lights. I swapped them to see what warmer lights would look like.
The warmer light is nice but too dark and too orange. I reverted back to the cool white bulbs and will add warmer colors using a spot light when I start taking photos of rolling stock.
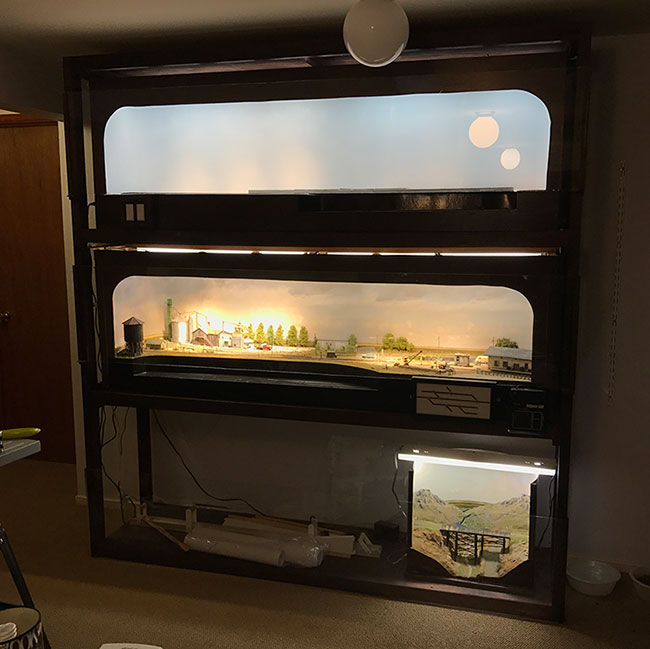
I placed the diorama on the bottom shelf with the light. It's going to look really nice once the other dioramas are installed.
I decided that the embankment was mostly man-made and therefore the railroad engineers dumped a lot of rock and sand on the sides to build up and stabilize the run-up to the bridge. Therefore I went to my supplies of rock and sand and made up a mix that I thought would work. I paid attention to the colors and made sure that contrasts were kept down and the mix was kept within scale - the foreground has to match the background/backdrop.
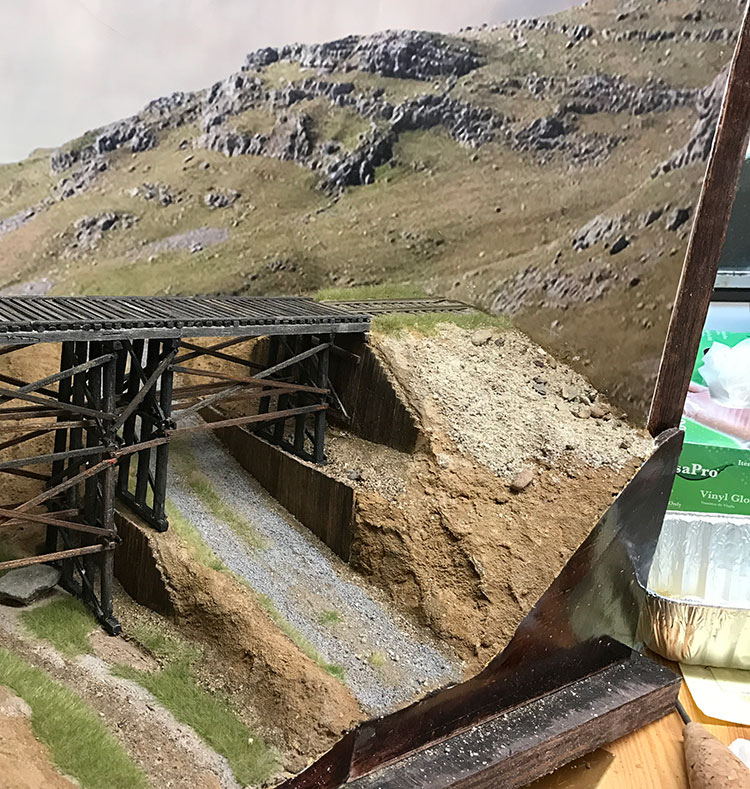
I spread the mix over front top of the eastern side. My first thought was that it looked like someone had vomited over the diorama but soon after I felt that it looked pretty good with a variety of colors and nice mix of stones and small rocks. This is just the base for the grass so I won't look like this for long.

Next I added grass. The way to do it is to go slow and add very light colors first. I wanted to avoid a carpet of rich green grass and I wanted to be able to see the ground beneath. It is easier to add dark colors on top of light than the other way around. I made up a mix of dry grass and then once stuck down I added a second layer of slightly greener dry grass. I will eventually add dark patches of grass here and there but for now I want to keep the colors relatively flat and muted.
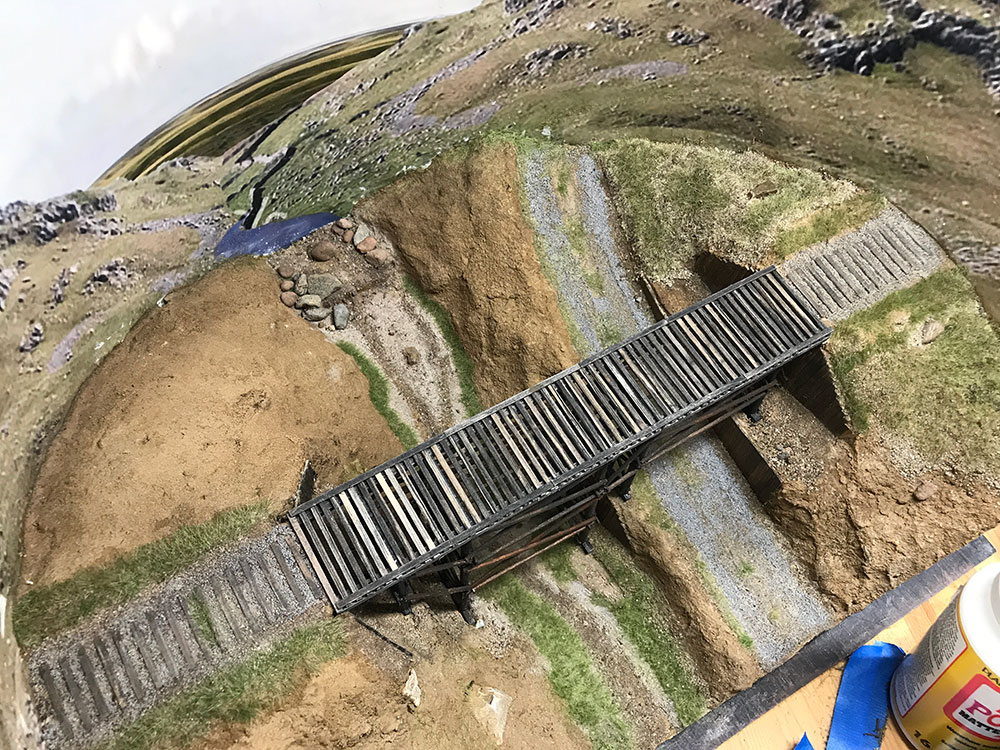
I experimented with 2mm dry grass on the back and it came out ok - not great. I added a second layer of greener grass and but this intermediate stage things still look a little rough. This work is just a base for additional landscaping. The banks need a lot more work and will eventually have plants, flowers, rocks etc to make them pop a bit.
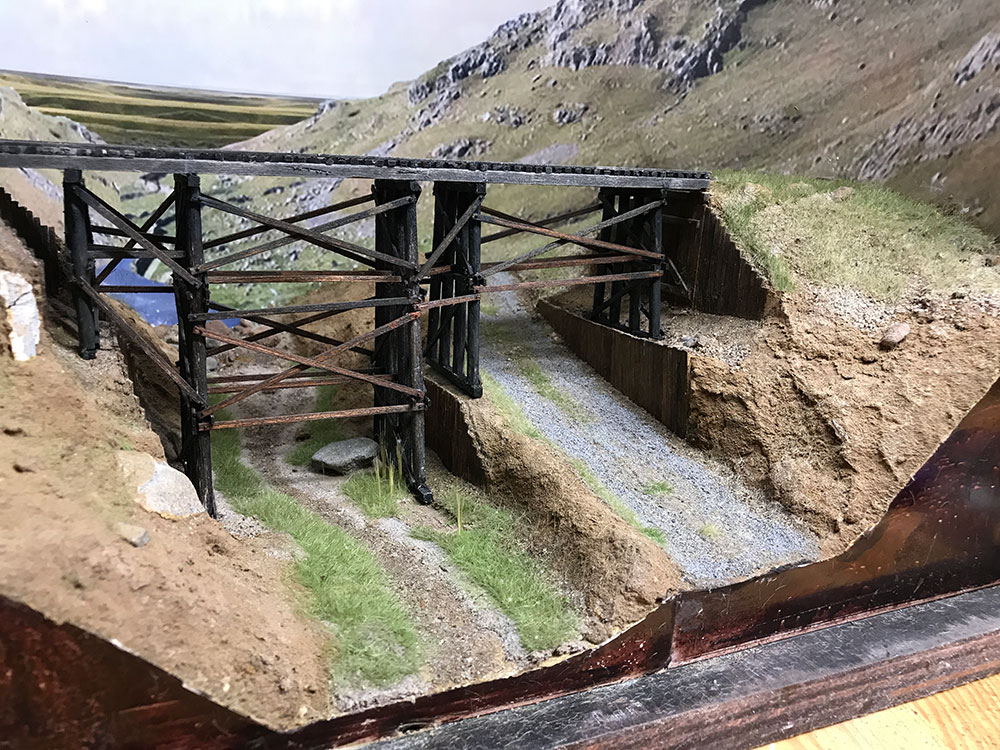
Overall I'm trying to use natural materials as much as possible to finish the landscaping. I find that materials such as stones, sand, dust and bits of wood scale really well. They also retain a nice mix of colors and textures at HO scale. I haven't yet had to use paint yet but I'm not ruling it out for some finishing at the end of the project.
I've done the first pass over the east end (right hand side) of the diorama and added as much as I thought I needed in order to create a realistic scene. I'm happy with it so far.

It took me a couple of attempts to get the grass looking the way I want. One of the issues I've been fighting is the grass color. As much as I like Silflor static grass (and it was used to perfect effect on The Depot) I really find the colors to be a little flat. I would have much preferred to used a brighter vivid green and after searching around I eventually found some wonderful static grass made by Noch. I only added the new Noch grass in a few small areas for the moment. However I'm really going to use the Noch grass around the river bed where water would make the grass brighter and vivid.
Sadly this photo doesn't do the colors justice - the Noch colors are much more vivid and rich in real life. The difference in color will be much more noticeable when I use the Noch grass for larger areas around the rest of the diorama. I'll still have to dampen the Noch colors down a little but over a larger area they should make the diorama a richer viewing experience.
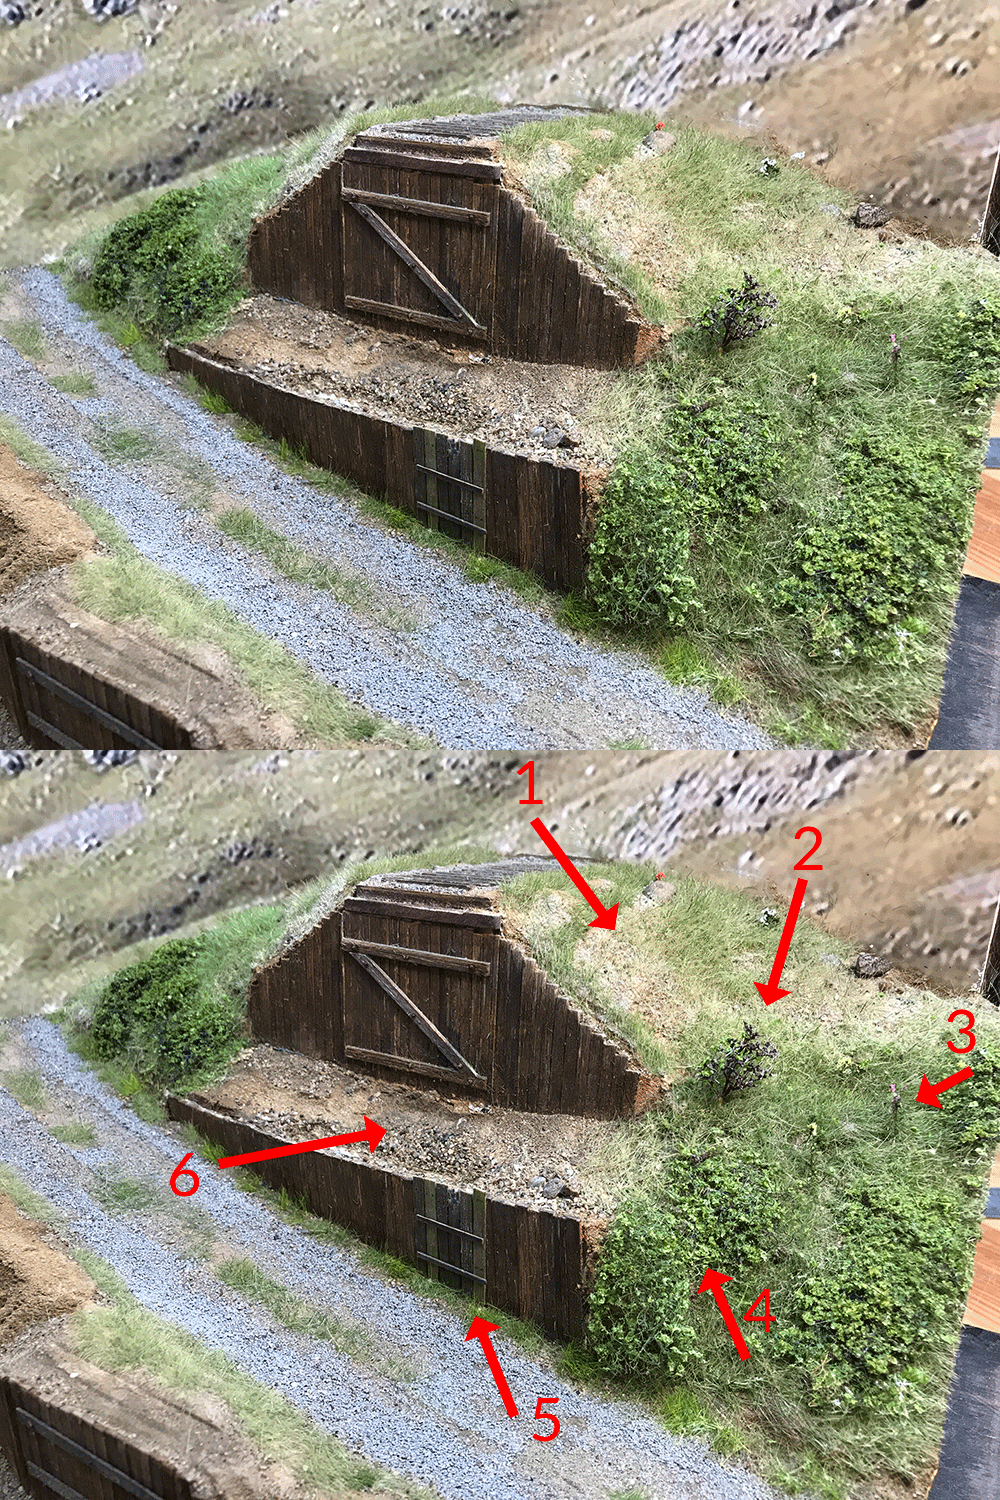
Here's a clearer view of the east side:
1. I wanted to leave some of the rocky/stony base visible and expose the rocks and stones that were used to build the embankment that leads up to the bridge. The grass is also dryer on top from the effects of not much rain and exposure to the elements.
2. I'm not going to add too many plants. This one was created from Super Trees. They scale really well and have a lot of detail at this very small size. I might add more leaves but otherwise I think that's it for the trees on this side.
3. This is a flower and I'm going to add many more flowers and have them loosely dotted around the place. The tiny elements of color really help bring the scene to life. I just need to be careful to not over do it.
4. I don't know what these plants are called but I'm surrounded by them where I live. Brambles? I made them from a textured matt.
5. This is a Gordon Gravett tip: break up a continuous area (such the support timbers behind) wherever possible. I decided to add a small repair job to the retaining wall.
6. This area needs more vegetation but I want to leave the stones and rock exposed as much as possible to show off the colors, textures and variety of sizes. The stones have scaled really well and I don't want to hide them.
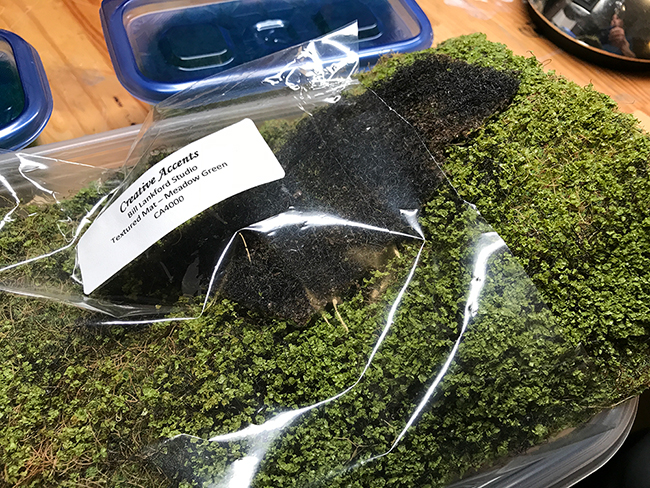
Here are some steps for making the 'brambles'. Start with Creative Accents Textured Matt
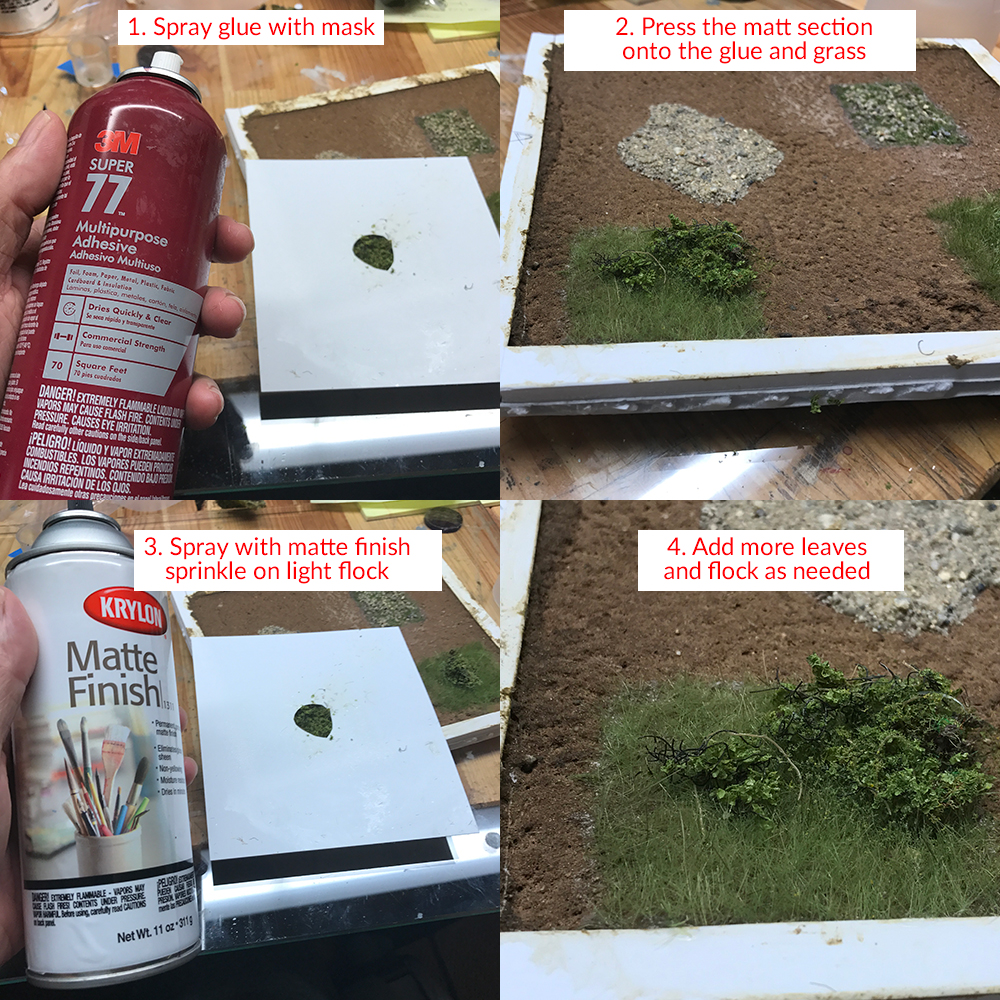
I used a scenery scratch pad and masks to test this out.
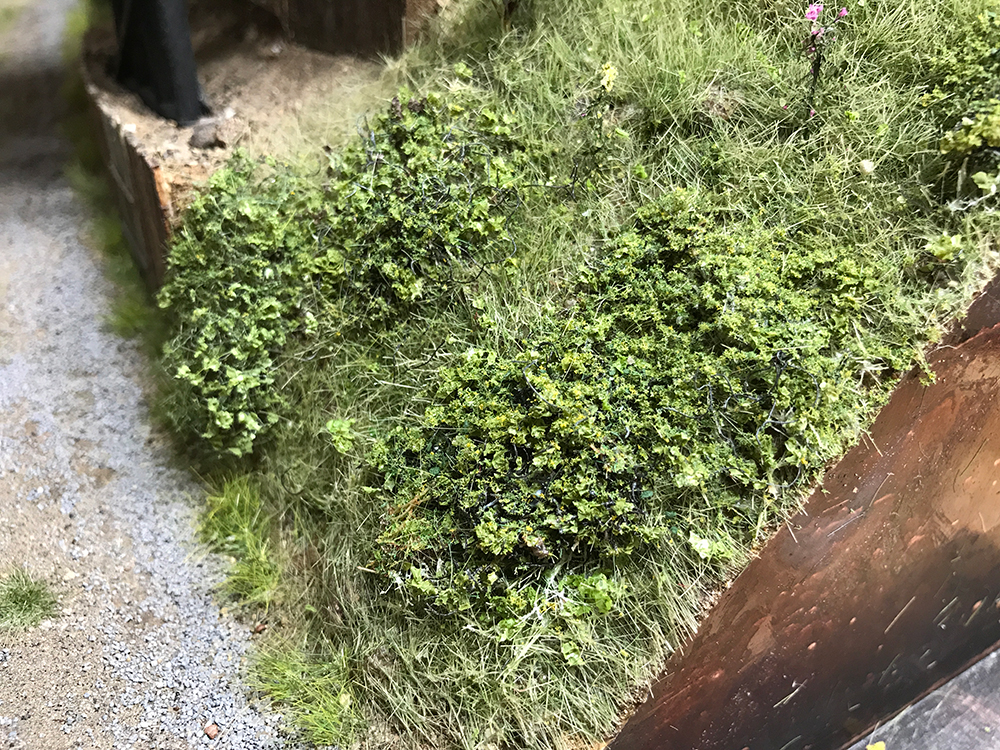
Here is the result. It looks convincing enough at a very small scale.
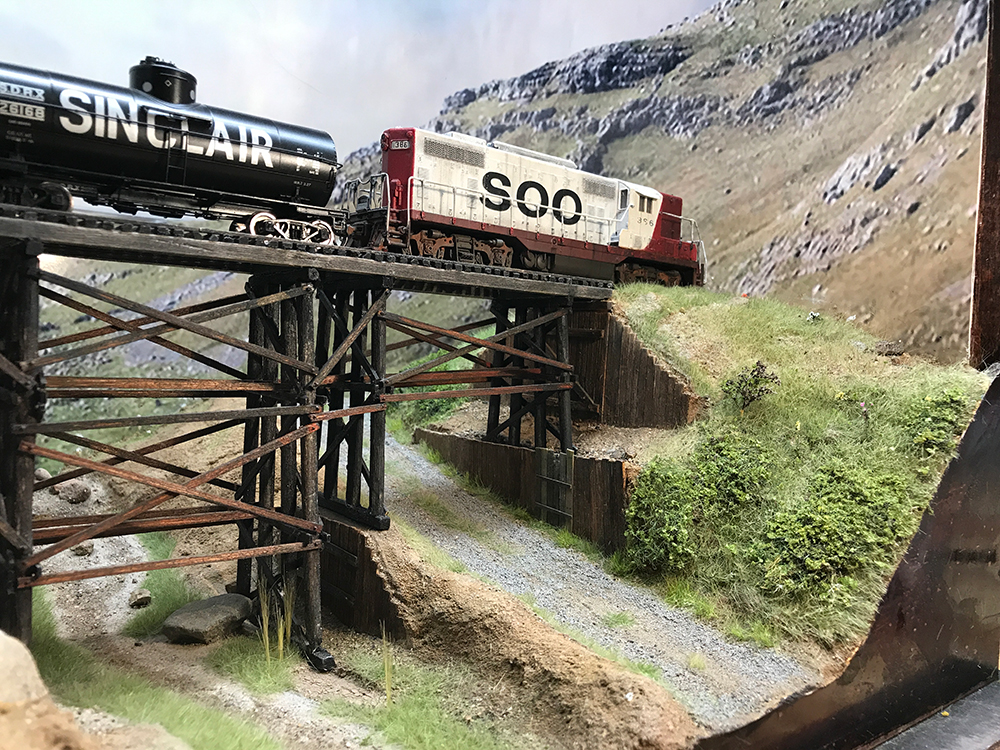
And so for the time being here are a couple of images. Plenty more to do but I'll come back to this side at a later date and add more plants and generally tidy things up.

I kept staring at the above scene of the east bank of the trestle I and kept coming to the conclusion that I wasn't happy with it. The hardest part is that didn't know why. It should have worked. It ticked all the boxes: it had a mix of textures, materials, and colors; it avoided too great contrasts; I think it did a reasonable job of reflecting the real world while avoiding impressionism; and it told a little bit of the story of the construction of the trestle. Yet I kept looking at the scene and kept finding it really uninteresting. I won't bore everyone here with all my ruminations since I went into this issue more on my blog.
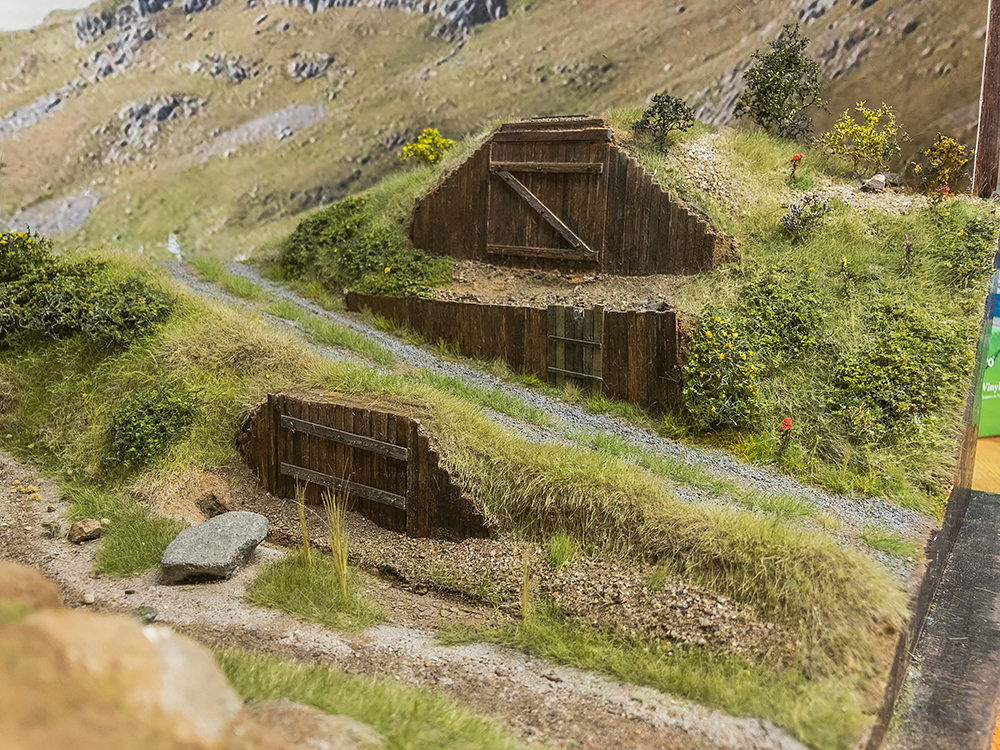
After a few weeks of tweaking the vegetation here is the east side as it stands. I'm going to hold here for the moment while I work on the other side. I need to add more greenery and cut the grass a little (it's looking a little too 'hairy'). The positioning of the various elements (grass, flowers, long grass, bushes) also looks too contrived. It may work in the long run but I'll revisit this later in the project and may rearrange some of the vegetation to create a more natural wilder look.

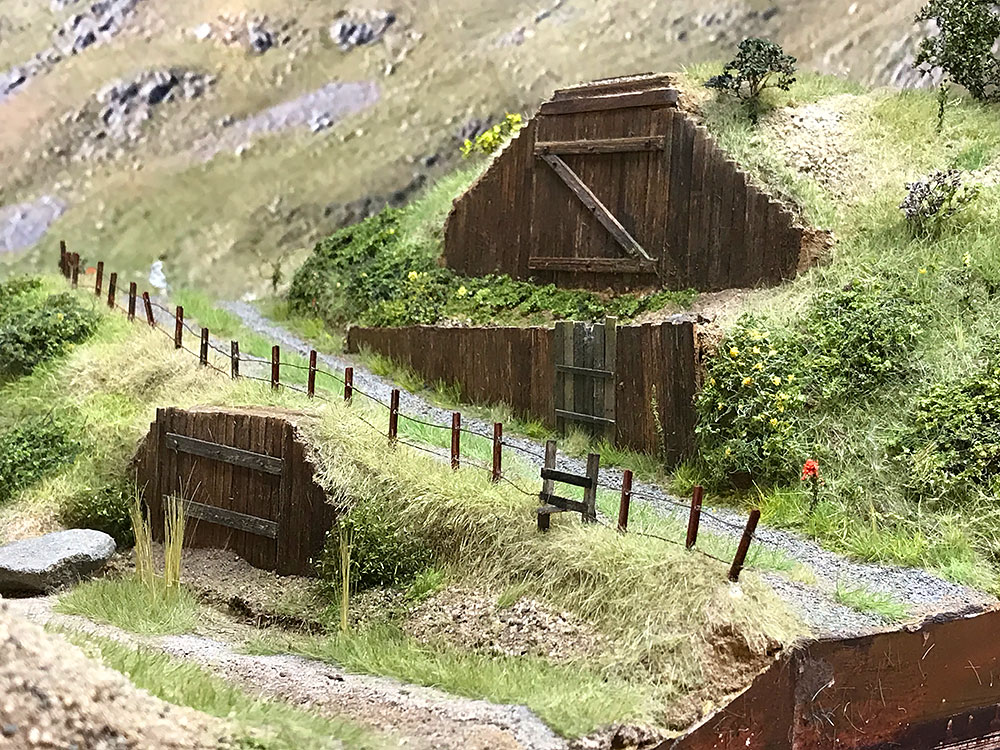
I finished the fence.
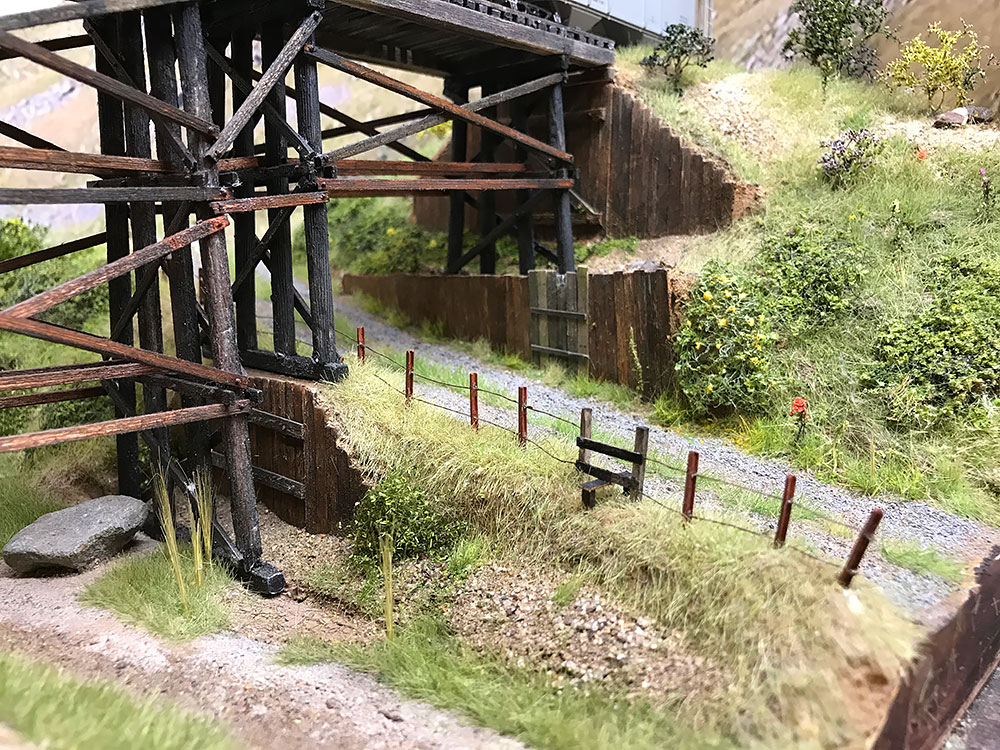
I plucked out some some thin strands of wire from some metal bailing wire which I strung between the posts. The final effect is perfect. I also added a small stile gate to break up the fence a little and provide something interesting to focus the eye on.
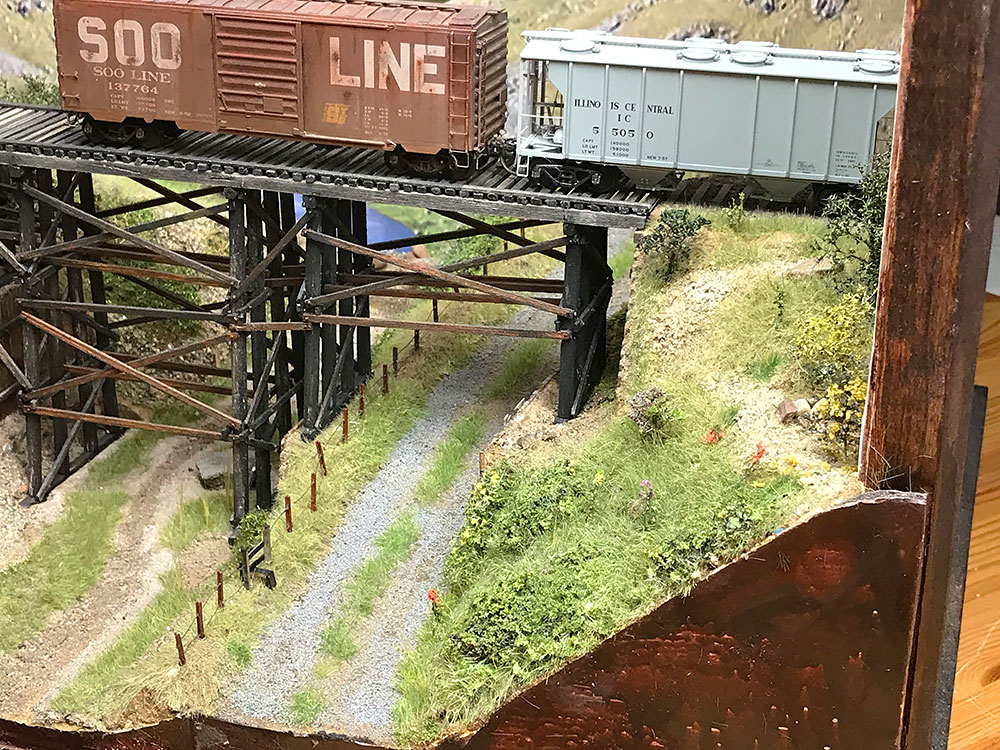
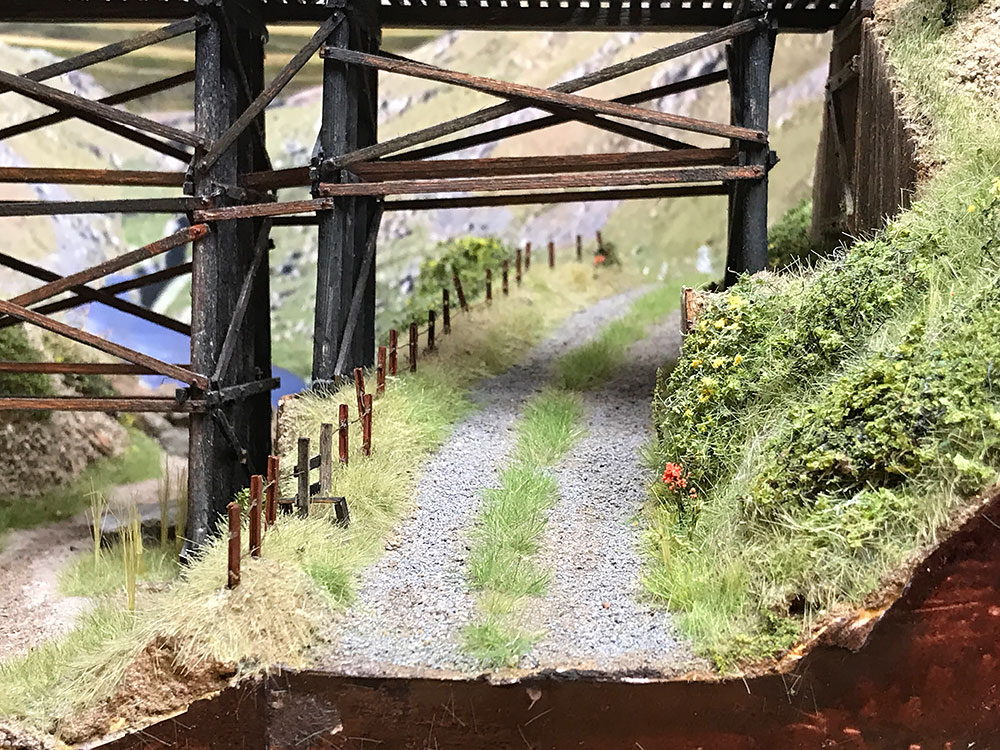
The fence was made from discarded rail when the track was upgraded from 75 lbs to 100 lbs rail many years ago.
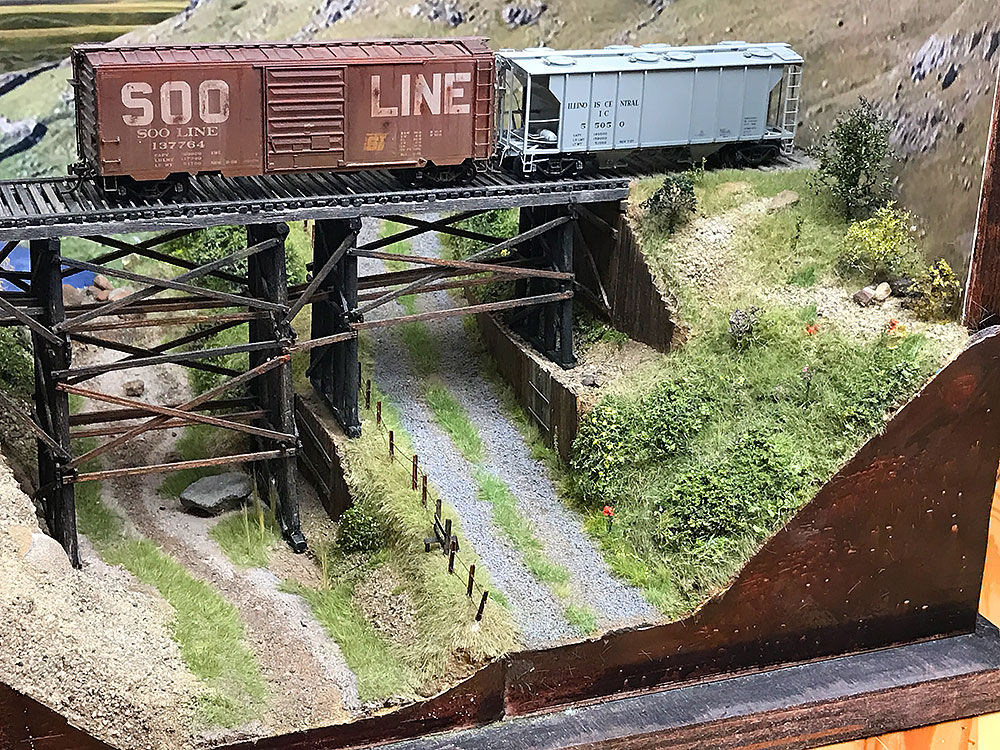
I wanted to add a scree. A real scree of course will have formed out of broken rocks from a rock face located above the scree. The embankment has no such source of rocks so I created a story of an earth slippage caused by rain that created a scar in the soil.

View of the diorama just before starting the west side.
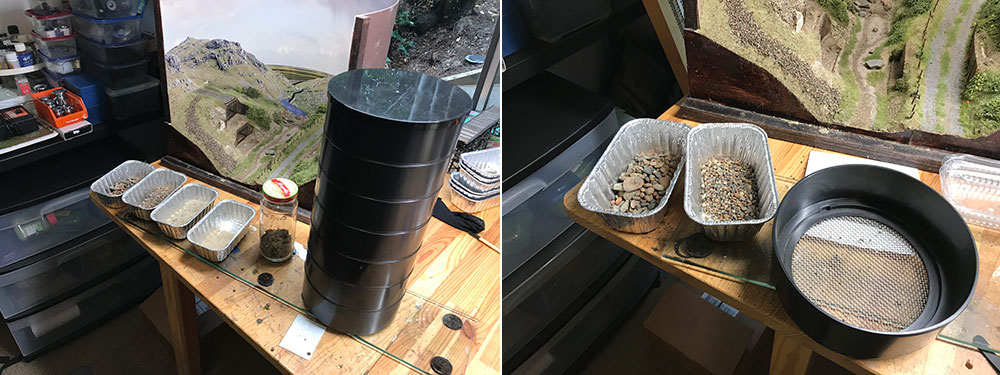
I sifted through my jars of stones and soil to create several grades.
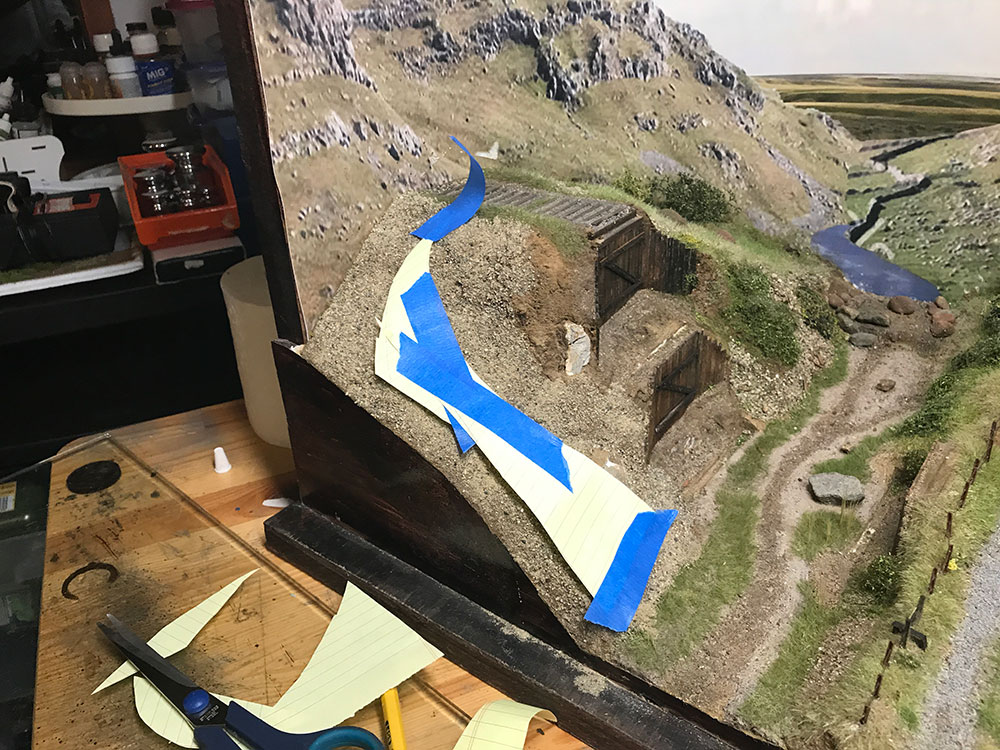
After putting down a base layer of small stones and dirt I masked off the area I did not want grass to go over - the scree area.
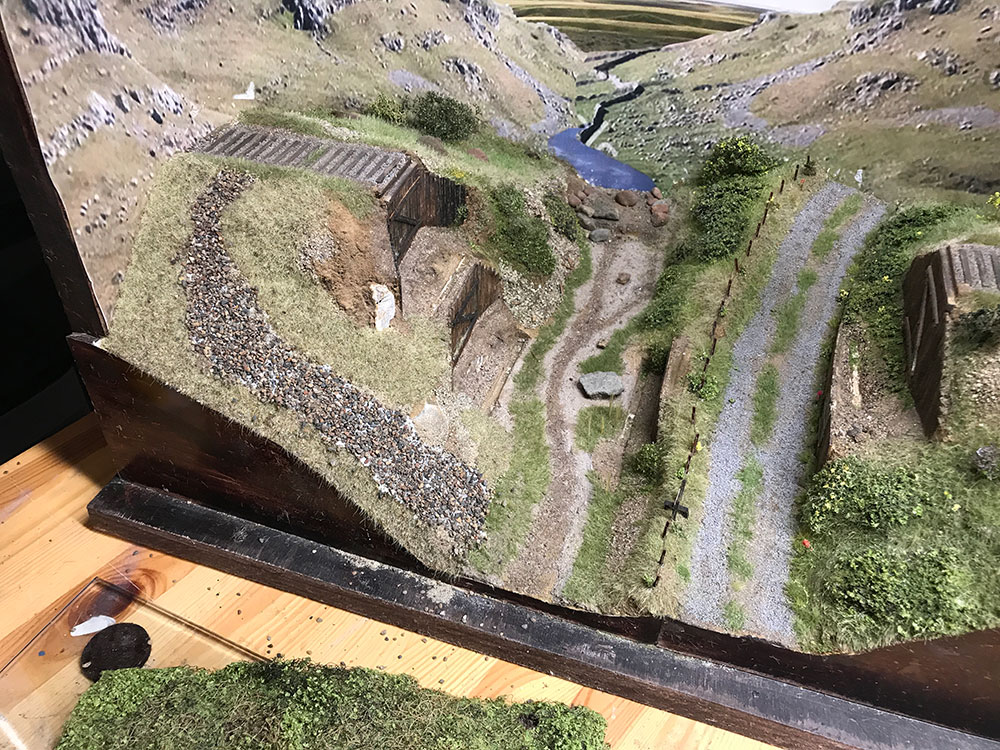
I added the grass and then laid the scree area with heavier stones.
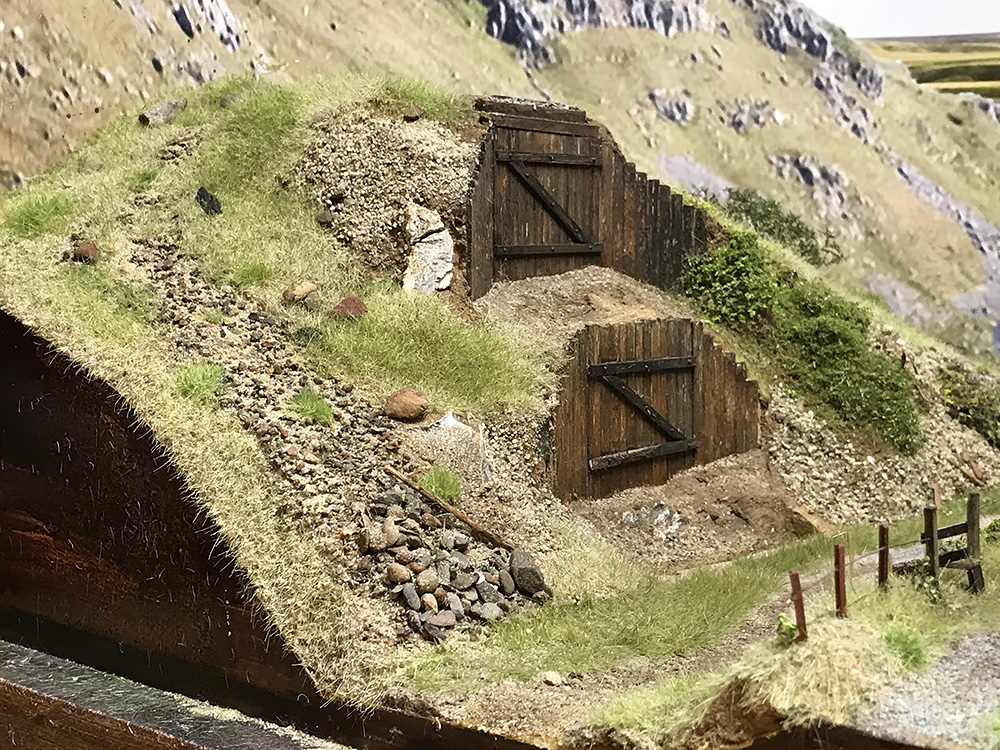
I then glued down more stones in layers with the smallest at the upper level. As the scree goes down the hill the stones become bigger.
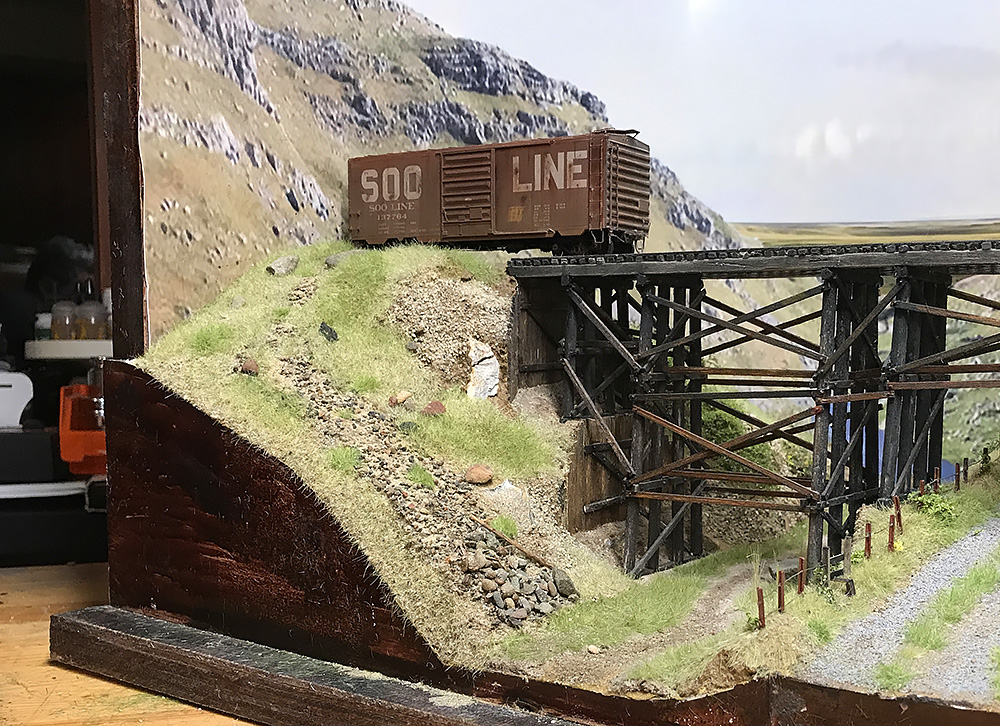
Looking a bit bare at the moment but things will improve with the addition of a fence and some vegetation
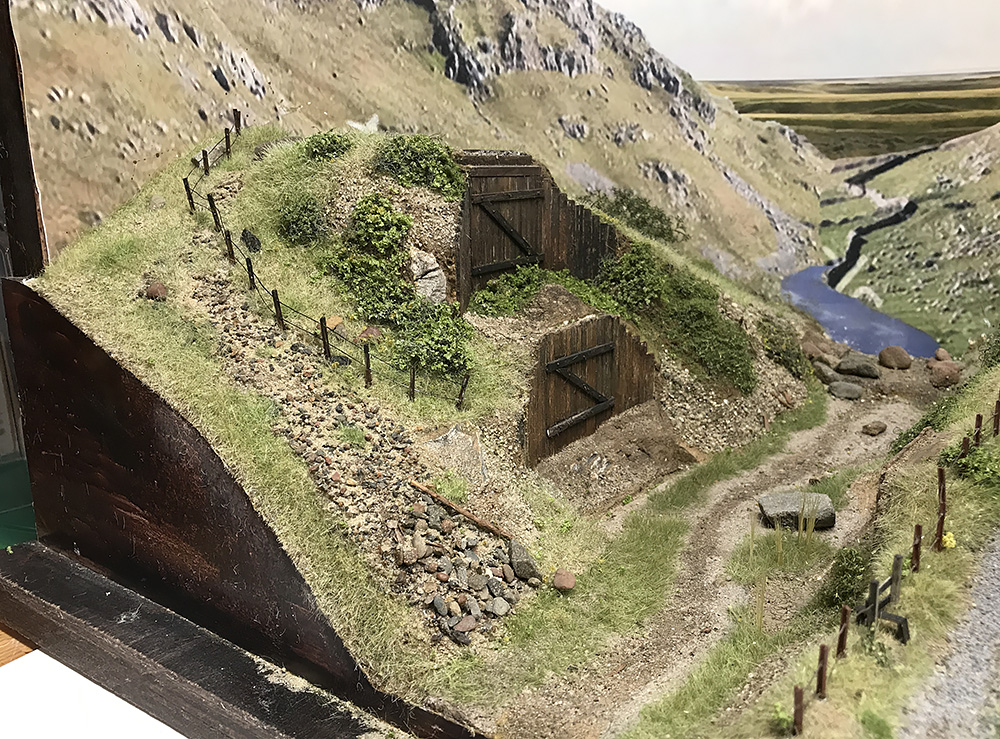
Much better view now that the fence is in place
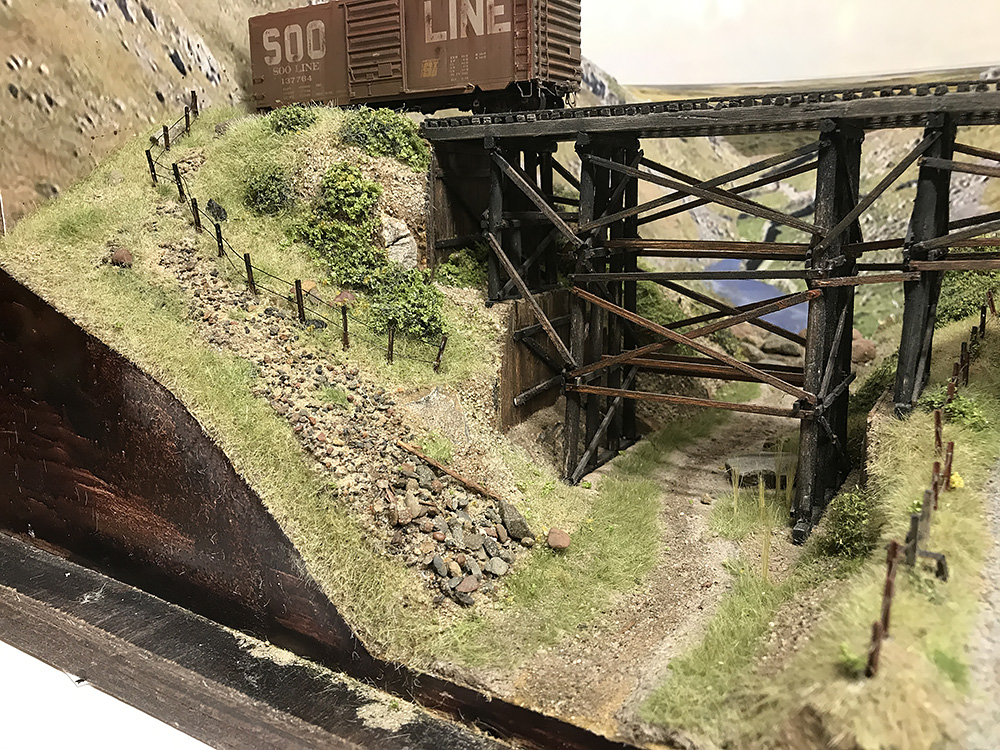
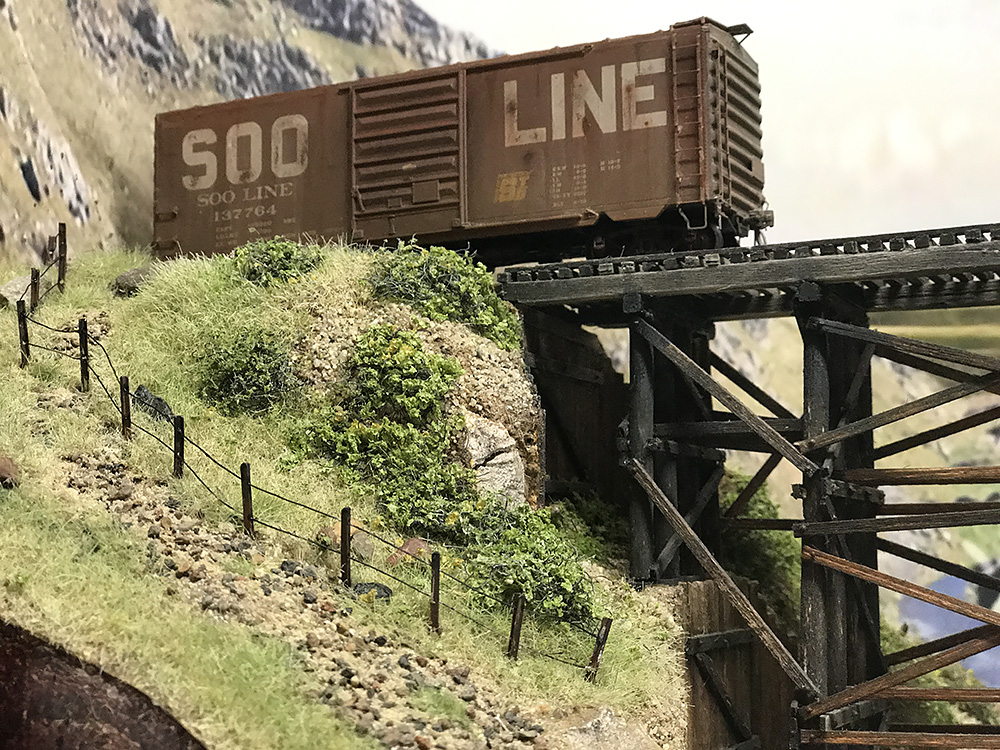
The diorama has to look realistic as possible because I would like to take closeup photos.
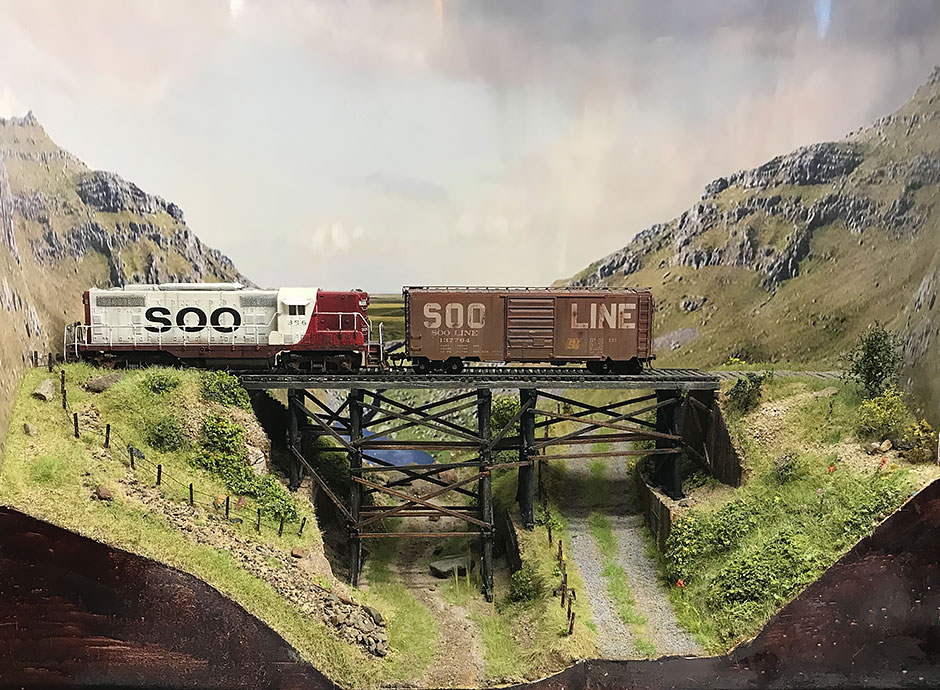
Coming together at last.
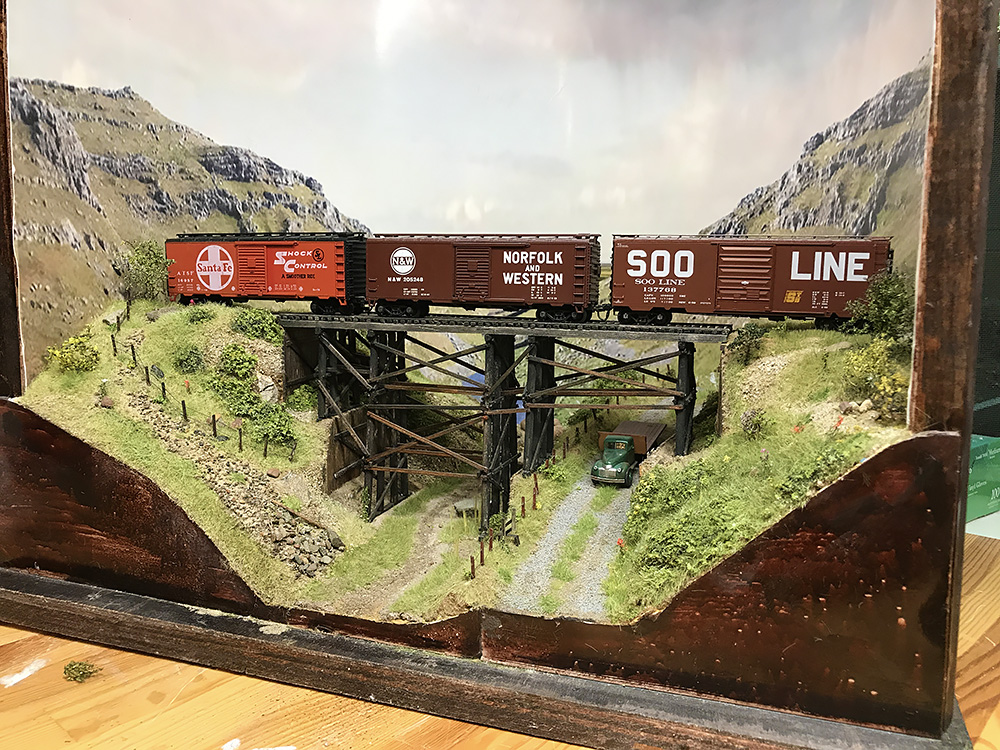
I added some plants
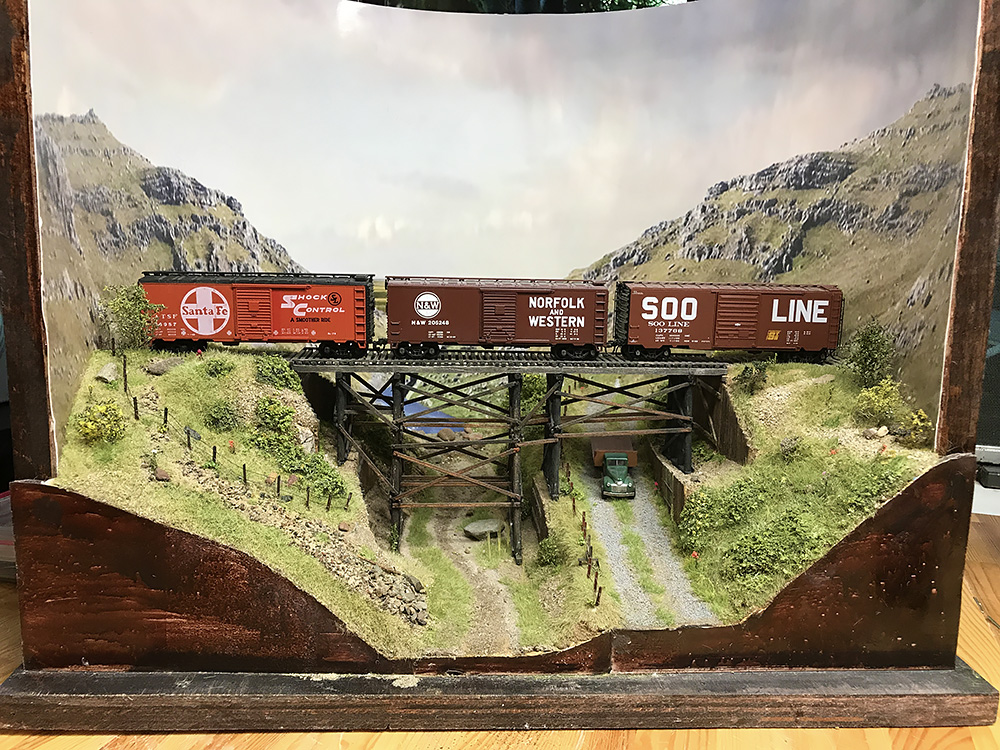
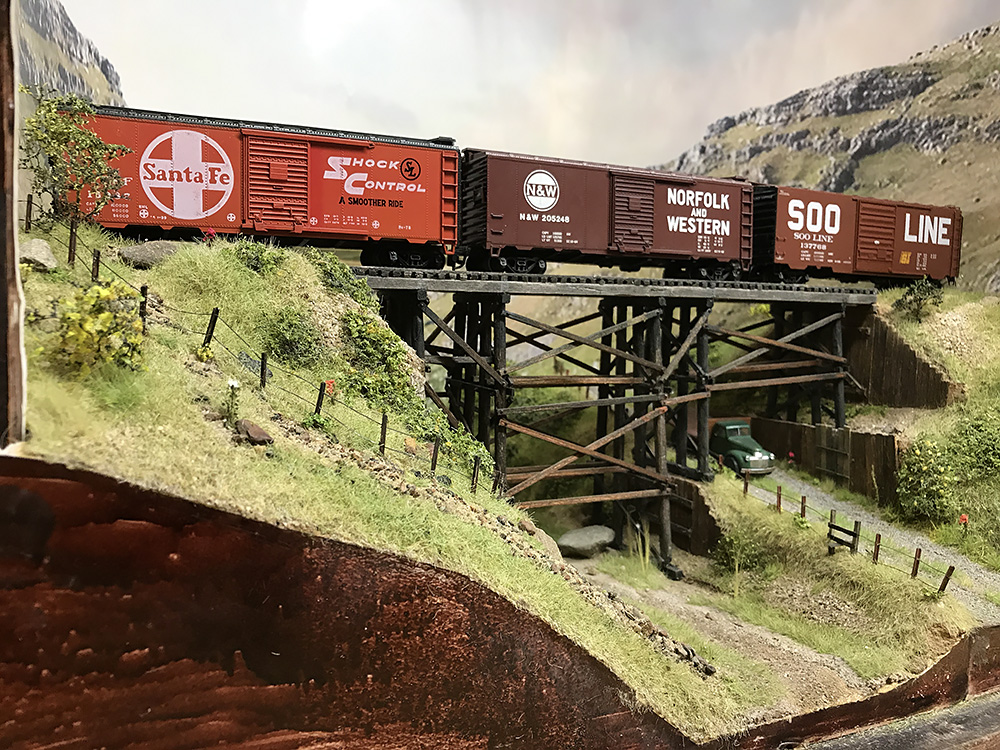
By now I actually have bunch of techniques at my service so I had much more control over how this side came together. As such it looks more realistic and there is a clear story being told about the trestle and embankment. I'm very pleased with it and feel ready to move on. My only small complaint is that there is not enough range in color ie too much green but I will experiment further at a later date with a wider range of colors. I'll then be able to add them to future models.
I mainly want there to be a mix of colors and textures that change within a very short distance of one another. My materials are static grass of various colors and lengths, sand and stone of various textures and shades, miniature flowers, miniature reeds/rushes and then the usual flock and paint etc. That’s not a lot of materials to work with but it’s a start so let’s how I do.
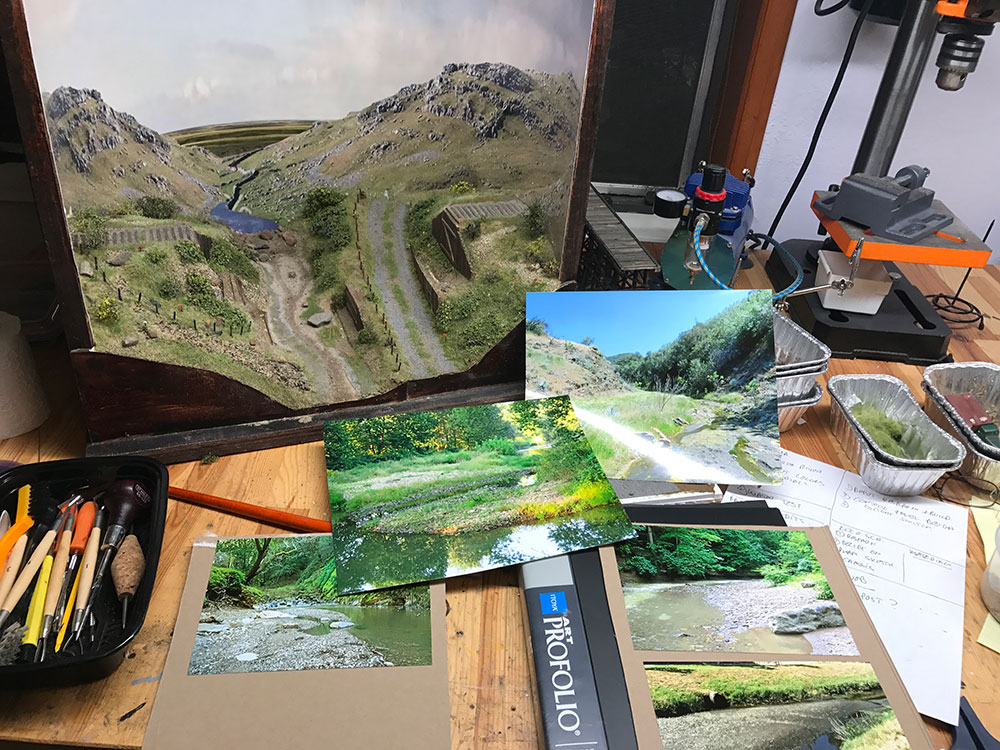
The starting point: strip off the previous materials and get back to a base on which to build the new creek bed. I also keep these photos near me for inspiration and to make sure I don’t go off on some surreal tangent.
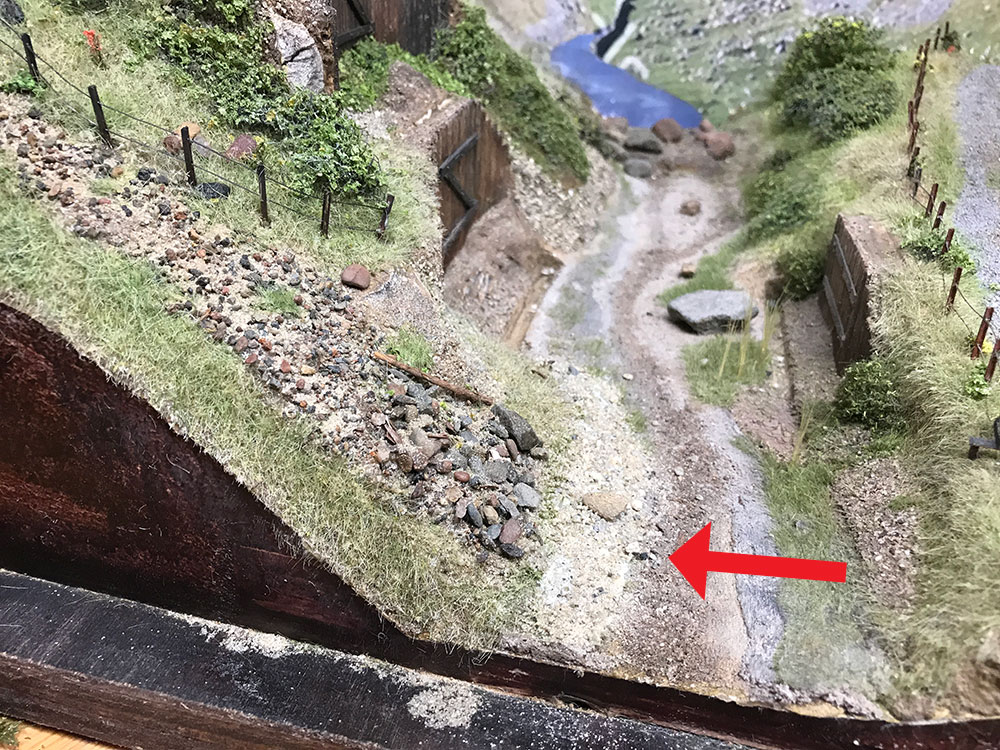
I decided to start by adding lighter sand and rocks. I found the original color to be too absorbing of light – I wanted the opposite – for the sand to give off light. I have several grades of sand to lay down – some smooth and some stony – the important thing is to make sure that it stays within scale. I have a little HO person I put down there to keep me aware of the size that things should be.
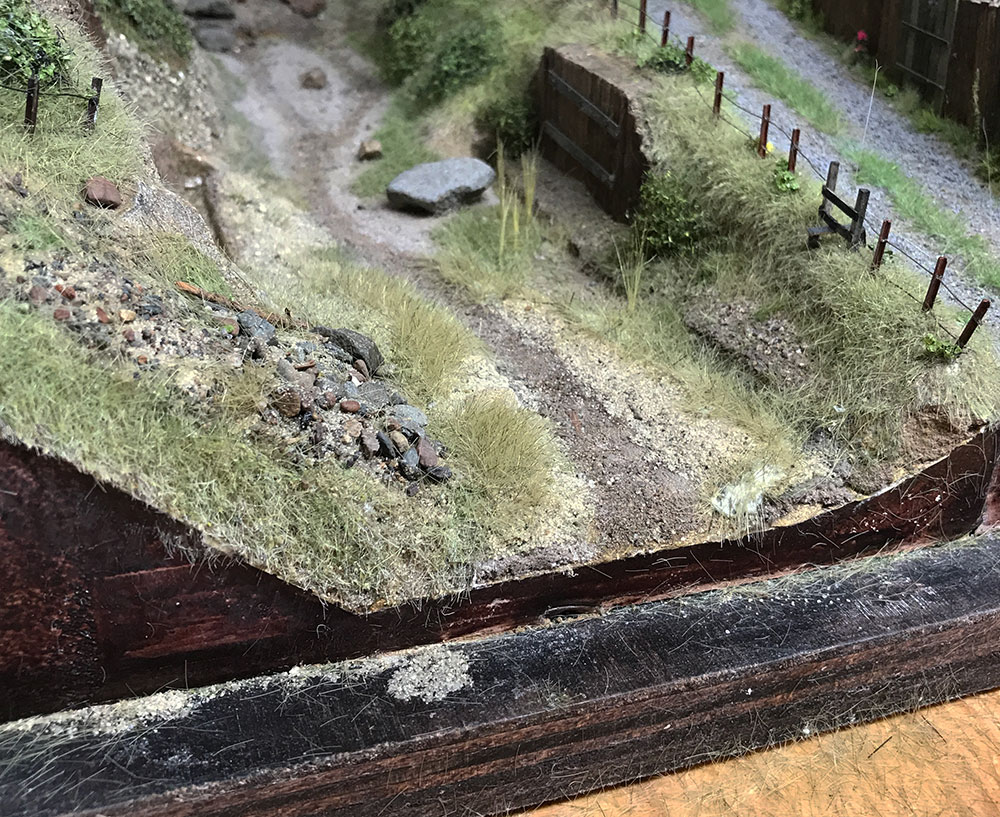
I added the first layer of dry static grass. I’m going to spray paint the grass to get some color variation in there. I experimented last week with an air brush and was very pleased with the results.
I gently sprayed the static grass to add a few shades of orange. I’ll try different colors at different times.
I purchased some model reeds (rushes?) which I experimented with. They have their place somewhere around the creek. More suited to O scale than HO it was necessary to really cut them down in height. They will really add to the textures around the creek.
I’m adding small details every night and in the morning. This allows the glue to dry and for inspiration to strike!
I’m carefully positioning all the elements to try to create nicely composed scene. A rock here, a stone there, some weeds here, some grass there – it should all combine to create a credible picture but one that is nice to look at too. I’m enjoying finding that balance between real life and a pretty picture.
Grass is not one color or texture. There is a gentle variation of color within the strands but a group or area of grass strands can have several ‘sweeps’ of color. By mixing the colors of the static grass you can have a nice variation of color at a ‘granular’ level but by using an airbrush you can capture those colorful sweeps as well.
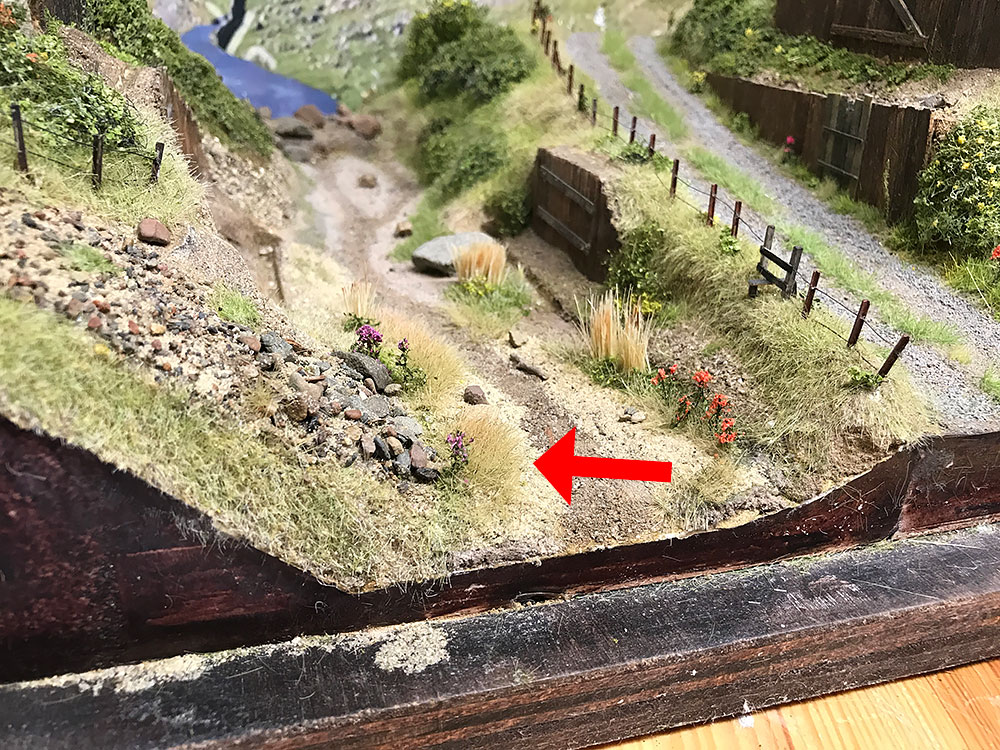
To get the ‘sweep’ effect I gently sprayed the grass to bring out a second tone. I think it looks great. Very subtle and much like real life. I’m excited to try this method using different colors and materials.
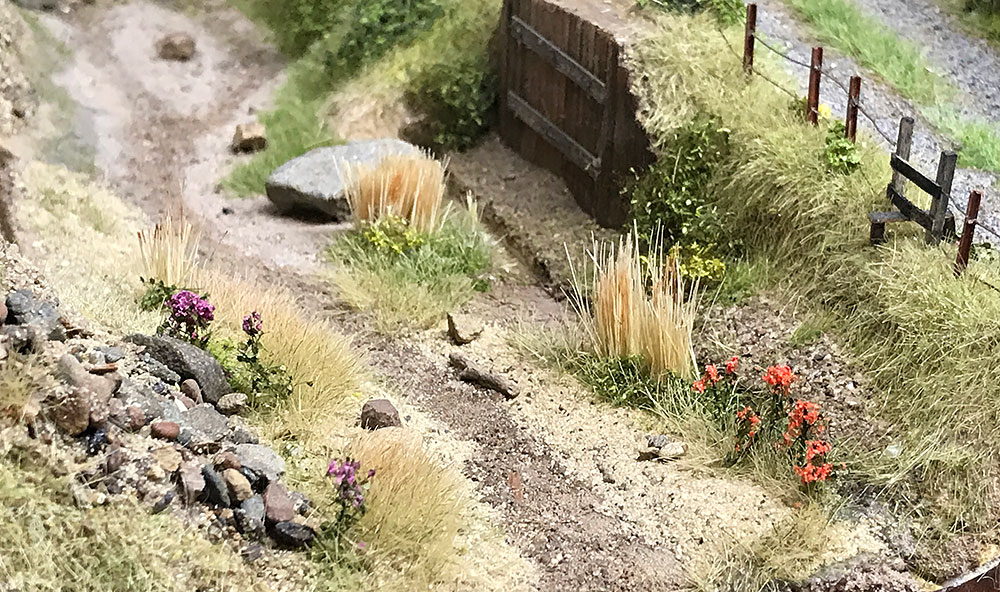
In go some flowers, stones, reeds etc. I’m not crazy about those reeds but they do add some very striking texture to the overall effect. This process is done in layers and over time this area will get dense with details.
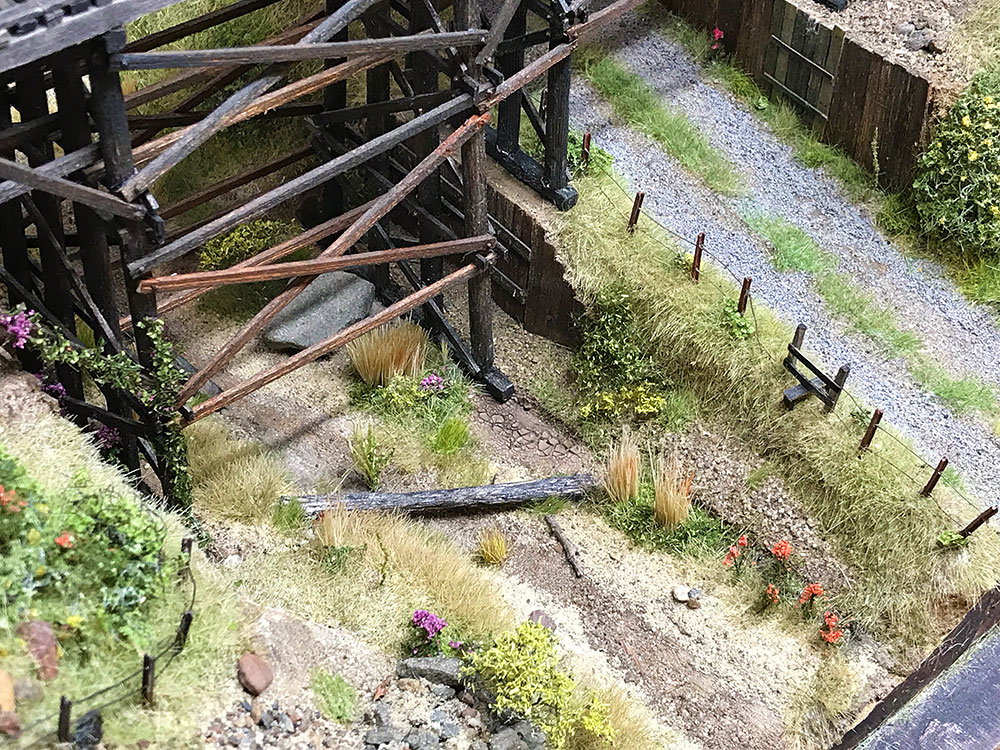
More details have been added such as a fallen trestle leg, more flowers, plants, grass etc. I could keep going but don’t want to crowd out the area. If you add too much detail you lose the impact of the smaller individual details. I want to give the eye just one item to focus on at a time.
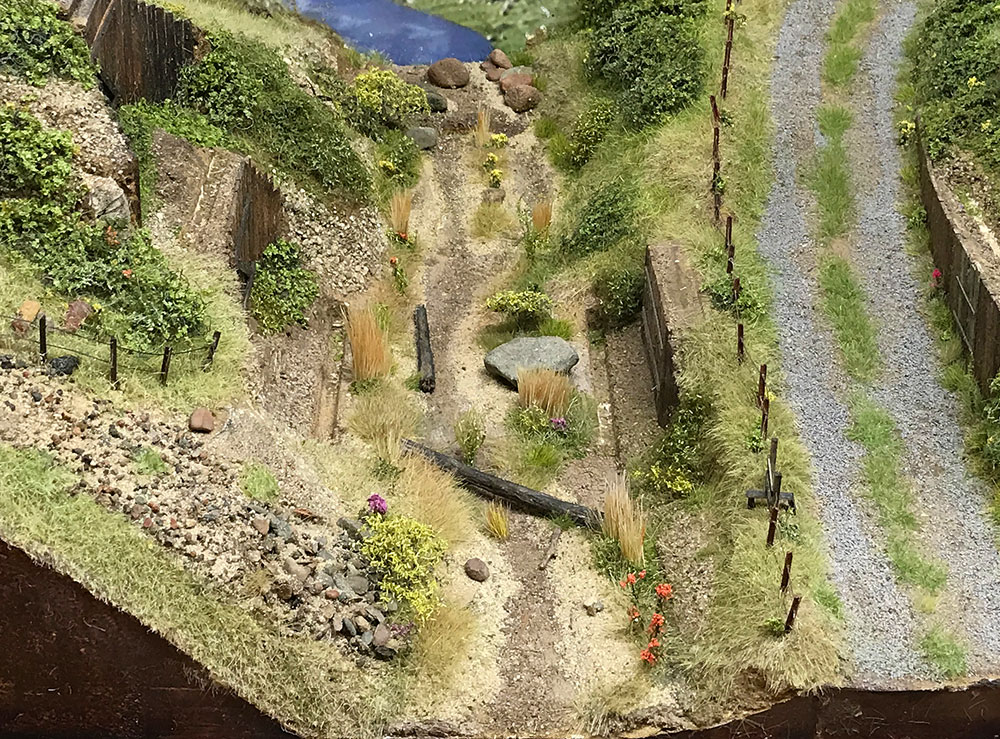
I detailed the creek bed to the back. I may still add small details here and there but it is now ready for me to add water.
I have a small truck to add to the road which I will weather it this weekend.
Not sure about the vines but I’ll probably keep them.
Having finished detailing the creek bed it was time to add water. I felt that I had added enough plants to create a somewhat realistic scene. The scene looked flat here but I hoped by adding the water the area would begin to sparkle.
There are many methods for creating water but the two products that I wanted to try out were Woodland Scenics Realistic Water and Gloss Mod Podge. Both had been recommended and I watched a couple of videos by other modelers as they built their own water scenes. The main difference between the two is simply consistency. The Realistic Water is much more runny than Mod Podge and is ideal for smooth surface water and deep water scenes. The Mod Podge is thicker but more easily manipulated and can be gently sculpted to create an impression of running water. I tested both on my scenery scratch pads and immediately was drawn to the Mod Podge. I just really felt at ease using it for this project.
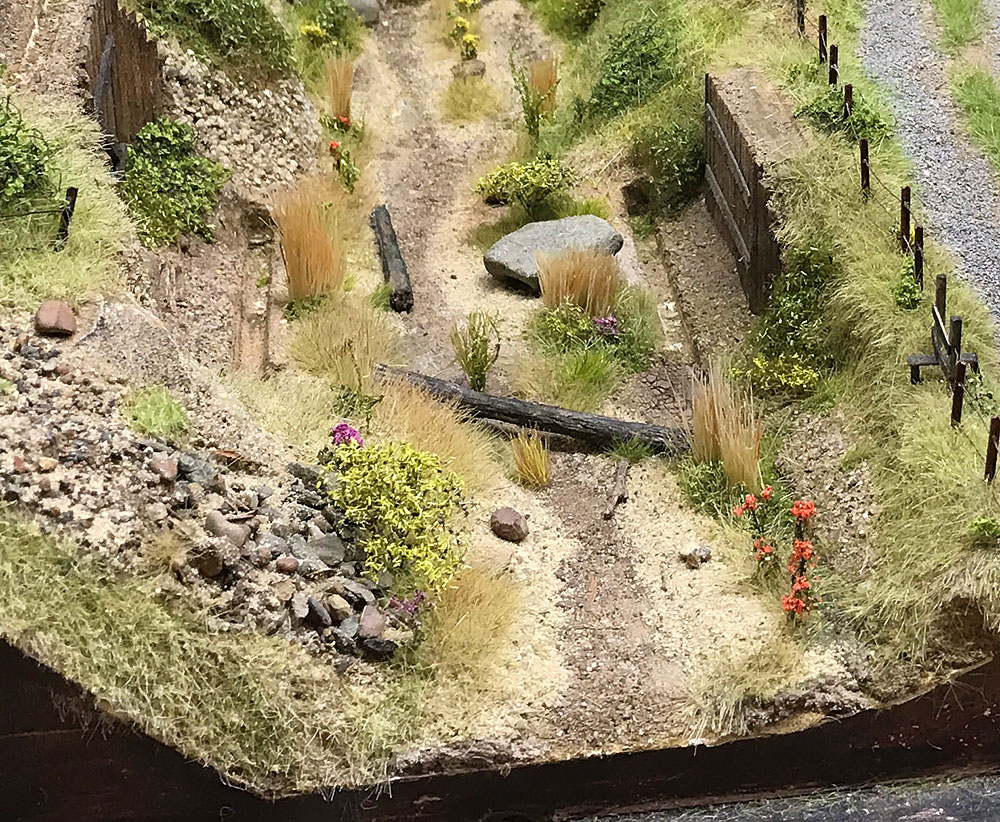
The creek bed was designed to have sandy banks with a darker center for the (fake) water.
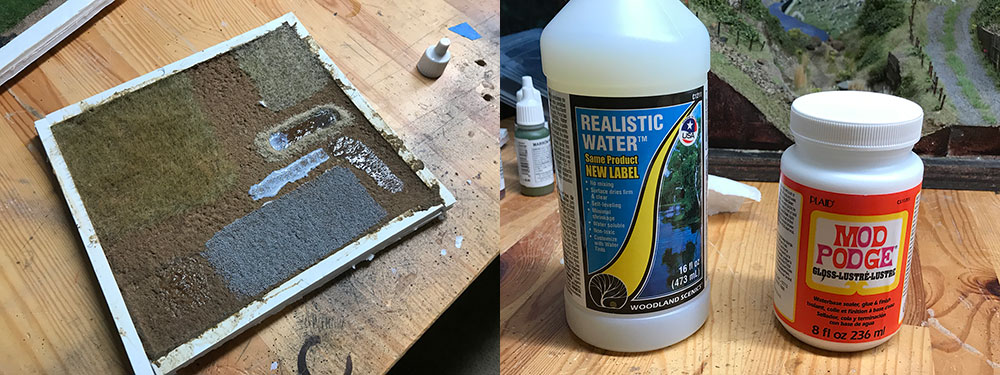
Both products did a fine job of producing convincing water. In the end I felt more comfortable using the Mod Podge as it was just that little bit thicker and easier to produce a running water effect.
The scene moments before adding the water

Using an eye dropper I added the Mod Podge bit by bit and used a small toothpick to move it into the various cracks and gaps. You can add as many layers as you like until you have the effect you want.

The white color of the Mod Podge really helps see where the water is going to run. It had a really nice consistency - easy to move around and not too fluid.
It took about 8 hours for the majority of the Mod Podge to set.

The final part near the front took about two days to clear.
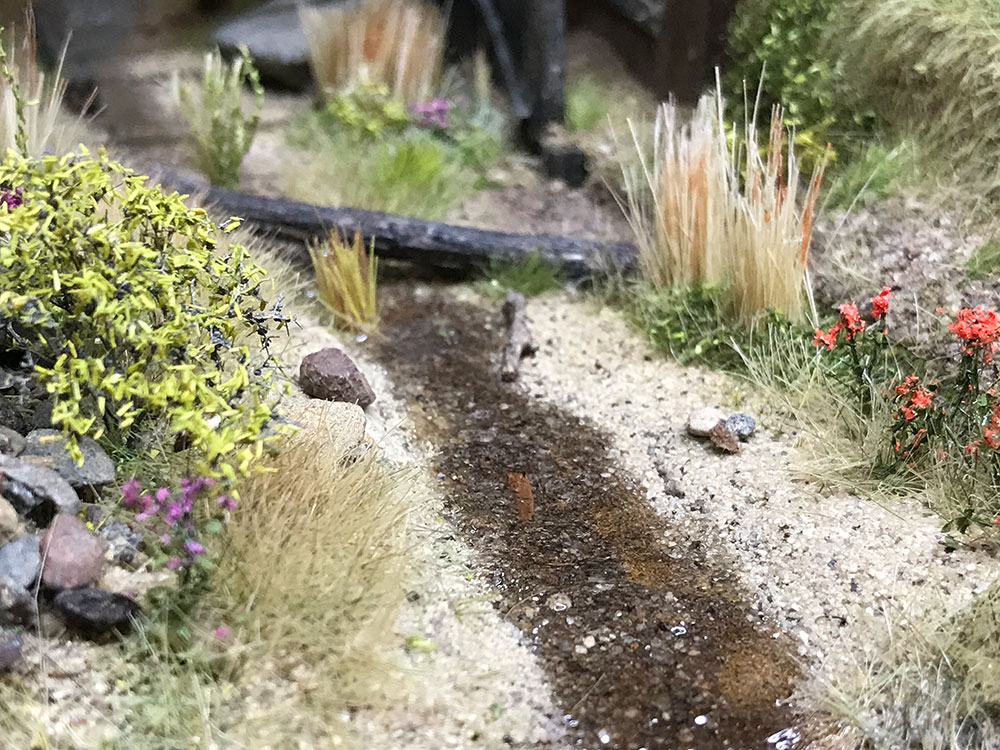
Once dried, the Mod Podge hardened to a clear and very realistic gloss finish that complimented and illuminated the creek bed.
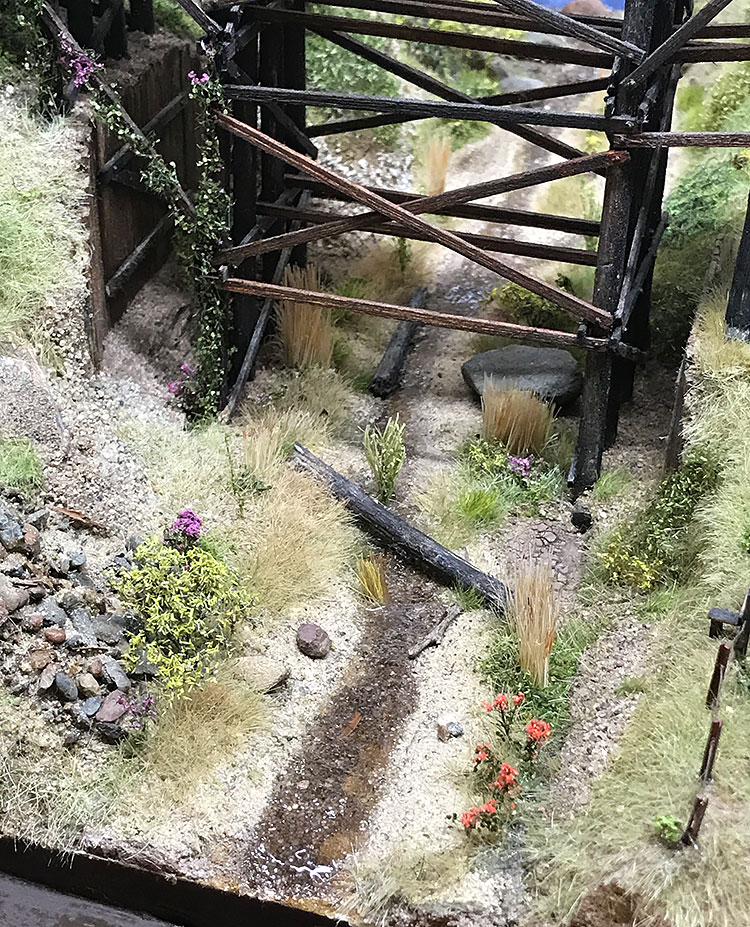
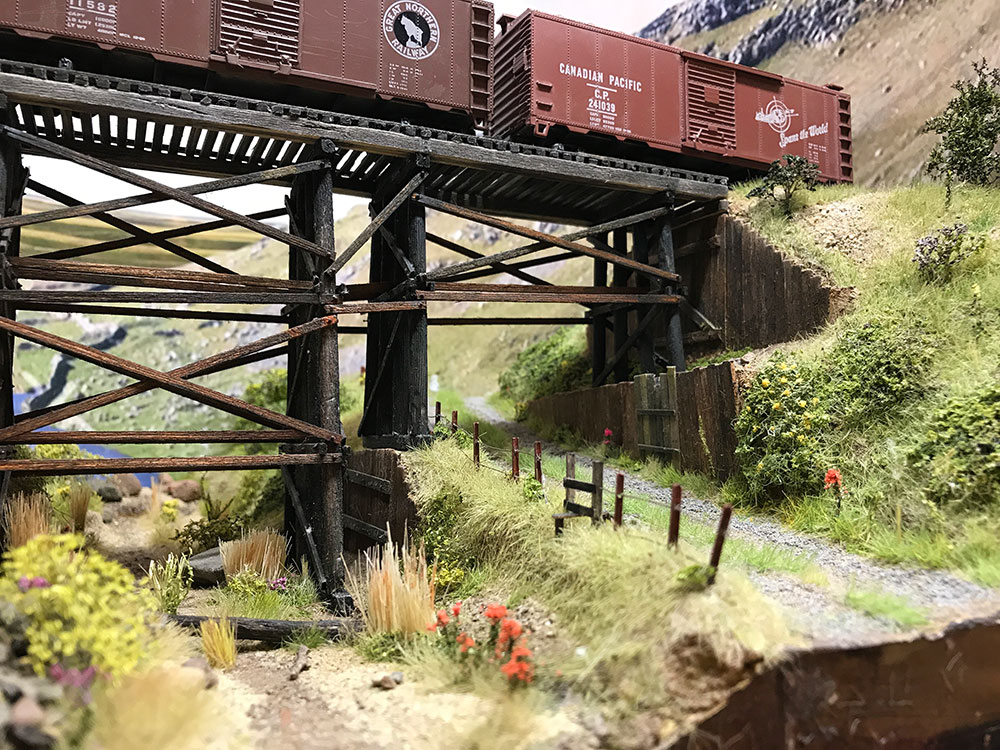
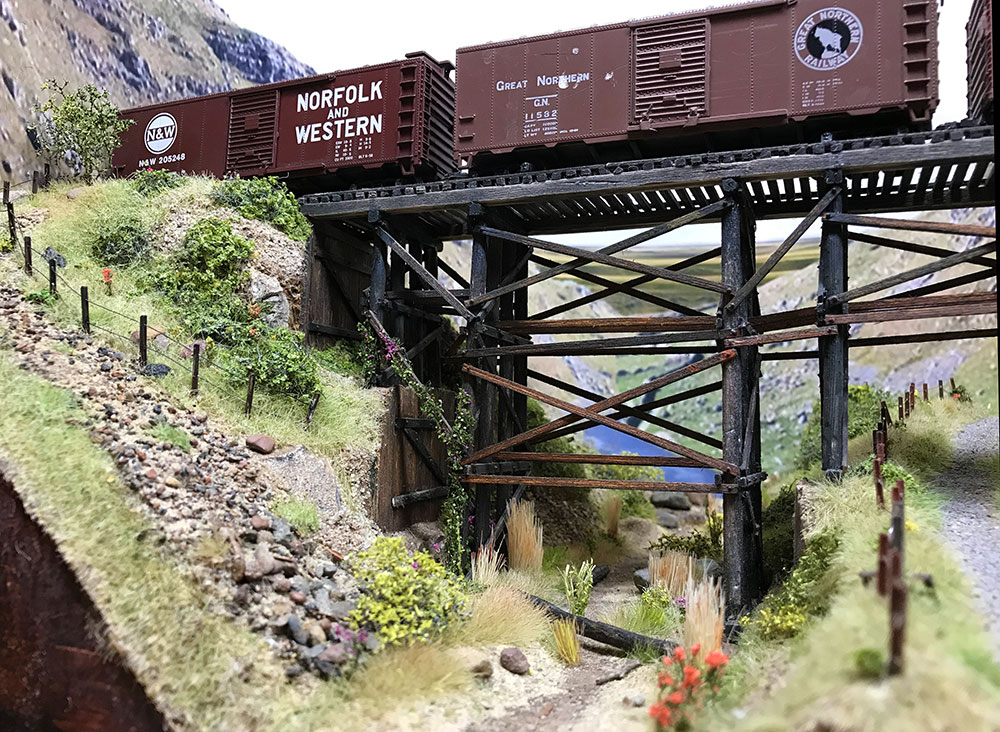
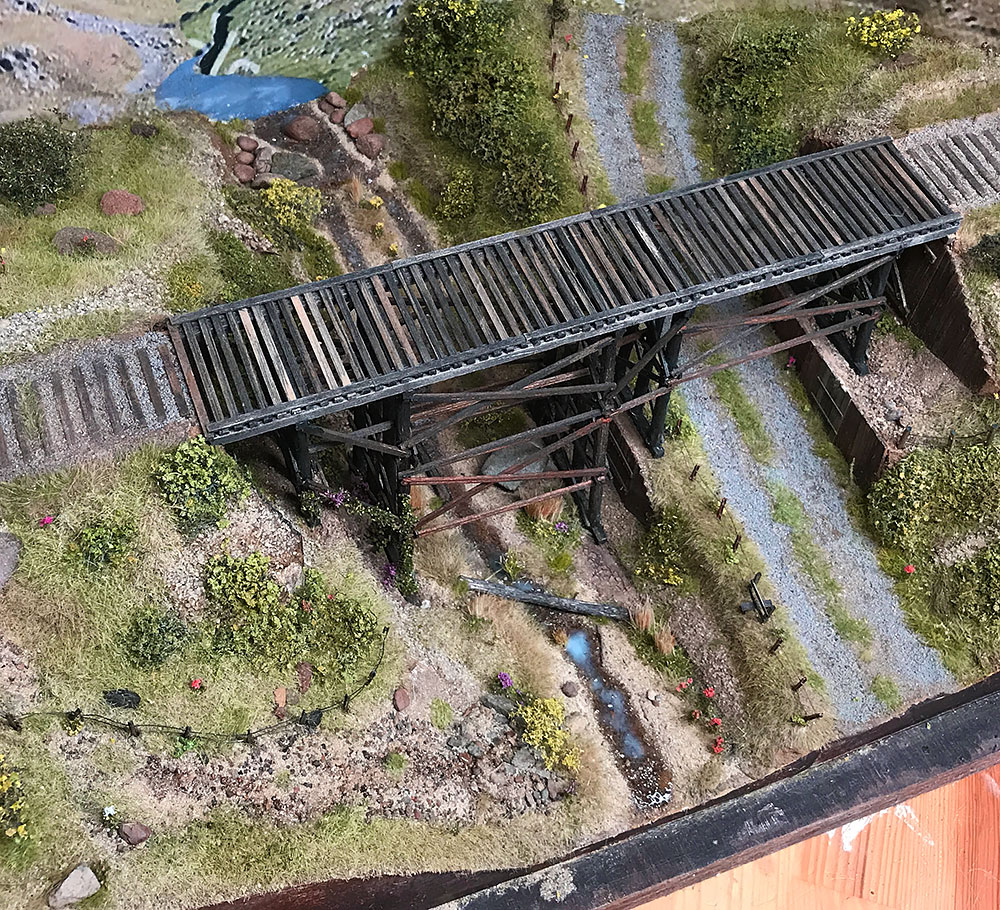
A gentle meandering stream in summer but seasonal rains can turn it into a raging torrent of water. Bridge repairs have been carried out over the years and a couple of old piles have been left in the creek bed by work crews. One of the piles is used by hikers to cross the creek.
Last finishing touches. Alot of very subtle detailing goes in at this point which individually seem trivial but quickly add up to a much richer scene.

Time finally to stick down the bridge. I used Mod Podge - the matte finish version this time. Similar to PVA.
Then the rails. I just used Super Glue which worked fine here but is not a recommended method for a full layout.
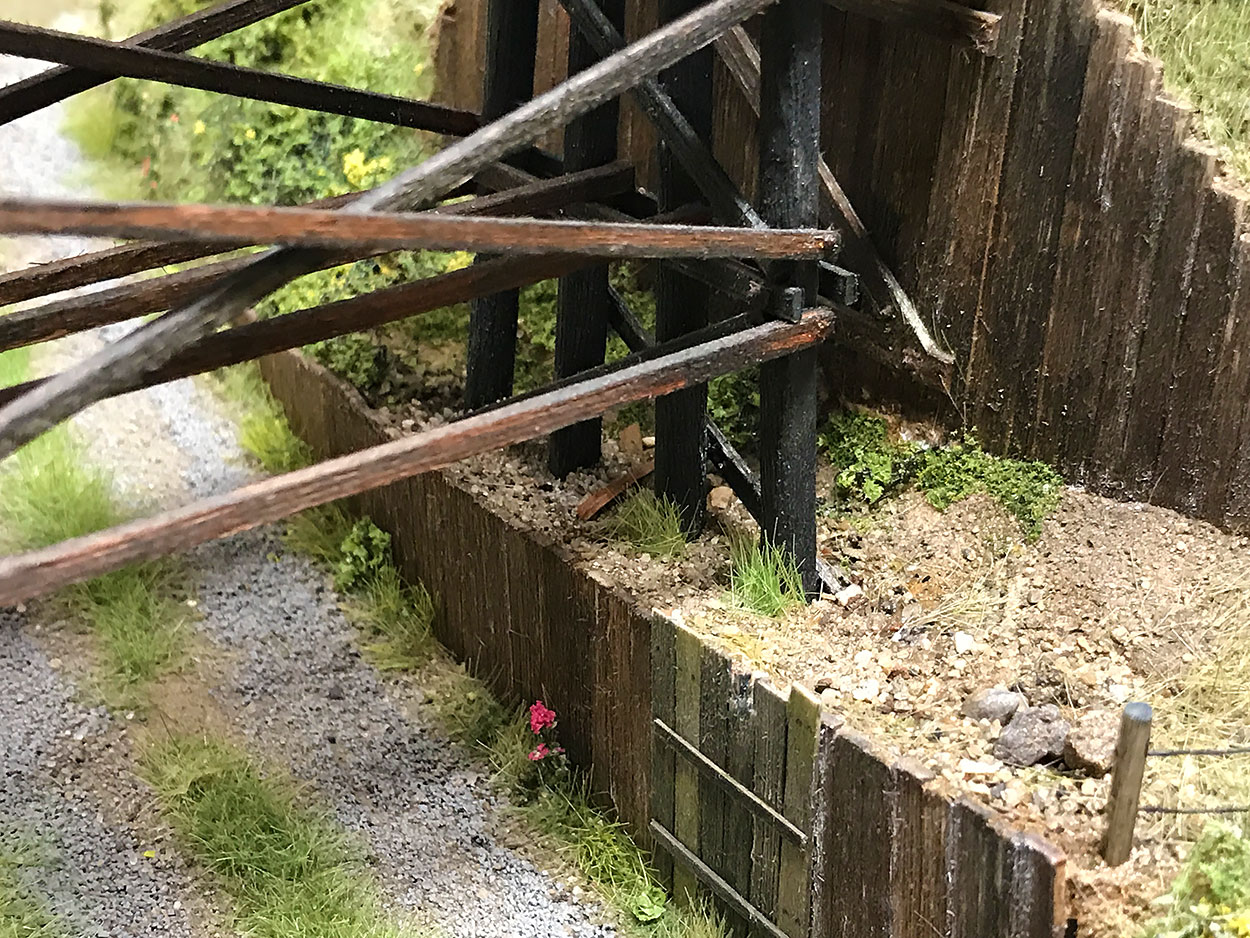
Time to bury the piles in the soil. I wasn't able to bury all the piles due to my miscalculation of various support heights.
The project was started simply because I wanted to present models in a realistic setting while I worked on them doing detailing and weathering. A photo-box is an ideal way to display models in their natural setting under controlled lighting. The concept evolved quickly from a simple embankment located along the branch-line in flat countryside and was eventually set in a wilder and more spectacular setting. This change occurred because I wanted more of a challenge and a chance to really dig deep and learn as much as I could about landscaping models.
Things went slowly though. I scratch-built everything and this probably slowed things down. Also it was my first attempt at landscaping and the fact that I had to figure out how to do the various tasks involved (such as making realistic grass, build the embankments, build the bridge etc) ended up with the project taking more time that expected.
What was interesting about the project was how much more I paid attention to the world around me. I closely observed nature and wondered how to replicate in miniature form the wide variety of plant life around me. I realized that compared to real-life modelers have a very limited range of products and techniques at their service. Moving forward I want to figure out how to model a wider array of plants.
While working on this I kept these principles in mind to guide me:
1. Matching or complimentary colors: colors should not stand out or clash. They should compliment each other and look as much like real life as possible.
2. Vivid colors - colors should radiate light rather than absorb light in the way that white reflects and black absorbs.
3. Just the right amount of contrast - there should be no major changes in contrast between the objects and the landscape should give off an even spread of light.
4. Variation of texture - as much change in texture as possible as provided by rocks, stones, sand, grass, bushes and trees. Every element on the diorama should have a texture of some sort: from the weathered wood of the trestle to the gravel road.
5. Scale - make sure all elements are to scale from the sizes of the fence posts to the grain sizes of the gravel and the height of the plants.
I think I came close to achieving some of my goals (defined by these principles) I didn't get quite as far along as I hoped. For example I was over-cautious with color and things look a little flat. I've since figured out how to make the grass 'pop' more (using brighter static grass and also spray paint the grass a variety of colors) but this lesson and others will have to be put to use on the next project.
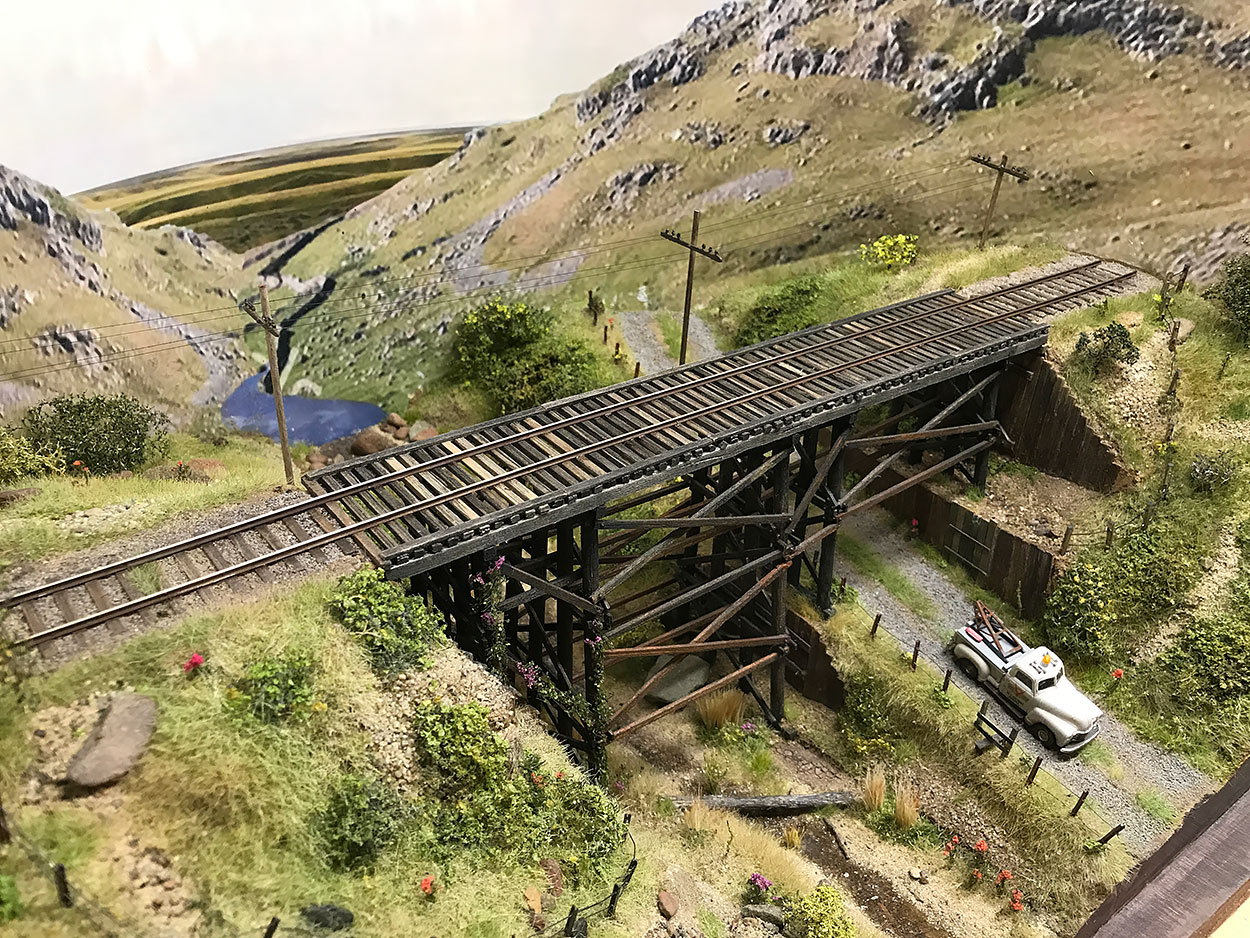
I added telegraph poles and the rails and may still add a 'No Trespassing' sign to warn hikers off the bridge.
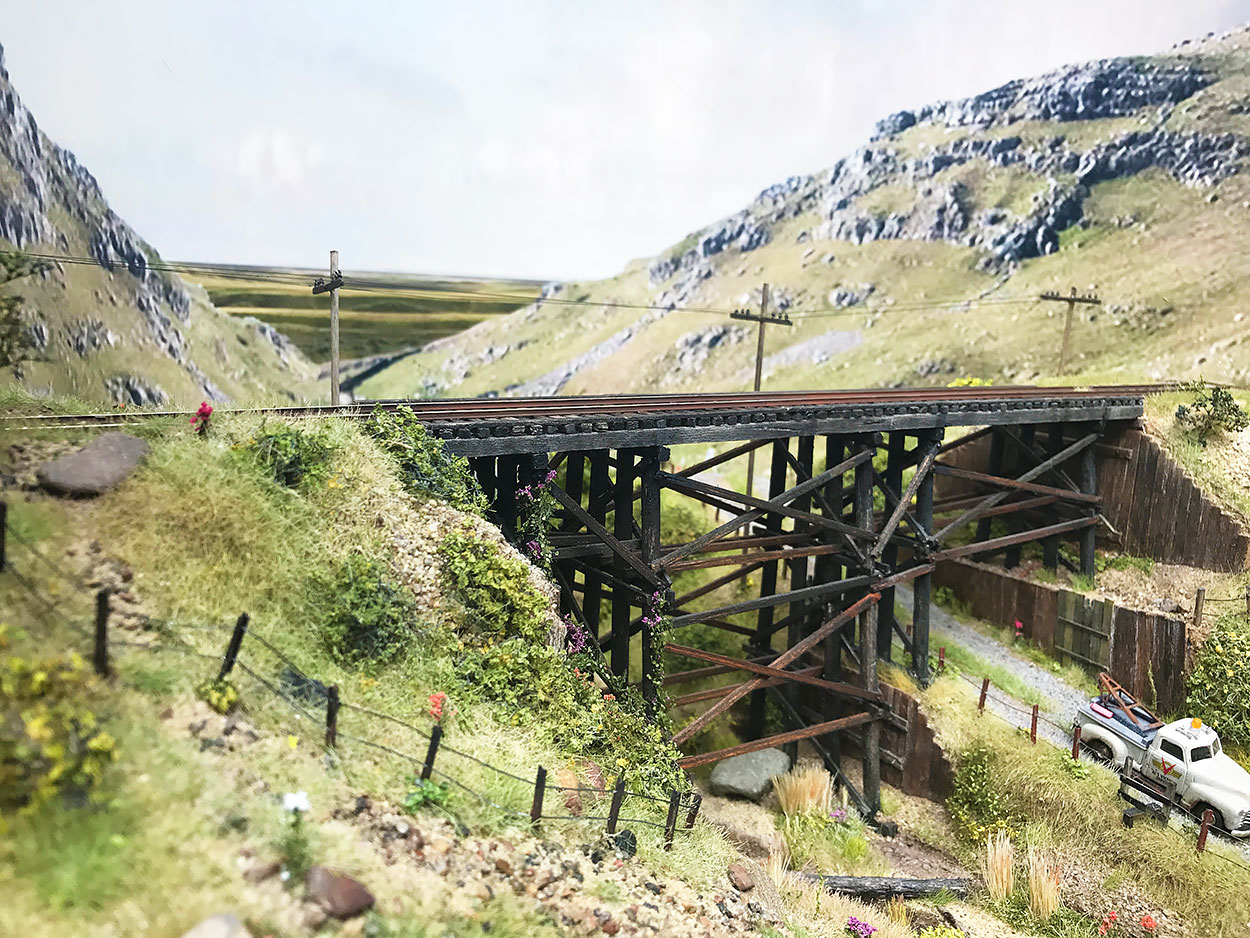
The vine was extended to quite a height. I used Silflor flowers stalks to build the vine and left a few flowers attached here and there.
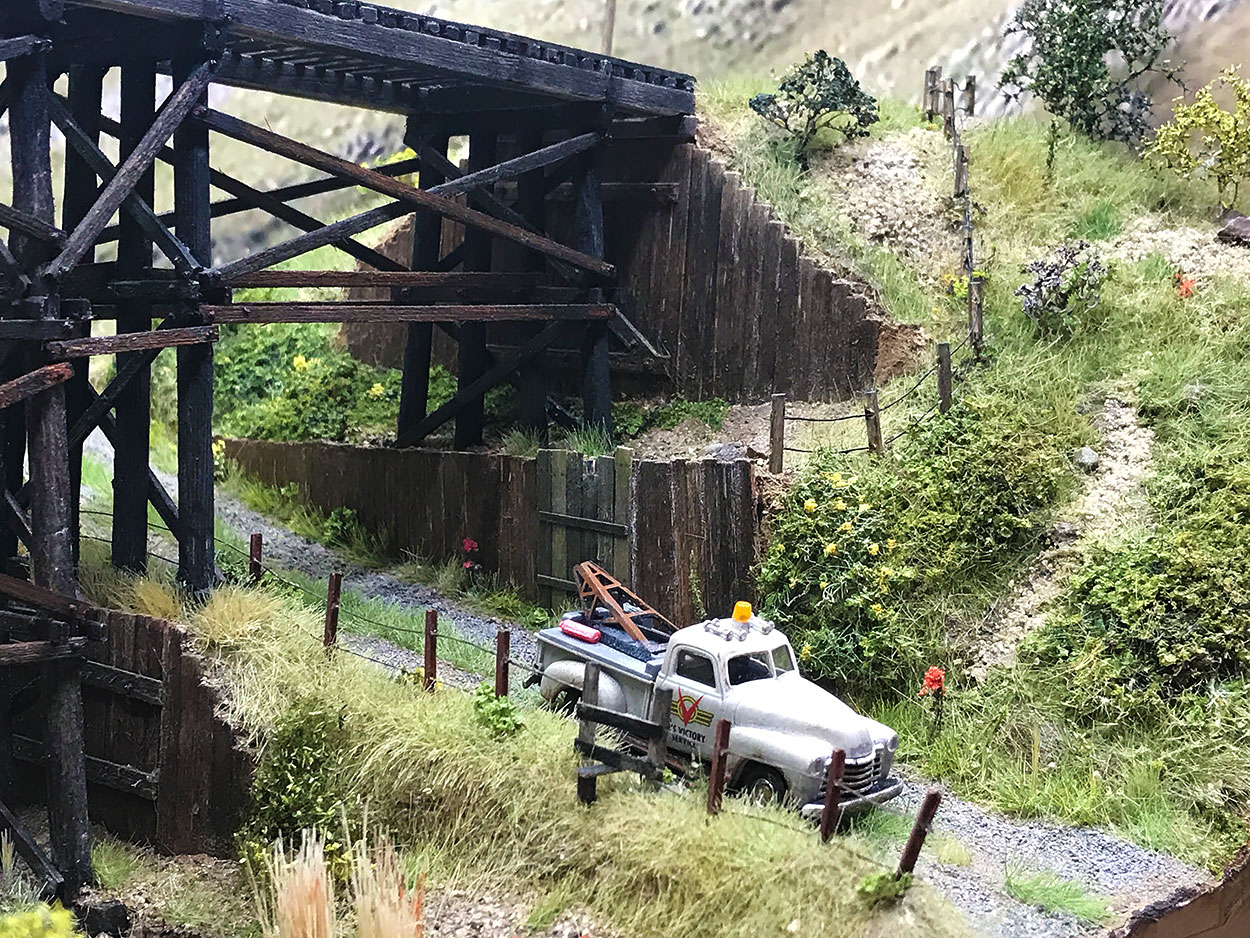
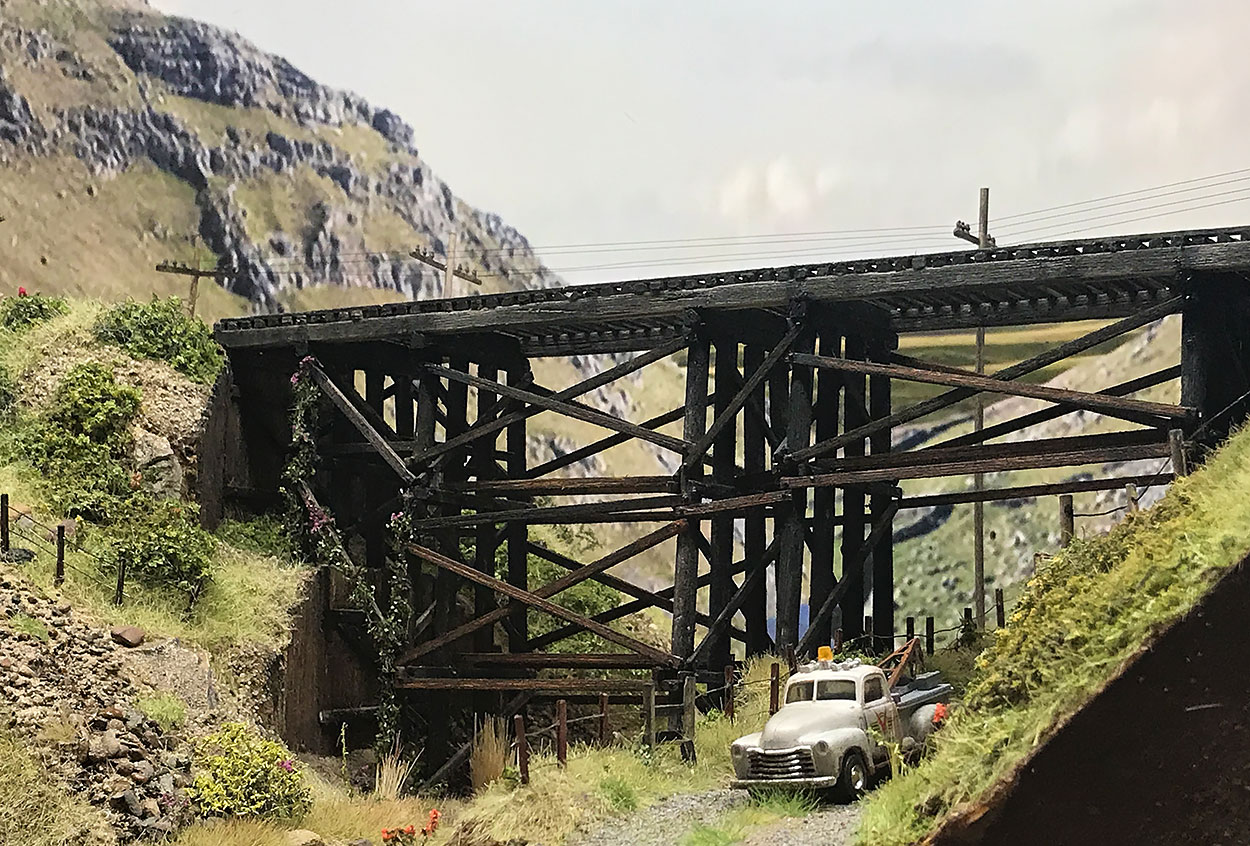
I did a gentle weathering job on the truck. Any color would have worked nicely here, such as blue or red, nevertheless I'm happy with this pale grey color.
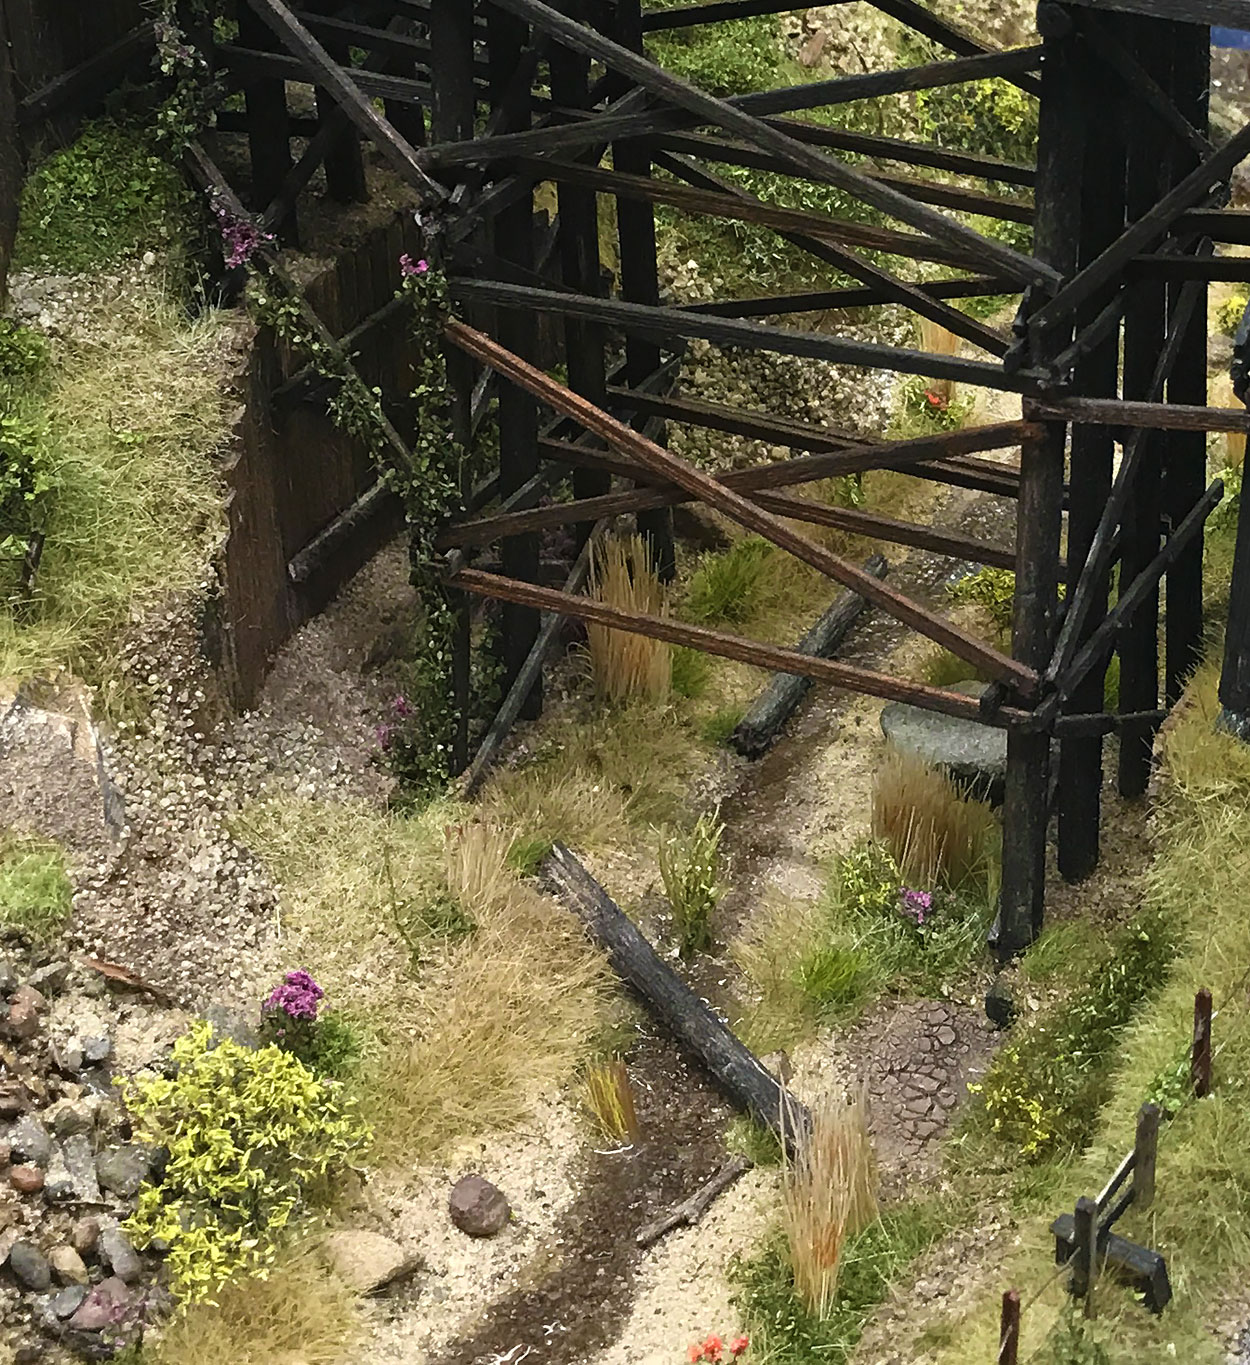
I wanted the diorama to look as realistic as possible close up. I selected a wide variety of materials and colors. This area is about 3 inches by 3 inches.
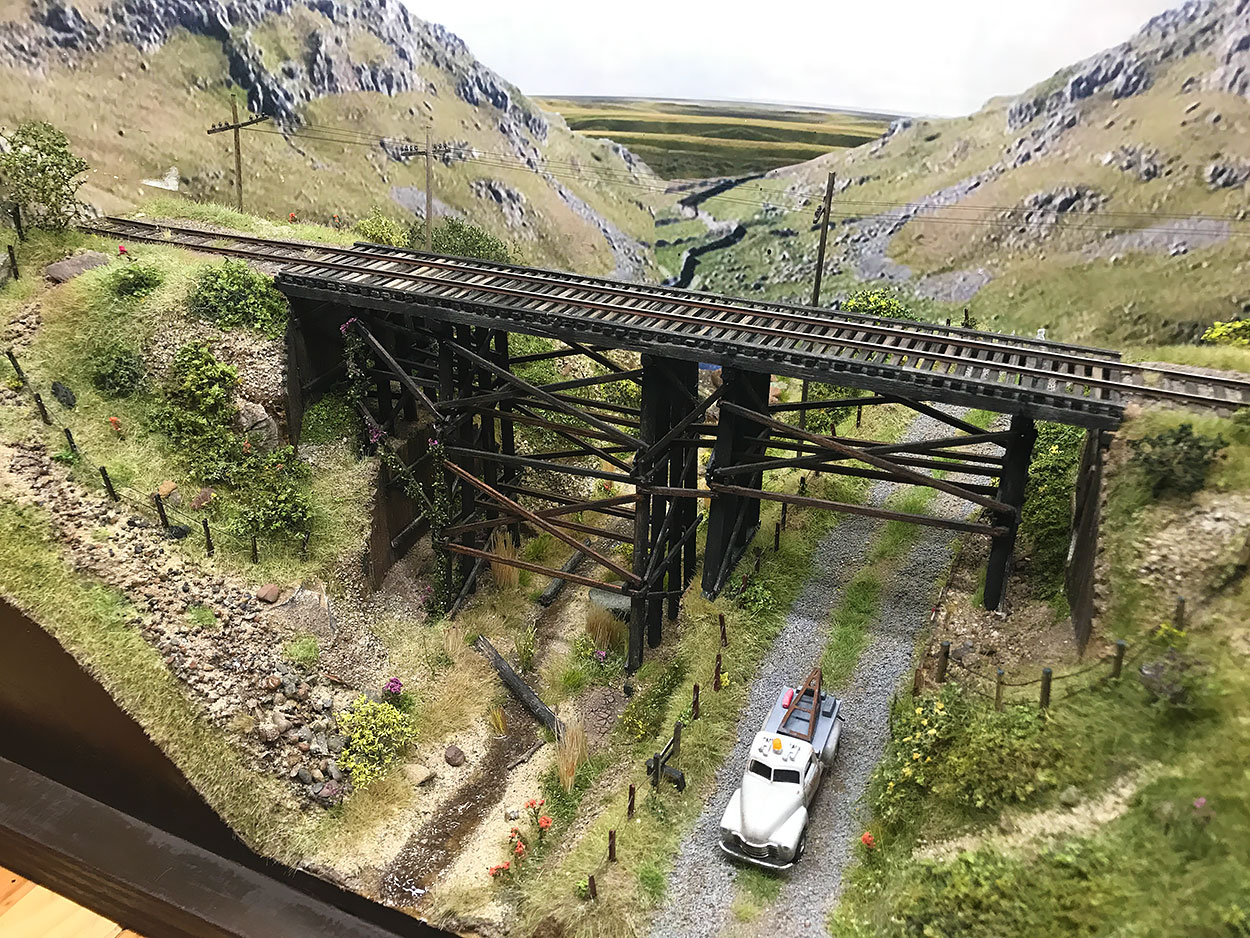
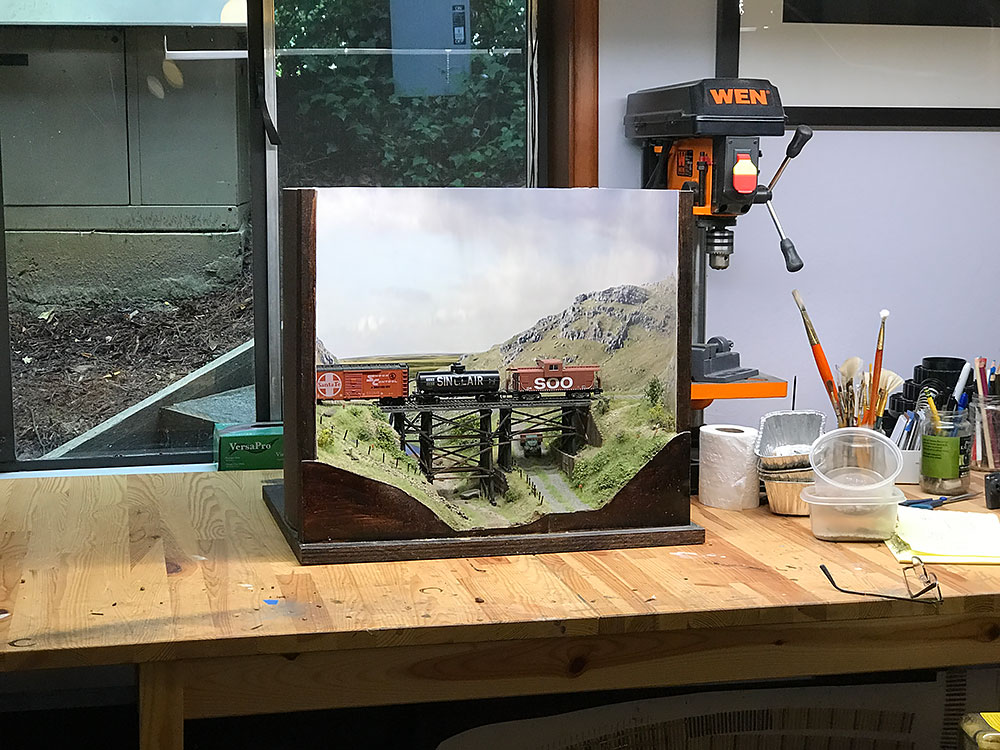
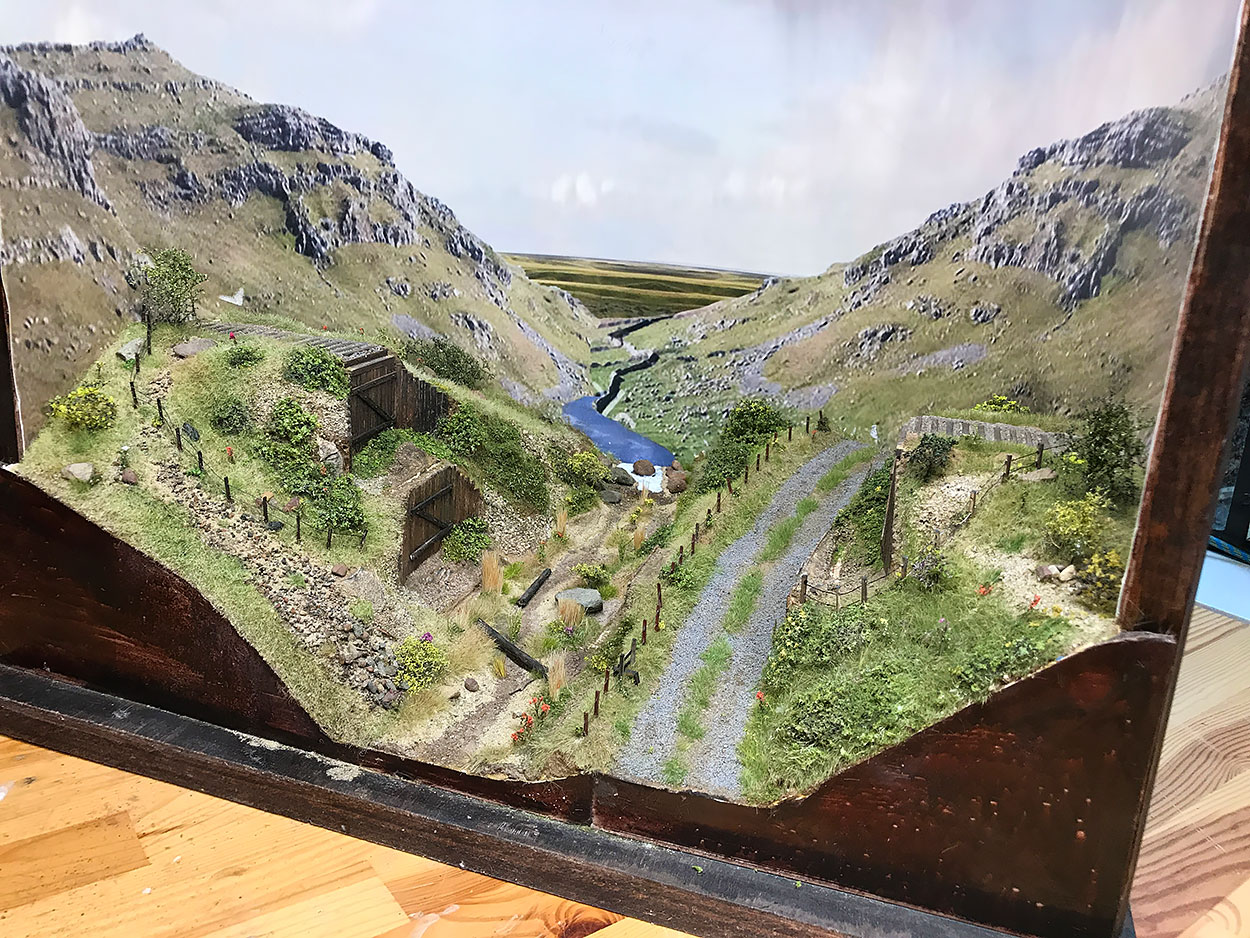
The trestle is set near the end of the branch line at the start of the climb into the hill region.

I like the contrast of the road and river: two channels with very different purposes that both needed to be crossed.
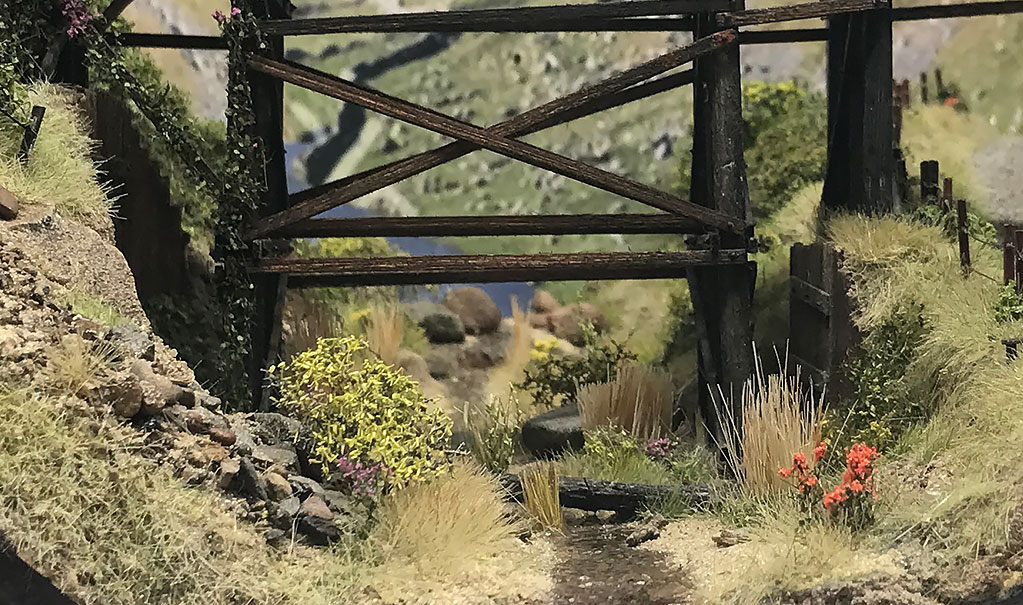
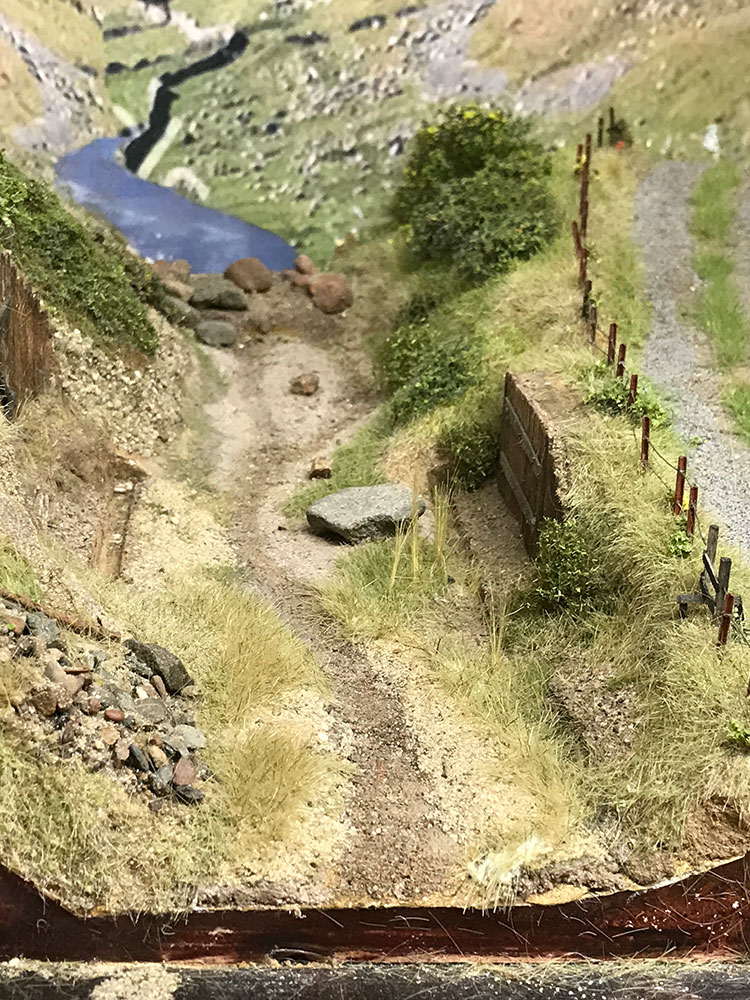
A hikers view of the creek bed. There is a lake in the distance. I need to adjust that lake view which I will do at a later time.
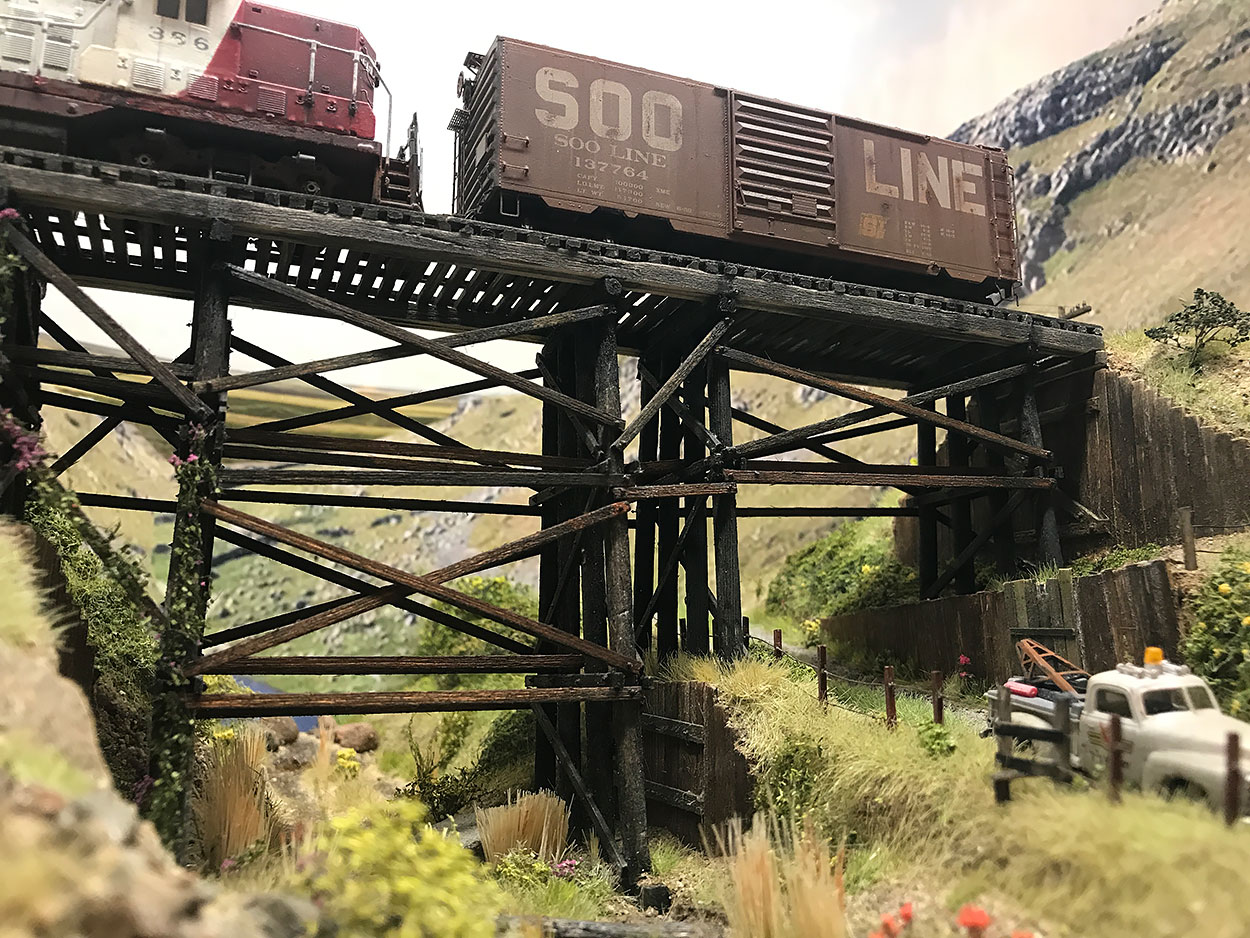
The original purpose of the diorama was to display newly weathered and detailed rolling stock and to be able to view items from different angles such as from beneath the bridge.
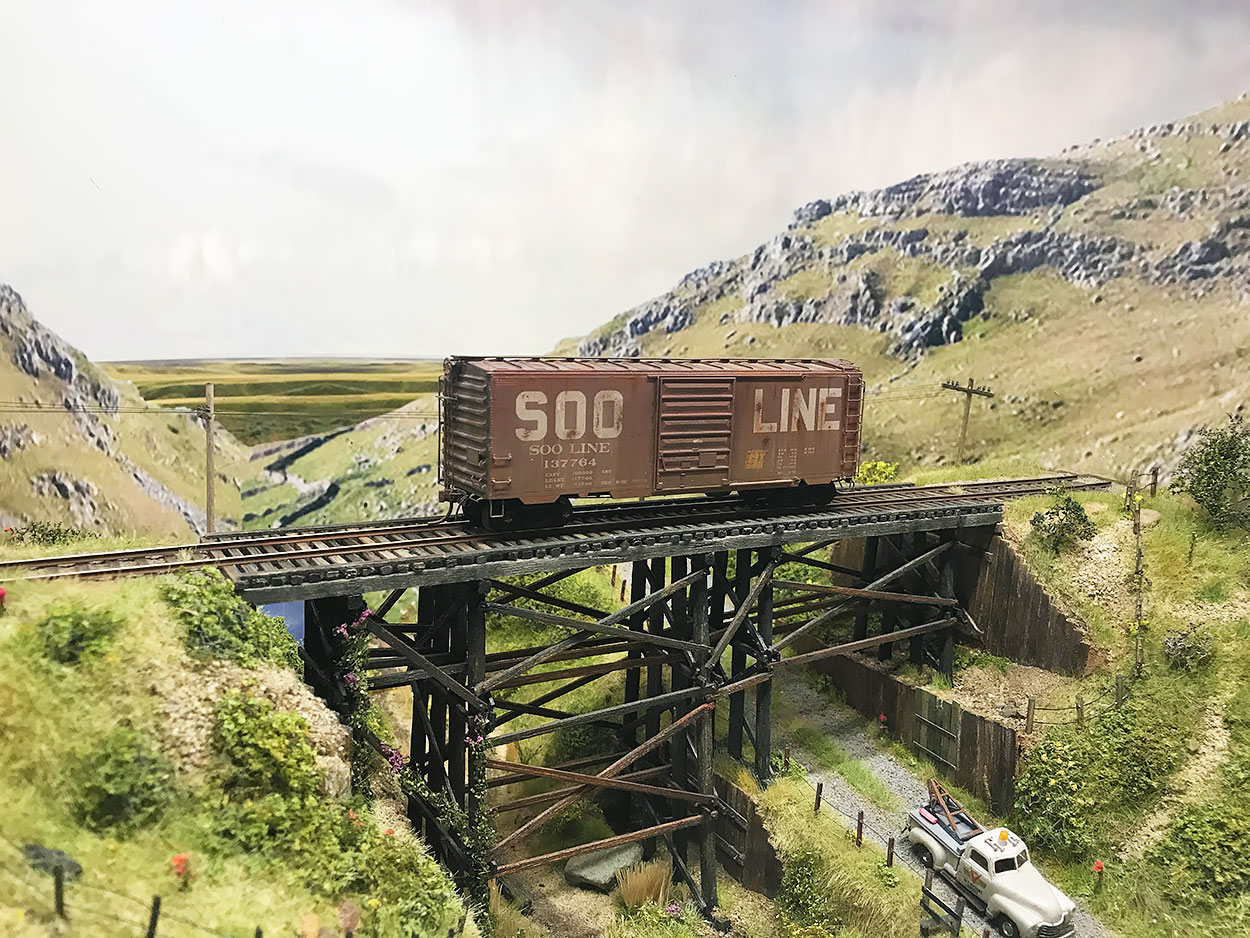
One of my first weathering attempts. I hope to get better at weathering and detailing models moving forward.
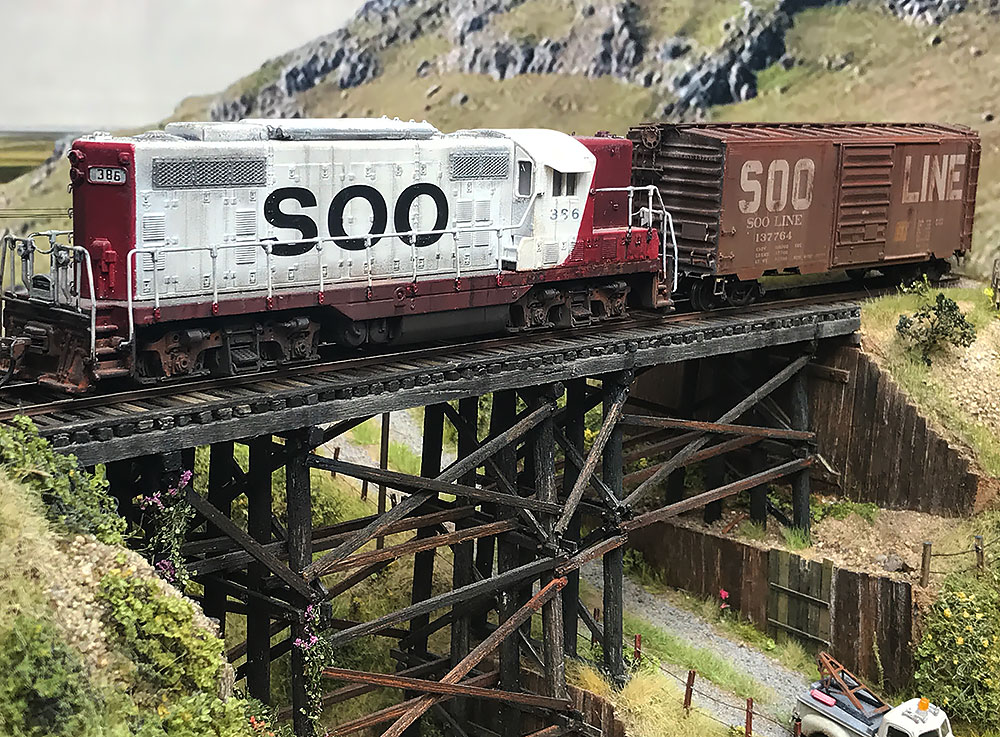
Hopefully the weathered rolling stock will do the work on the diorama justice.
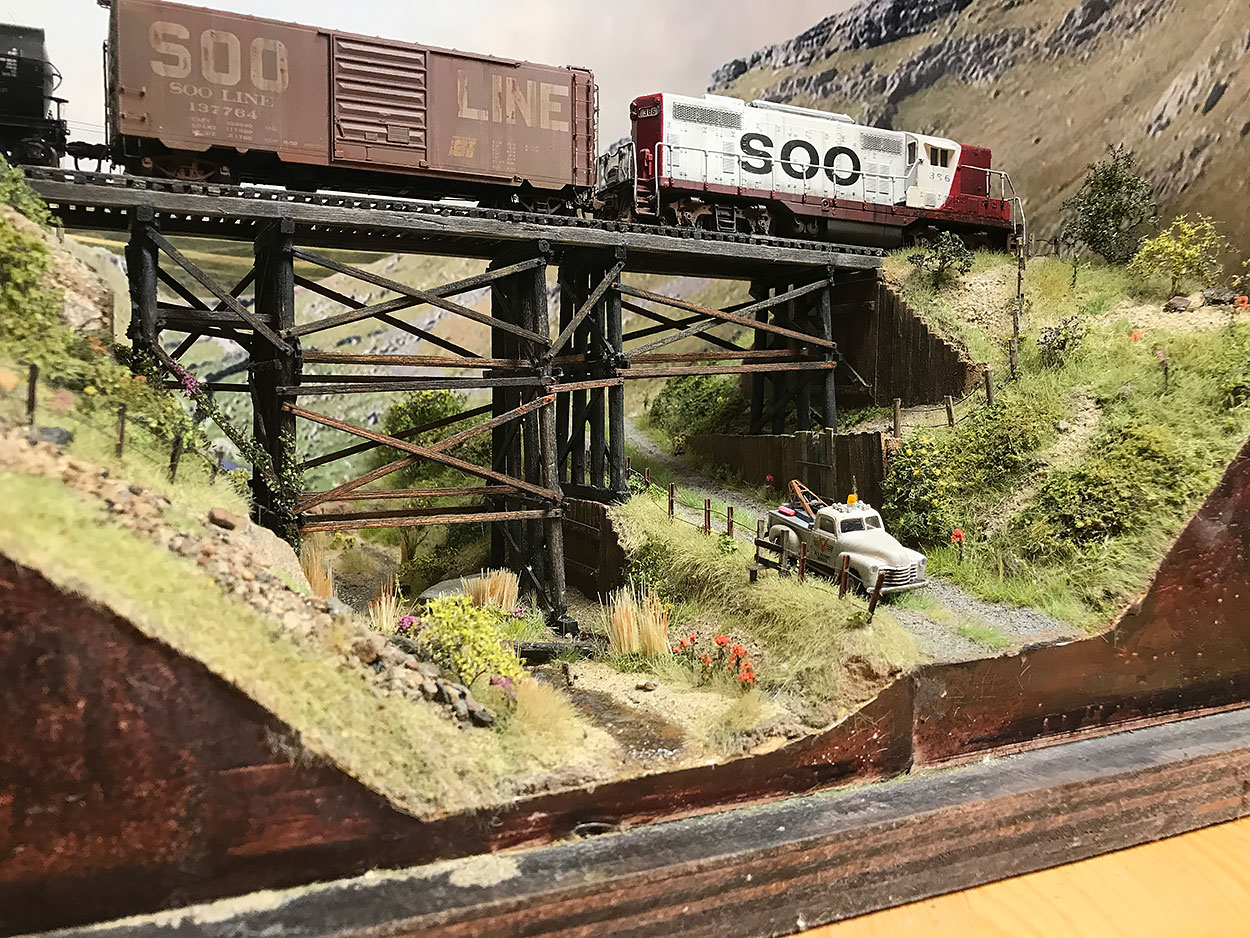
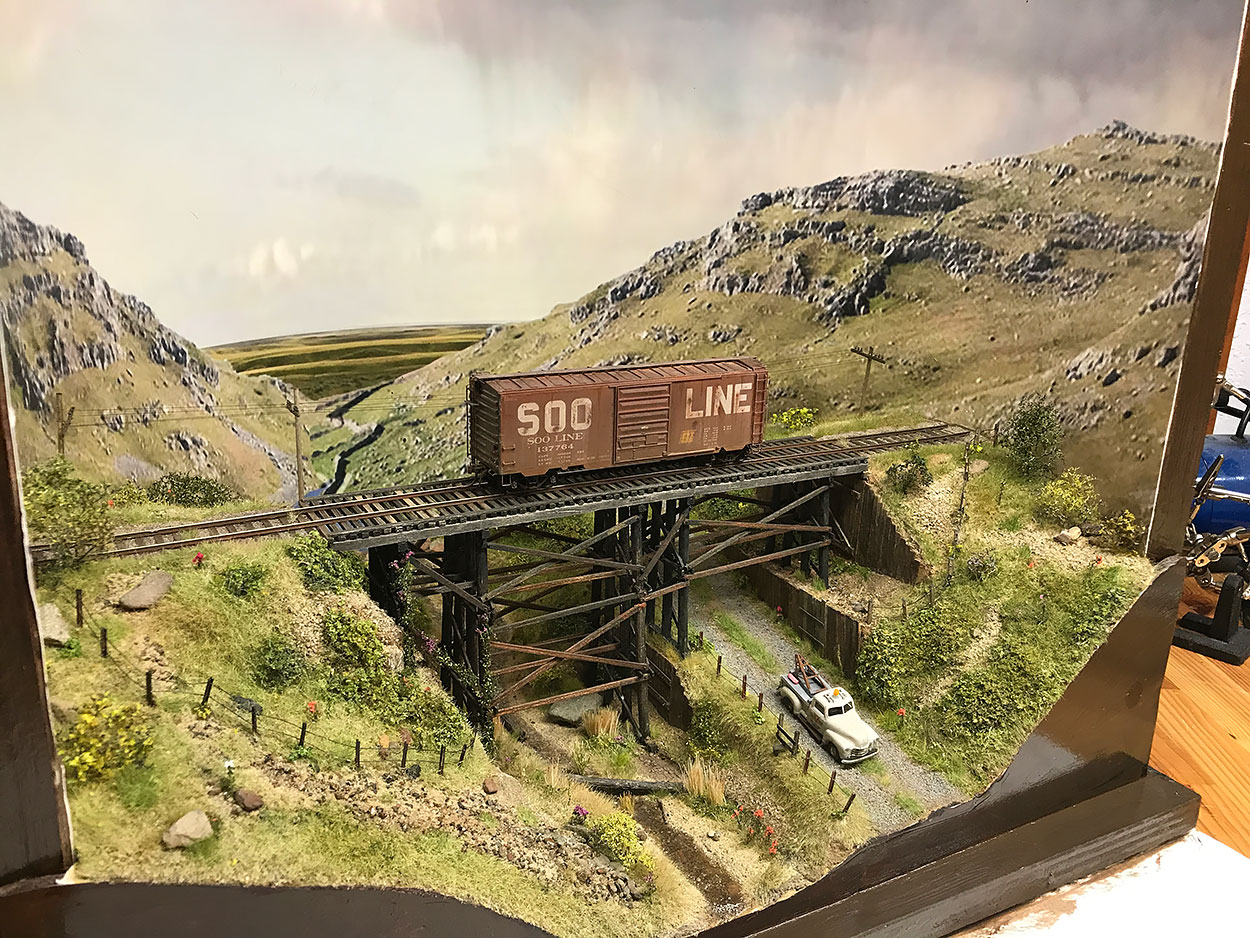
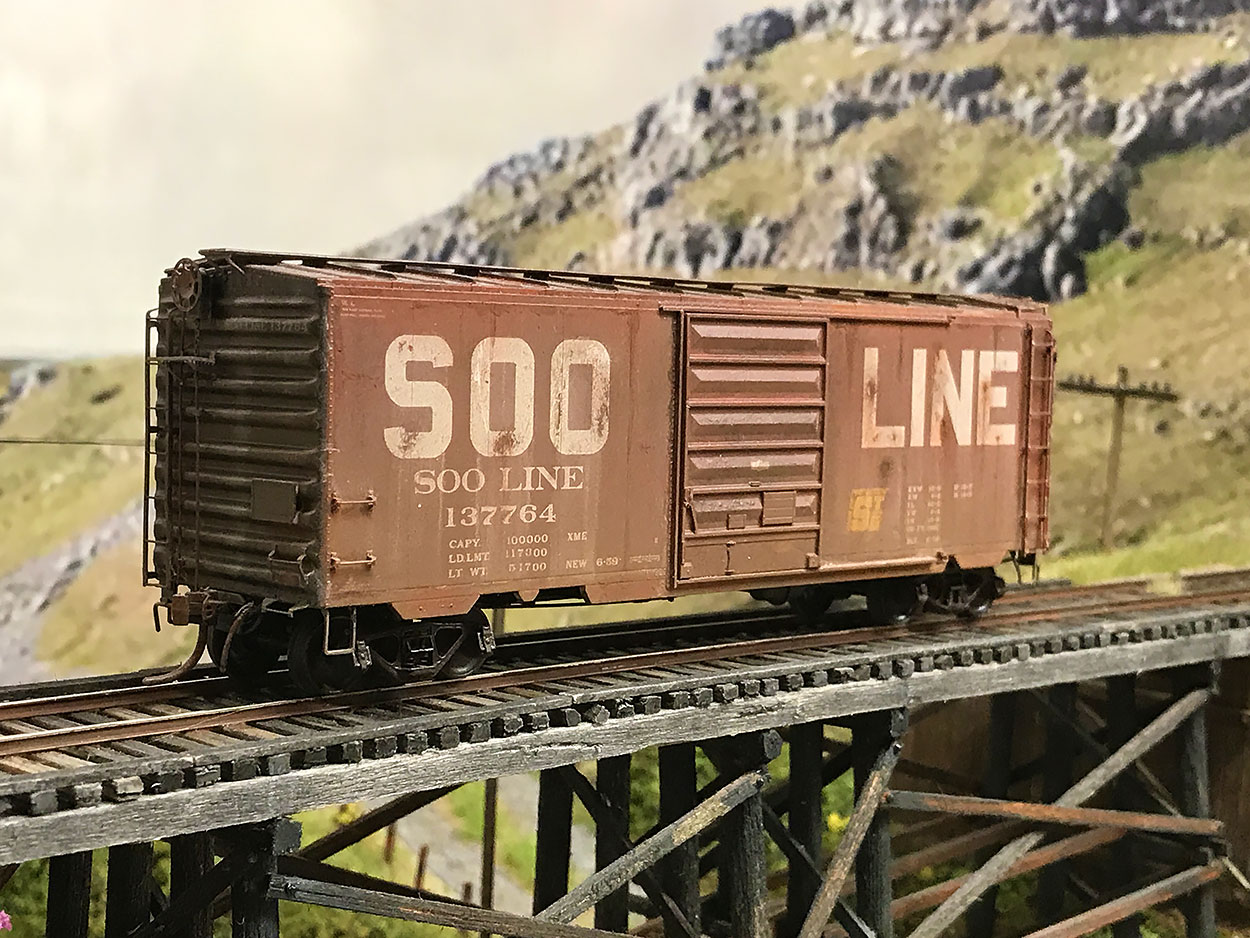

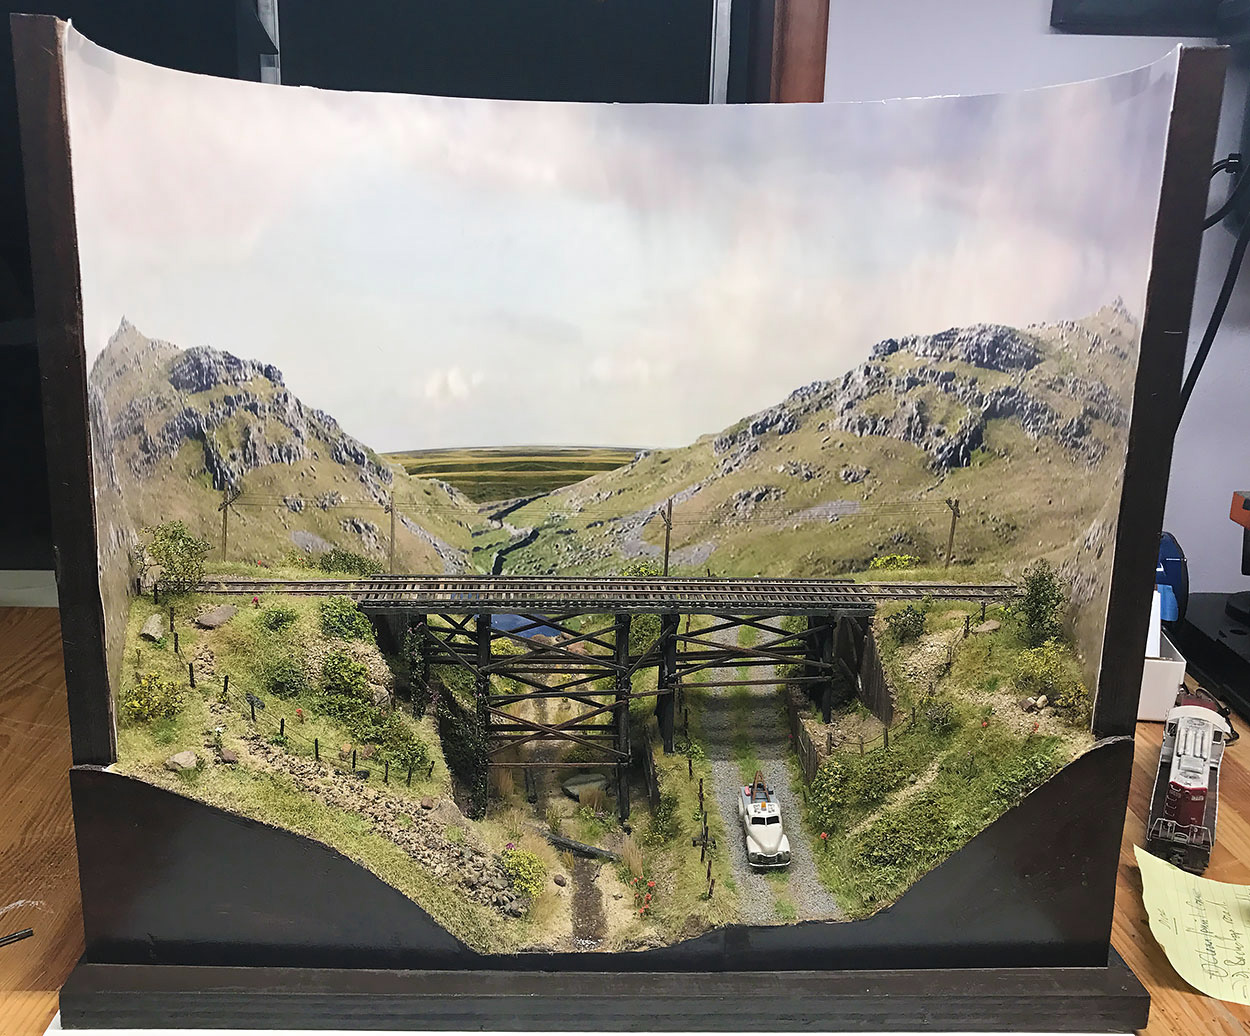
The finished diorama

The diorama now lives on the bottom shelf of the layout cabinet. It will be eventually joined by two more.
I started the project with only a rudimentary understanding of how static grass worked and wanted to use the project to really get a feel for the material and develop techniques to create realistic grass.
I studied plenty of pictures of grass and confirmed what I already knew: that nature has created grass to have an infinite range of colors, textures and arrangements. There are also an infinite way that grass interacts with other elements such as other plants and features of nature such as rivers, creeks, and of course man made objects such as roads, paths, walls etc.
The biggest issue therefore is figuring out how to model this infinite display with only a limited range of products. What do we have at our disposal? Just static grass made by various manufacturers of various lengths and colors. That's really it. There are probably other products available but until I got very comfortable with static grass I didn't want to look any further.
So with this in mind the challenge really came down to this: color and length. Firstly how to get a variety of colors showing up both within the strands and then of course how to create those sweeps of color across an area of grass (small or large). And secondly how to make long grass, short grass, medium grass, grass with a mixture of all those lengths and mix them together to create a credible scene.
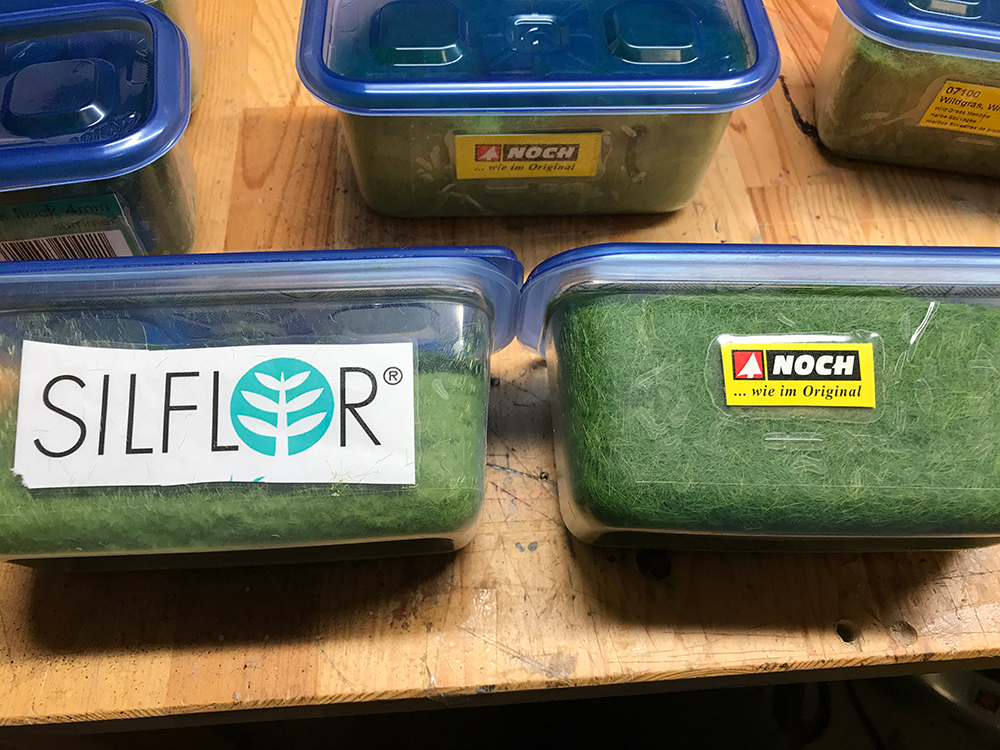
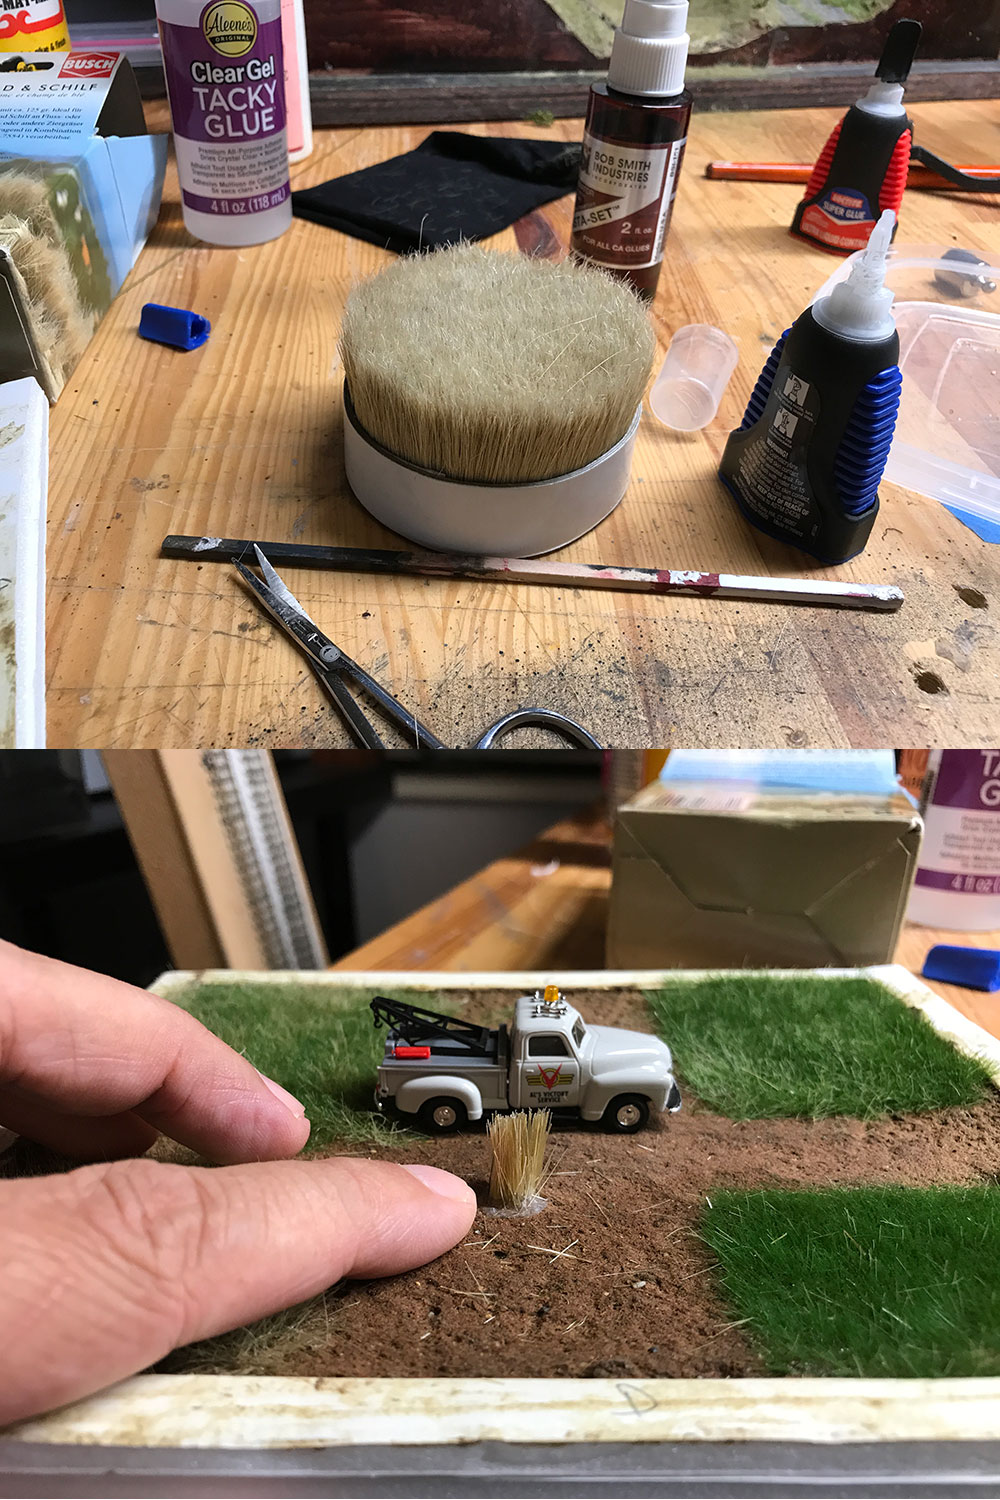
Static Grass - This is a big topic and I'm not sure I have the desire right now to go into every nook and cranny of the available products, etc. However I mainly used Silflor and Noch static grass. Also I'm currently experimenting with dried grass from various manufactures such as Heki.
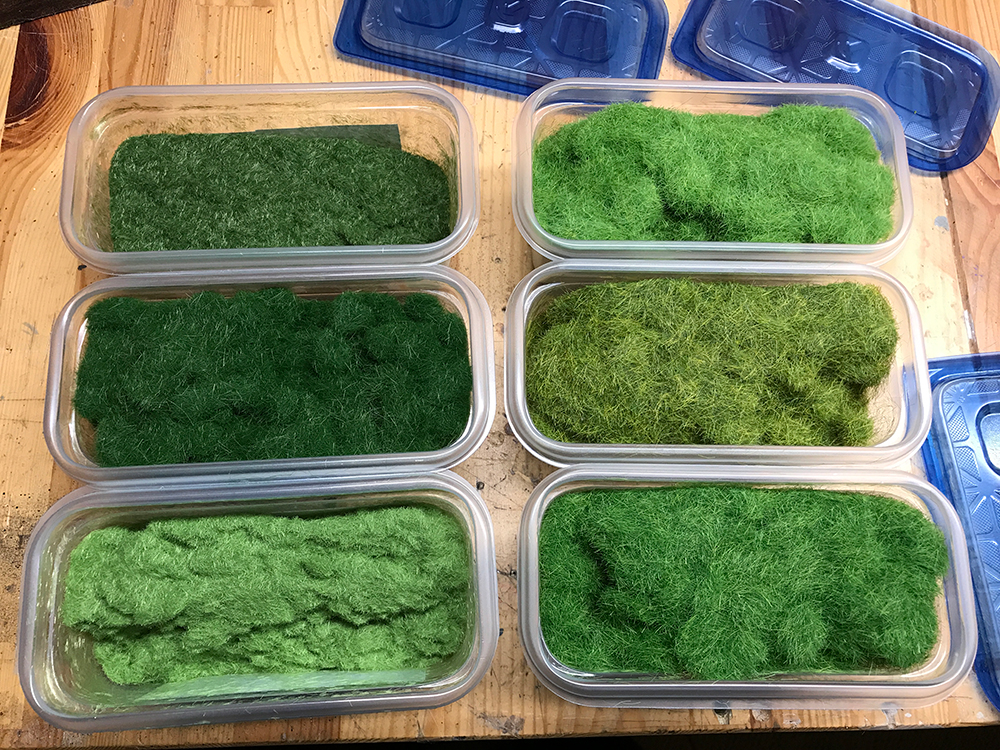
The differences were twofold: weight of strands and color. The Silflor grass is much lighter than the Noch grass and really lays down a much more feathery carpet of grass. The Noch grass on the other hand though thicker has a much more vivid and striking color. The choice of one or the other came down to how much I wanted the colors to 'pop'. The Silflor grass is actually quite flat and dry and the diorama often looked very uninspiring once the grass was laid down. The Noch grass on the other hand really made the diorama pop and glow and look more interesting and fun. However the Noch grass came in halfway through the grassing of the diorama and I felt that I couldn't just change it at this stage. I decided to use it on another project or in small doses around the diorama as accents only. I may point out those accents.
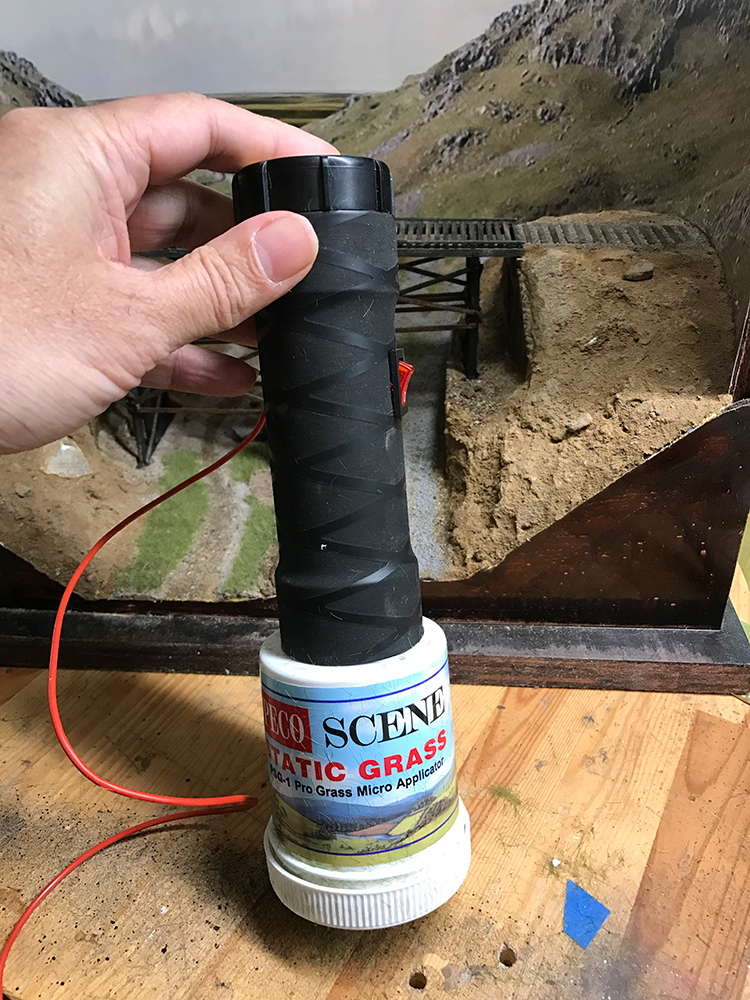
Static Grass Applicator - I purchased the Peco applicator. This is a fantastic tool. Put my last home made applicator to shame but just doing an incredible job throughout. It's small to medium size that was able to get in close to the areas that I need to access. Very powerful, the grass just stands to attention while the applicator hovers above it. It was one of the star tools of the project.
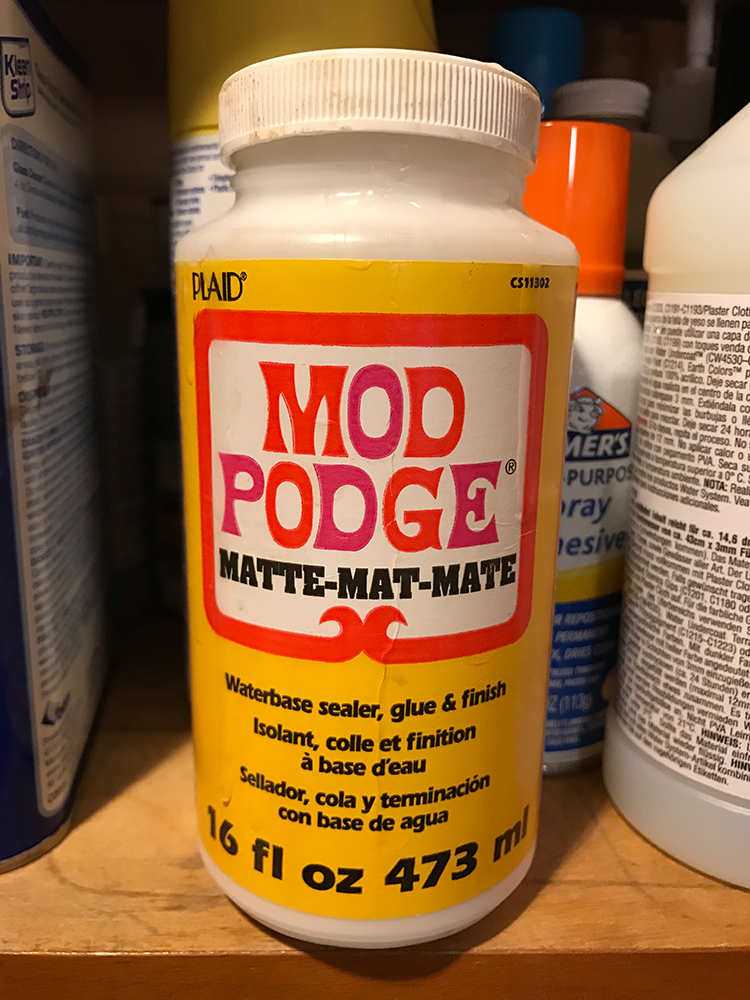
For this project I used matte Mod Podge - it clears to a matte finish unlike regular PVA (which leaves a satin finish on the surface that hte grass is attached to). I wouldn't use anything else now for that first layer of static grass.