Main module

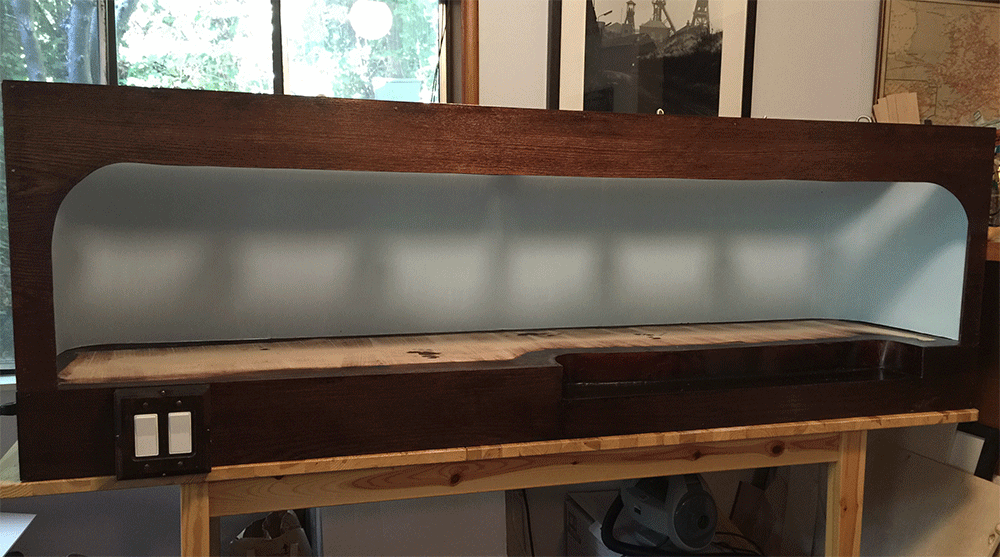
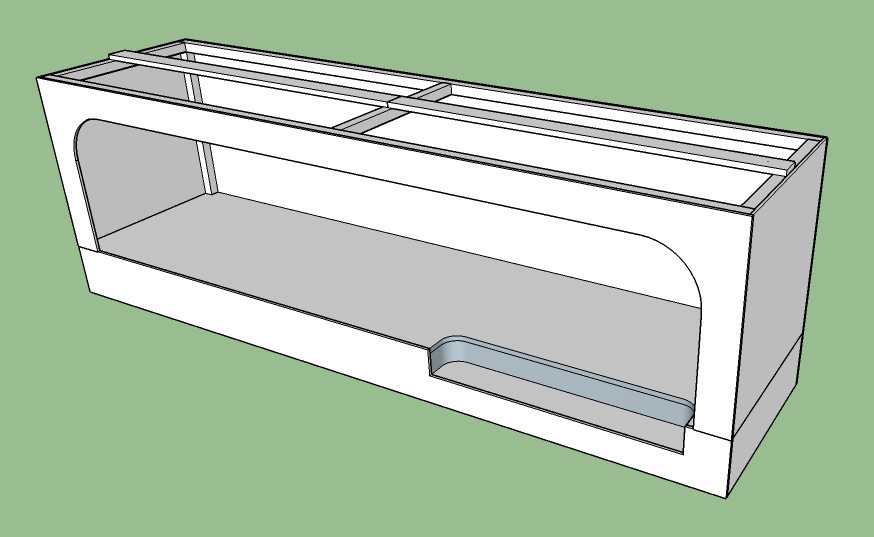
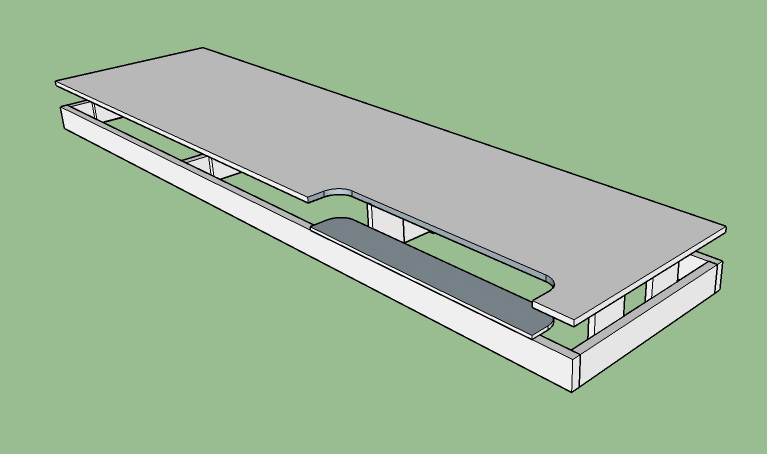
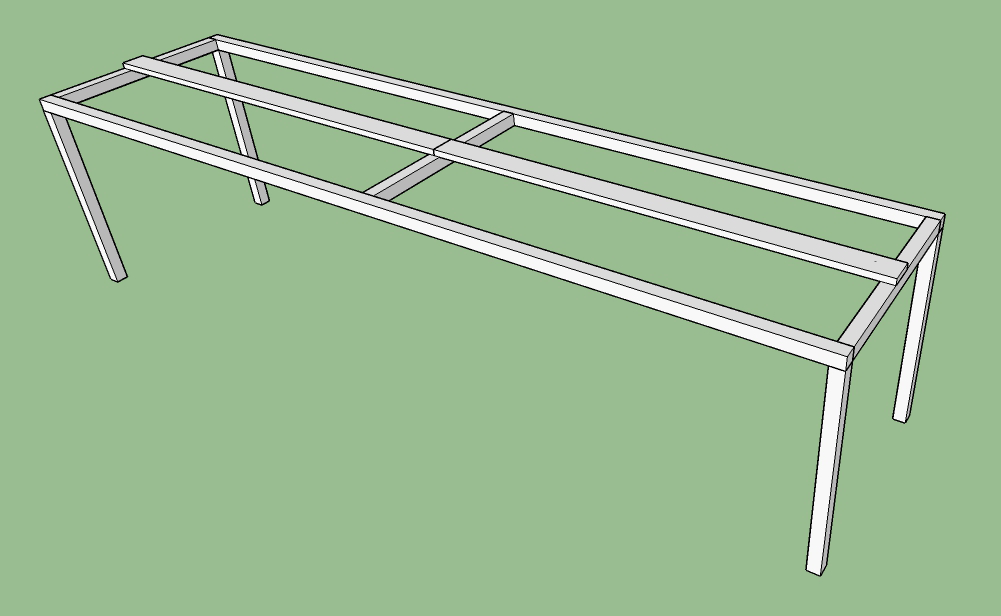
I didn’t keep any images of The Depot module construction so instead I’ve added those belonging to the Town. I made several refinements but the underlying concept is the same: a removable backdrop that sits upon a base:

I’m often asked what the purpose of the cutout well is. It has no real purpose other than being a presentation feature. I first saw the concept on an Tasmanian layout featured on the Micro Layouts website. I thought it was a great presentation device. The cutout well allows me to view trains close to the edge of the baseboard as I think they look really good when up against the edge. It also softens the look of a rigid rectangular design and helps emphasize the flow of the trackwork.

Module cabinet

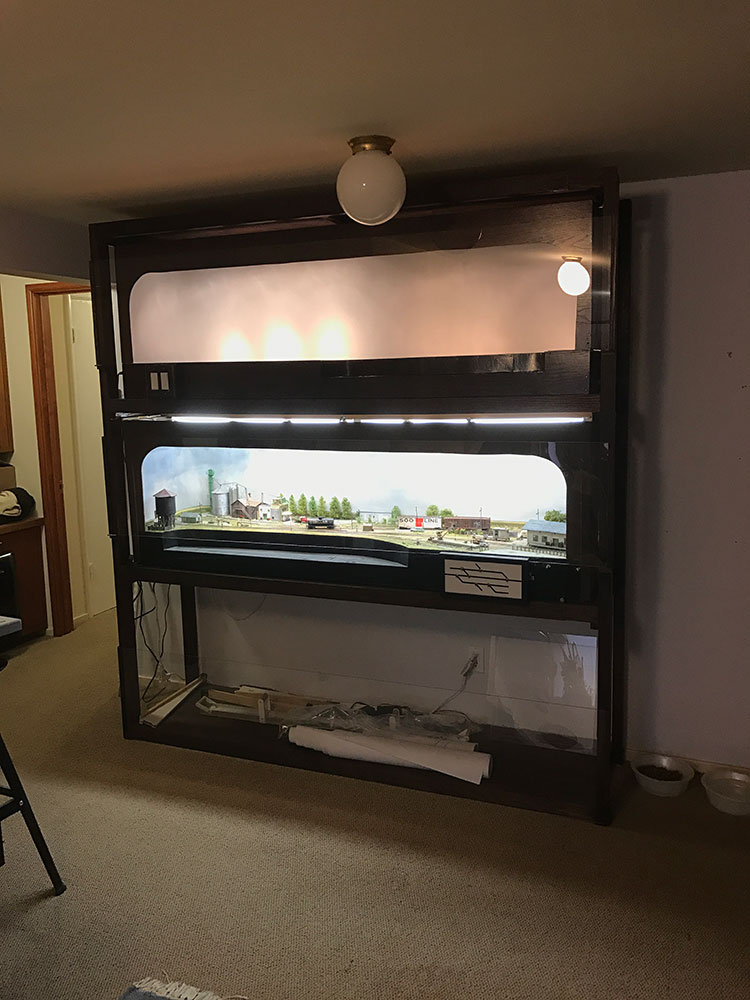
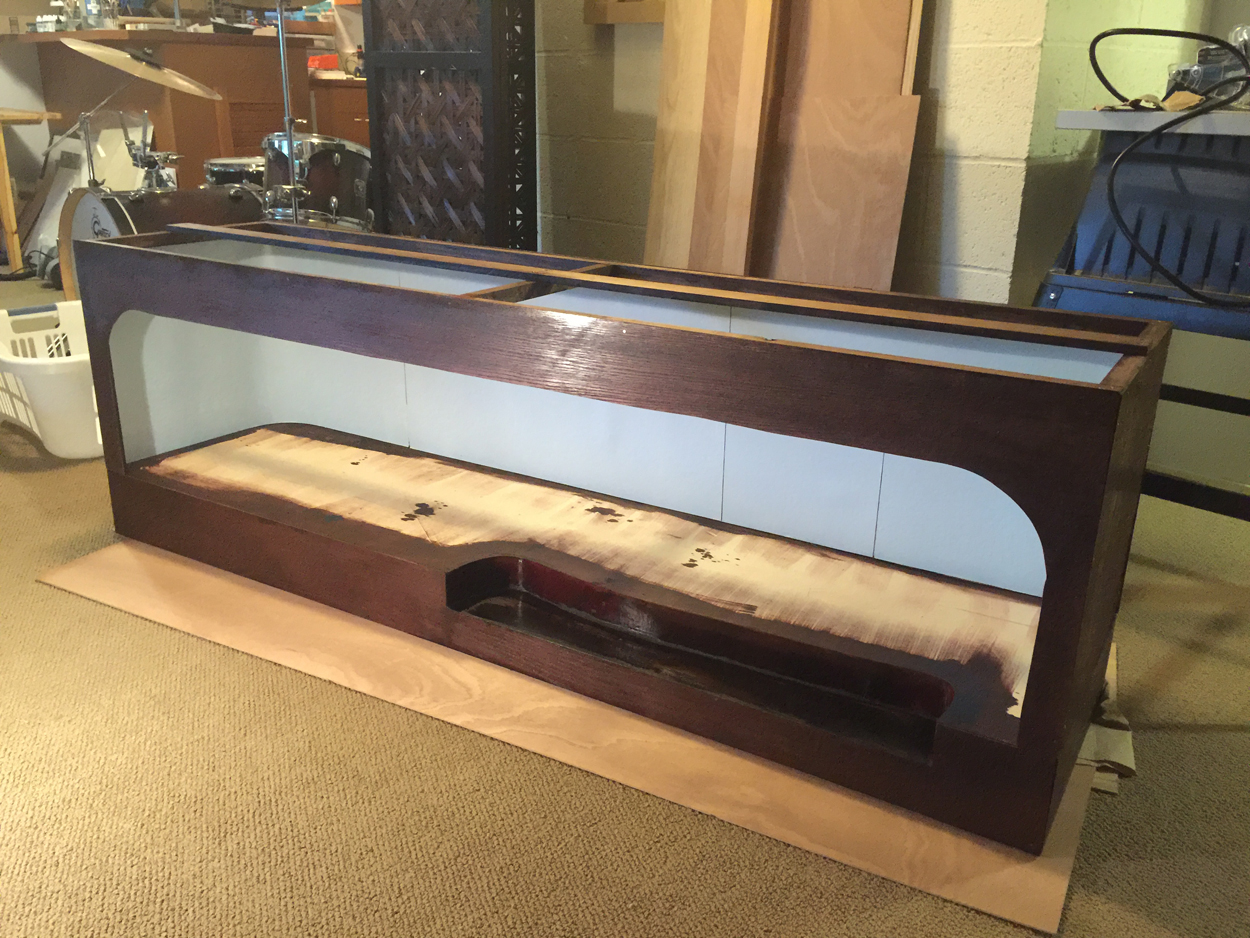
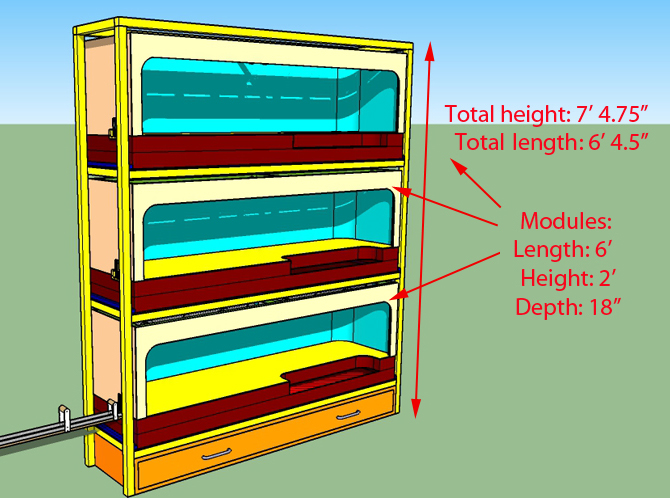
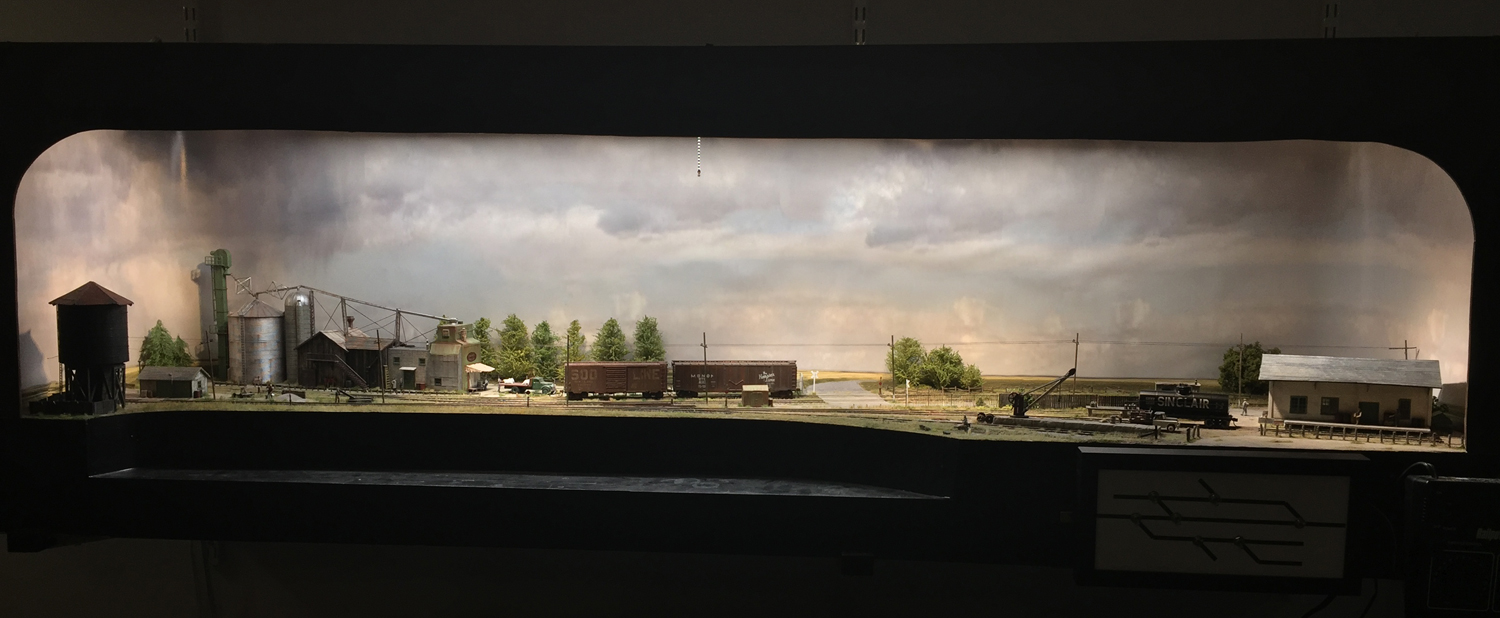
The layout is being housed in a purpose-built cabinet. The cabinet is designed to hold another module on the top shelf and a series of dioramas on the bottom shelf.

Each module has a plexiglass screen in front of it to protect it from curious cats.
The original concept had a drawer in the lowest level to hold cassettes and trains. In the end there was no space to fit it.  Also the lowest level shelf turned out not to be practical to operate trains so I will use it to store dioramas. The additional modules planned (two more) will be stored in a second cabinet built to this same design.
The best feature of this design is the ability to pull a module out, remove the backdrop and then work on it at the work table. I can get in close to any area I like for detail work. Once done I can just replace the top and place the whole unit back in its shelf.

Backdrop

The backdrop was created from a photo I found on Google images. I typed in word ‘Great Plains’and I think it was one of the first results.
Using Photoshop I moved the storm, stretched the sky, and duplicated scenes horizontally. It ended up looking like this.
I sent the file to a printer I found on the East Coast (http://www.posterprintfactory.com/). They printed it out full-size and sent me back the rolled up image two weeks later. I unrolled it and stuck it down using spray glue. I marked the backdrop to make sure the elements lined up correctly (such as the roadway fade).
Even though some elements repeat across the backdrop they are so far apart that they become unnoticeable in photographs.
The storm in the west is heading towards The Depot and signifies the threat of closure that hangs over the line.

Cassette

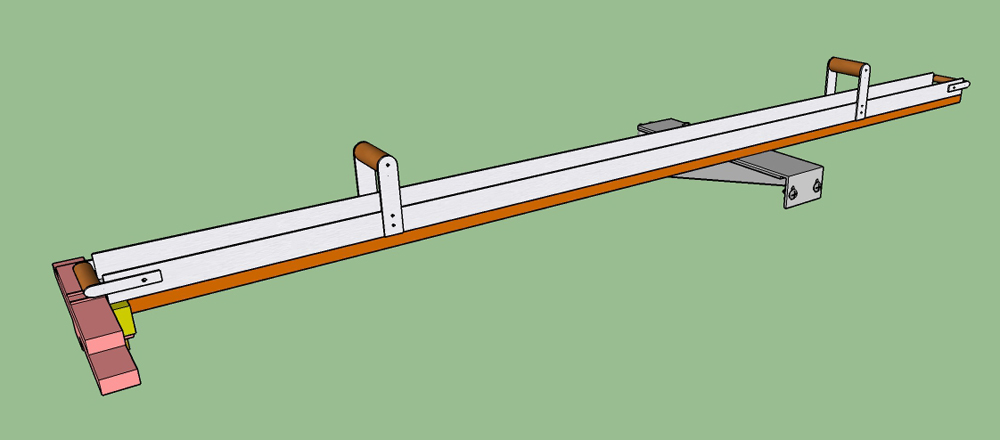
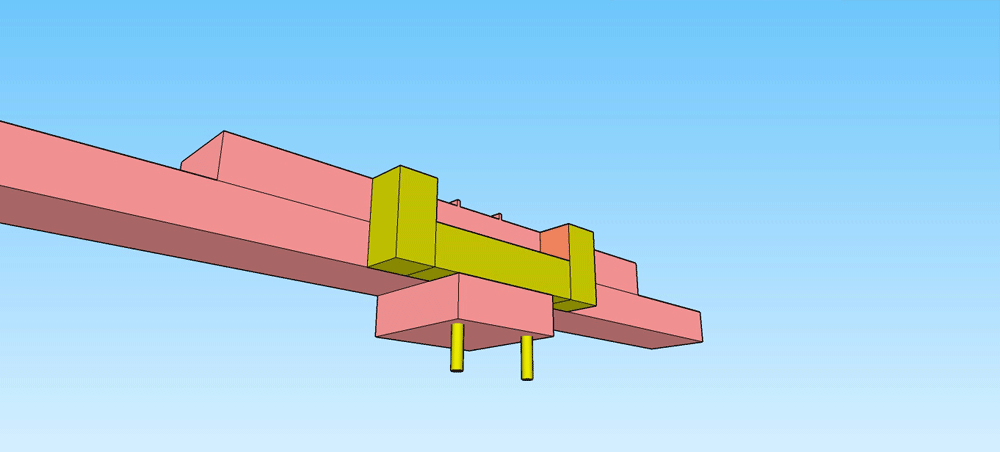
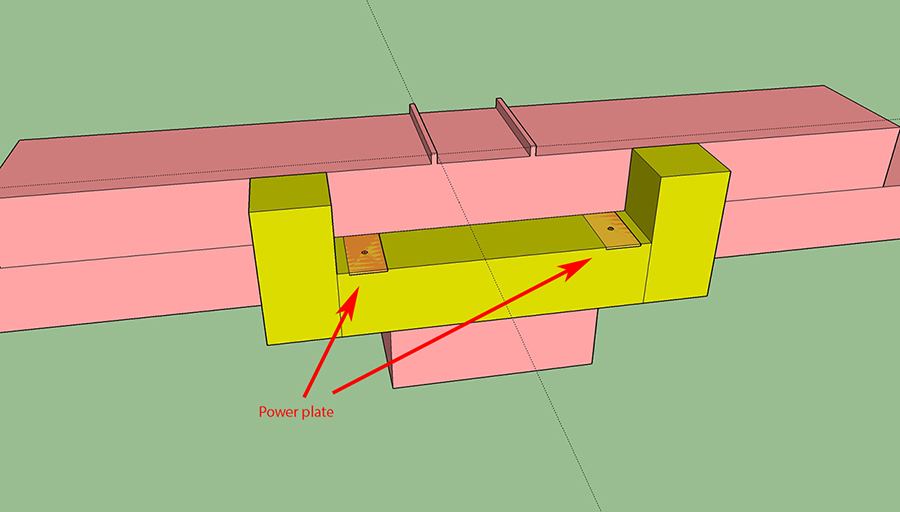
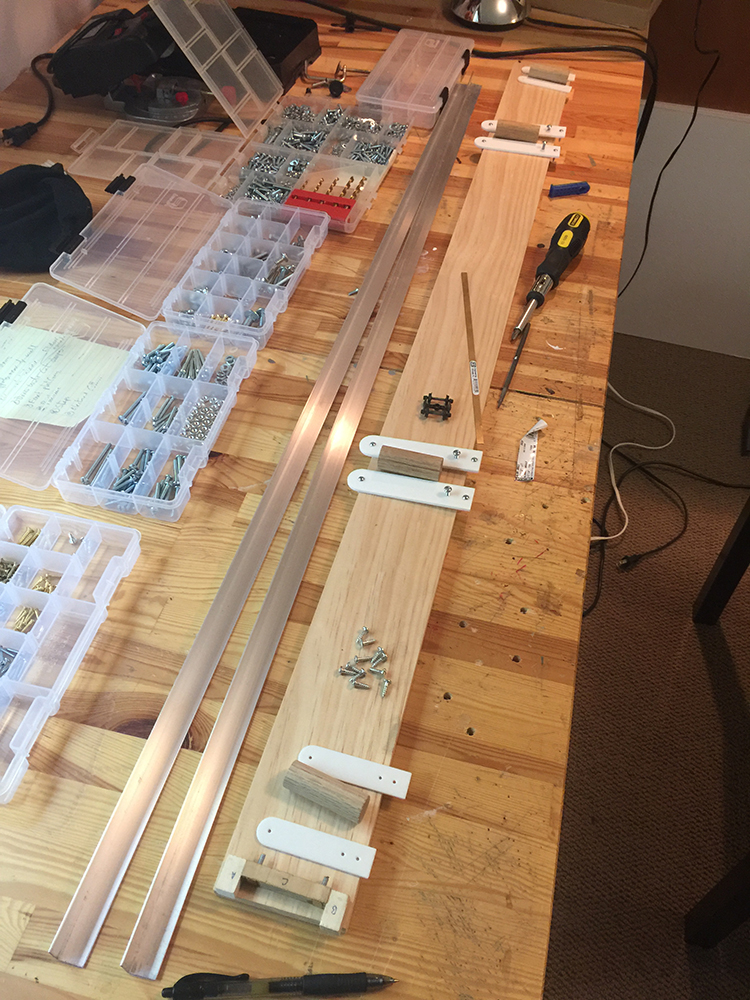
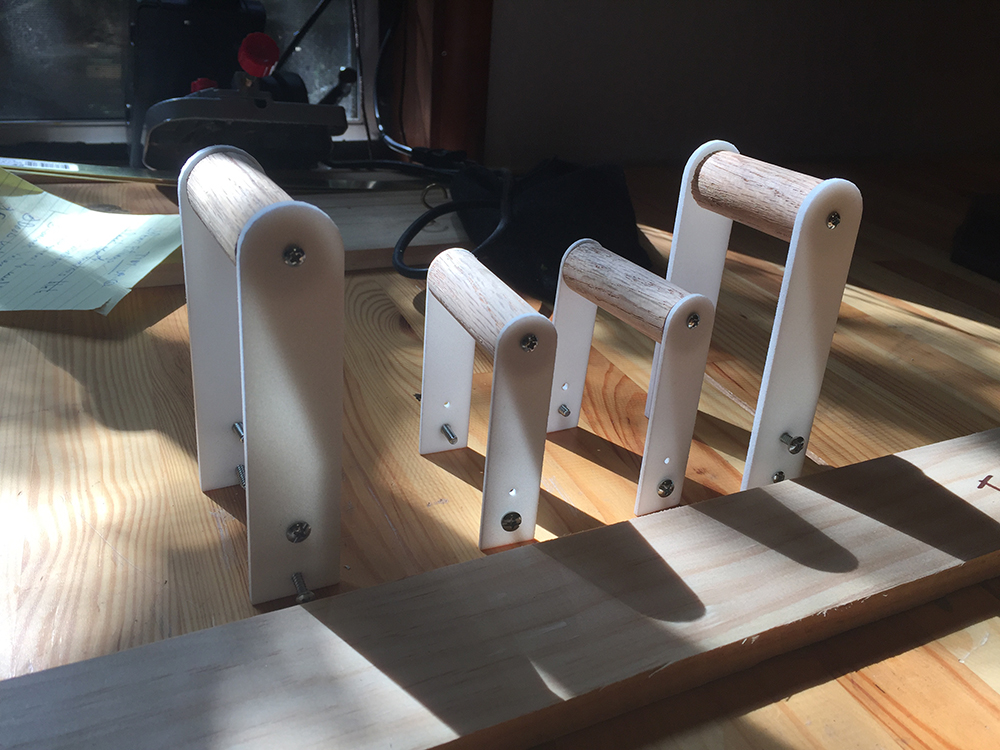
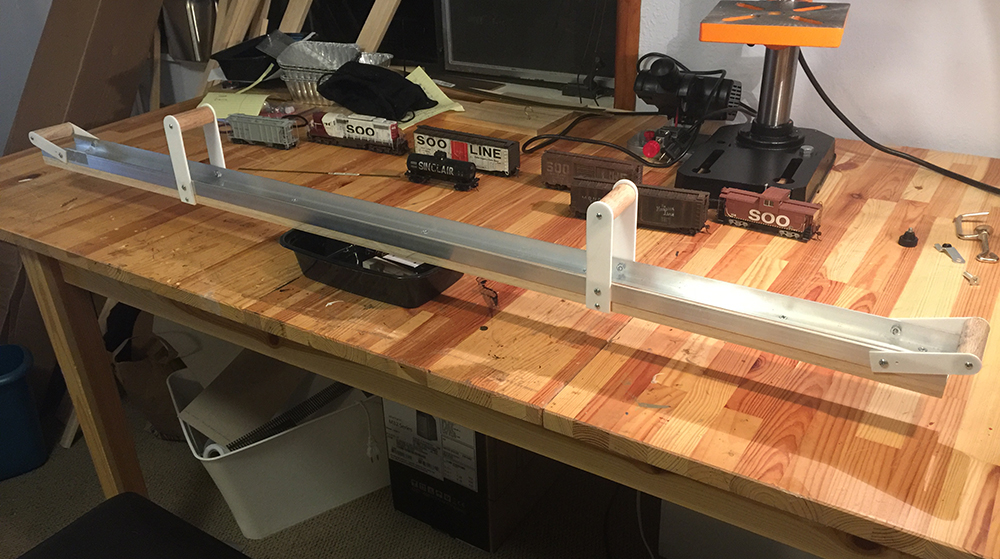
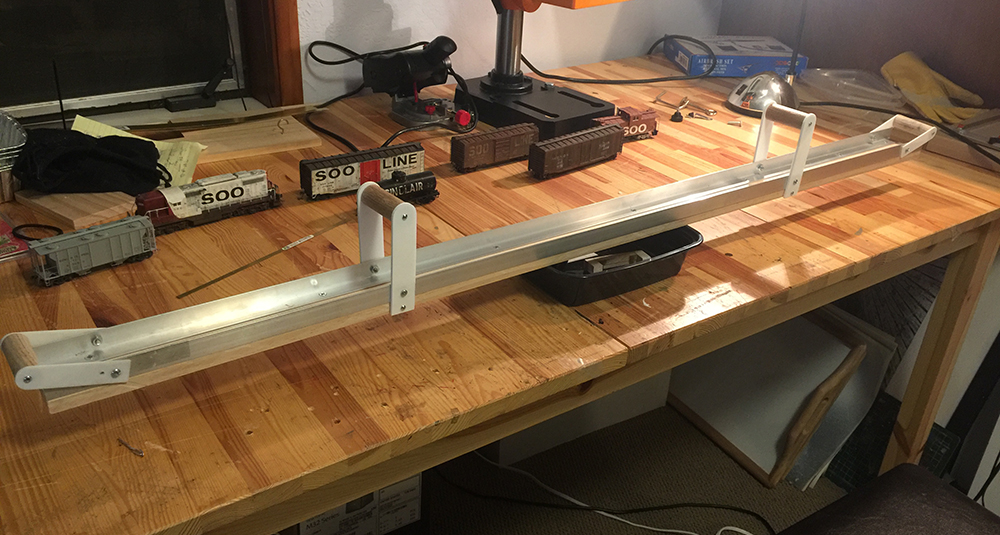
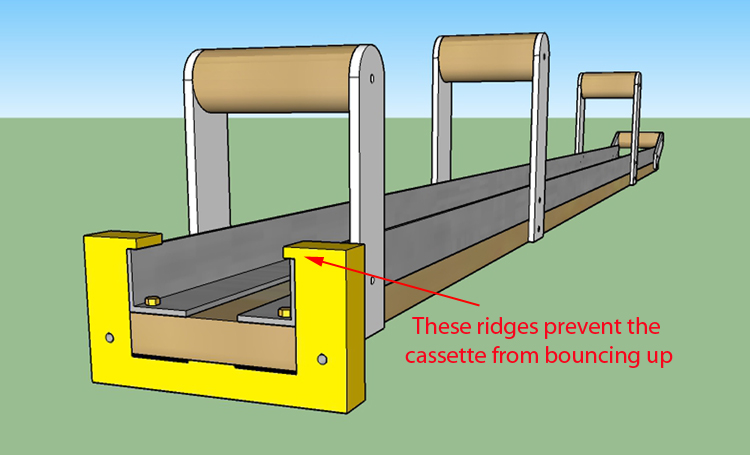
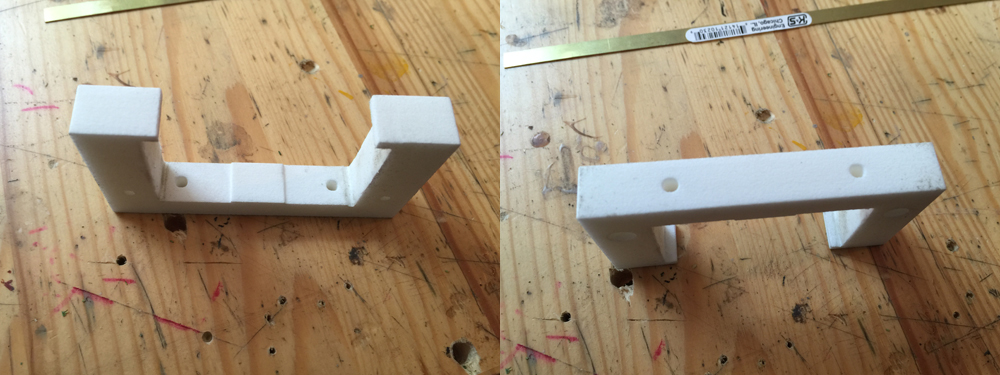
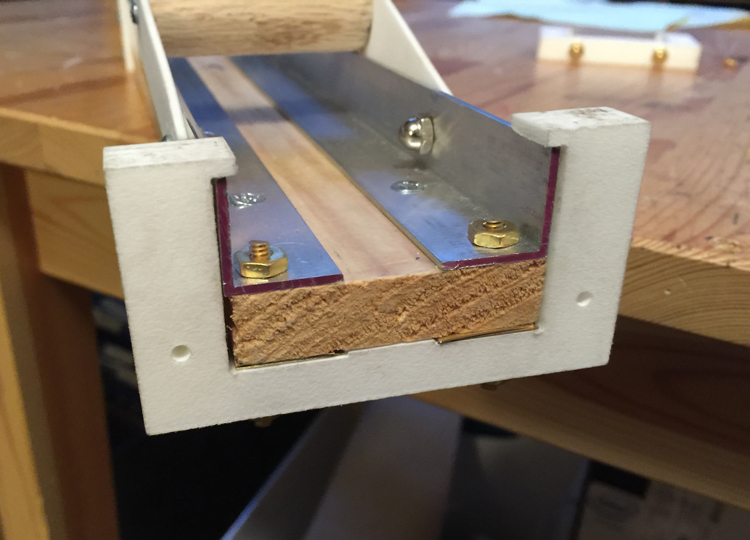
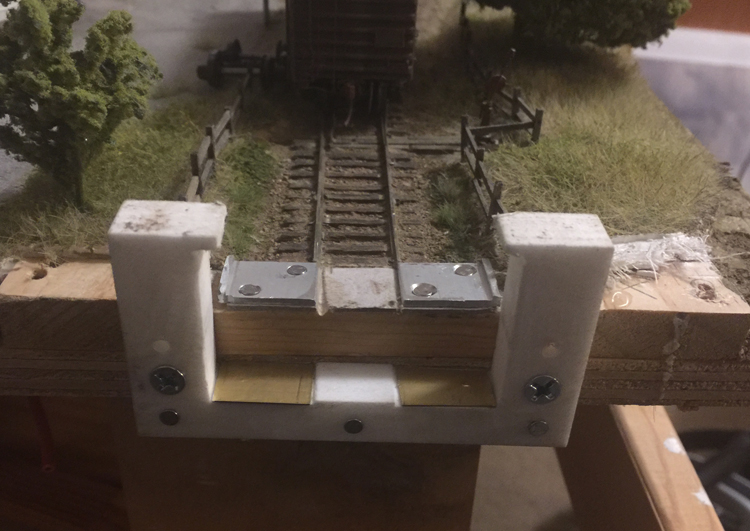
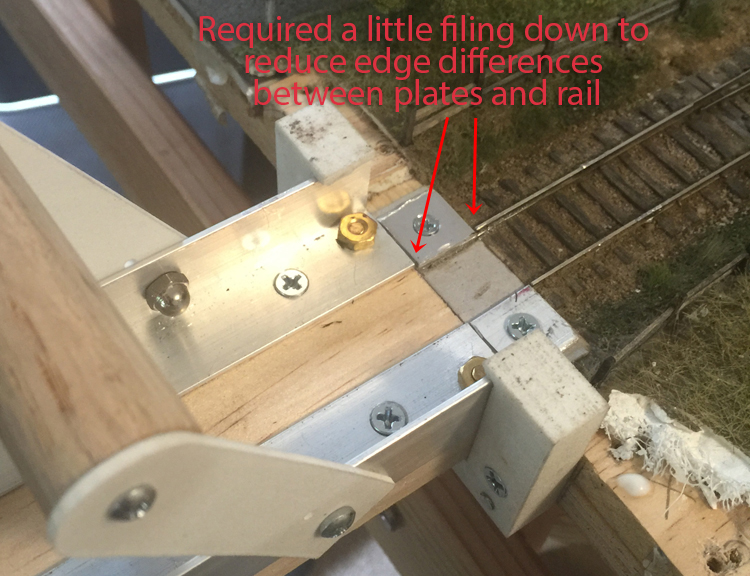
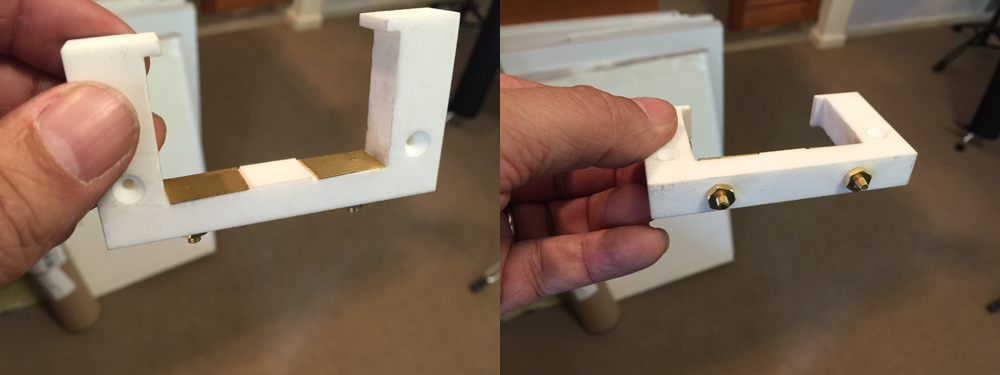
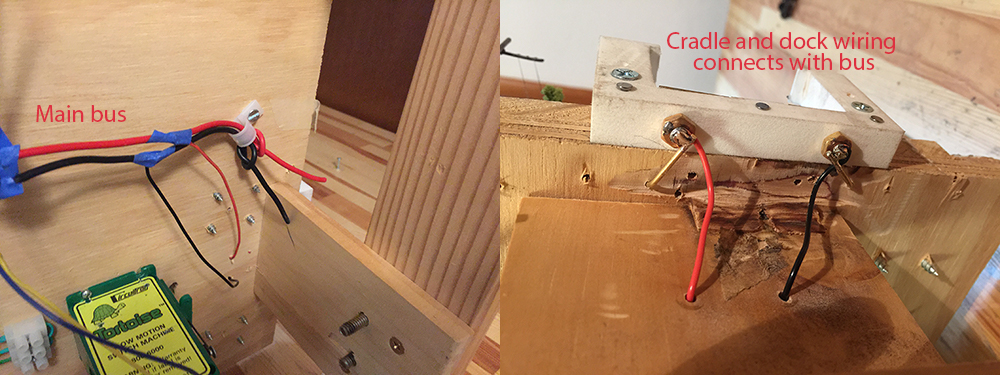
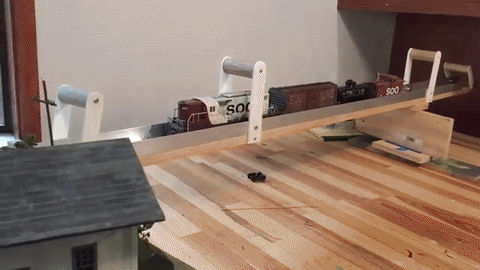
Opting to build a series of modules depicting the branch line I always intended rolling stock to be able to move between them. The only issue was how to do it. I don’t have space for staging so I decided to build a fixture called a ‘cassette’ to store, assemble and move trains between modules. I first read about cassettes in one of Iain Rice’s books on small layouts and always thought that they were good way to save space and store trains. The underlying concept is of two aluminium corner bars mounted on a wooden deck which join to the layout at a docking point. The three main components are a cassette, a dock and a cradle. Here are some images of the design and construction process:

I used SketchUp to design the basic cassette. It uses aluminum angle bars (4ft long) screwed down to 1/2 inch solid pine board. It has handles to help lift it and it has drawbridge handles at the ends to keep trains from rolling off while being moved.
The hardest part of the design to figure out was how to connect the cassette to the layout. I decided to make something I called a ”cradle”. It took several iterations of the design to get right. Eventually I designed it to attach to a dock to into which the cassette sits and this prevents any sideways movement.
Power comes into the cradle from two connectors and a shaft that connects with power plates on the upper surface.

Power plates on the cassette touch the power plates on the cradle.

I took me a while to gather all the materials and parts. I have to build another one soon so I’ll publish a proper building diary with parts listed for anyone who wants to have a go themselves.
After failing miserably to make handles from aluminum I eventually turned to Shapeways and had them 3D printed.
And here’s the final result. It actually came together pretty quickly although I definitely had to scrap one earlier version.

It is designed to hold the local freight which is really the only train that will move between modules.
I added an upper ridge to the cradle to stop upwards movement of the cassette.
I had Shapeways print the cradles for me. I can have as many duplicates made as I need. The Town module will need three.
The cassette has a tight fit with the cradle to prevent vertical and horizontal movement.
The cradle is fitted to the dock area. It is where the most care needs to be taken to make sure things line up and trains don’t derail.

I added power plates to the cradle. Shapeways printed the holes for me but the plastic is easy to drill through if necessary.
This is a test to power the cradle and the cassette.

The train ran though without any hitches.
I added docks and cradles to both ends and so trains can enter and exit as planned.

Lighting

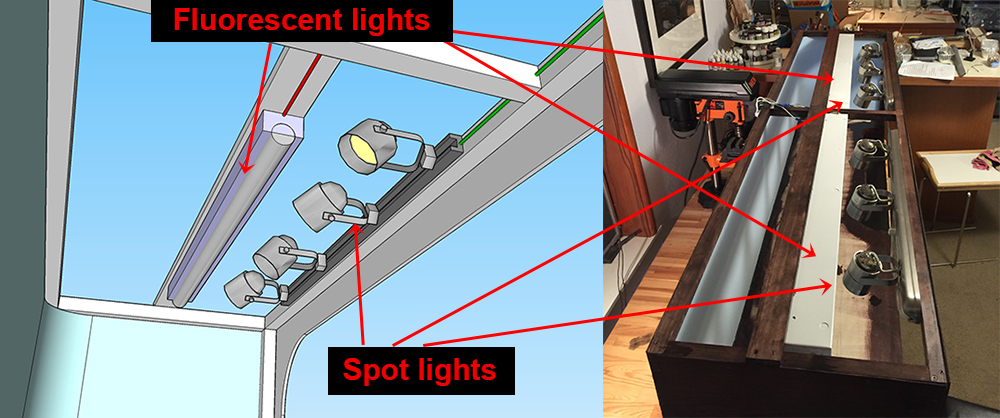
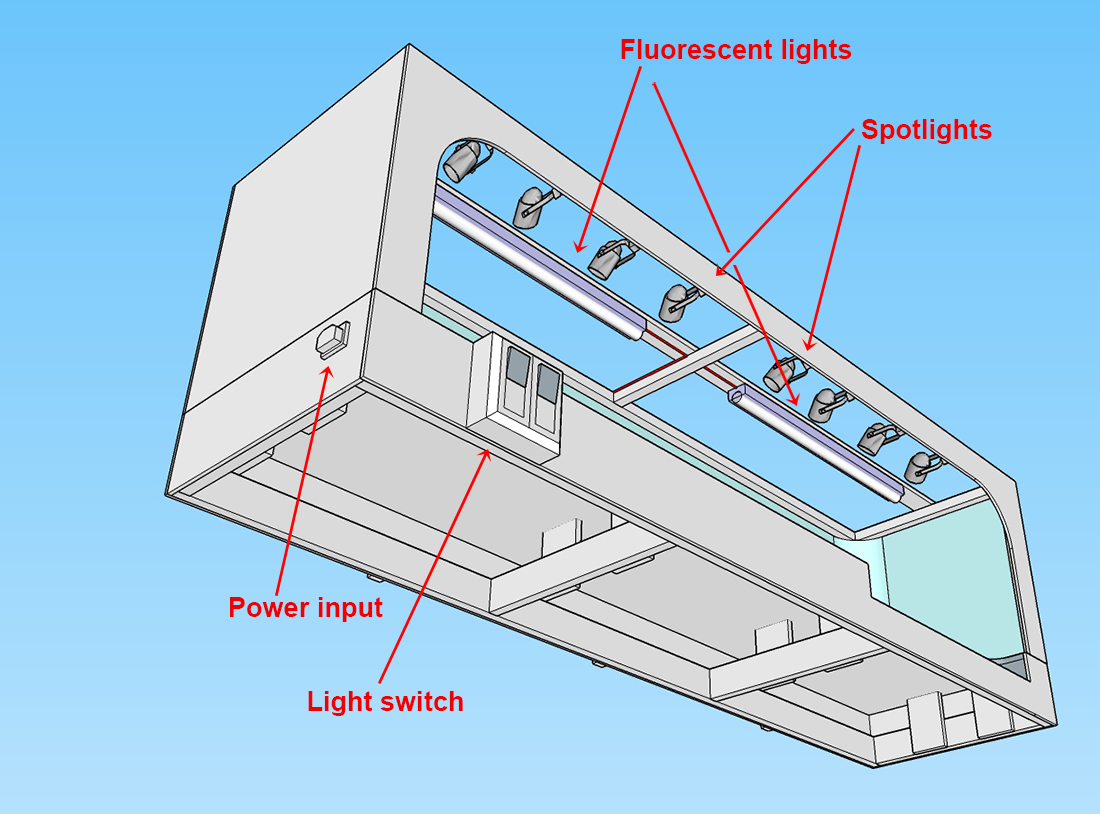
The lighting consists of two fluorescent lights and two sets of spotlights. The drawings below show the lighting for the new module but are used in a similar way on The Depot.


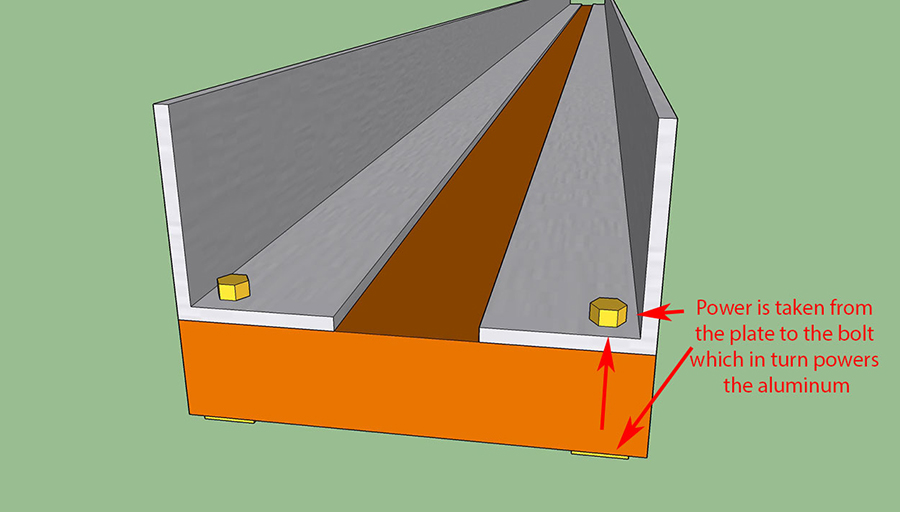
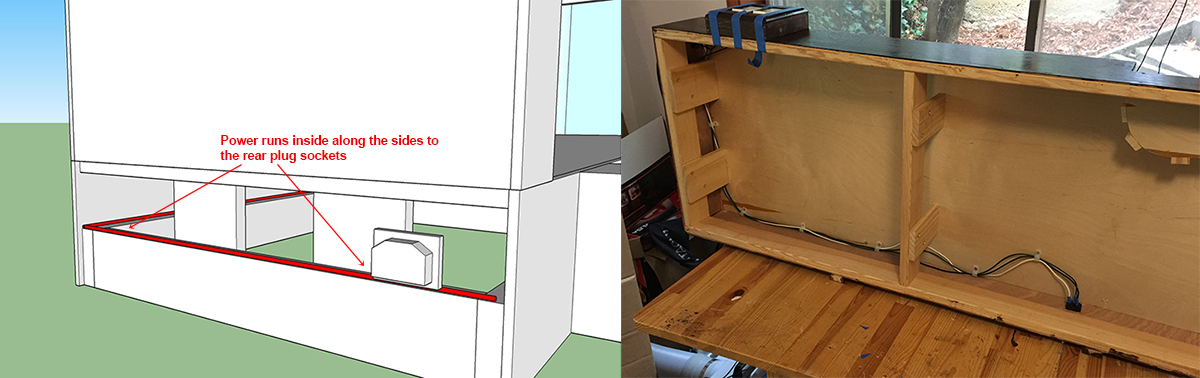
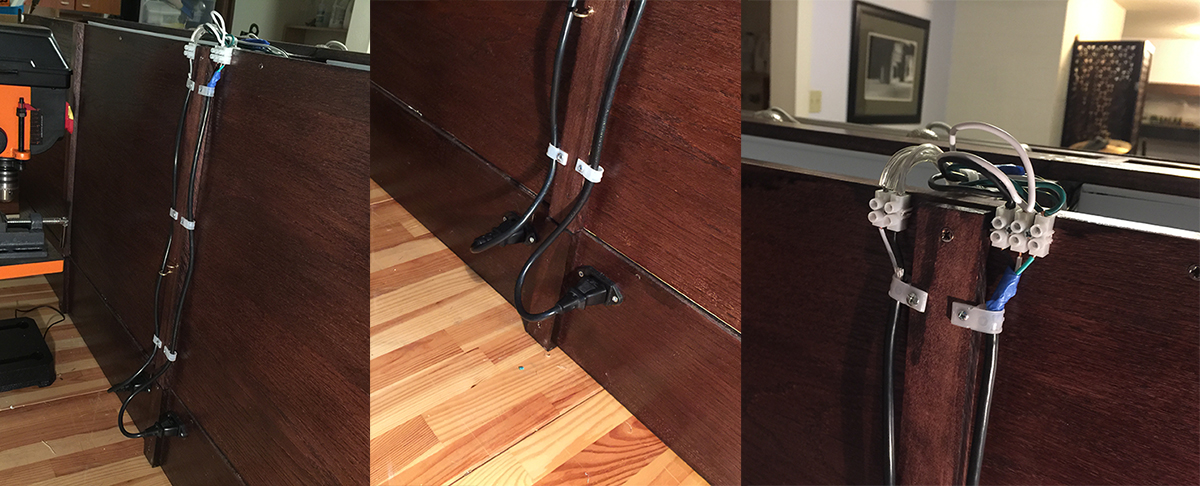
On the inside I ran the cables along the sides to two plug sockets at the back.

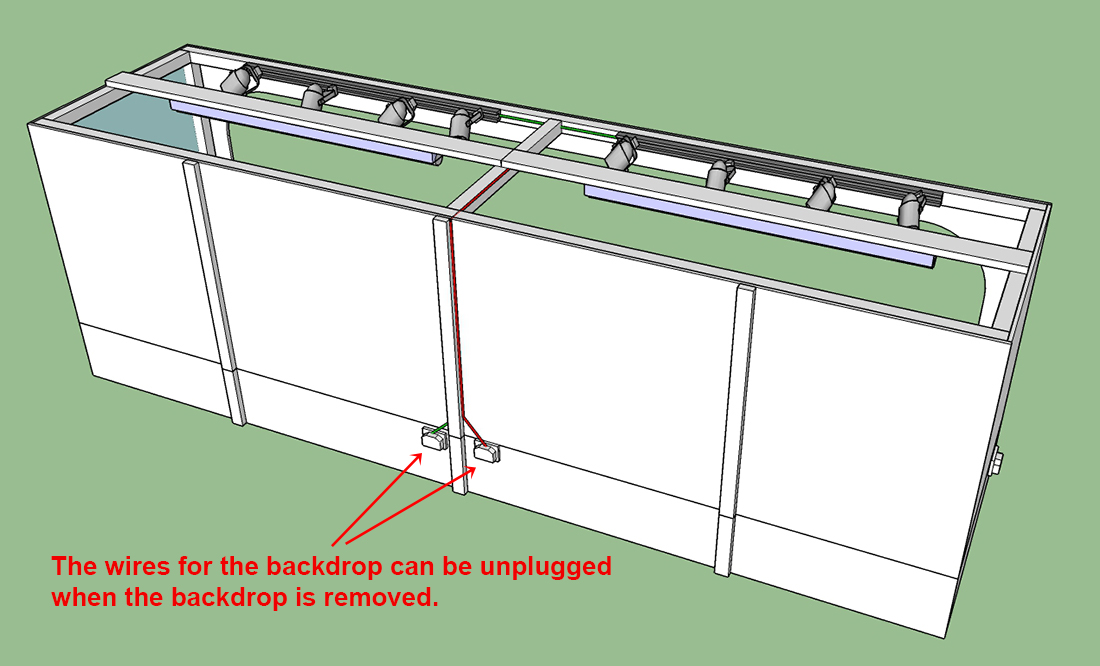
Power runs to the lights from the back from these two plugs. They can be detached when I need to remove the backdrop. At the top I used terminal blocks to get power to the individual lights.

There are two sets of lights. Fluorescent lights which provide a consistent overall cast and spotlights which focus a warm light on specific areas. The spotlights have their own dimmer.