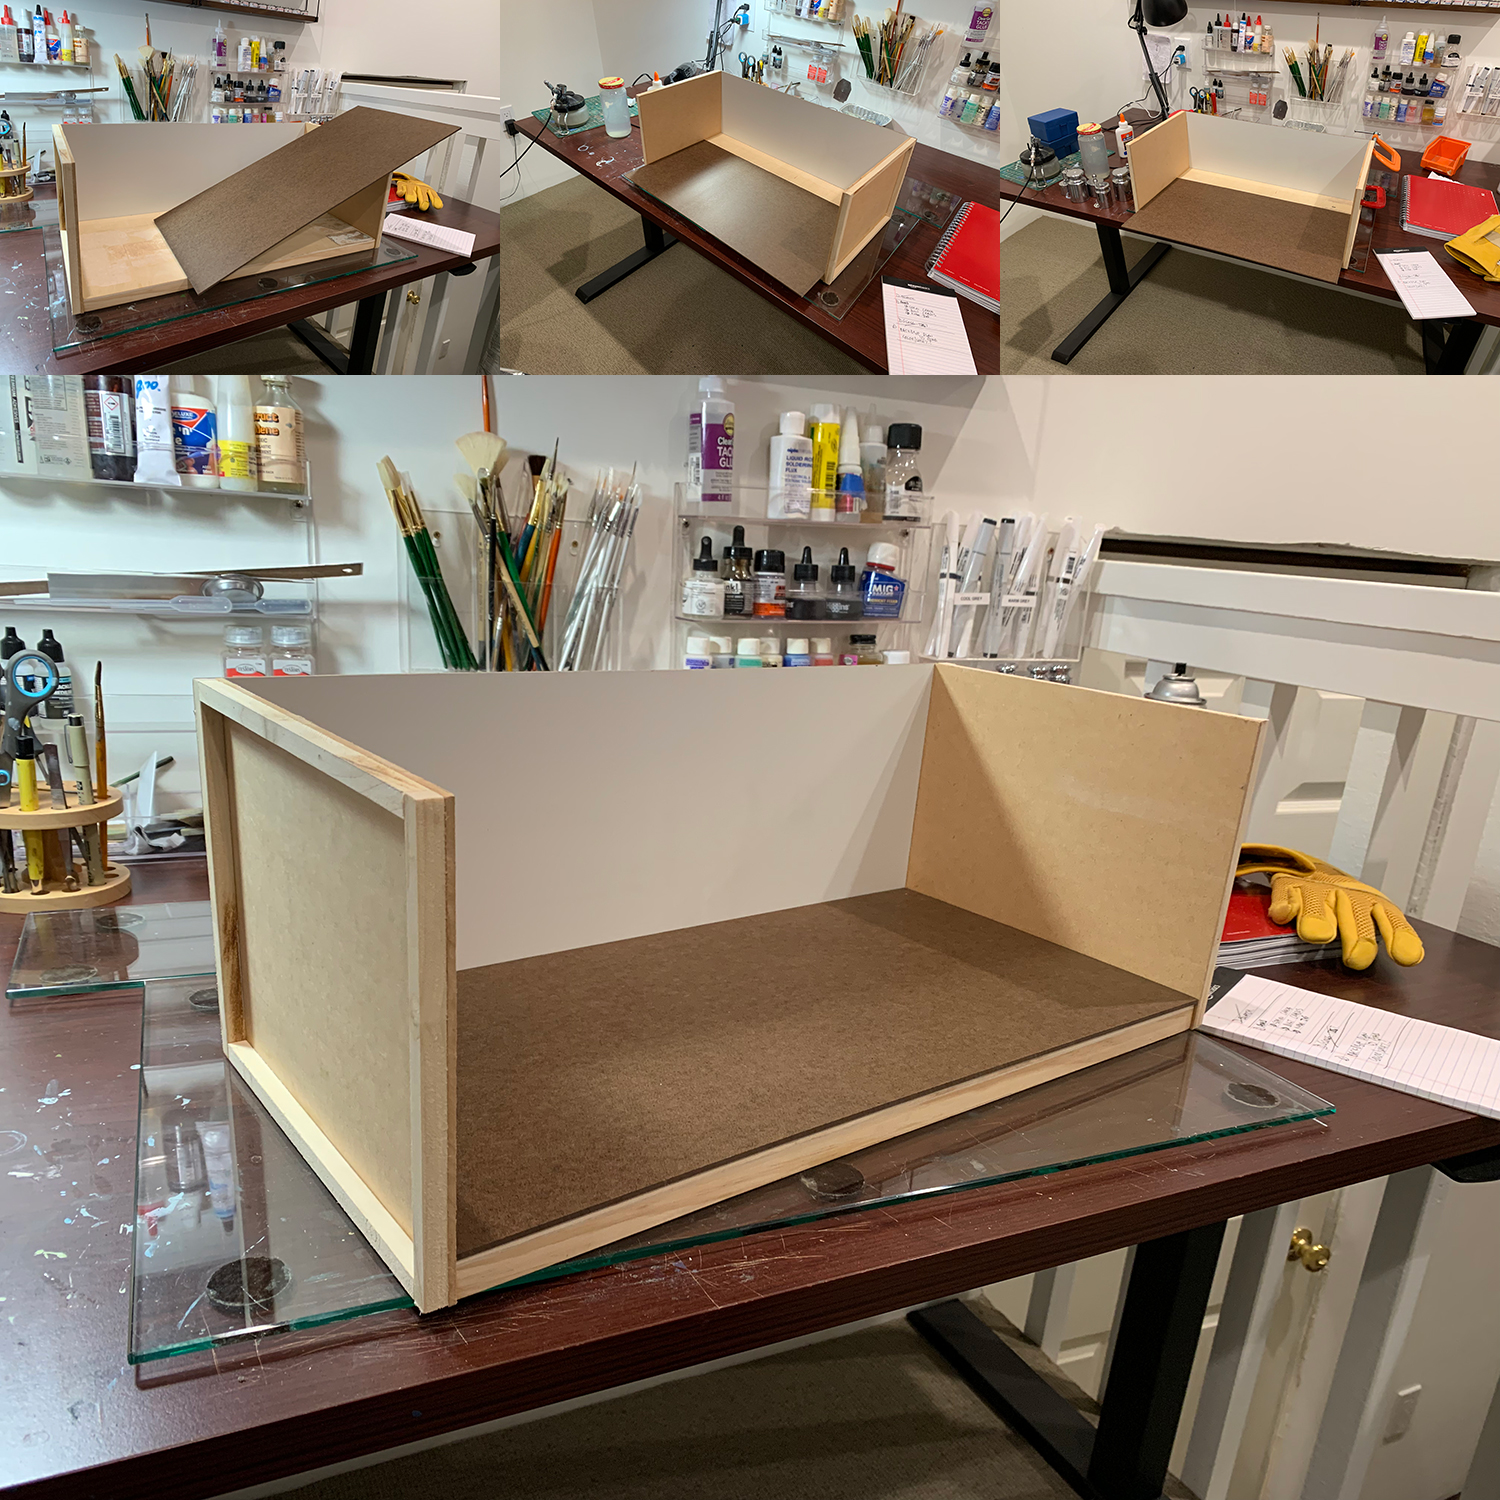
This week I finished the diorama frame. I created sides by cutting up three pieces of hardboard bought from my local art store. The diorama is 20 X 10 inches so the sides needed to be two pieces of 10″ and one piece of 20″. All the pieces are around 7″ tall. I framed the left and right sides with 1/2 inch lengths of wood (is there a name for that wood?). The rear board is just stuck to the left and right frames and is not itself framed. I used glue throughout to build the framework. Fairly simple.
The complicated part was deciding how to work on the diorama away from the backdrop and then fit the backdrop to the diorama once completed. I decided to create a separate base from hardwood, build the diorama on top of that and slide that base into the backdrop frame once completed. That way I can work on the back of the diorama and have easy comfortable access for my various tools such as the static grass applicator.
The diorama base and the frame are two separate pieces. I will install the backdrop on the frame but work on the diorama separately on my work bench. Once completed I should be able to just slide the model into place. It also means I can fit the backdrop immediately and not worry about damaging it when modeling towards the back.
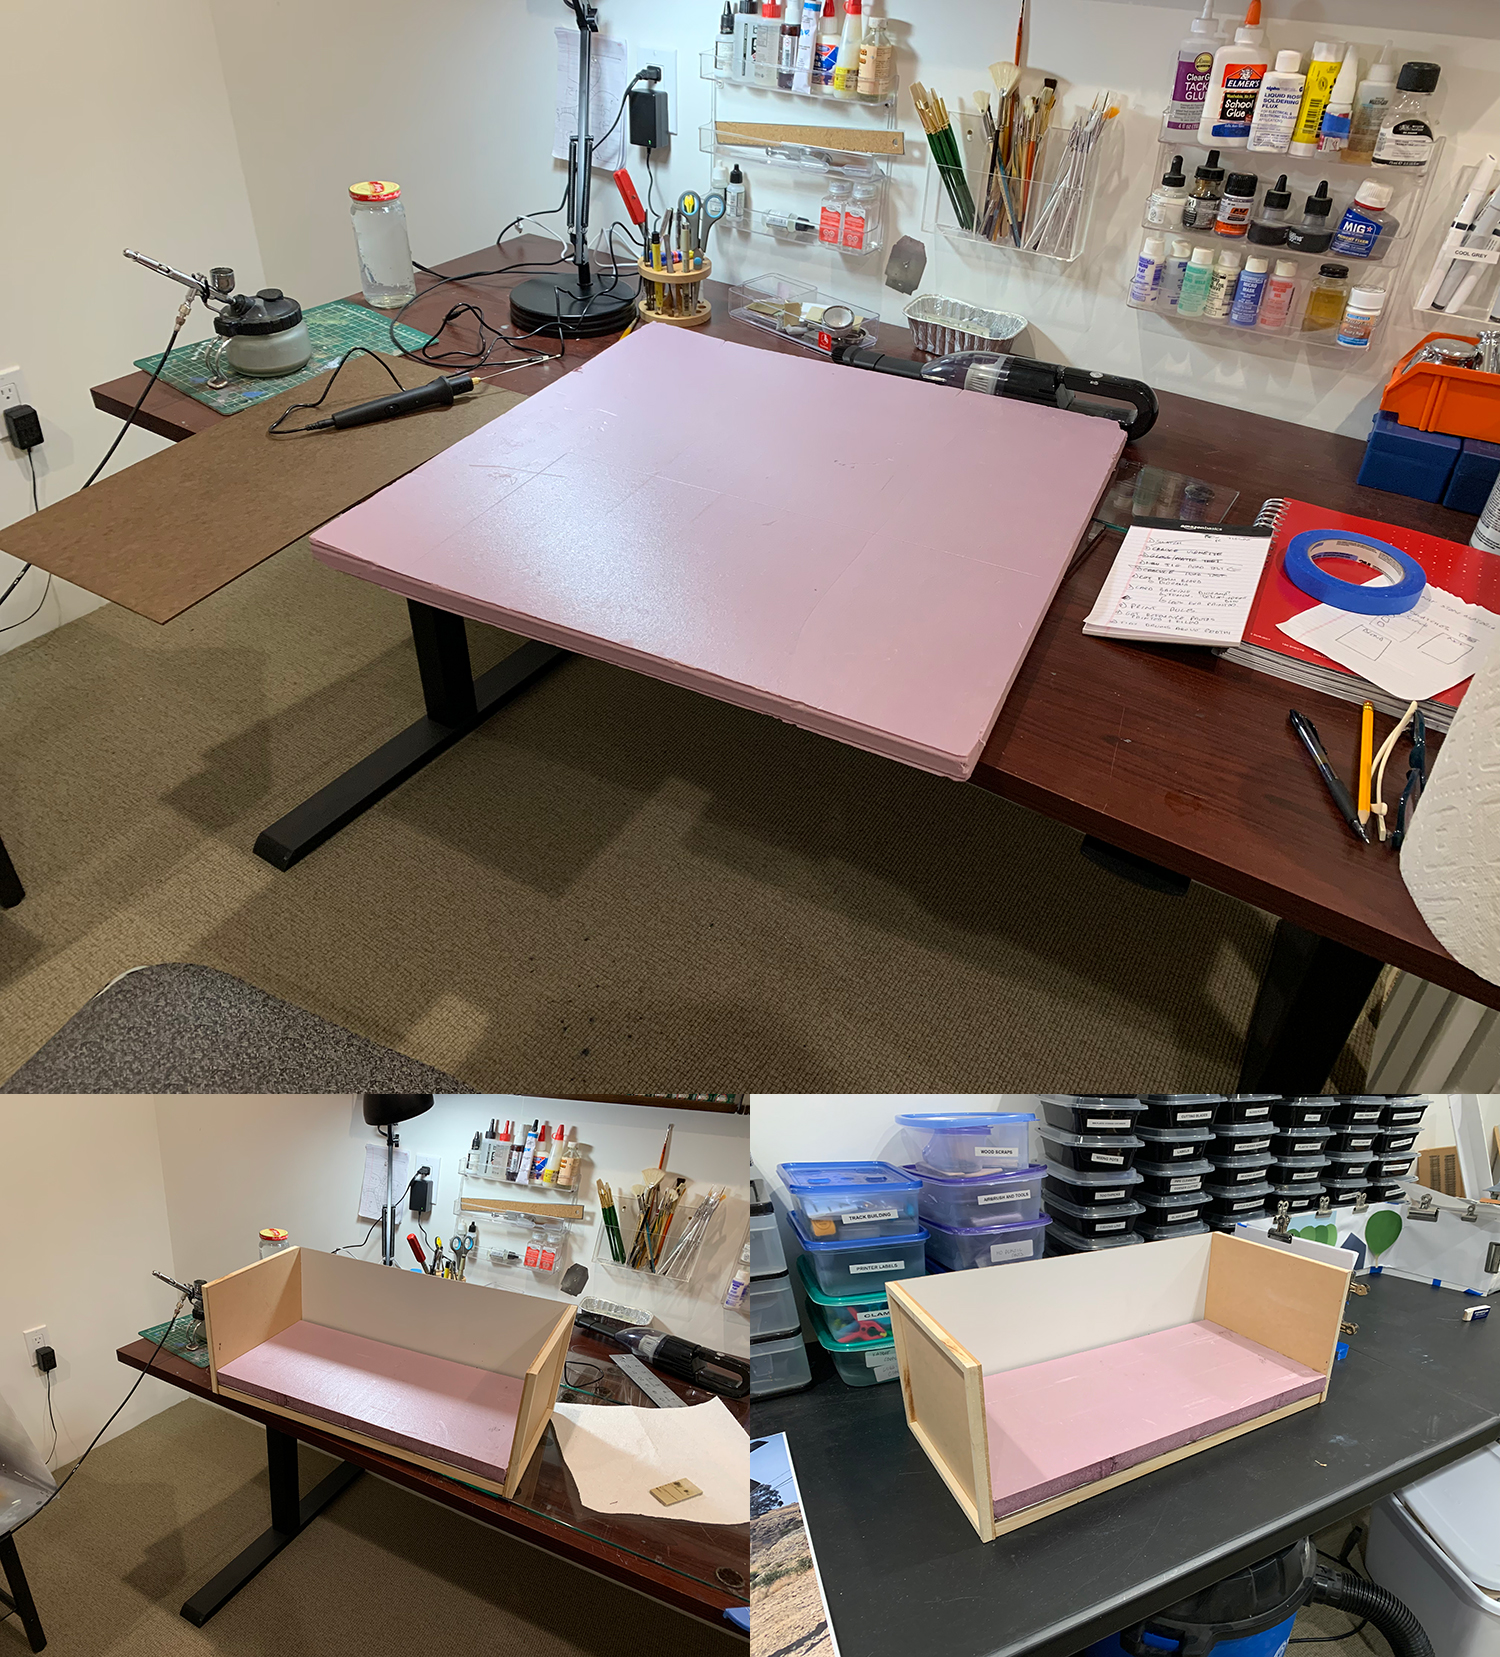
Because I have stream running parallel to the road I need to be able to dig down beneath the level of the track. To do that I need to raise the level of the model and then dig out the stream. I decided to used extruded polystyrene to raise the level. I also purchased a foam cutter and used it to cut the foam to the size of the underlying hardboard. It will be glued to the hardboard and will be able to slide in and out of the diorama frame.
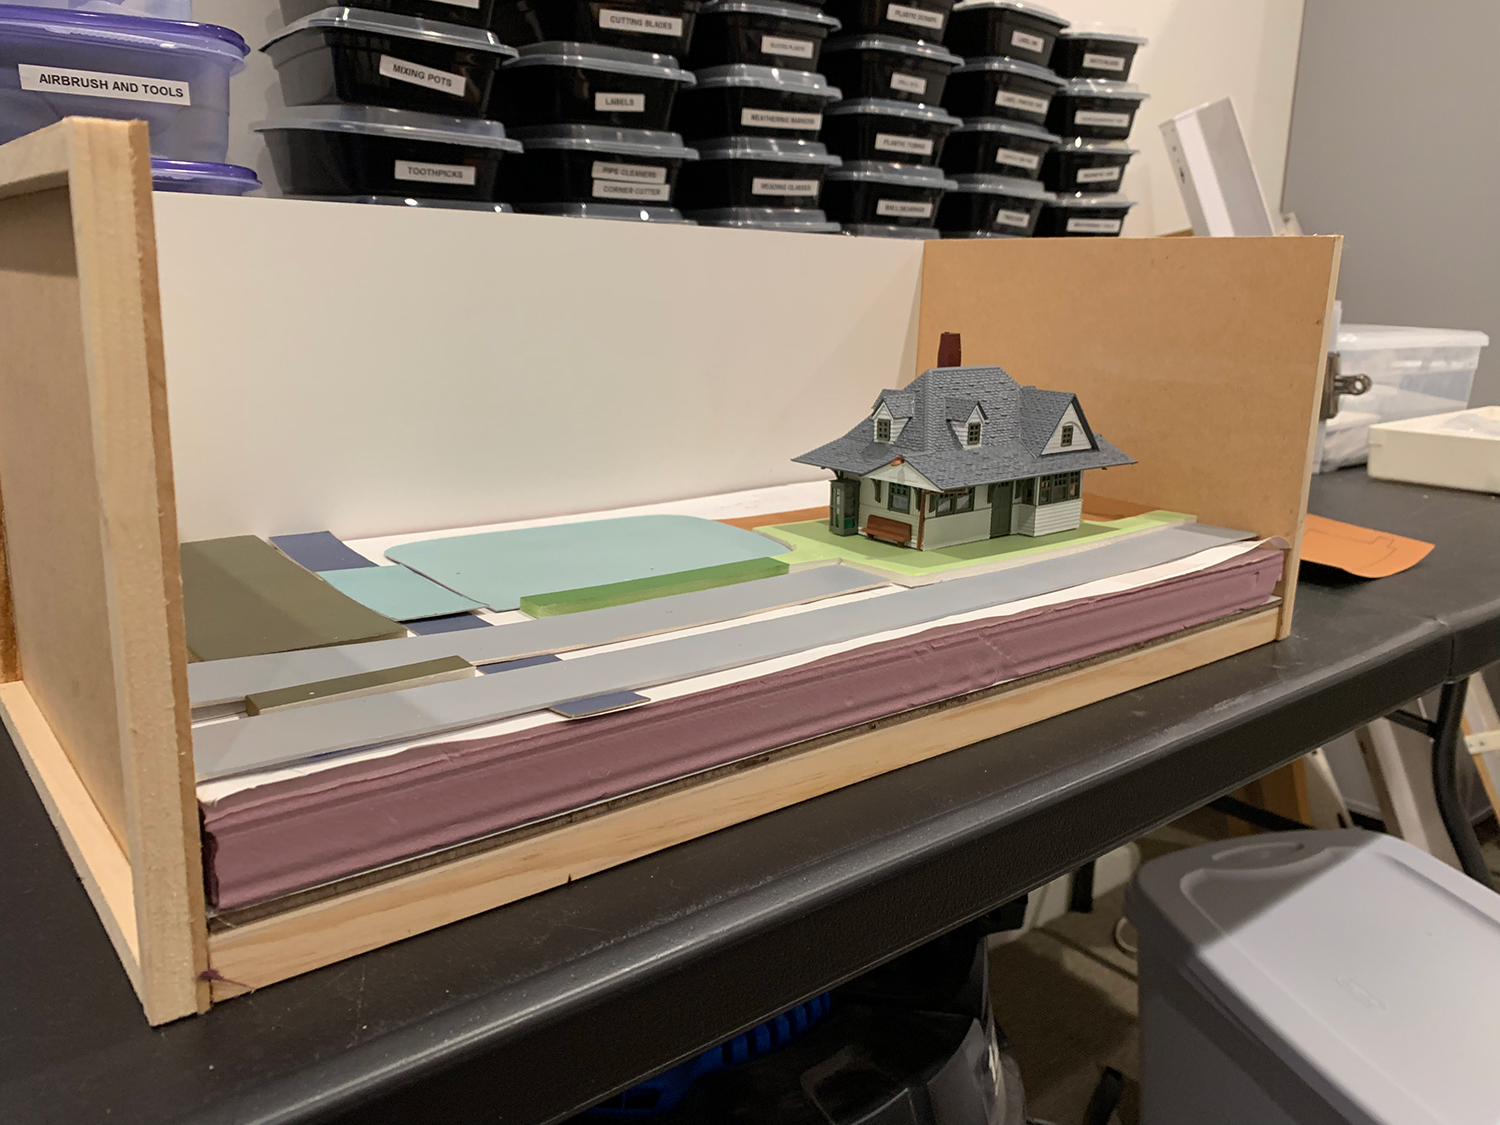
I continued to return the various planning elements to the board to make sure things were still looking good. All good so far.
Backdrop
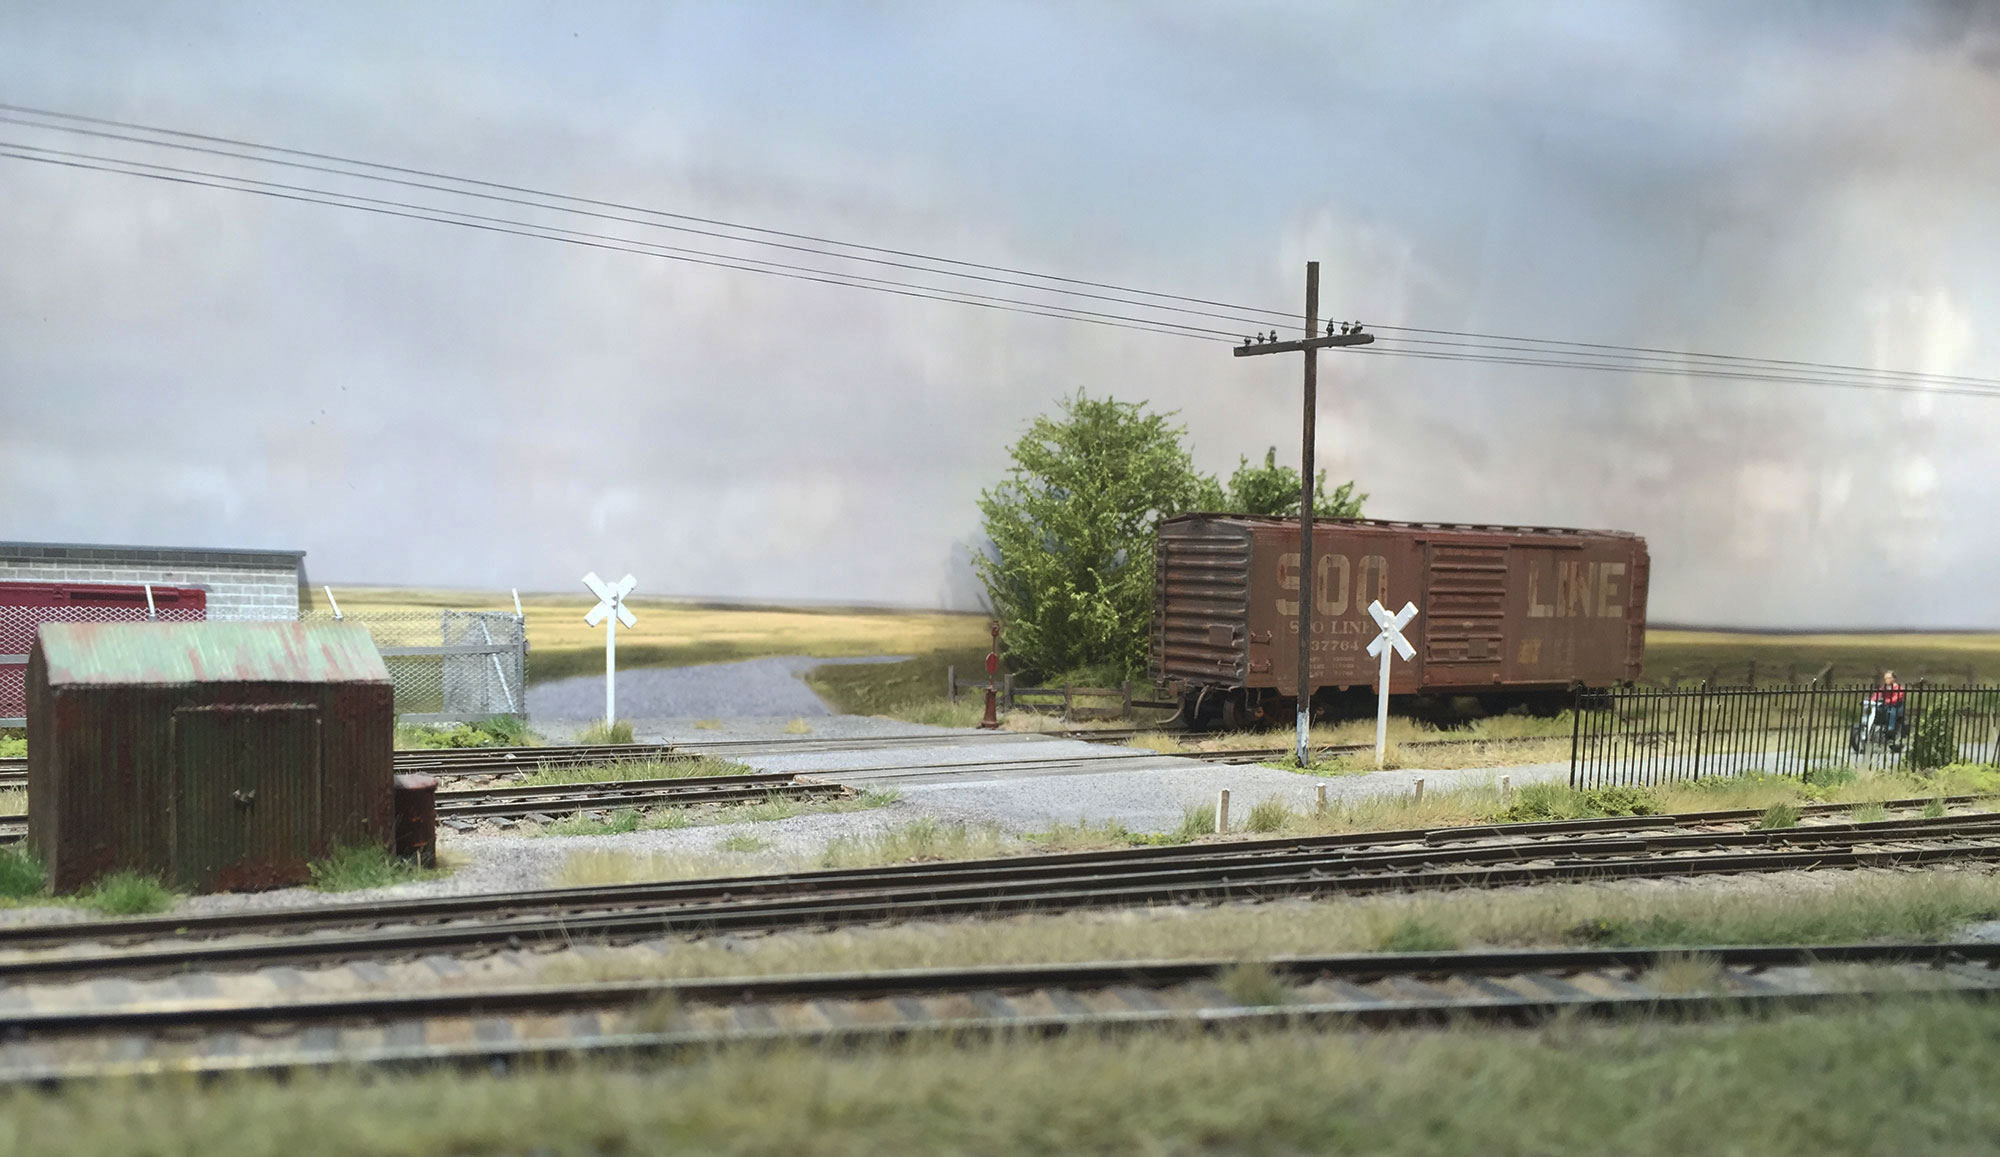
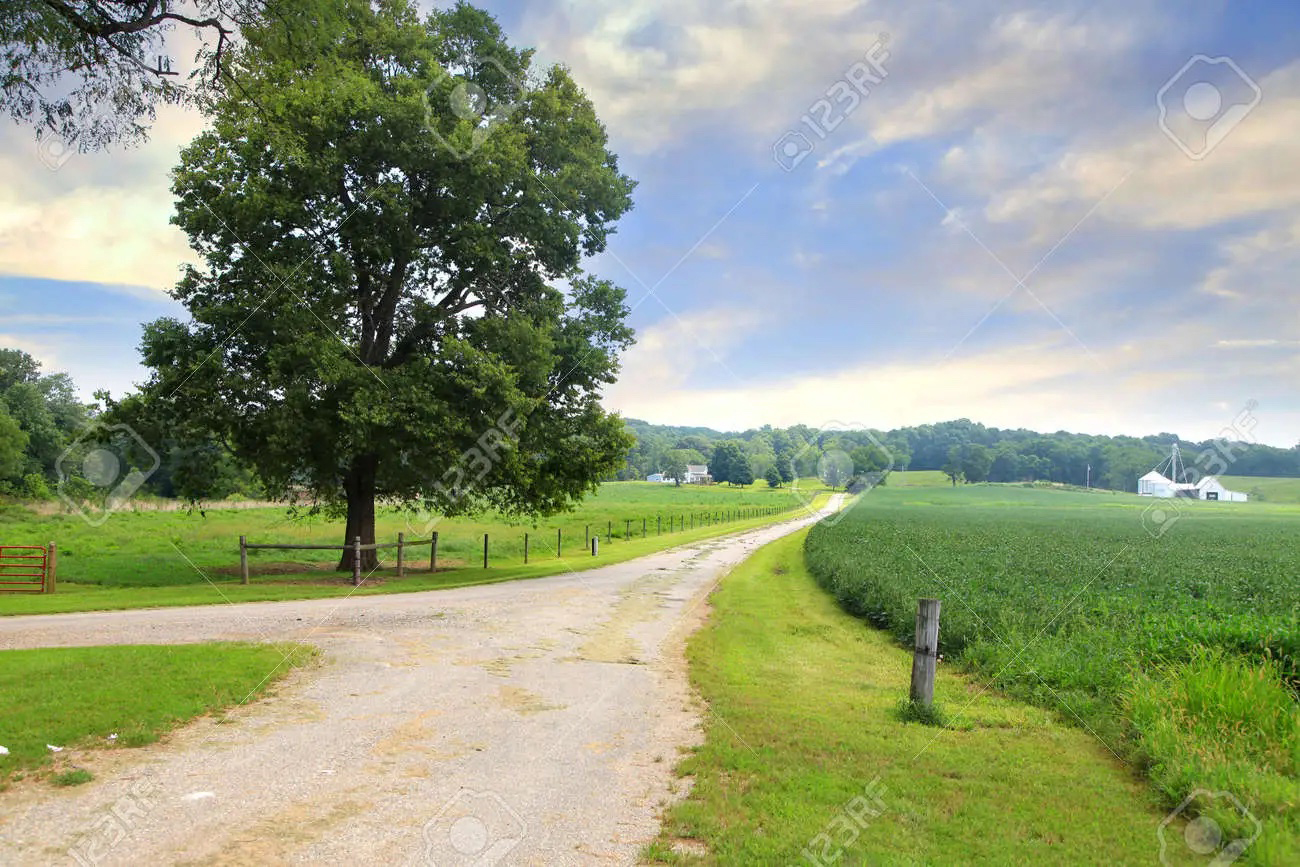
I really like this image below. I like the strong colors, the country lane and the horizon of trees and farm. I decided to use this as the base for my backdrop. As mentioned before I already did a quick treatment to see if this was a direction I wanted to go. Like most things, the more time you spend on the task of creating a backdrop, the better it will be. However it is my least favorite task in modeling and I encounter enormous resistance to working on it. Nevertheless I did not want to rush it so I decided to spend this whole week working on it bit by bit and I eventually got to place I’m happy with.
This image was downloaded from Google. I typed ‘Indiana countryside’ and this was one of the first images that appeared. I have since purchased a license to use this image so that I have a clean version clear of watermarks and legal right to use for various purposes. I’m going to use as many elements as possible – tree, road, sky, farms, but will have to heavily rework the image to stretch it left and right and adjust the road to meet my road on the diorama head on.
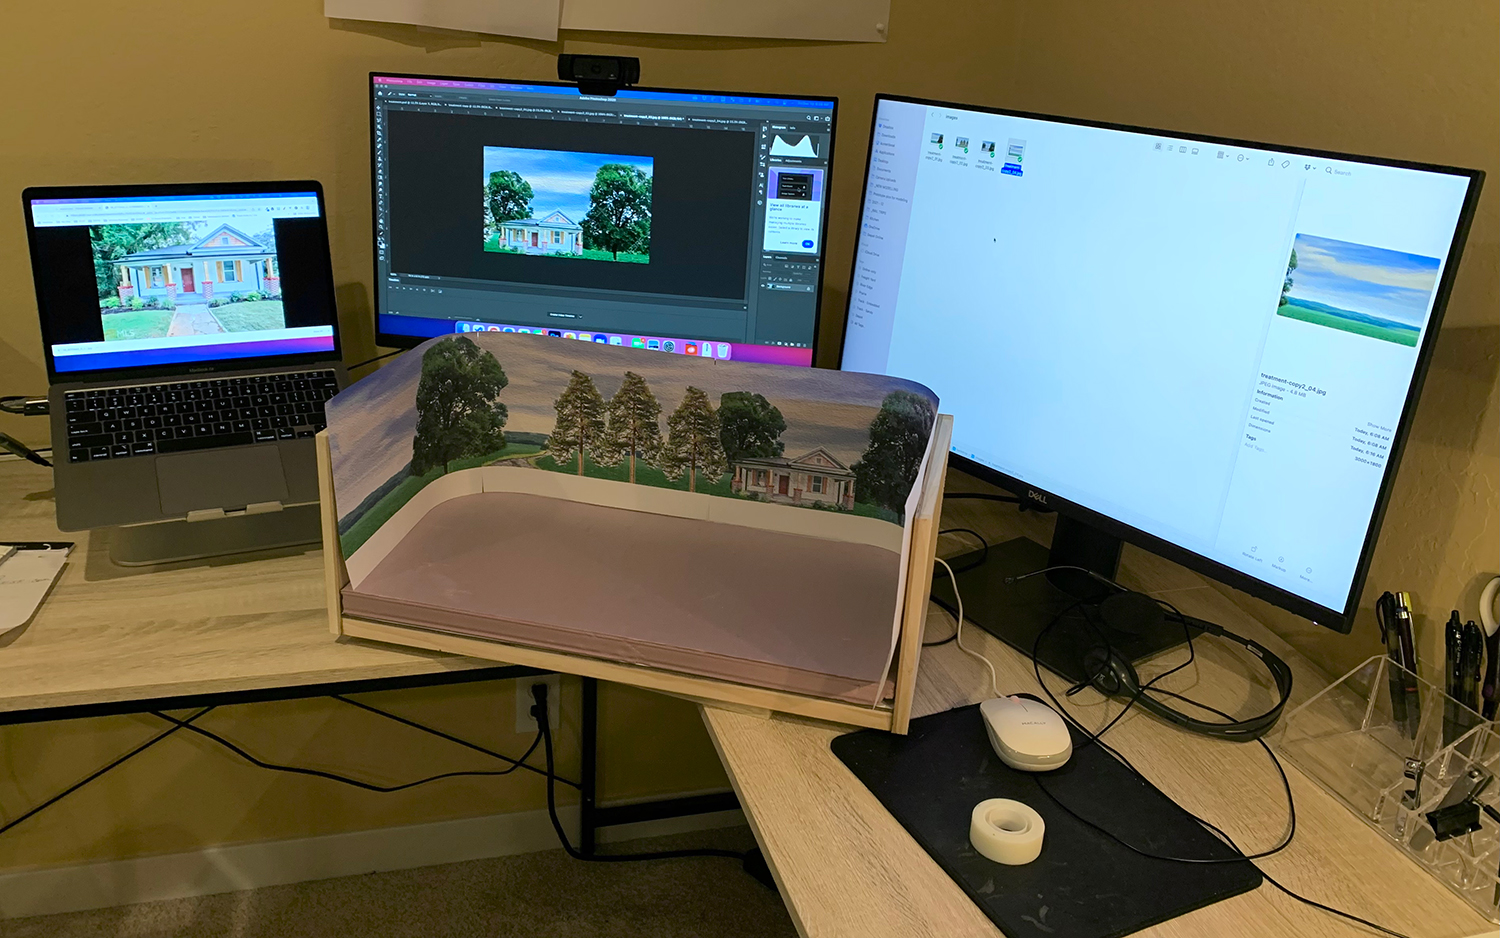
Moving to my computer in the main house (with three monitors), I used Photoshop to do a trial run of finding and positioning elements. I figured out which Photoshop tools and filters I would need and got a rough layout to print and test on the model. I cut out images roughly, I added an oil paint filter, added a house and some other trees. On the next version I will go and adjust everything at pixel level which will sharpen things up. I will also choose better artwork.
Even though I have a computer station set up in the train room my three work monitors in the house are set up nicely for graphic work. I was able to print out the scene into four separate pieces, stick them together, and add tape the temporary backdrop to the model.
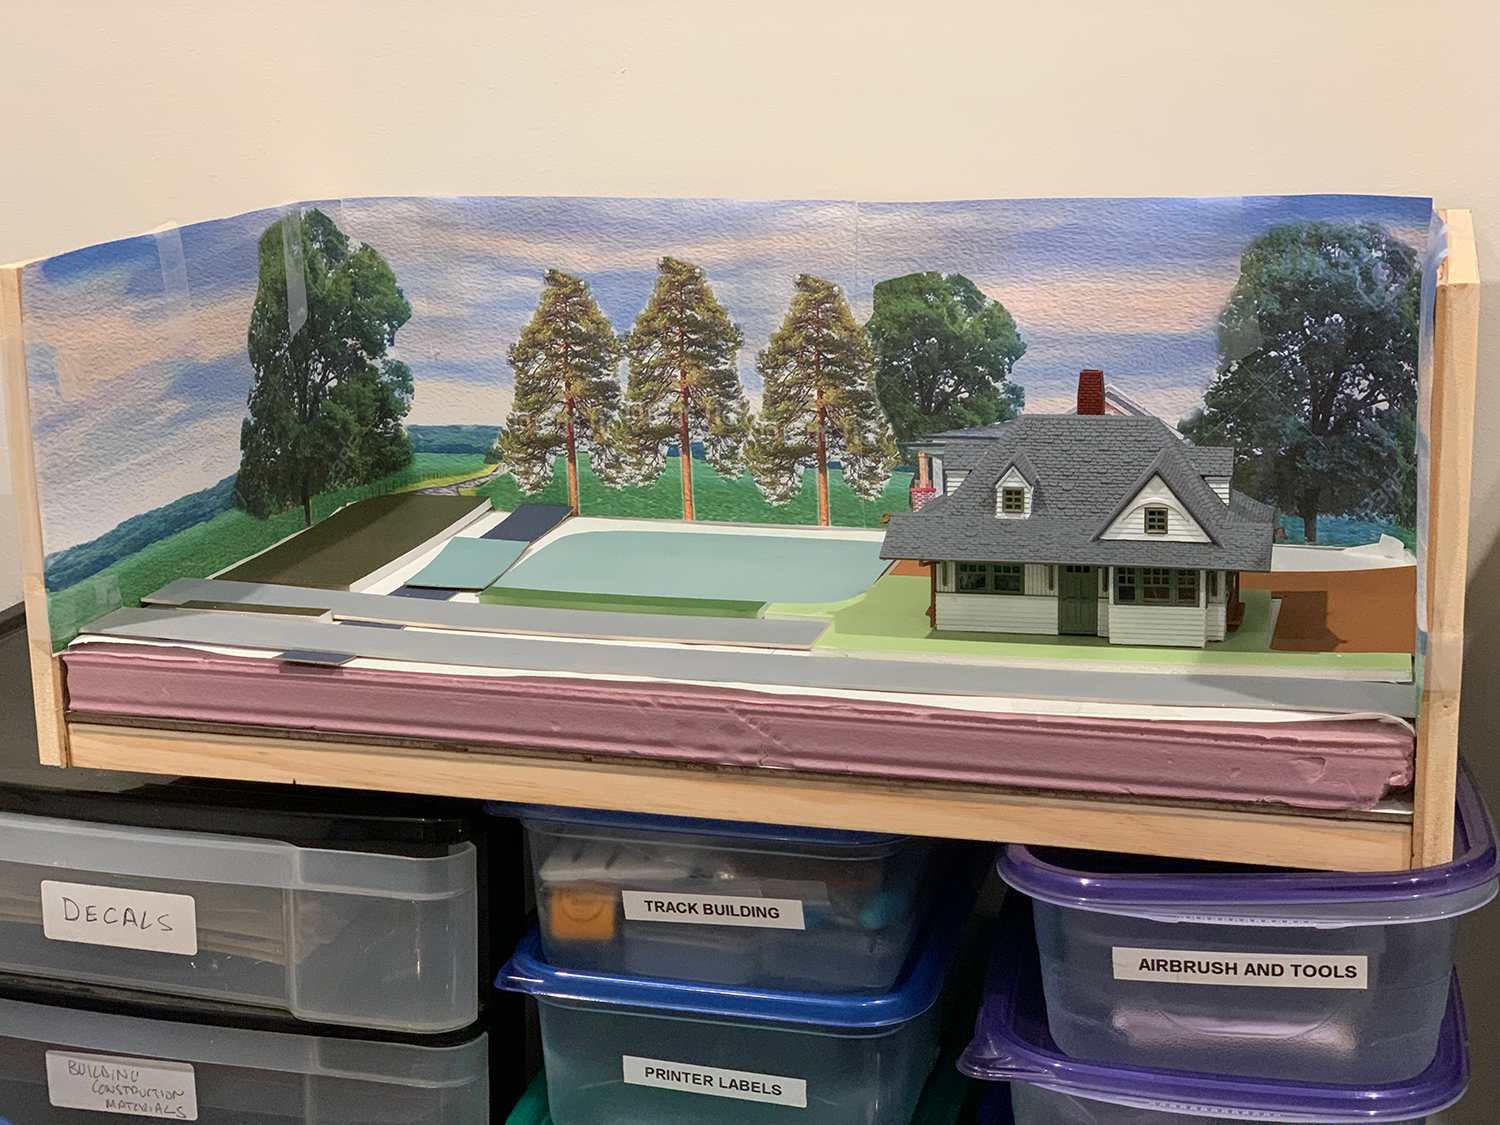
I added back the planning elements to get an idea of how everything was looking. Pretty good I thought but changes would need to be made. I did not like the oil painting filter. I used it to hide imperfections and artifacts left over from bad cutting and pasting. I decided to try to use the original photo as much as possible and just do a better job of adding layers. The three pine trees are good but the wrong color. I decided to find new ones. The house at the back is nice but I decided to try to find a taller structure that would rise above the depot and could be seen from the front. I should be able to get to a final version on my next attempt.
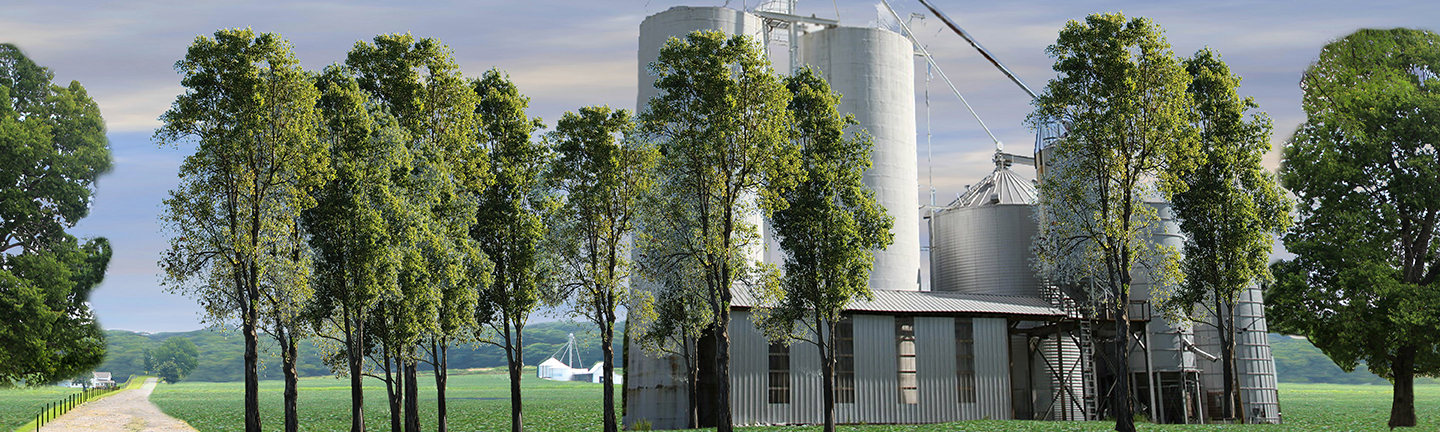
Here is the final version. It would take too long to walk through the various steps that got me to this point but in short I used cloning, blurring, smudging, stretching, copy and paste and resizing. I also worked at pixel level to tighten up edges and clean areas. The road took a while. It now lines up with the diorama road. I am going to match the color of the diorama road with the color of the road on the backdrop. That means using sandy gravel instead of asphalt. I will use asphalt for the depot parking area instead.A closeup of the area behind the depot. I added a mill to rise above the depot building. I also found some nice trees that matched the overall color scheme.
I sent the backdrop file to the printers (https://www.posterprintfactory.com/) and will receive it in a couple of weeks. I will use my temporary printed version while building the diorama.