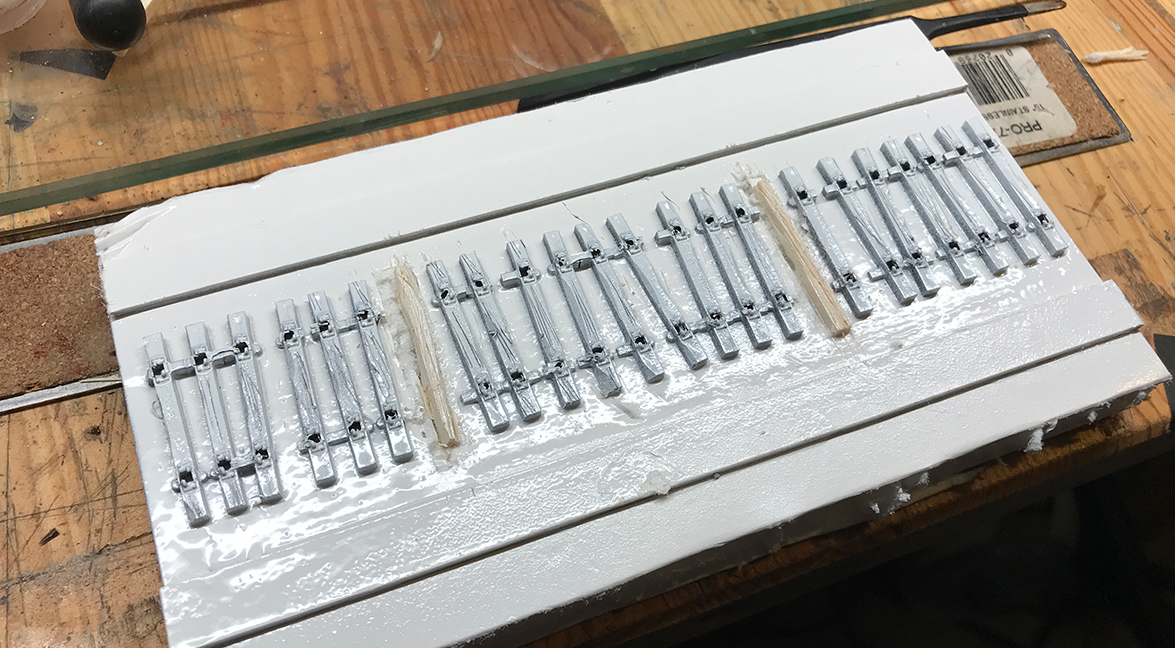
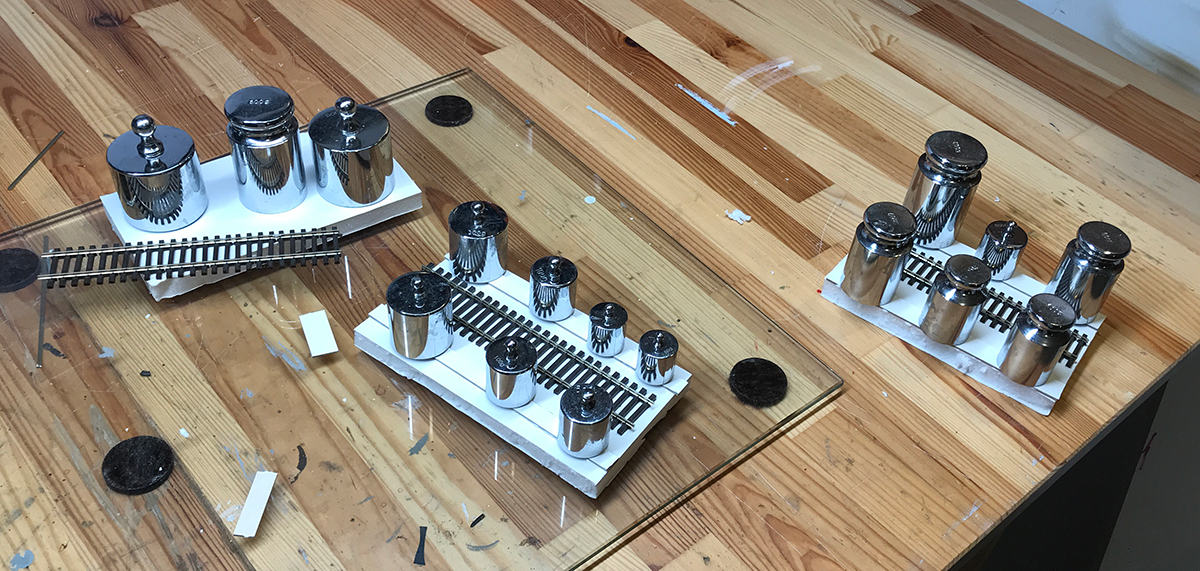
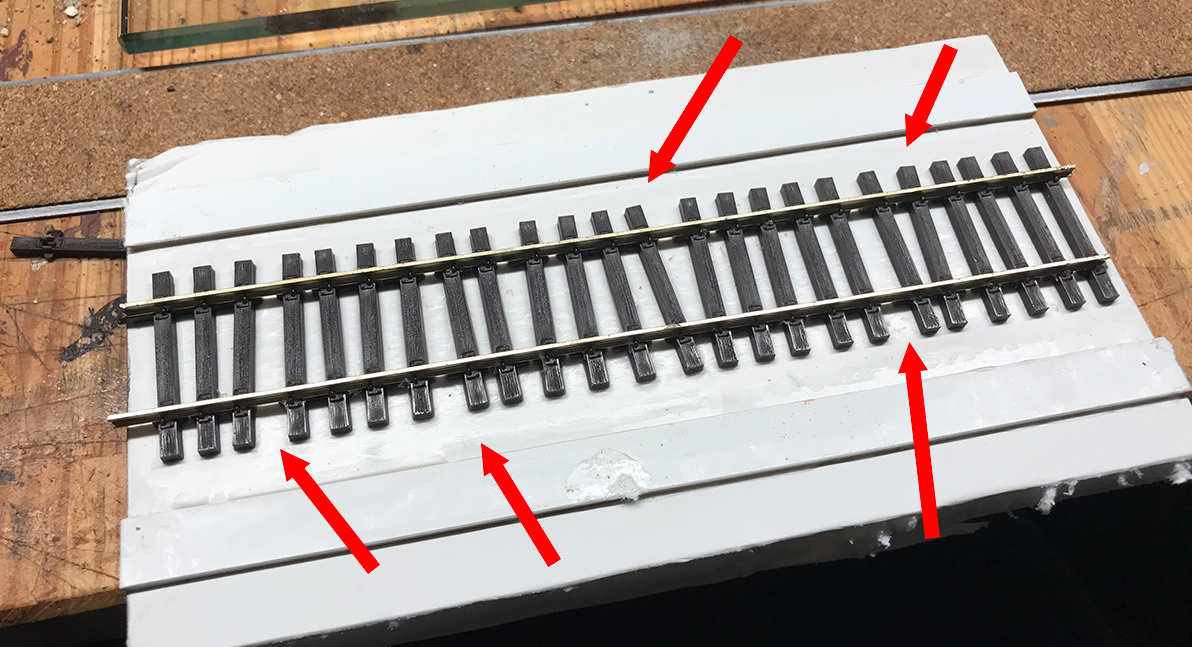
As previously mentioned I made four bases from 1/2 inch foam board of about 5.5″ x 3″. I added a little strip of card to either side in order to bring the level of the surrounding ground up to the height of a tie. I really like that sunken-tie effect on real track. It gives the impression of the track having emerged out of the ground in an almost organic way.

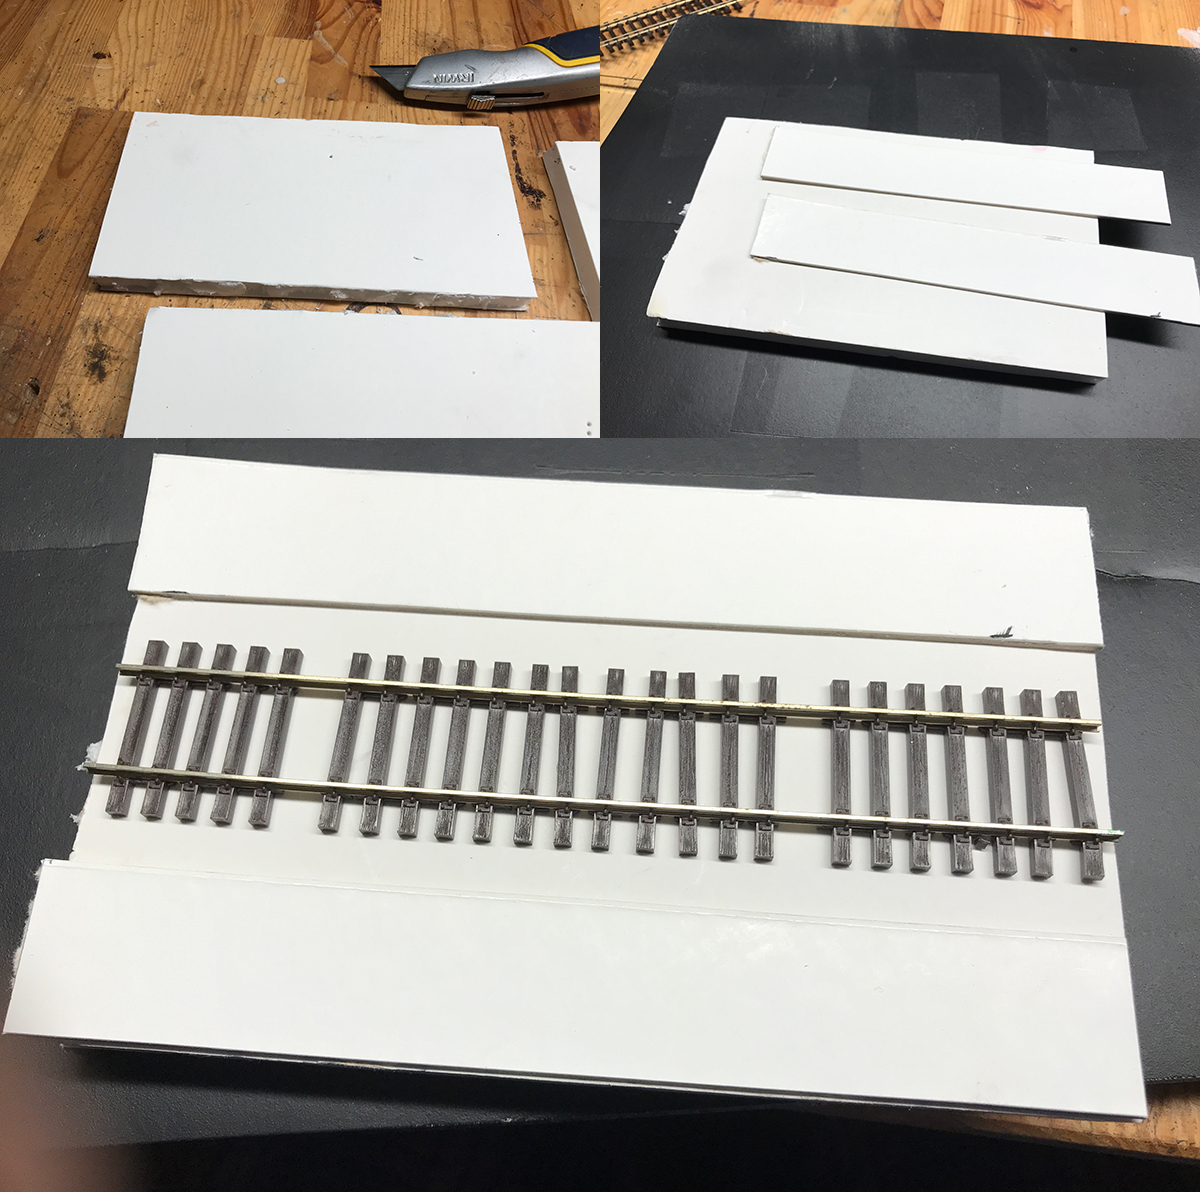
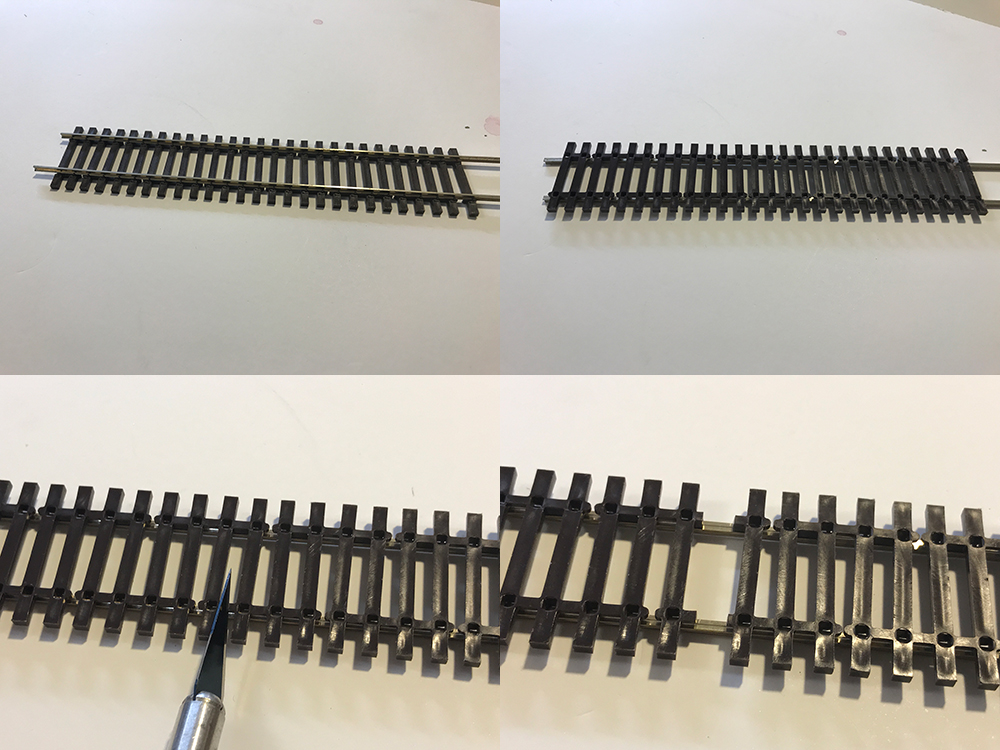
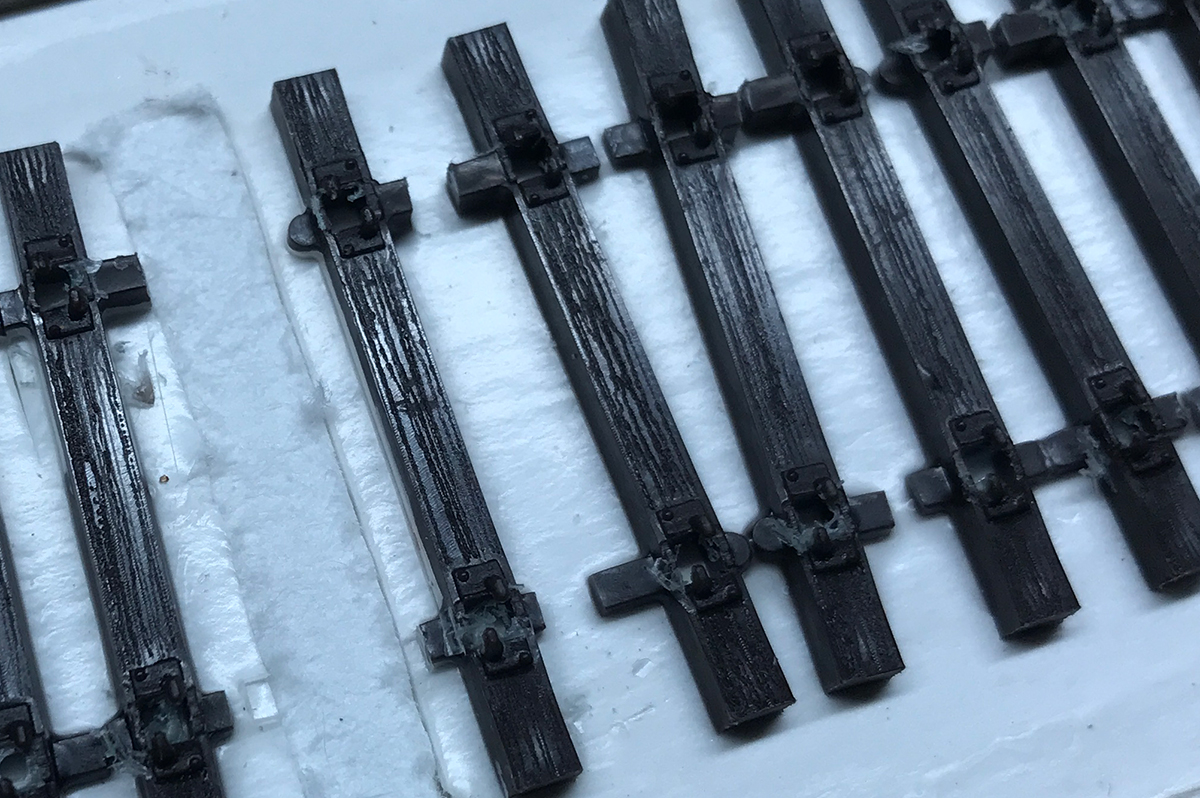
Before gluing the track I turned the track piece upside down and made cuts in the plastic ribbon to separate the ties. You don’t have to do all of them I cut some individual ties and also left blocks of ties joined together. As long as you keep the ties attached to the rail they will keep the rails at the correct gauge.
So the next task was to stick down the Atlas track. I used PVC glue and left it to dry overnight.
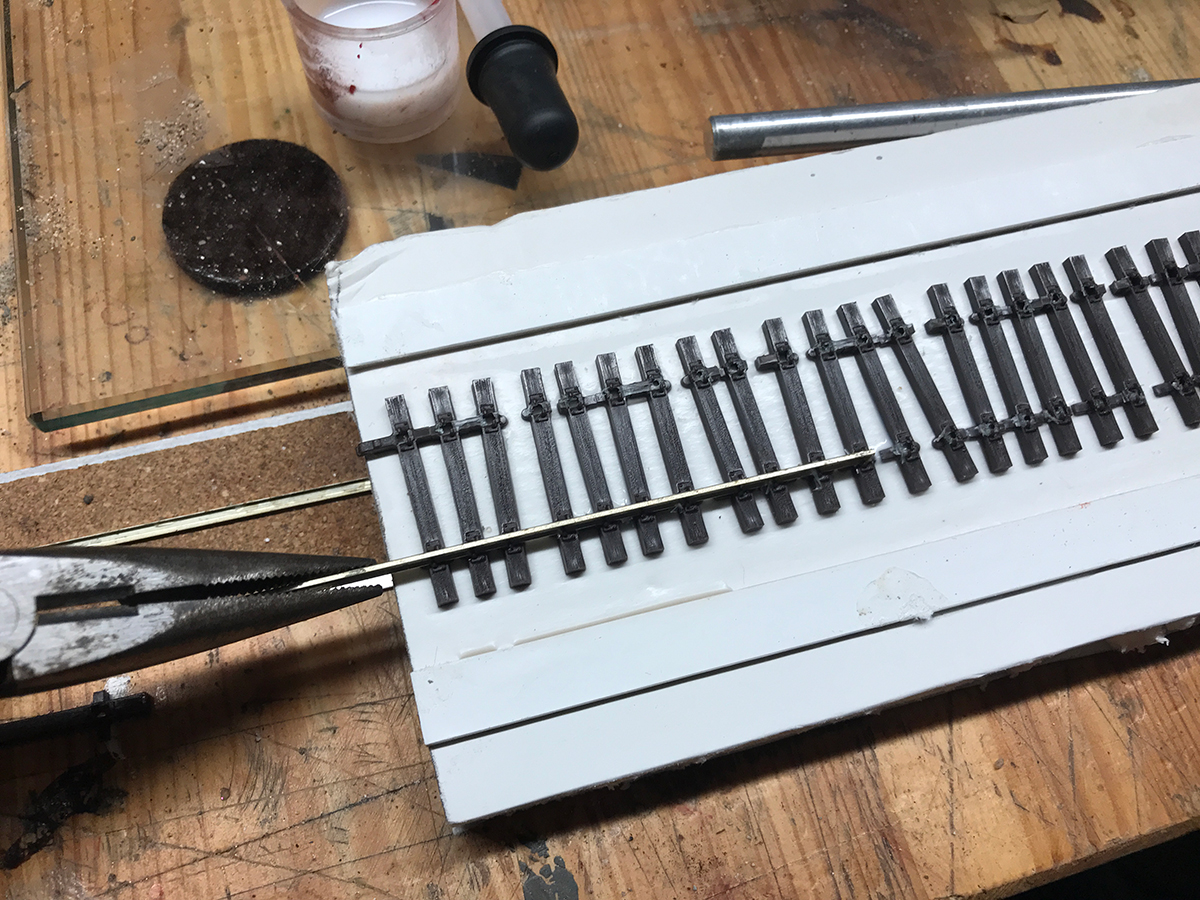
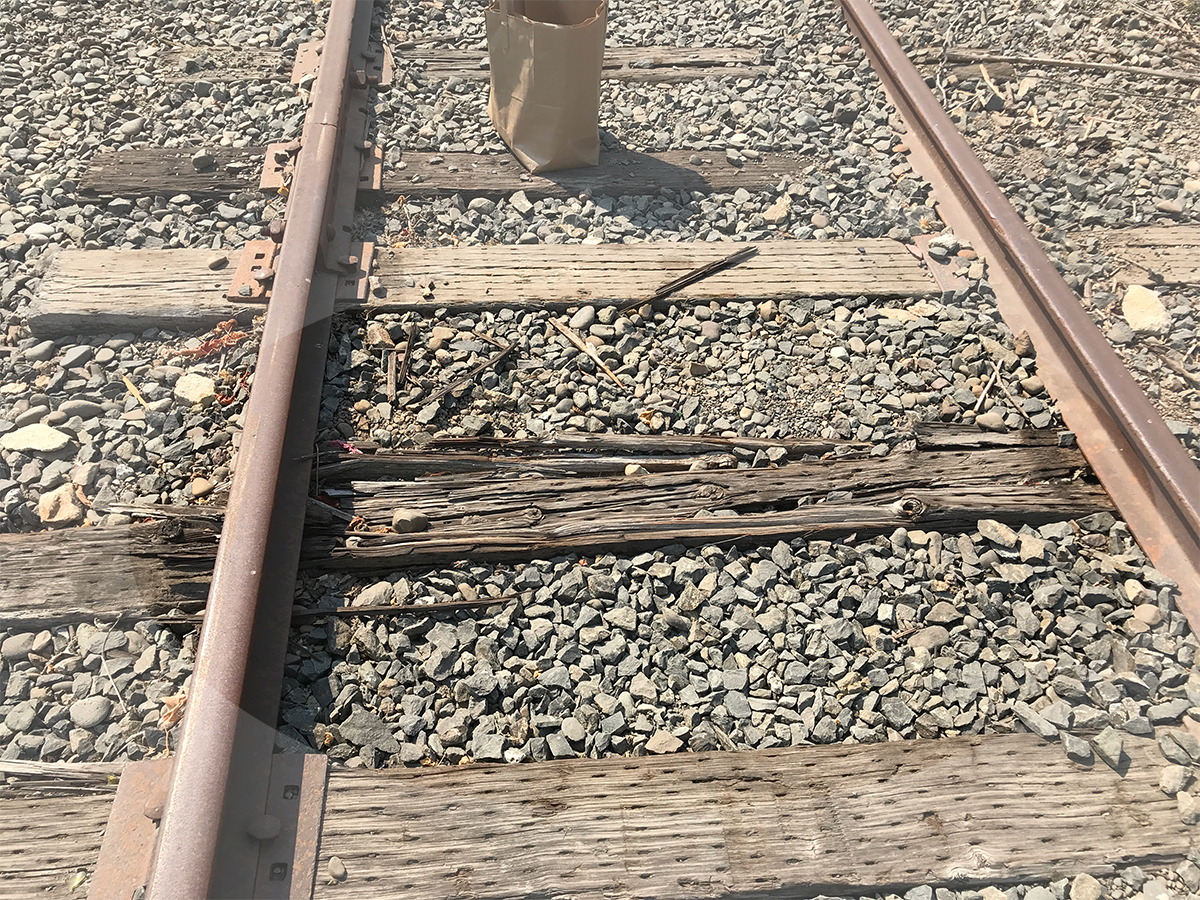
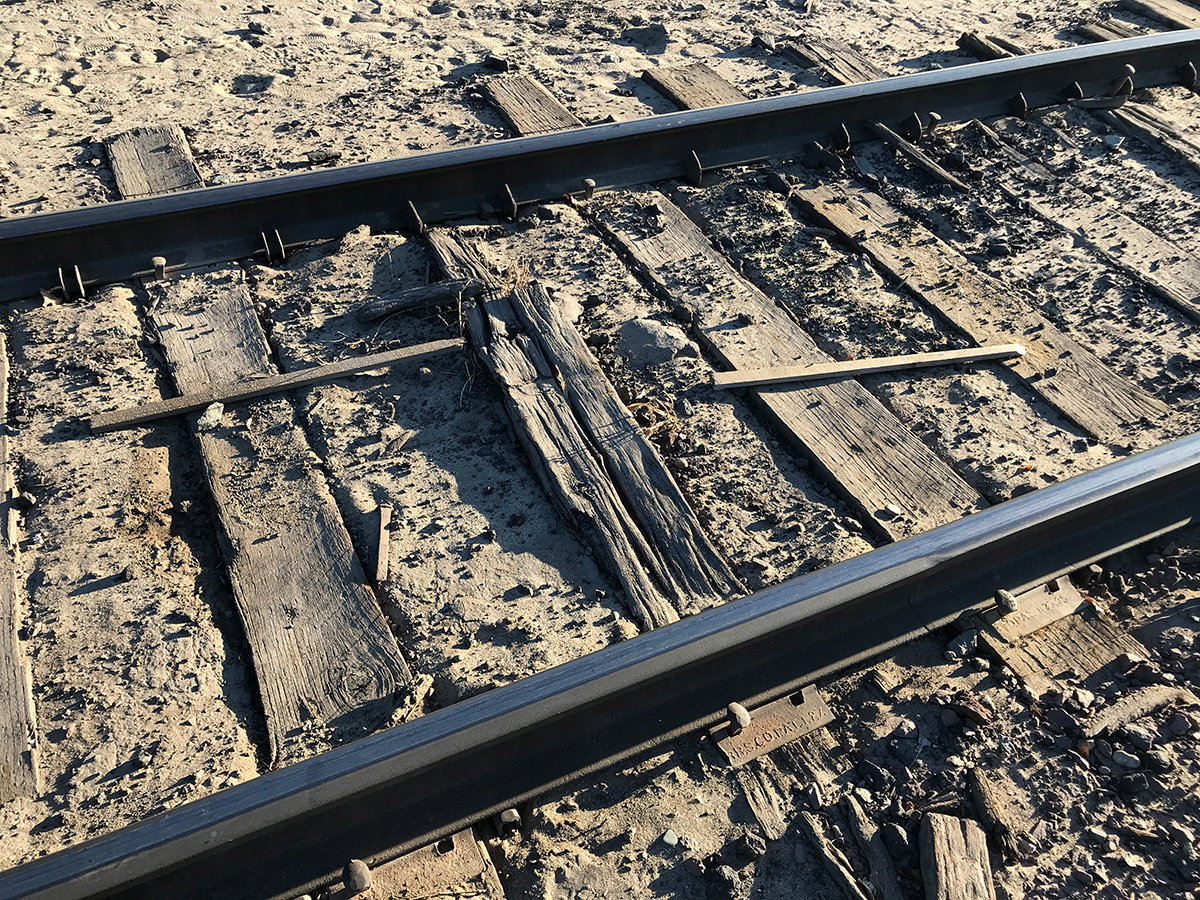
Before gluing, I moved some of the cut ties to different spaces and angles. I wanted to replicate that effect that I saw in the real thing whereby ties simply move out of place over time.
After that I pulled out the rails and left the ties in place ready for weathering. You don’t have to do this step but it does make weathering and adding ground cover a little easier. In this example I wanted to also bash up the rail little to give it bends and bumps and marks to match the look of prototype worn out rail. This was easier to do if I removed it from the ribbon.
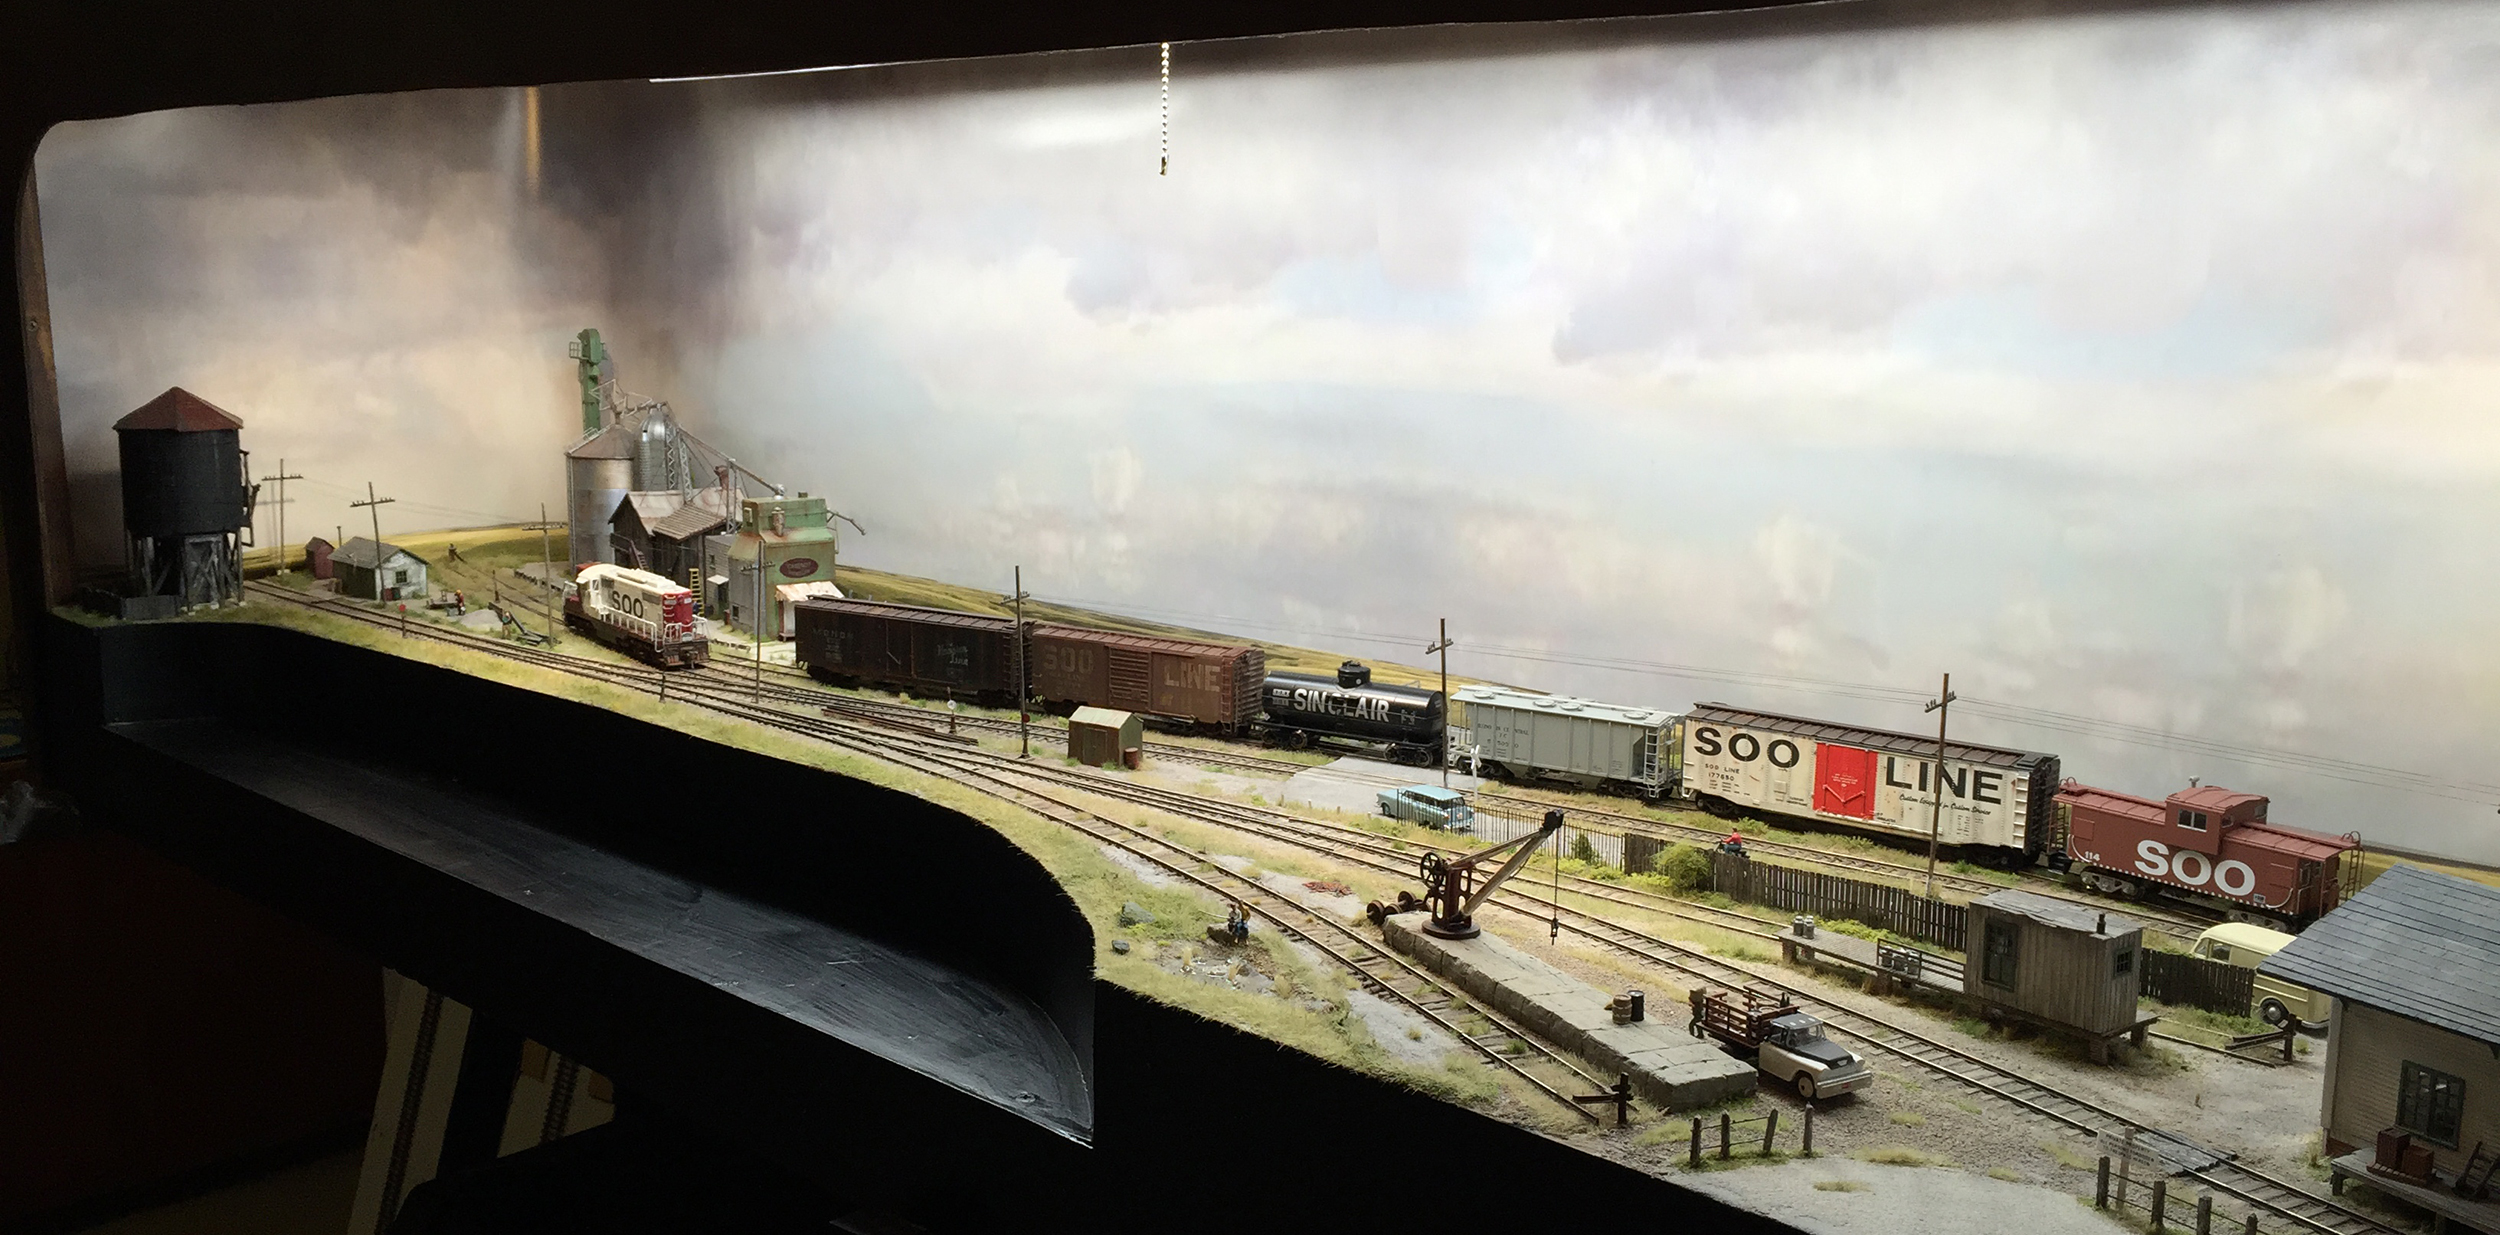
I then started weathering the remaining ties. I took a knife and started cutting the plastic away from the sides to displaying rotting and splintering and from the ends to shorten them. I also gouged them in places and in general made the wood grain much more noticeable. Once has to take care. There are two basic effects that one can go for: if you overdo the weathering you get an effect that shouts ‘look at me I’m a noticeably worn tie!’, while on the other hand if you restrain yourself and add properly scaled marks and cuts you’ll get a nice looking effect that basically looks like a miniature version of the real thing. I definitely have examples of both in the project.
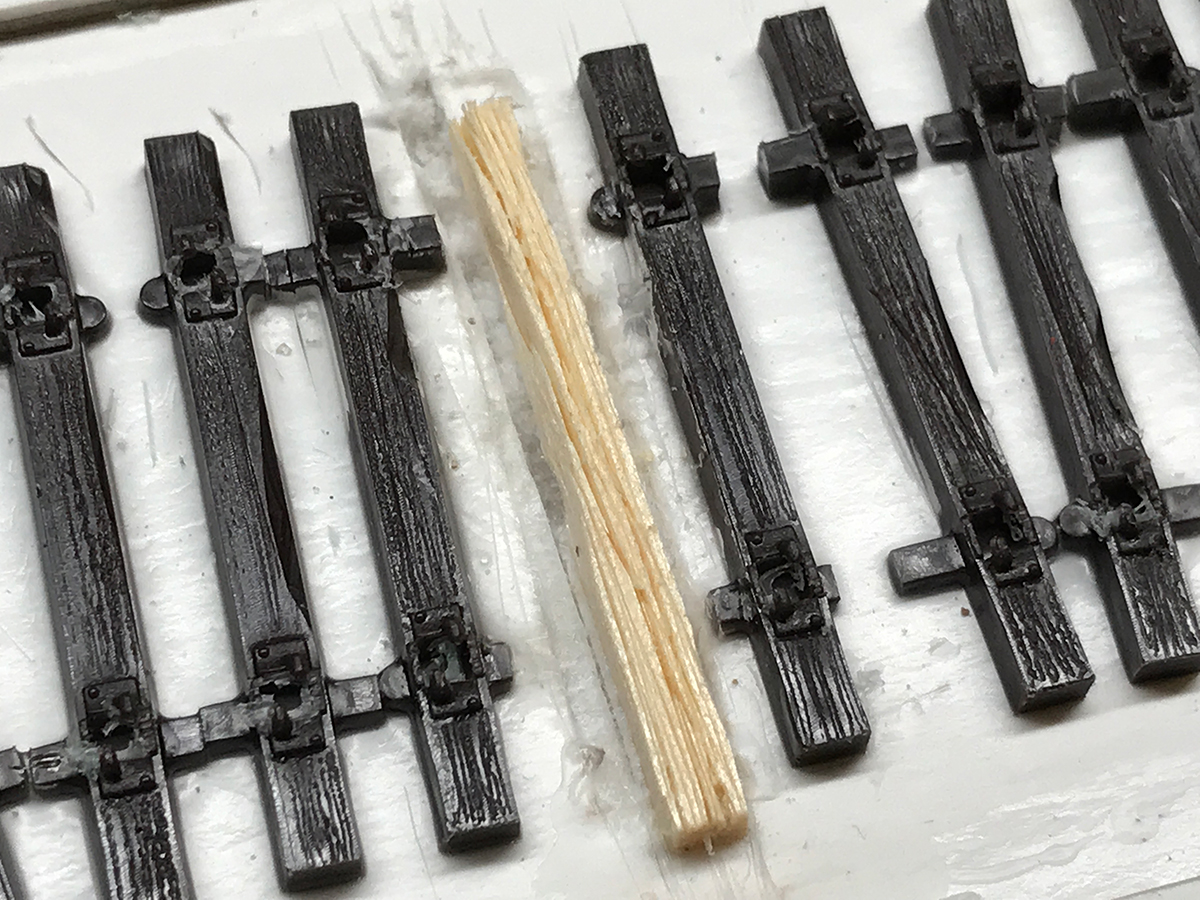
Besides spacing ties out I also removed plastic ties from their space altogether. The reason for this was to give me the chance to add my own longer and custom weathered ties made from wood. They were basically just wooden ties from my hand-laid track project. I left them unstained (more about that later) but I also split them and really went to town on the weathering. I was trying to model the ‘maverick tie’ – you know, the one that for some reason has completed disengaged itself from its surrounding tie brothers and sisters and has sunk into a weathering world of its own.
The final step before coloring and ballasting (I use that term loosely) was to give the whole trackbed a primer spray of white. Yes white! The reason is that wood fades to a light grey and that is an effect that can only be modeled on a white background. My discovery of this was the key to the whole project. Once white, the ties can be colored any which way you want. You can use marker pens, or crayons, or chalks or ink stain or paint – and mostly importantly you can build effects on top of each other which is easier on top of white than black or grey. Once I figured that out everything else relating to color fell into place.