Now that the control panel has been designed and fitted I have begun the wiring. The steps are basically:
Lay missing sections of track.
Isolate rails .
Connect sections to the control panel.
Wire up the crossovers and connect them to the control panel.
Add the turnout motors and connect them to the control panel.
Add three docks to the exit points for the removable cassettes.
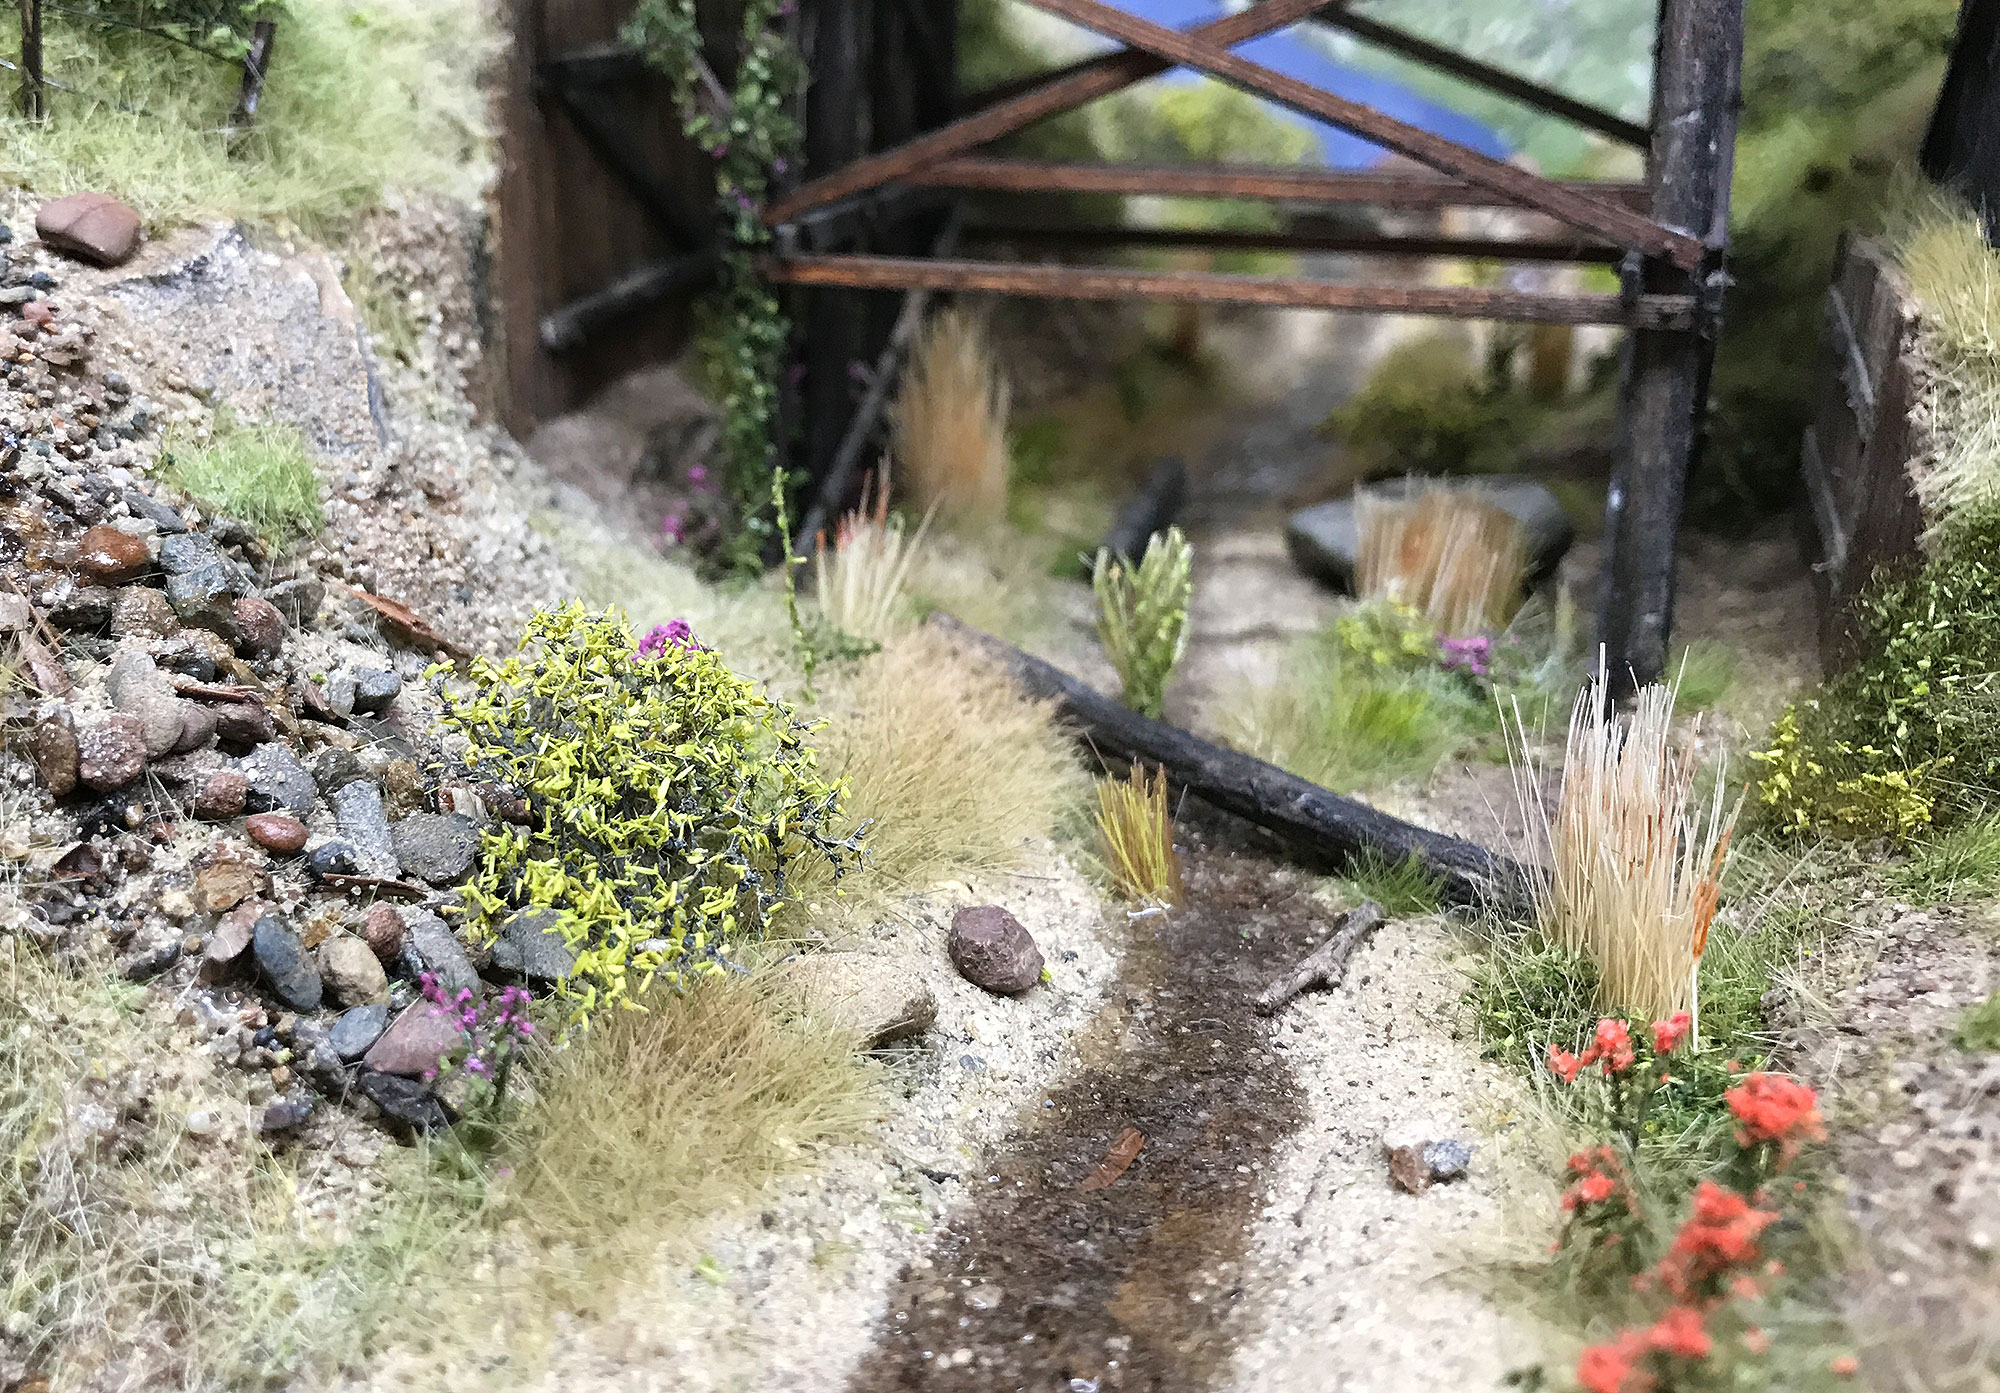
I had previously left several sections to be laid with rail while I focused on the turnouts and the crossovers. I have begun to lay those sections. It sometimes has meant removing rail and adding new ties but the goal is to lay the rail in complete and isolated sections wherever possible. The various tracks that will comprise a single wiring section will be powered by a single bus connected to an on/off (SPST) switch.
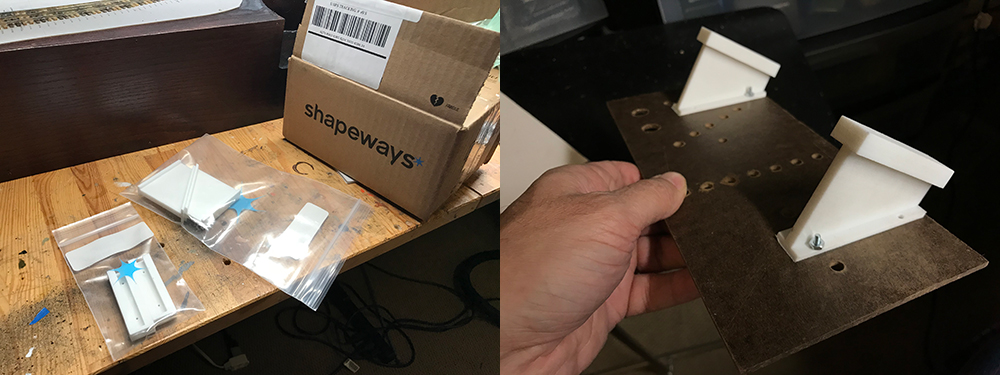
My brackets arrived from Shapeways and I waited no time to fit them. They are made of very tough plastic that called strong white and flexible. From the Shapeways site:
This material is incredibly versatile, and can be used for a wide variety of applications, from iPhone cases to jewelry, remote controlled quadcopters to wearable bikinis. When thin, it’s flexible enough for hinges and springs. When thick, it’s strong enough for structural components.
There was no doubt that the brackets were going to do a good job. My task was to sand them down so that the controller attachment slid nicely and easily into the board attachment.
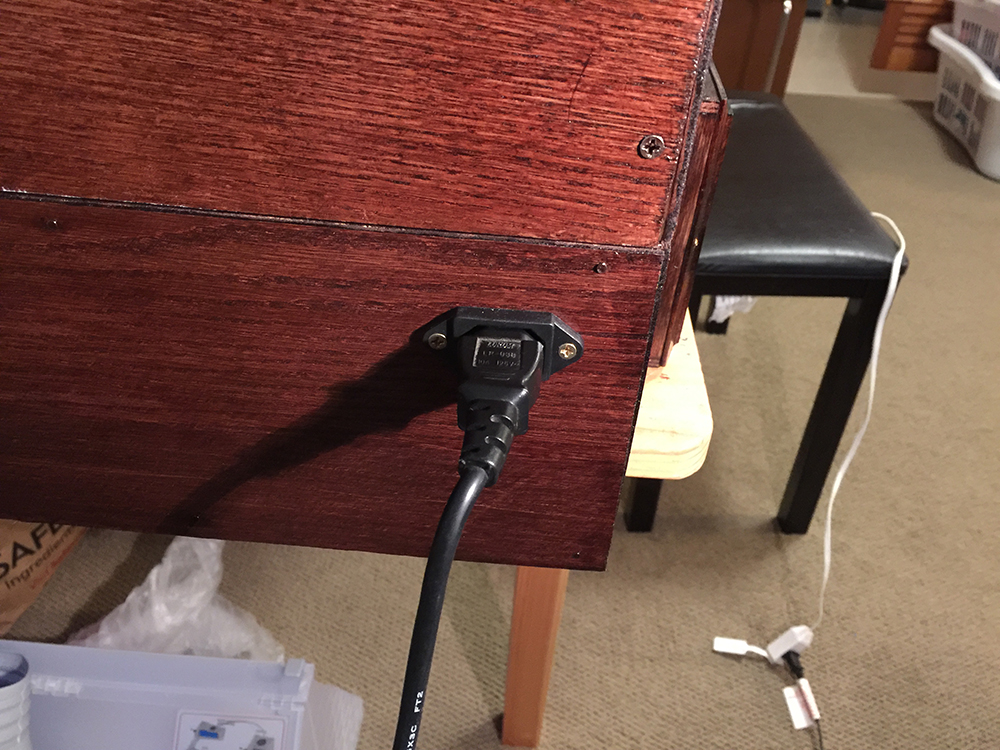
I managed to set up the internal AC electrical system which provides power to the DC adapter/s and the lighting system. I built the lighting system a while ago but had housed the switches in an ugly box that protruded from the front. I removed this and have now located the switches on the control panel.
I’ve covered the lighting system in the past but as a quick reminder here are some pics of the process:
Power comes into the module using this adapter which itself connects to the mains.
I had decided a while ago that I was not going to settle for second best when it came to The Town module. I’m not in a hurry to get things done and I really want to make sure I’m 100 percent happy with each stage before moving on to the next.
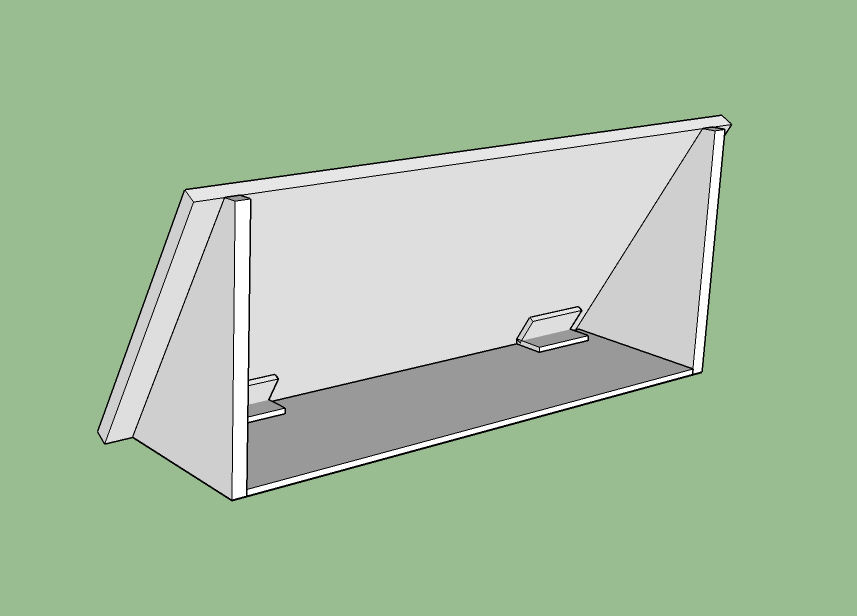
I wasn’t happy with the first box that I built. I felt it was unnecessarily bulky for such a small layout. I decided that I wanted to keep the design of the box very simple – just the basics – a firm flat surface for the switches with a couple of angled supports to join it to the main board. I did a new design in SketchUp to get a feel for what I needed and then built a foam board demo.
This is my first attempt. I added a couple of hinges on the inside so that I could pull the cover forward to do maintenance. The biggest issue then became how to join the box to the main board. Continue reading “New control box and diagram”
I spent this weekend building the controller box. This will house the section switches and the toggle switches for the turnouts. I’m not sure how I’m going to wire the layout yet but I want to do it slightly differently from The Depot. The Depot is wired for one engine only and as there are no sections as soon as you turn on the power it powers up the whole layout in one go. As such you can’t have more than one engine on the layout.
For the Town I wanted to get more experience with sections and have the ability to keep numerous locomotives on the layout while only running one at a time. I will add various sections and use SPST switches to turn power on and off. I’m still drawing up the power plan but hopefully I’ll have it nailed down this week. It may be that I figure it all out while I work around the layout.
Here’s the construction process for the controller box:
Using my supply of various board and strips of wood I assembled the controller box.
I decided that I’ve been avoiding working on the Town module for long enough. On one of my Facebook groups a new modeler asked the group for tips about the hobby. One of the tips that really struck a chord with me was: don’t get distracted by other smaller projects. I realized that I’ve been distracted for most of the year by the diorama project and had not given The Town module the attention it needed to keep it moving at a reasonable pace. I’ve seen other modelers complete at least two layouts in the time that I’ve been working on The Town. So with no more excuses or distractions I put the weathering project away and got back to building the control panel for The Town.
Before proceeding with my weathering project I wanted to find a matte varnish that would actually lay down an unmistakable matte finish. I first noticed the problem of shiny matte when I went to seal my first weathering attempt – the corner of the boxcar. The finish went from very dry matte to an unmistakable sheen – ruining my wonderful work! I decided to find the perfect matte before proceeding. For years I’ve been using trusted favorites such as Testor’s Dullcote but I’ve never been happy with the finish. I generally found the result too shiny – not really matte at all and much more of soft sheen. I believe it really ruins the look of a nicely finished model makes the result look toy-like. I really wanted to find a matte varnish that would do a better job.
After spraying this with Krylon Matte spray there is an unmistakable sheen on the boxcar which ruins it and makes it very unlifelike.
Just getting back to normal after a very unsettled domestic environment that has included trips to Europe, a kitchen remodel (that turned our lives upside down for twelve weeks) and then six weeks of guests and mini-trips away from home. Whew! All over now till the end of December after which I’m off to Europe again.
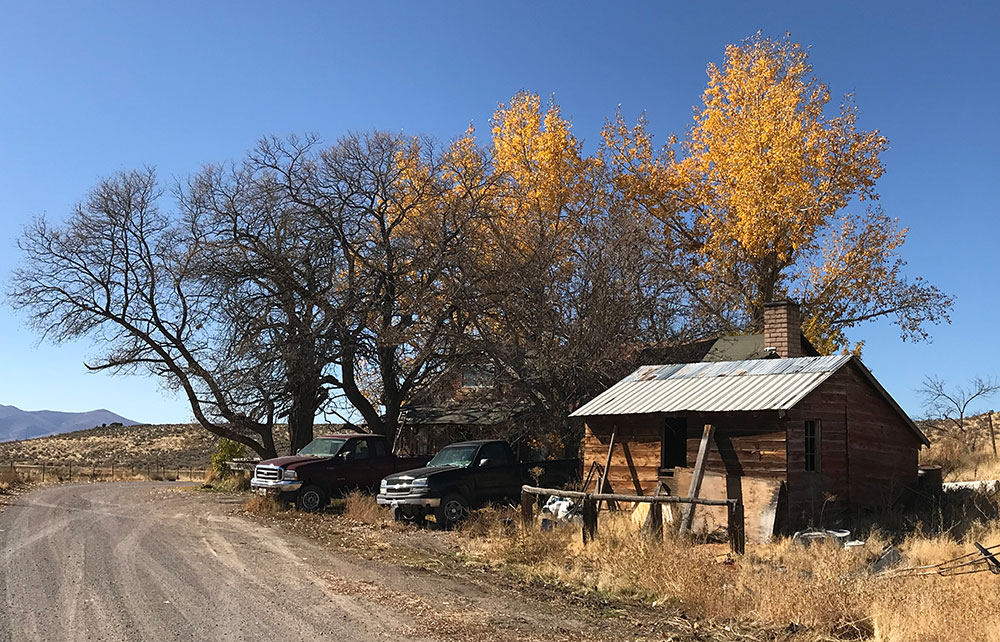
Found in the north-eastern California desert. I didn’t get any more pics of this house but will return next year to do so. I’m thinking of building a model of it within a diorama – and of course moving the location to the upper midwest. The SP’s Modoc Line is nearby.
First step in this process was to start adding physical changes to the model. This is a very important stage as it represents the first step away from the finish of the original manufactured model and immediately gives the piece its own identity.
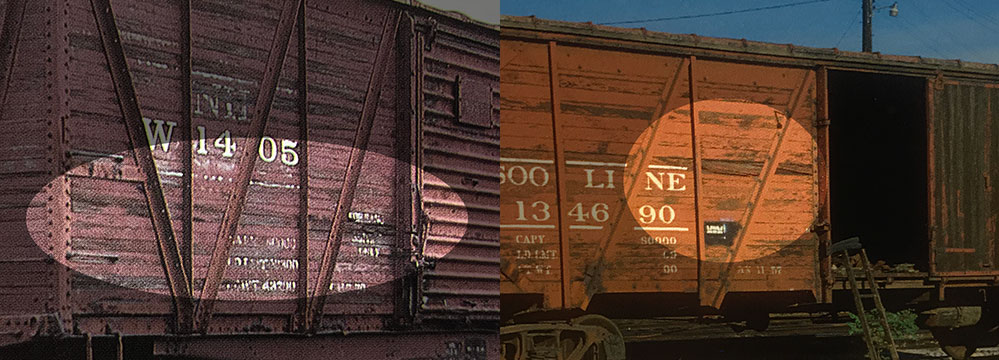
The marks represent what I have previously called ‘short-term specific weathering events’ and will be treated slightly differently from other areas of the model. The damage may have been sudden or over a time period but whichever way it has led to a unique effect that has occurred faster than the weathering elsewhere. This is an important detail that can be represented on any model from boxcars to oil tankers.
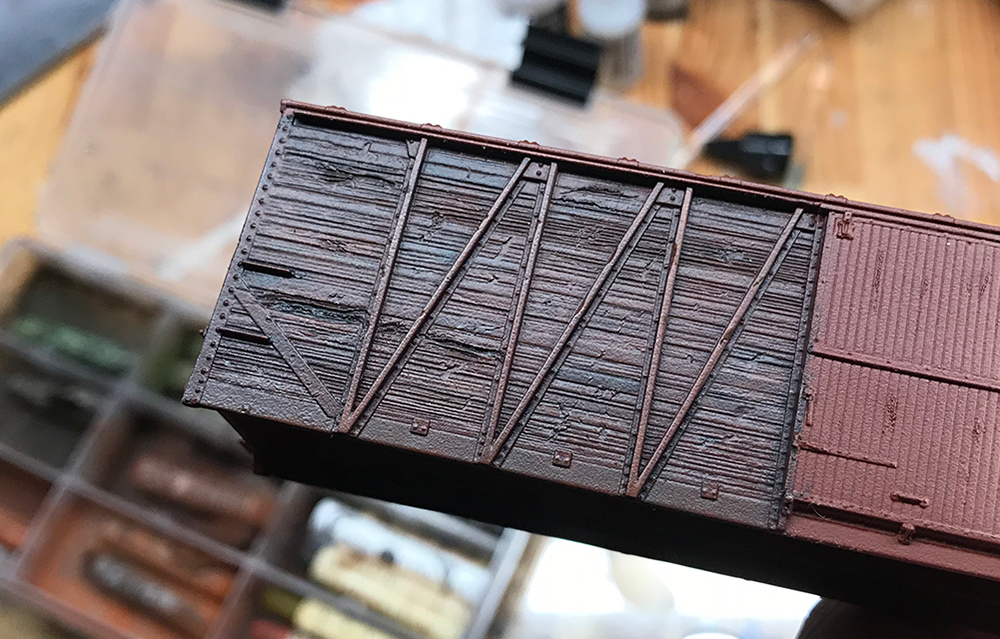
Looking closely at the prototype I noticed that wooden slats can get damaged in place. The wood is pitted, gouged out, chipped, stripped and generally worn while metal can be bent, rusted, and pitted. I found a couple of examples of this kind of weathering:
Pitted and damaged slats are a particular weathering feature of these single sheath boxcars. Marking each box car differently begins the process of giving each one its own identity.
I’ve started my weathering project at last. The goal is to produce nicely weathered and realistic looking rolling stock. Easy to say, hard to do well – especially for someone like myself with almost no artistic skill. I’m less worried about the result as much as finding a bunch of different methods to produce different effects when I need them. Therefore any rolling stock will do and the items don’t have to be expensive and may get painted over and over again. Once I have a grip on what I’m doing whereby I have a better understanding of paint, thinners and chalks I’ll then turn to figuring out how to create the infinite weathering effects of time and nature: rust, dirt, paint fading and chipping etc. After that I’ll be able to work on detailing – adding grab irons, breaking equipment, ladders, stirrups, and so on. The detailing project may grow into a scratching project whereby I build boxcars from scratch but let’s not get ahead of myself.
My starting point was to choose a piece of rolling stock to be my first patient. My favorite piece of rolling stock is the boxcar: modern or classic. However I do have a special place for the 40′ boxcar – especially those built between the wars. I’ve had trouble finding books devoted to boxcar history but I was able to find more generic freight car books such as those written by Jeff Wilson: Freight Cars of the ’40s and ’50s, The Model Railroader’s Guide to Freight Cars, and Detailing Freight Cars.
One of my favorite writers on railroad history and modeling, Jeff Wilson books have been an important part of my general railroad book collection. Easy to read and full of great tips and information about the prototype they’ve broadened my knowledge in the many areas of railroading that a modeler needs.