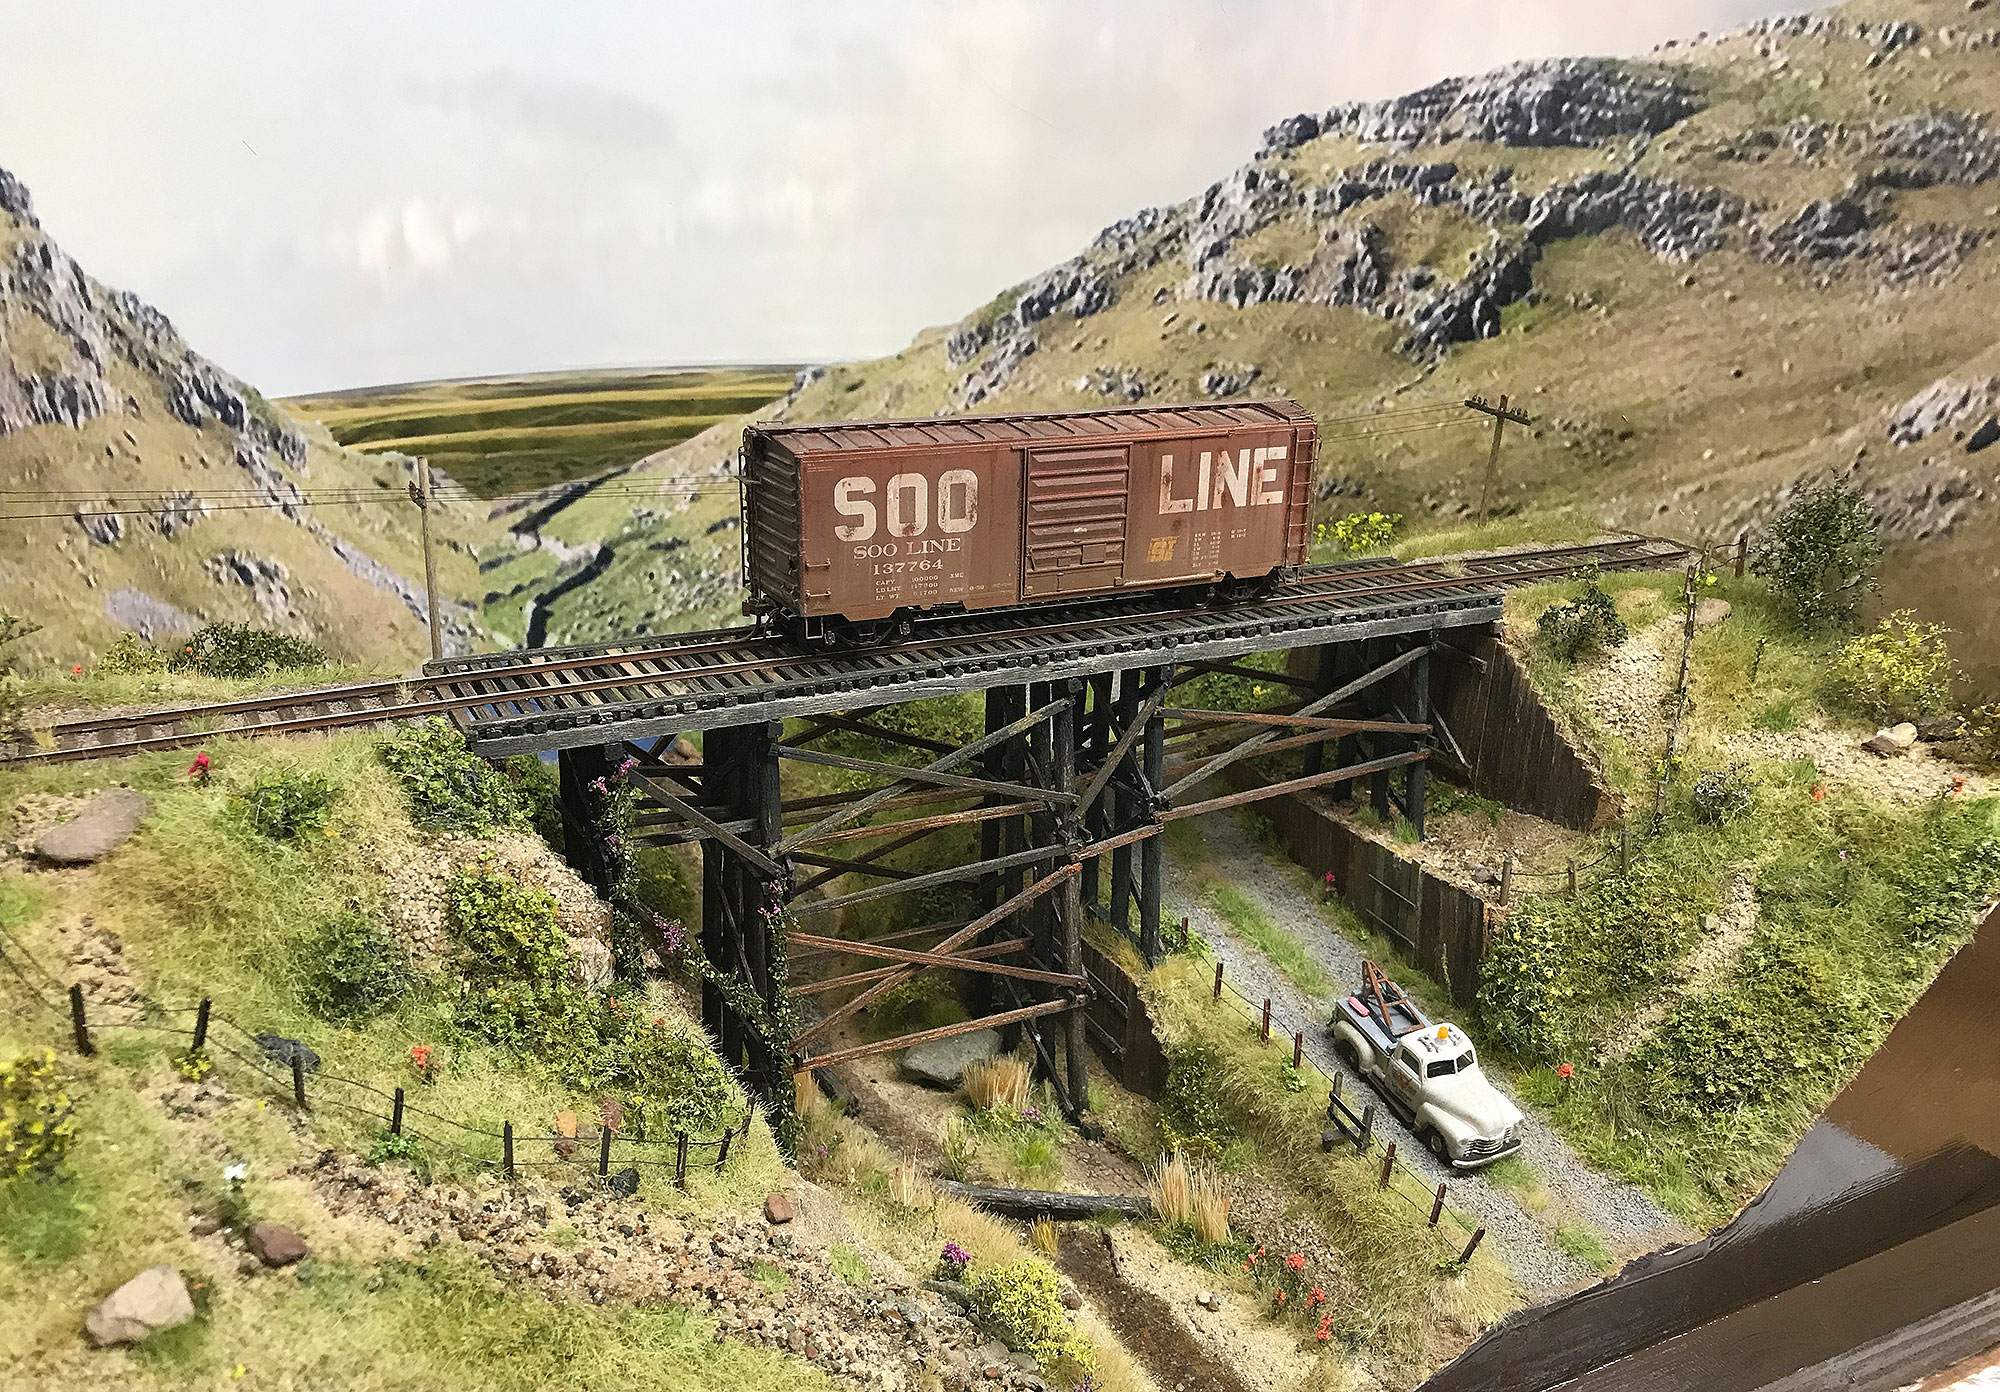
Once again been super busy with life but have kept on with the diorama in my spare time. As mentioned before progress has been slow but steady. Besides modeling the diorama I continue to experiment with different techniques and materials, and continue to organize the modeling room. I have also started the planning of my new layout which I intend to commence building early next year.
Here is the latest:
Cornfield
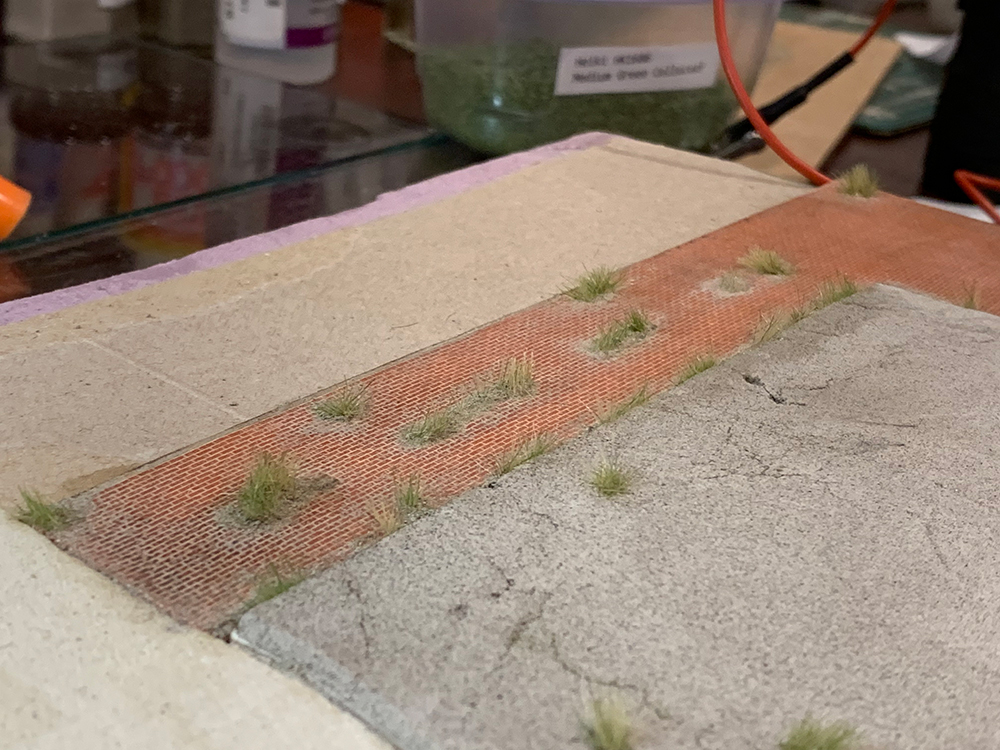
It took a little while to decide what to put into the little area alongside the rear path behind the depot. I thought about modeling a garden or some maintenance buildings, but in the end decided upon a corn field. This would hide the backdrop join and blend the diorama with the feed mill in the background.
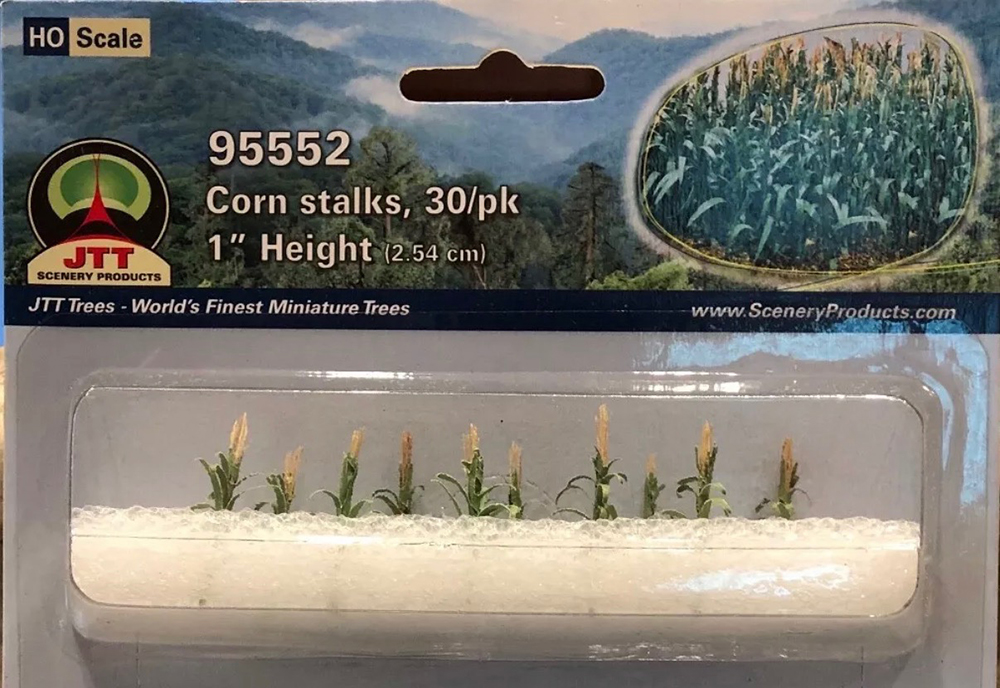
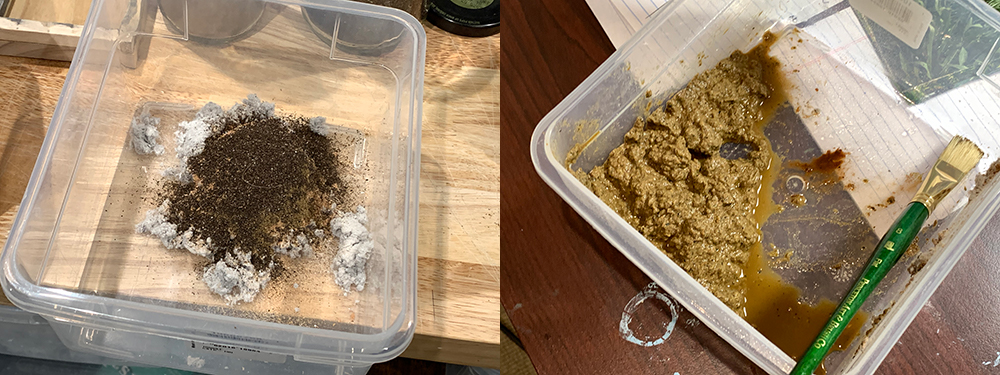
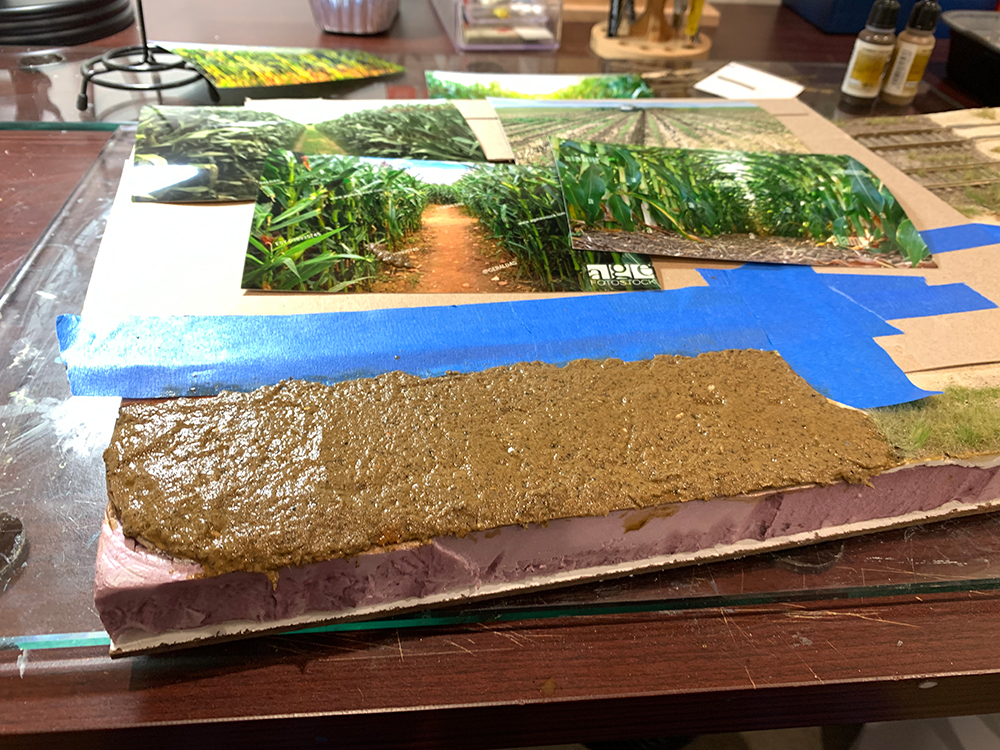
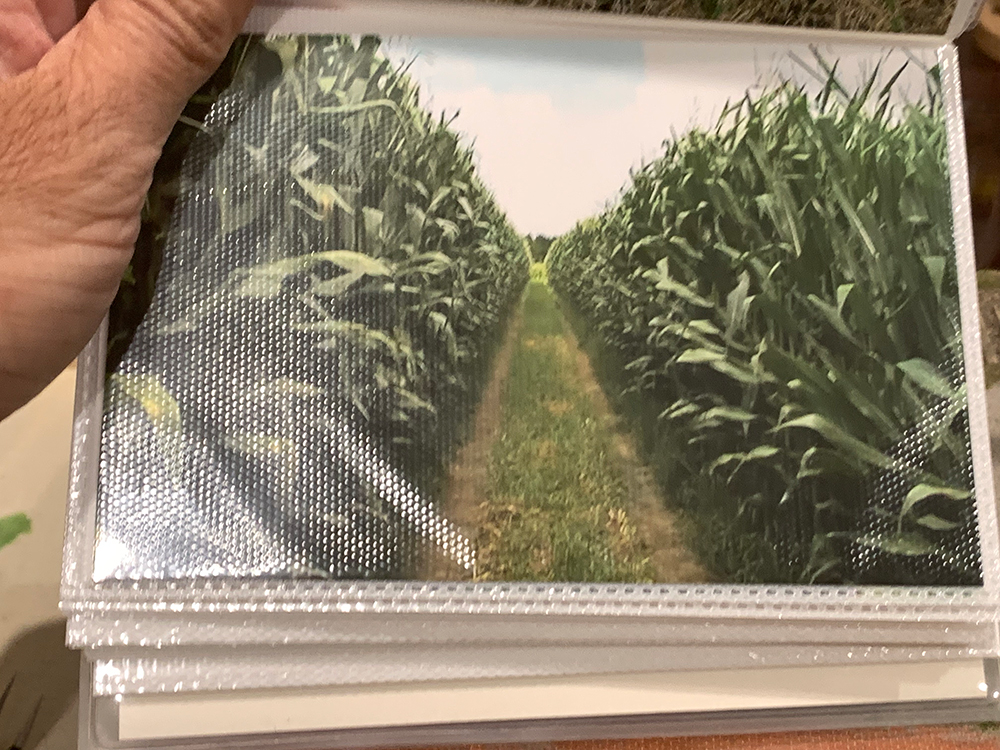
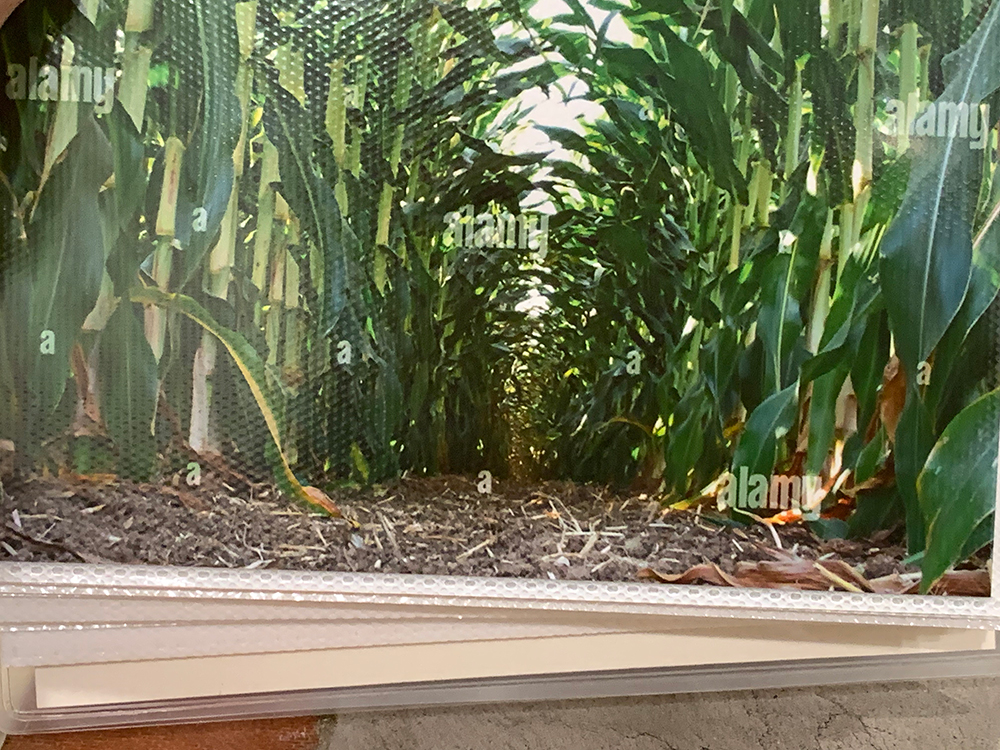
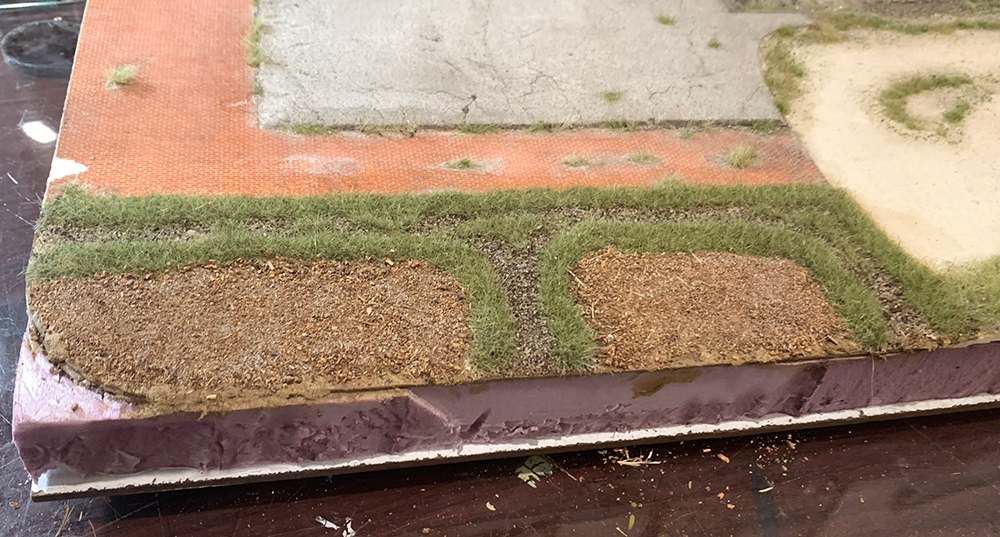
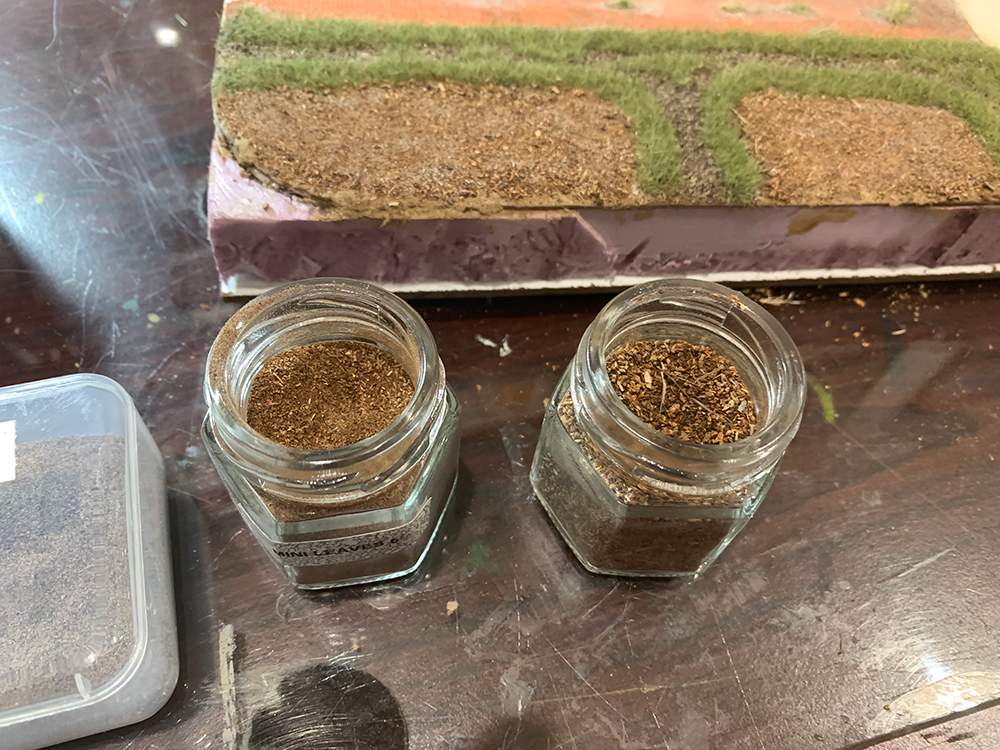
The area beside the path needed modeling and I decided upon a cornfield.I didn’t want to make the corn stalks myself and was able to find several products that I could use. I decided upon these from JTT. I still have to ‘plant’ them and until that time I won’t know how they will look. If they don’t look good I may have to customize them or simply use another brand.I like to model the landscape in a way that matches real life as much as possible and one of the first things I do when modeling the earth is to create an earth-mix to use as a base. The mix is made from Celluclay, white glue, sawdust, Woodland Scenics earth undercoat, water, and a mix of sand and soil from my natural materials collection. I also gave it quick spray of germ killer. It looks unpleasant but spreads easily enough and hardens in a few days to very nice and prototypical mud base.Once spread across the area there is nothing to do but wait a few days for it to dry and harden. In this case I left it a week and when I returned it had hardened to a very nice workable top soil.As mentioned in the past I like to model from photos as it keeps me on the prototypical straight and narrow. In the case of the corn field I could see from photos that there were two ground features to keep in mind: the base upon which the corn stalks would be planted and the surrounding borders to the planted area. I decided to model these two features next. The picture above has an example of a grassy verge.The picture above shows a muddy base with dried vegetation. I used real dried vegetation to get this effect.And here is my version of the same thing. Still needs a lot of work but it generally heads in the right direction. I used masks to create that manicured grass effect which I will mess with it to make it look a little wilder over the next few weeksReal dried leaves that I obtained by grinding up real leaves and wood.
I’m happy with the corn field area for the time being. Plenty more to do but good enough to keep moving and come back to it at a later date. The diorama is looking a little grey and messy right now but that is about to change. I’m going to start cleaning things up and will add vegetation that will make the overall diorama look brighter and more colorful.
Crossing tufts
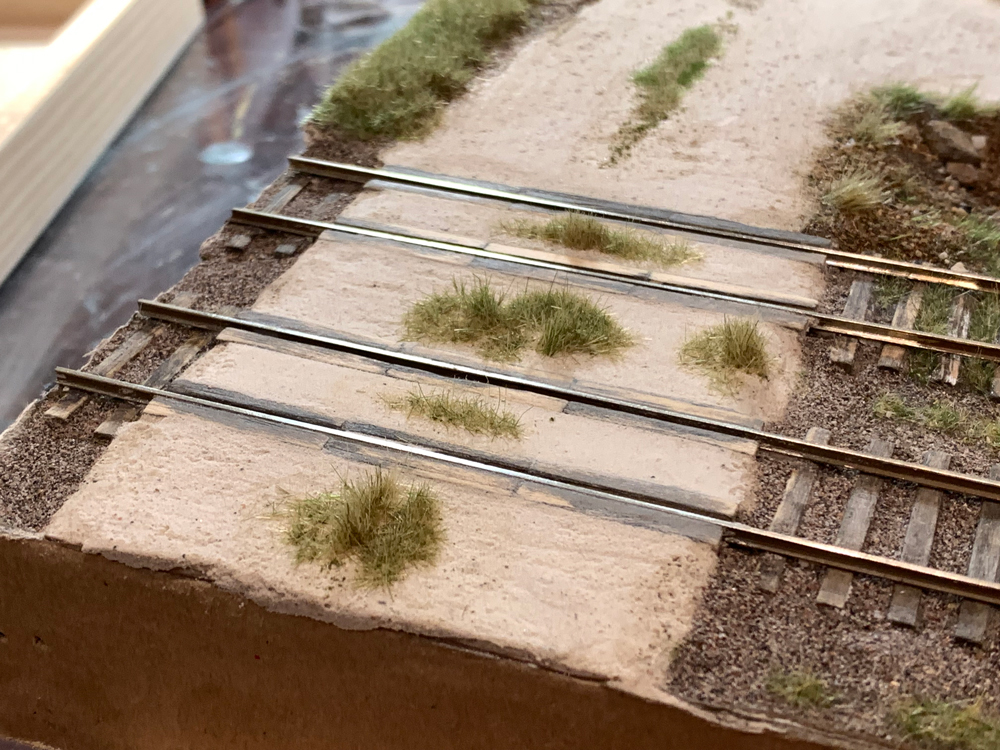
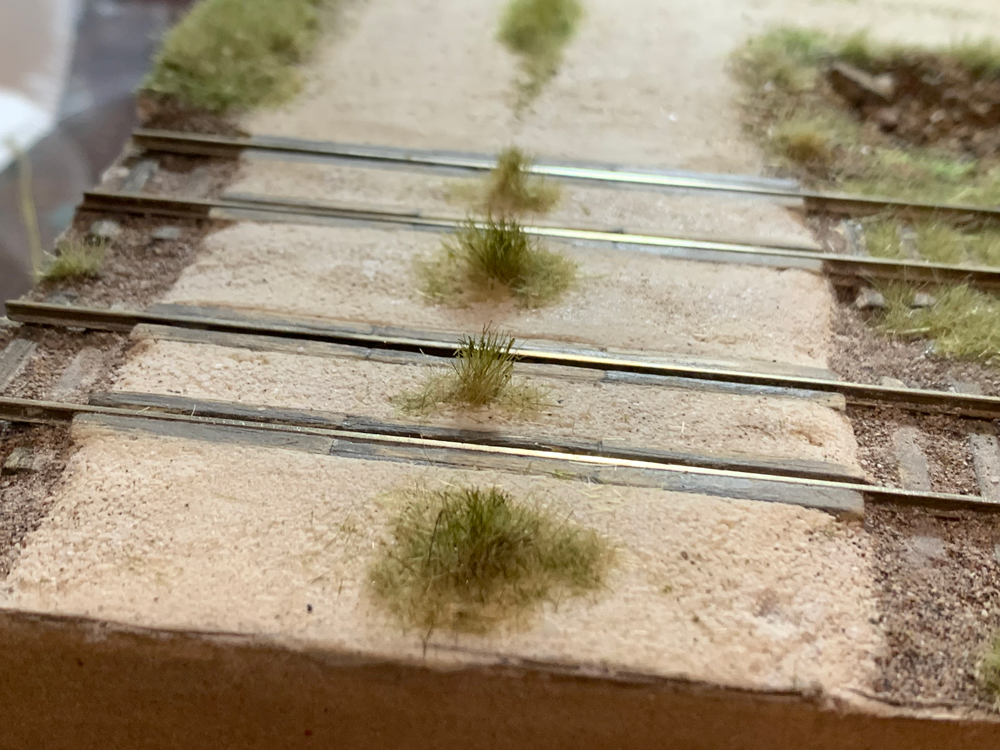
It took three attempts to get the center grass tufts just right. My original modeling rules had stated to not experiment on the model itself but unfortunately I broke by not having a method worked out before attempting it on the model. By breaking that rule paid the price as each time I failed to produce something I was happy with I had to remove the crossing gravel base, remake the paste and wait three days for it to dry before starting the tufts again. As such the crossing area and the grass tufts took nearly four weeks to complete to my satisfaction. I would even go as far as saying that they are still not quite right – they seem a little overscale – but at some point you just have to move on and take your learnings on to the next model.
The goal with the tufts was to model them in a much more realistic way than you generally see. Most model grass tufts splay outwards as result of the electric charge that pushes the strands away from each other. In some circumstances that is realistic and has a place on a model. However I like grass that points straight up, that is sculptured and groomed, and I like grass that has a defined shape and a prototypical height. The method I devised gave me complete control over the creation of tufts and minimized leaving the shape to chance. In the end the method to create tufts ended up being quite simple and I will post the method with photos another time.
Here are some pics:
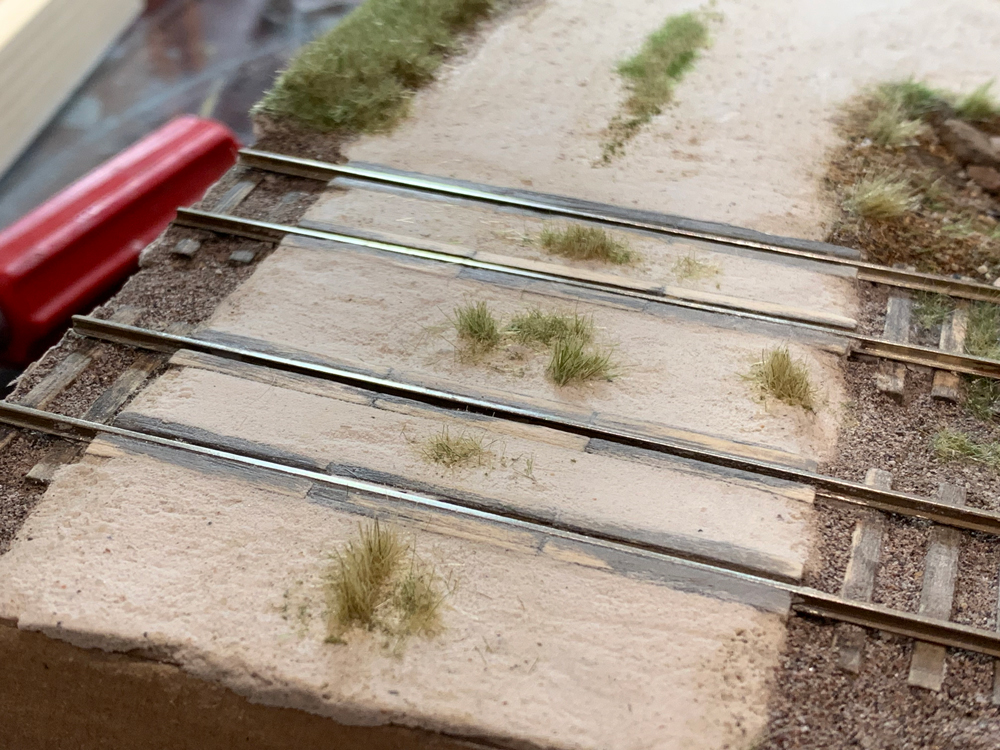
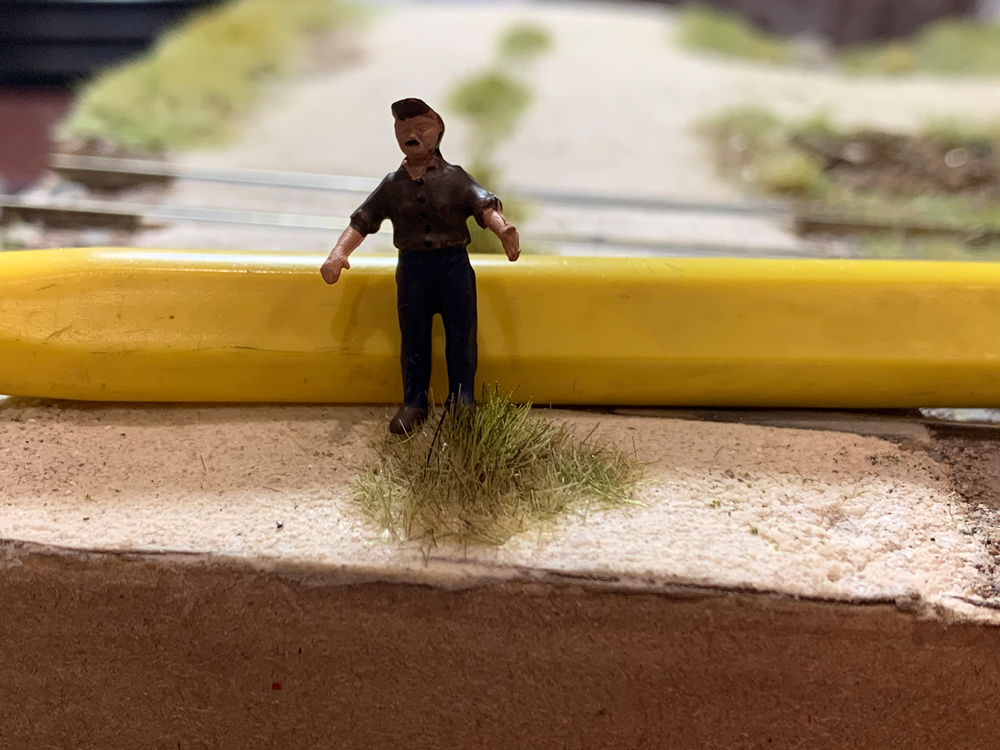
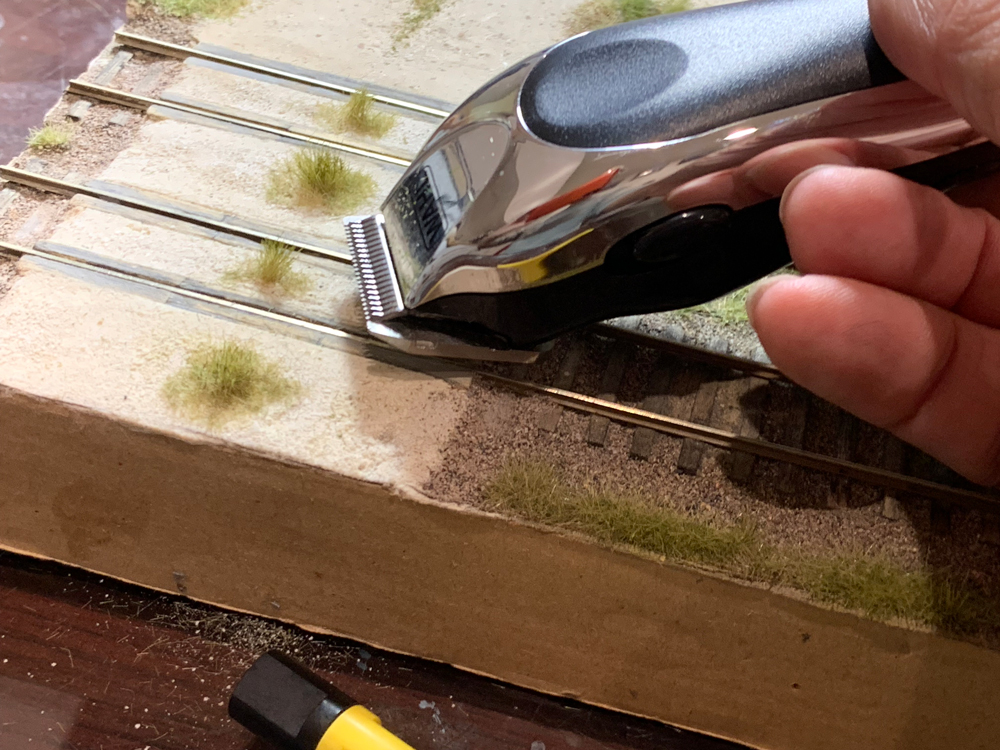
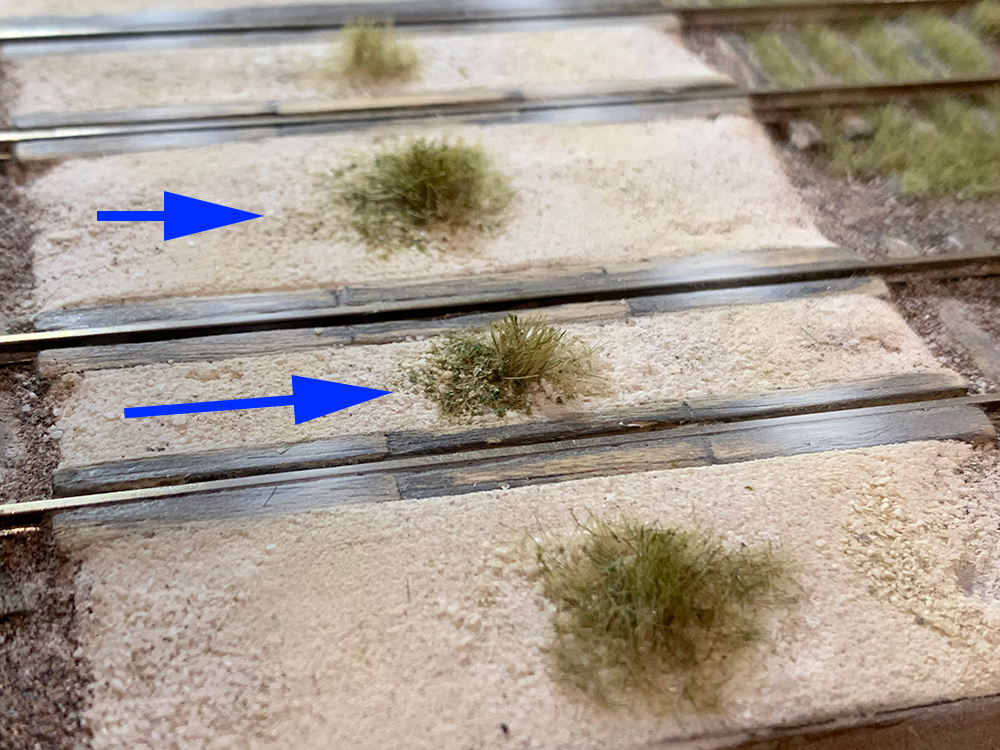
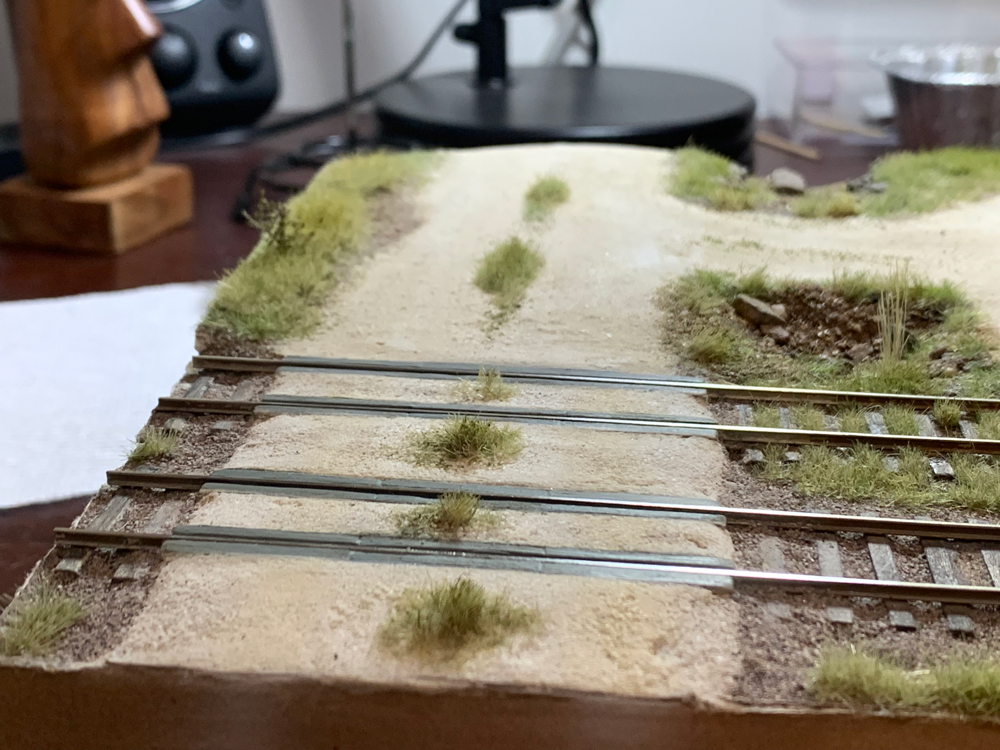
This was a starting point. The grass tufts were created by pressing 6mm grass between my fingers and then jamming the tuft into beads of Aleene’s Fabric glue. Then I laid down a layer of 2mm static grass using my static grass applicator. Once dry I used my nose clippers to cut the grass into shape. In this particular instance the method was correct but the result was not. These tufts are shapeless and blobby and make no prototypical sense in this context – they need to be thinner, smaller, shorter and inline with the center grass of the main road.To try to improve the look of the tufts I used my weathering brush to thin them. Unfortunately I ended up removing too much grass and ended up with this messy and poorly defined profile. The width of the tufts needs to match the widths of the center grass further up the picture and I needed to figure out a better blending method. Even though some modeling might be prototypical it also needs to be aesthetically pleasing and sadly these tufts were not. Time to start over.Once again, I finger-pressed tufts into glue that were then shaped using my electric hair tools,. Once again I added 2mm grass around the outside. Once again I used my weathering pen to thin things. It looks better but the tufts are still too wide. Trucks and road vehicles would have worn down the edges of the grass leaving a thin sliver in the center and that is not what you see here. I decided to try again.Ah ha. Almost got it. The tufts are not too wide, are in line with the center grass ahead, have a nice pyramid (cone) shape and is nicely blended with the road. Still more to do but on the right track at last.To get grass heights and widths correct I like to use an HO figure. By using this as a guide I can start clipping the grass into shape. However you have to be careful not to go too far as from a distance grass that is too short can simply disappear from the model. My compromise was grass that was about 1-2 feet tall – still too high – but nevertheless looked good on the model. I may still work on them more, strand by strand, cutting them down and into shape but for the moment this was good enough to move on.My mini-clippers – one of two electric hair cutting tools that I use to shape grass. The other is a nose hair tool that can cut strands one at a time – great for the fine-shaping of grass at an almost microscopic level.I have largely abandoned course turf for modeling. In this day of phone cameras taking extreme close-ups of layouts those old school materials seem much too bulky and ‘course’ for the fine detail modeling I like to do. However fine turf still has plenty of uses – one of the main ones is to act as a blender between a surface and adjacent vegetation. I mix fine turf with whatever matching color materials – sand, stones, rocks, dirt and dust and then use it in transition areas around vegetation. You will see it all over the diorama and it has an amazingly realistic effect.The arrows mark the use of blending materials. In this case they are Woodland Scenics fine mixed turf, some sand, some road surface material (dried and ground up), and a touch of ground and filtered gravel. The effect is to assist the transition between tuft and road and provide an extremely short vegetation effect around the tuft.Well by this point looking so much better. I really took my time to construct and shape each tuft while keeping in mind the plausibility of the shape of the tufts: ie what is the story of their shape? Does the shape make sense in this context? They are still not perfect – still too wide and tall – but I will come back a little later to fine-tune their shape after other elements on the diorama are worked on.
Landscaping materials and vegetation
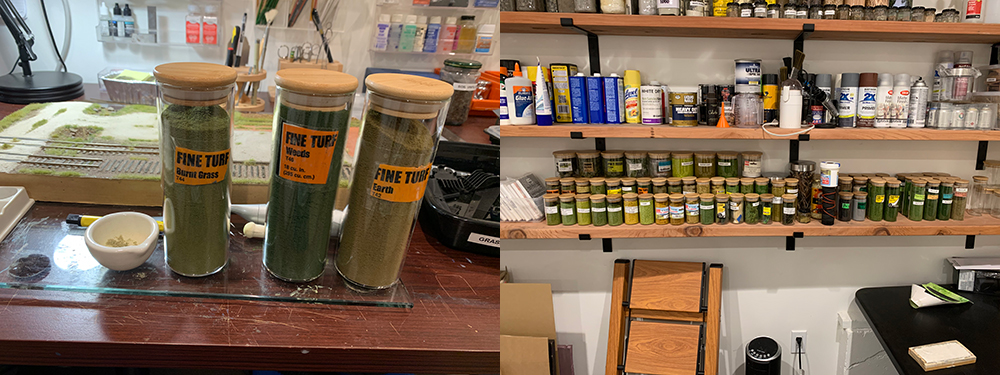
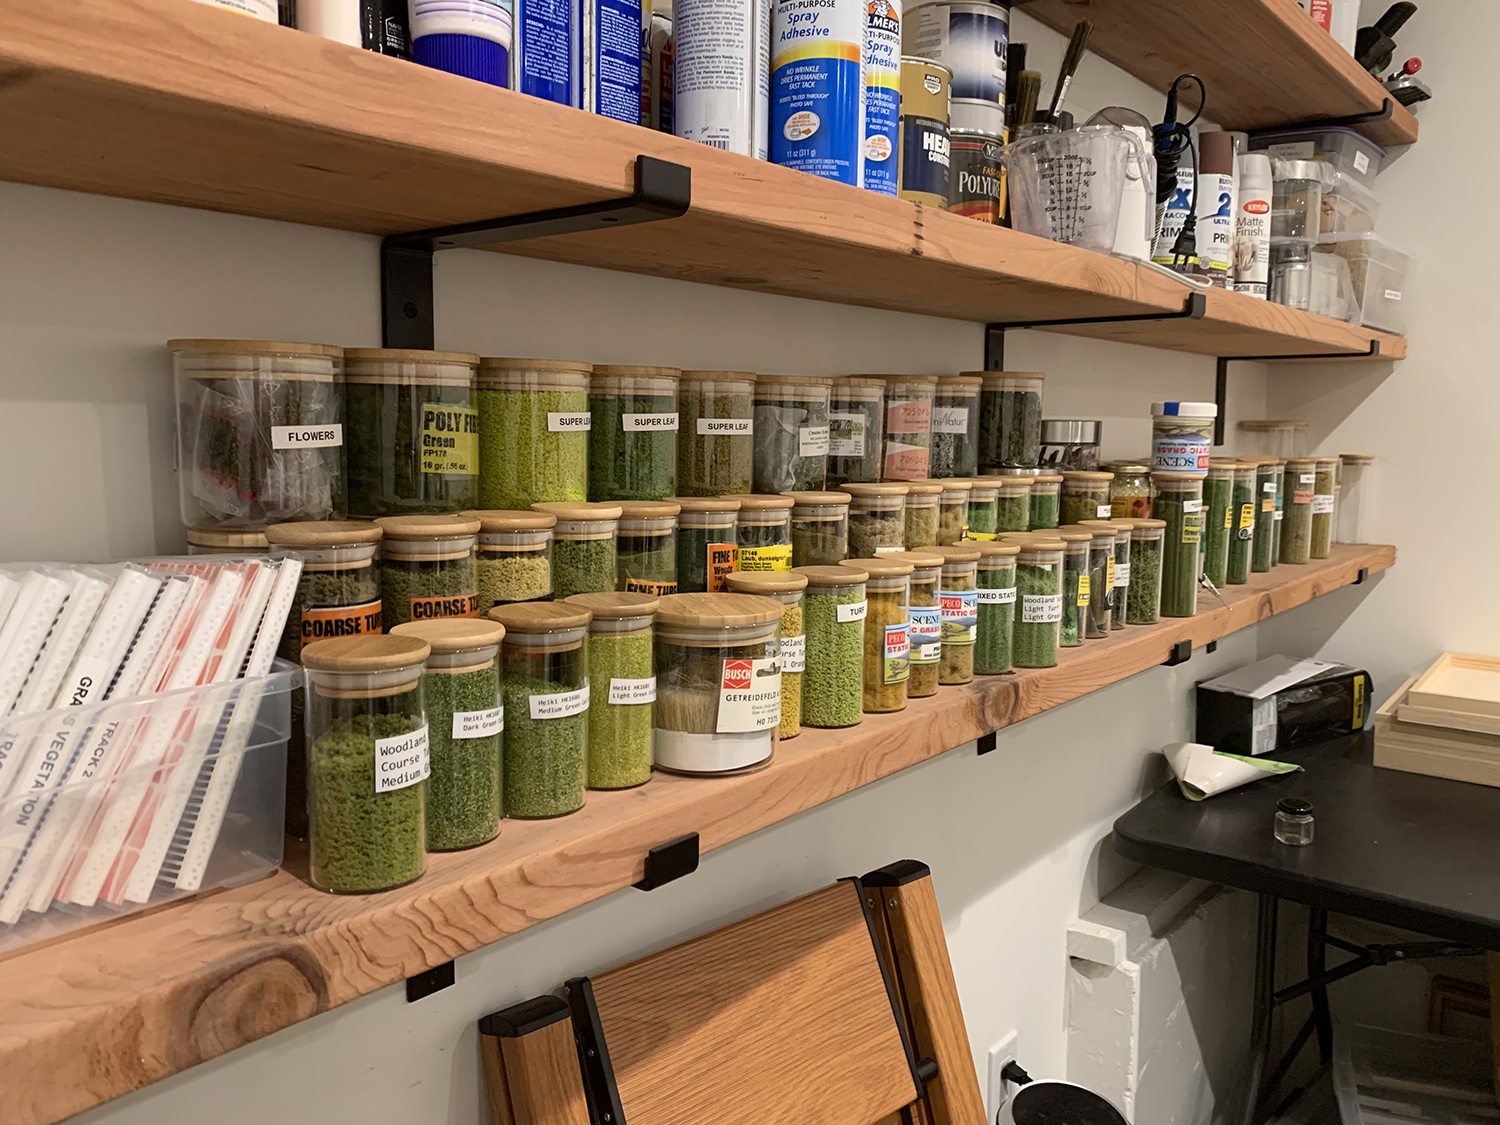
One of the reasons to build the diorama was to help me organize my tools and materials in the new model train room. I was about to start working closely on the vegetation and took the opportunity to reorganize all my landscaping, vegetation and terrain materials. Previously they were stored either in the original packaging or in supermarket-purchased plastic containers. I looked online for a better method of storing these materials and discovered bamboo-lid storage jars. here is one supplier I purchased them from: https://www.hobbylobby.com/Crafts-Hobbies/Glass-Crafting/Glass-Containers/Glass-Jar-With-Bamboo-Lid—24-Ounce/p/80846497
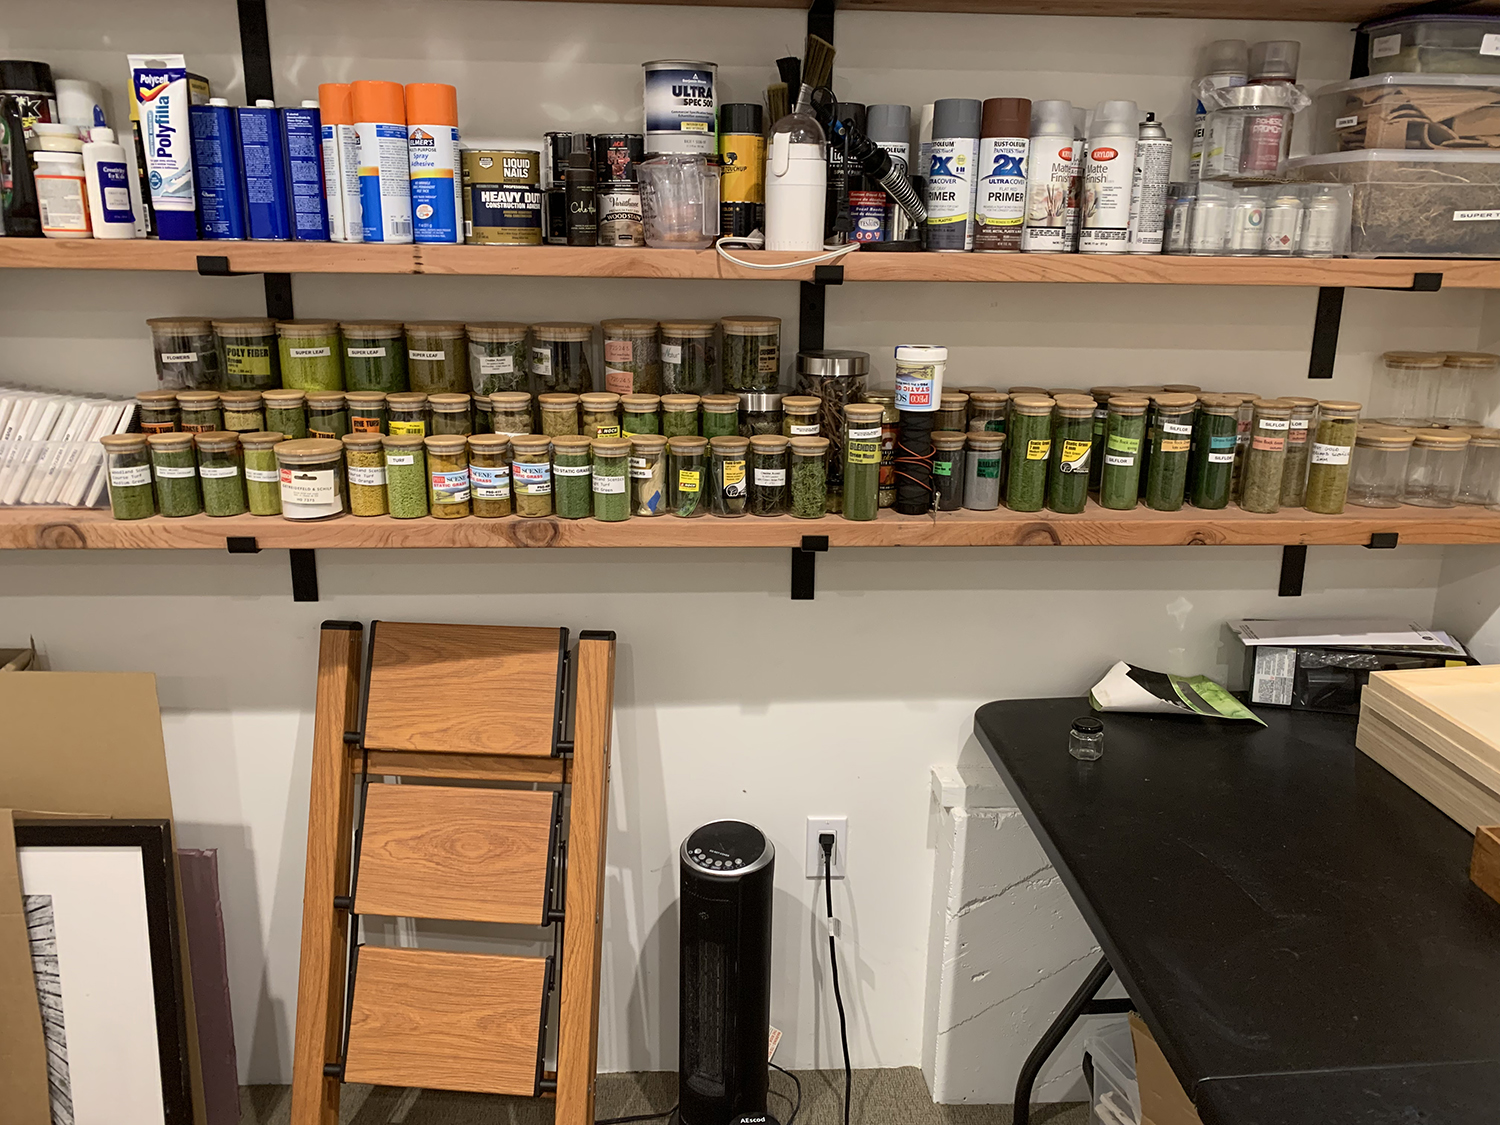
They can be bought in bulk and in different sizes. I worked through the packets and containers and kept purchasing jars until I had all my materials ‘decantered’. You can buy the jars for an average of $4-$5 a jar so not super-cheap but not too expensive either. They also look great and make accessing materials easier.
What I really like about these jars is that it is so easy to view the contents. I don’t have to open them to observe the type of material, the color and the texture. I can see at a glance what it is and whether it is appropriate for the task at hand.
Stored on the lower shelf for ease of access.I’m buying more materials each month and will continue purchase jars as needed.
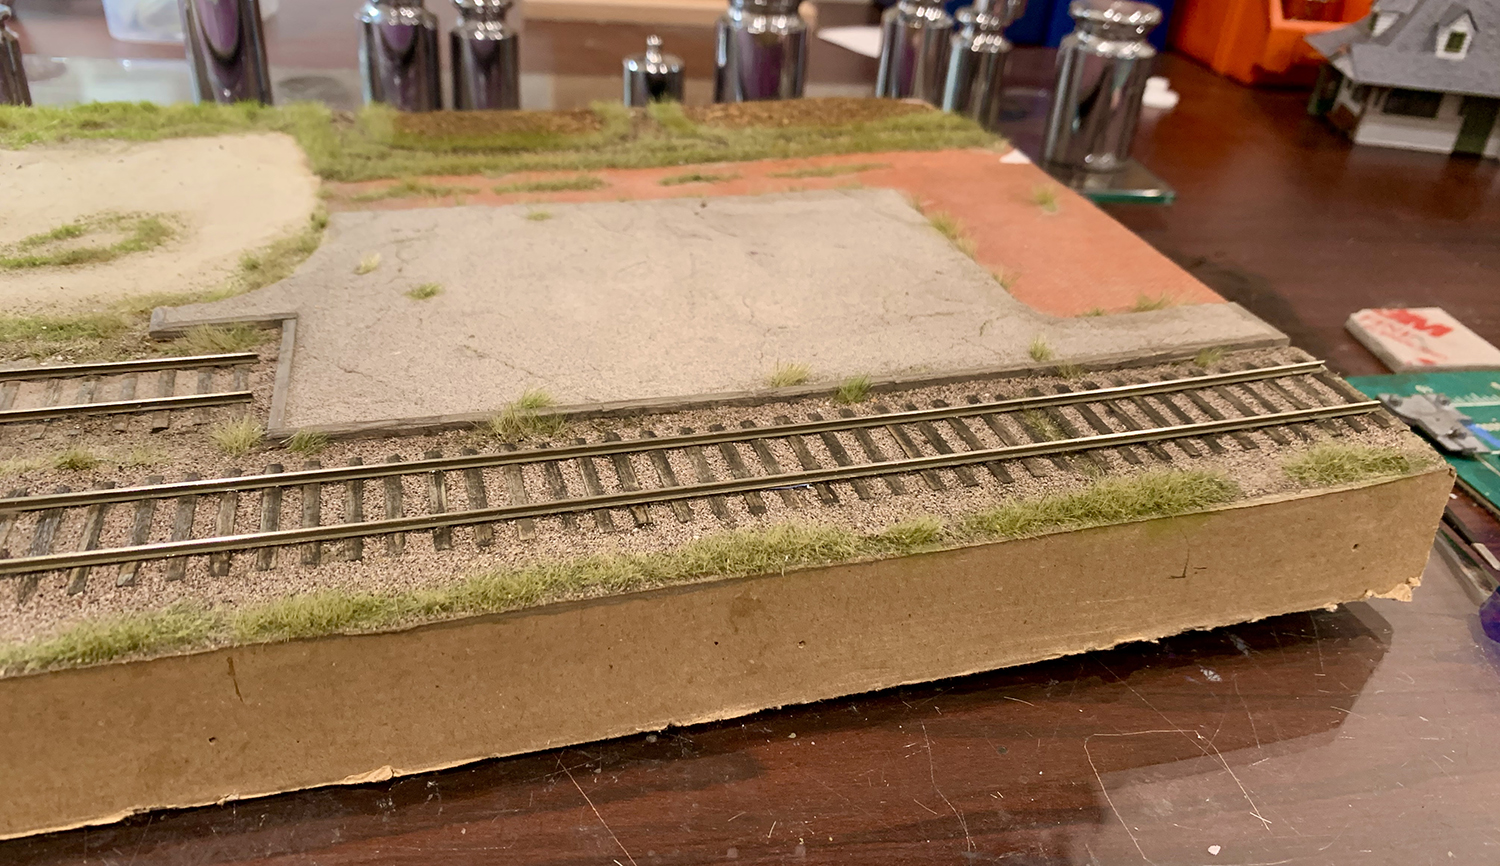
Track ballast
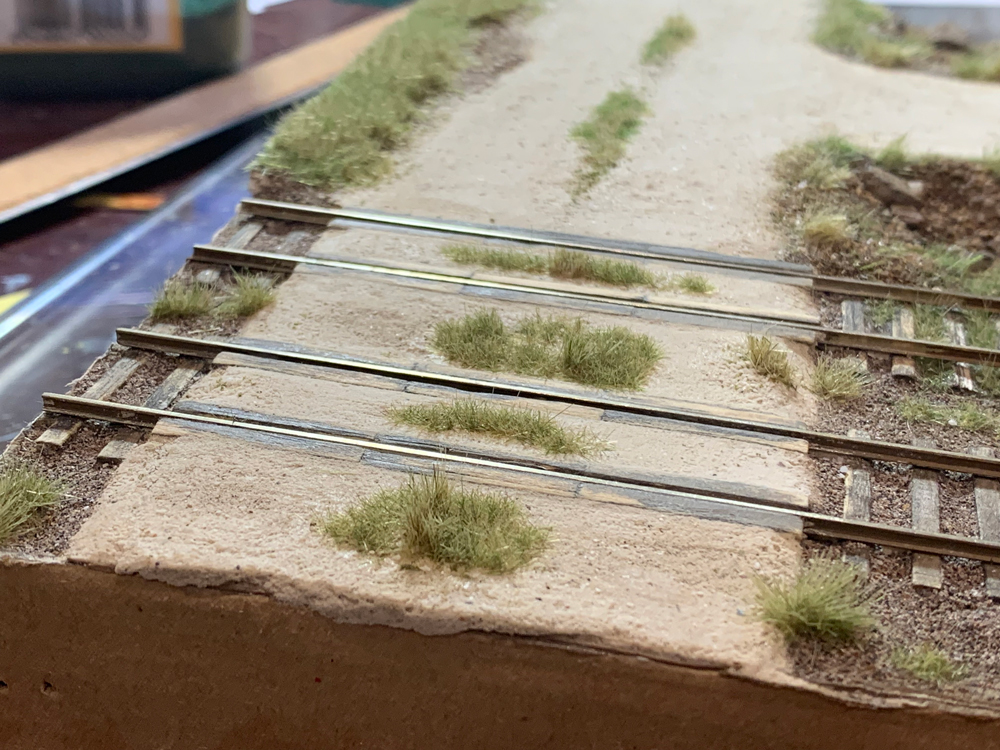
I decided to re-ballast the main line as I found the look of it too messy. I felt that either the ties or the ballast needed to be a consistent color. I removed the rails and used a nice clean ballast from Arizona Rock and Mineral. This layer is just a base onto which I will be lightly staining using my spray gun, rusting the rails and adding some invasive vegetation. So far I think it looks much better.
The road bed is looking much cleaner now. There is a nice contrast and better definition between the ballast and the ties. Next time I try this I will do the reverse – make the ties a consistent color and allow the ballast to be messy..I redid many elements in this scene. I added another layer of static grass and spread the grass to further invade the road bed. Landscaping – like weathering – has a story to tell. In this instance the grassy trackbed is caused by water spillover from the small pond adjacent to it. Nobody can be bothered to fix the overflow problem and so the grass continues to grow and spread across the track.
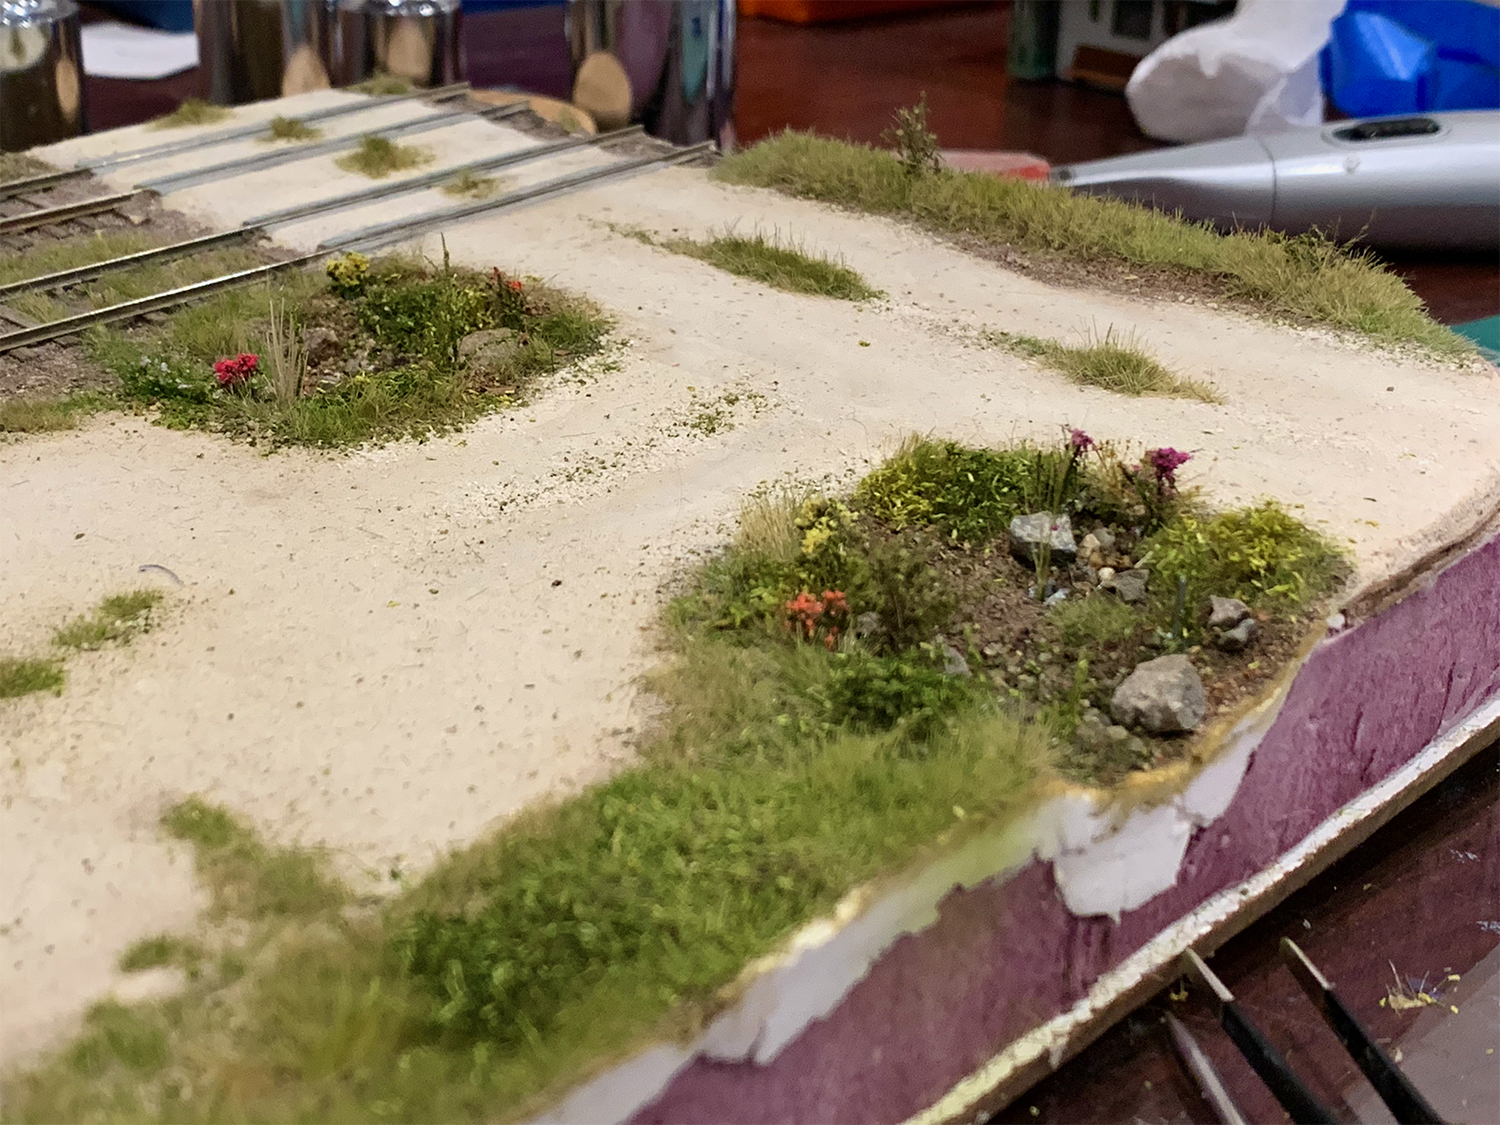
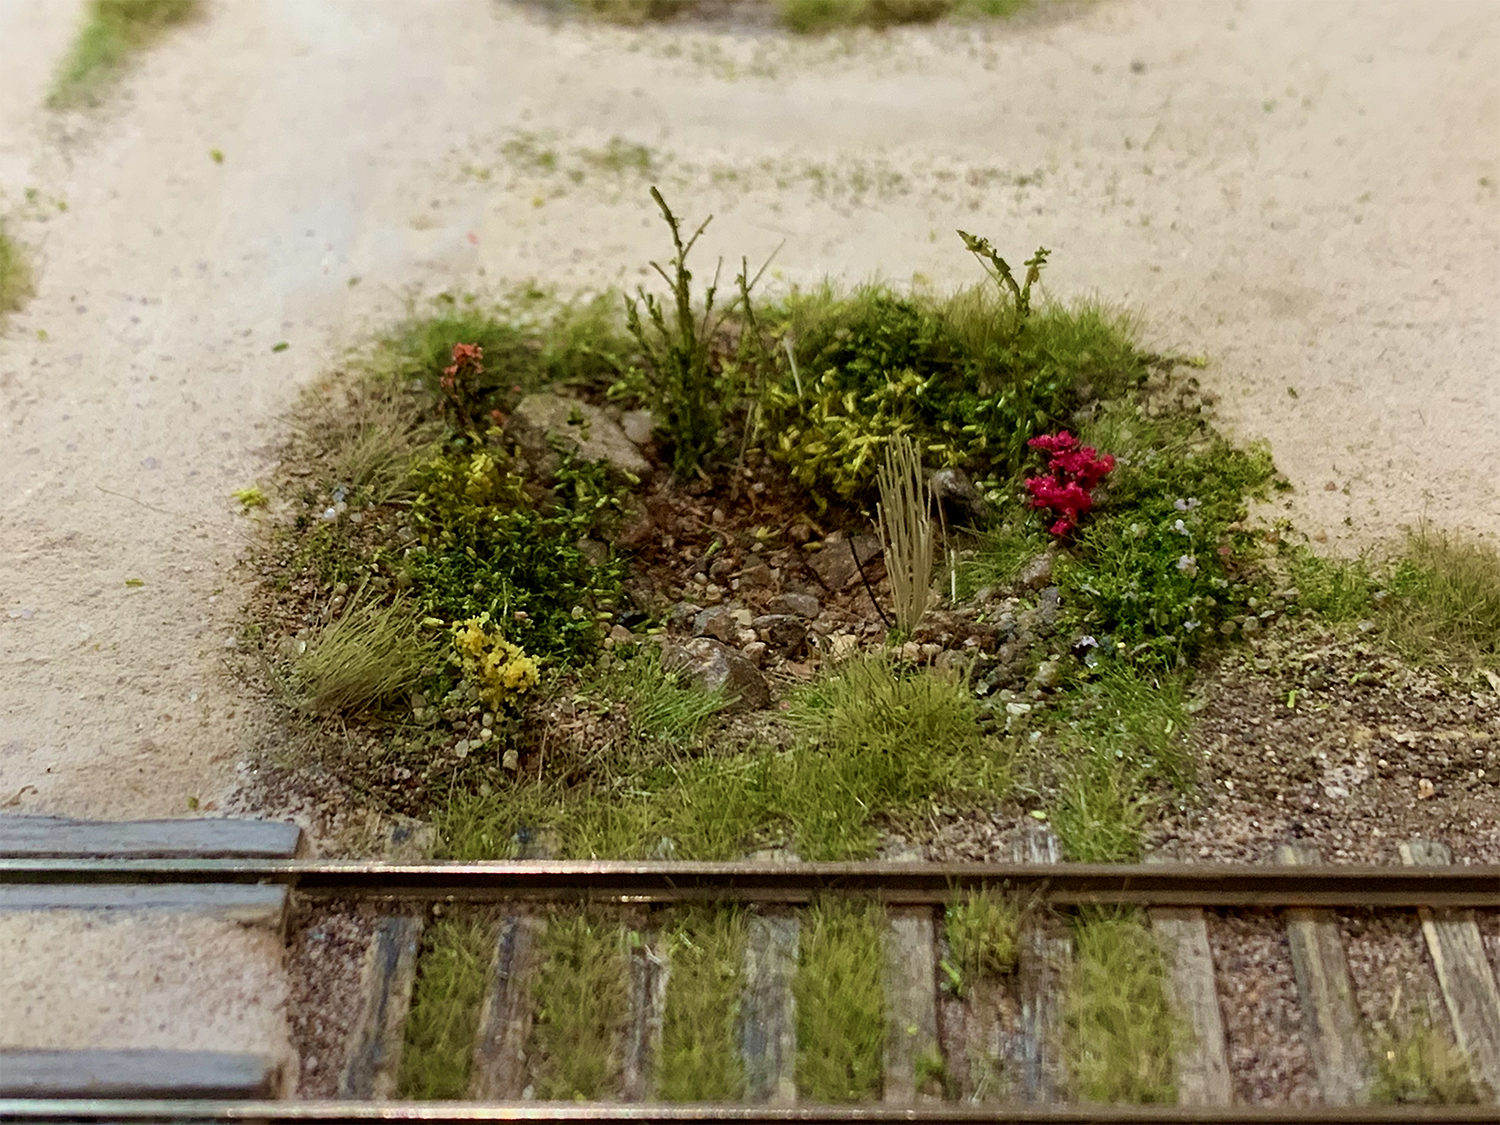
Flowers and Plants.
Here is a quick peek of current work: flowers and vegetation. I’m not finished but it looks pretty good so far and I wanted to share progress. I had to come up with a method to control the placement of plants and I spent several days just figuring that out. I’ll do a full post on plants in a couple of weeks.