I’m a huge fan of track, trackbeds, track profiles etc. I spent the last few years amassing a huge collection of track pictures (20000+) located here: https://railroad-industrial-bayarea.blogspot.com/?view=sidebar. I don’t really have much interest in modern locomotives or modern railroading – I’m more of late steam, first-generation diesel guy – and generally spend my time browsing Morning Sun books for inspiration. I photo, video and sketch track and for me modeling good trackwork is one of the most important parts of the hobby. For a long time I thought I was the only one on the planet who cared about modeling good looking track but then I discovered Facebooks groups with hundreds of like-minded souls with the same love of track and all attempting to reproduce in model form the wide variety of colors, textures, materials, landscaping, profiles, weathering and technical characteristics of trackwork. I’ve been hugely inspired by the work on these Facebook groups and would like to produce something that matches the quality of the modeling. So with that in mind I spent the last two weeks working on the roadbed of the diorama trackwork trying to figure out how to produce something credible.
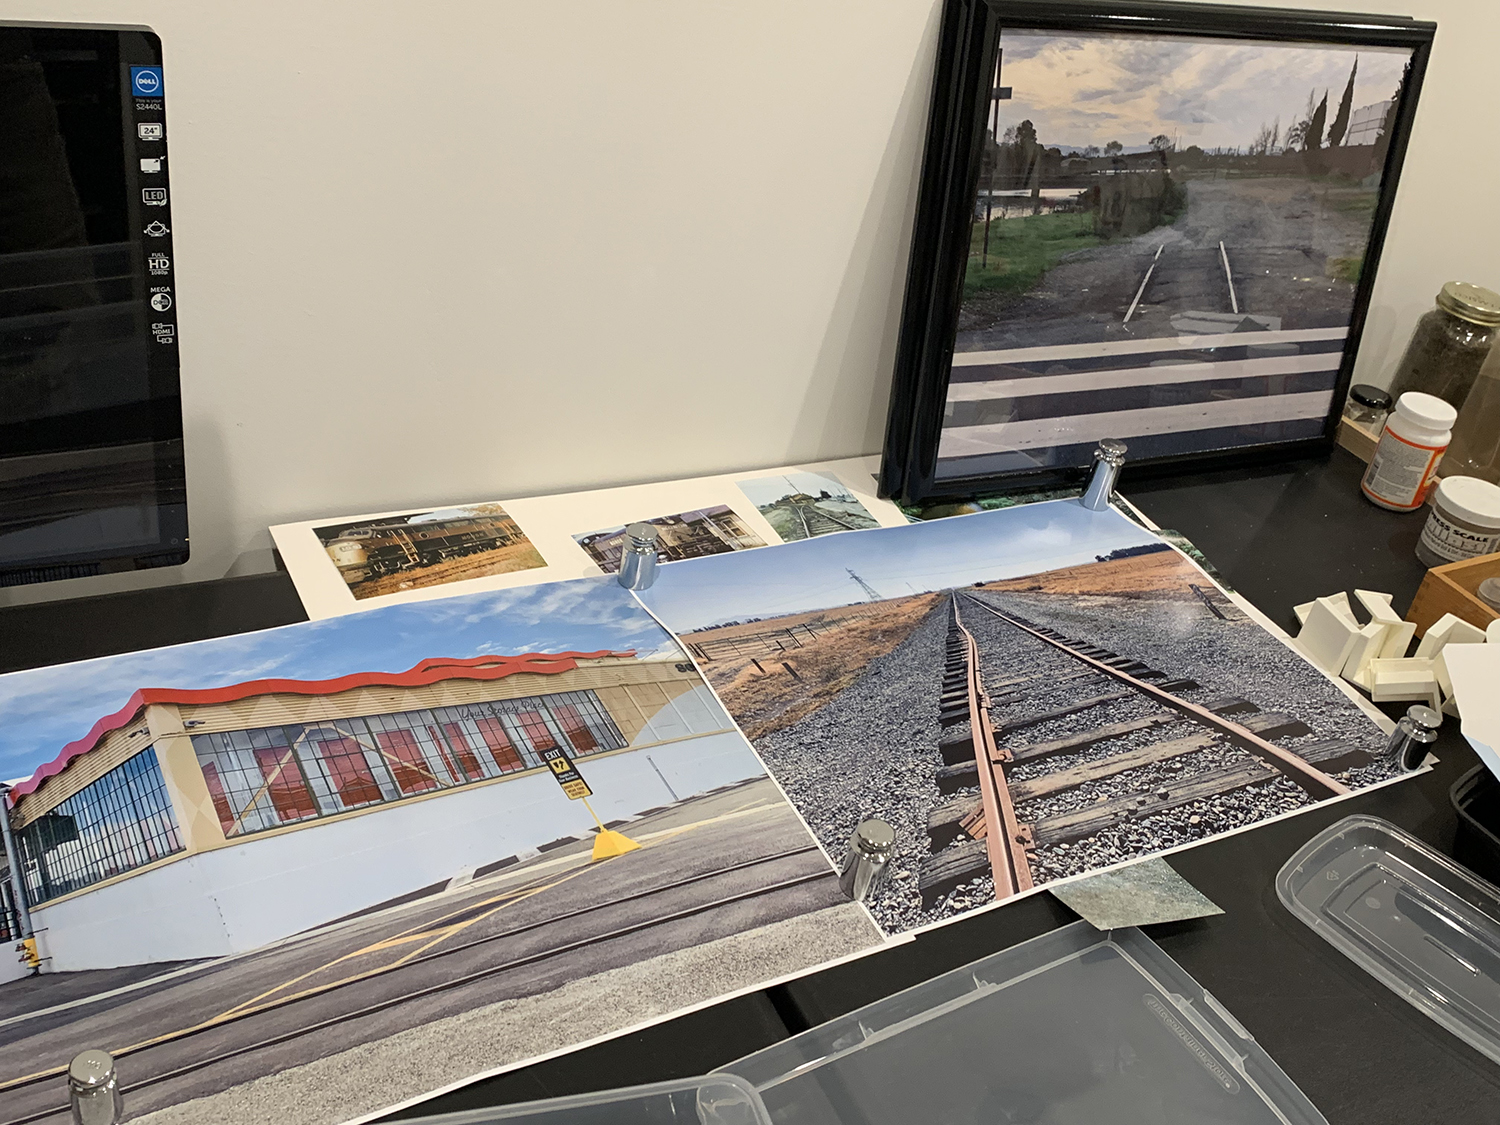
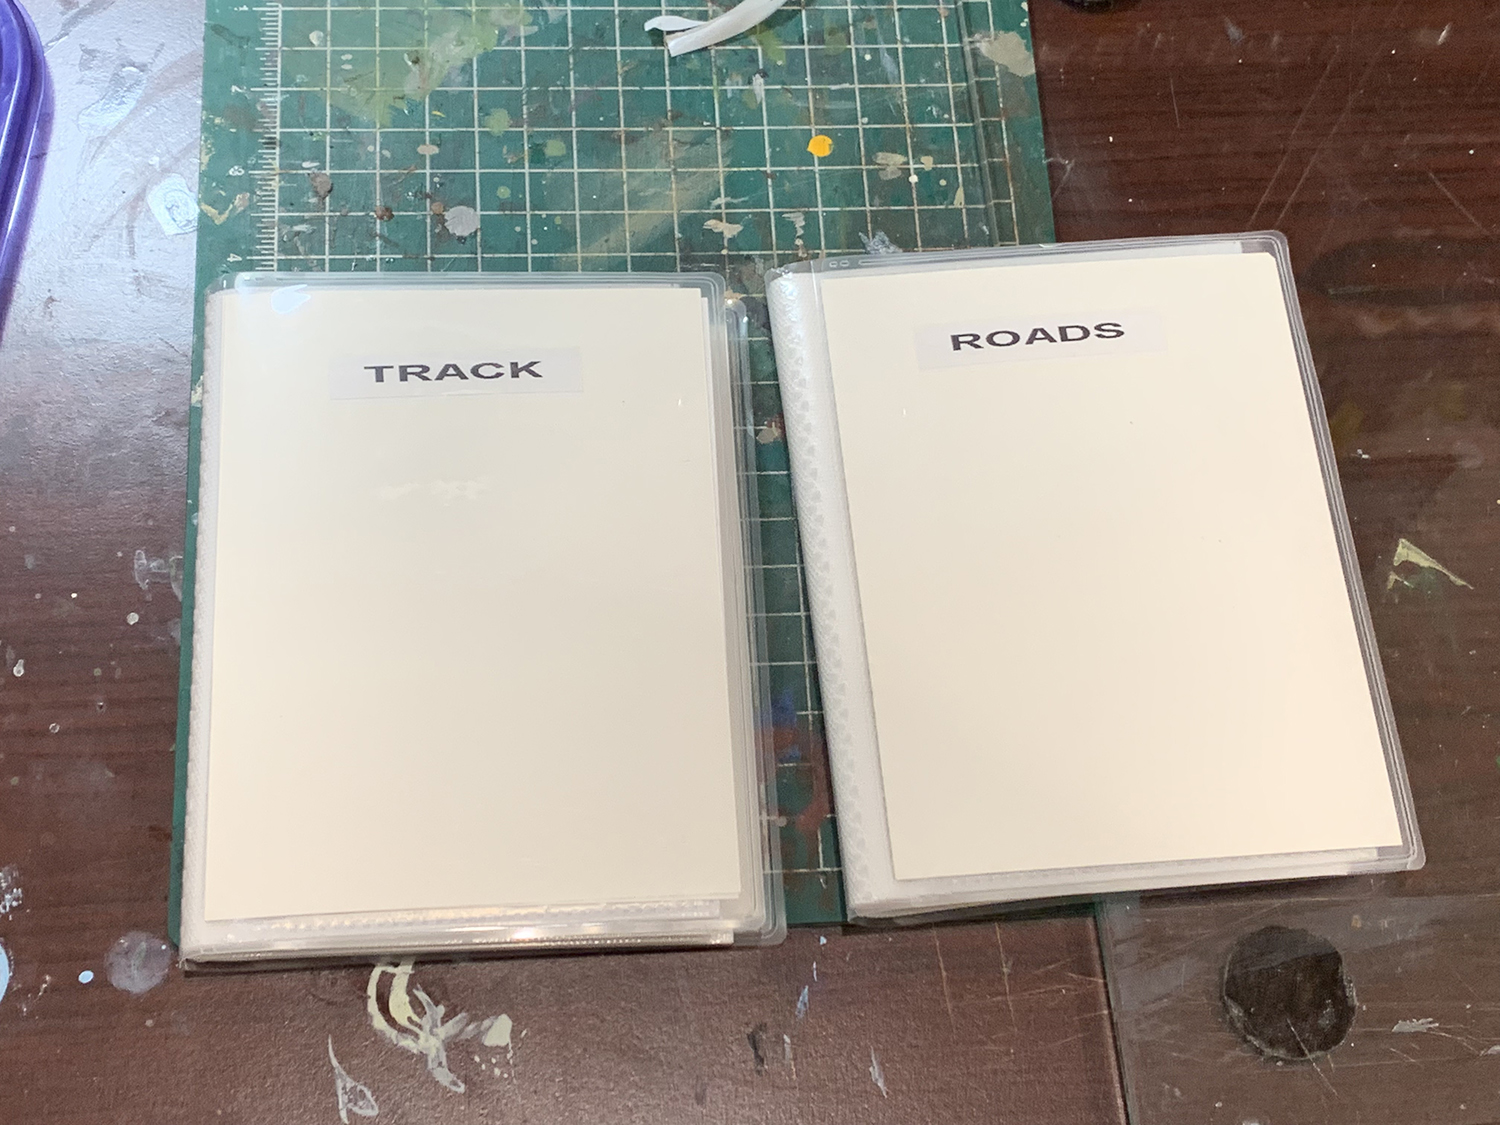
These are a few of my own photos. I have a library online of track photos to work from that are taken from my cycling trips to operational, non-operational and abandoned (but in situ) railroads around the Bay Area. I have an electric bike which allows me to travel wide distances but still get in close to the action. The above photos are some that I have had printed out for framing. They will be mounted on the walls of the modeling room but give you an idea of what I’m generally photographing when I go out.In order to use photos for reference I have them printed out at my local Walgreens – same day printing. I not only use my photos but will also take pictures of Morning Sun illustrations. I find it easier to use small versions on the modeling table than have to prop up a book with the risk it will get damaged or stained in some way.I bought these small photo albums to sit alongside me while I work. They were pretty cheap and can be bought in bulk. (https://www.amazon.com/dp/B07XSKWJ4Q/ref=cm_sw_r_sms_api_glt_i_5AJFA03RAF93FYZNYQYN?_encoding=UTF8&psc=1)I’m slowly organizing my books into categories. As I’m working on roads and track at the moment these two were my first working booklets. I will eventually have other books devoted to bridges, trees, grass etc.
Track Modeling
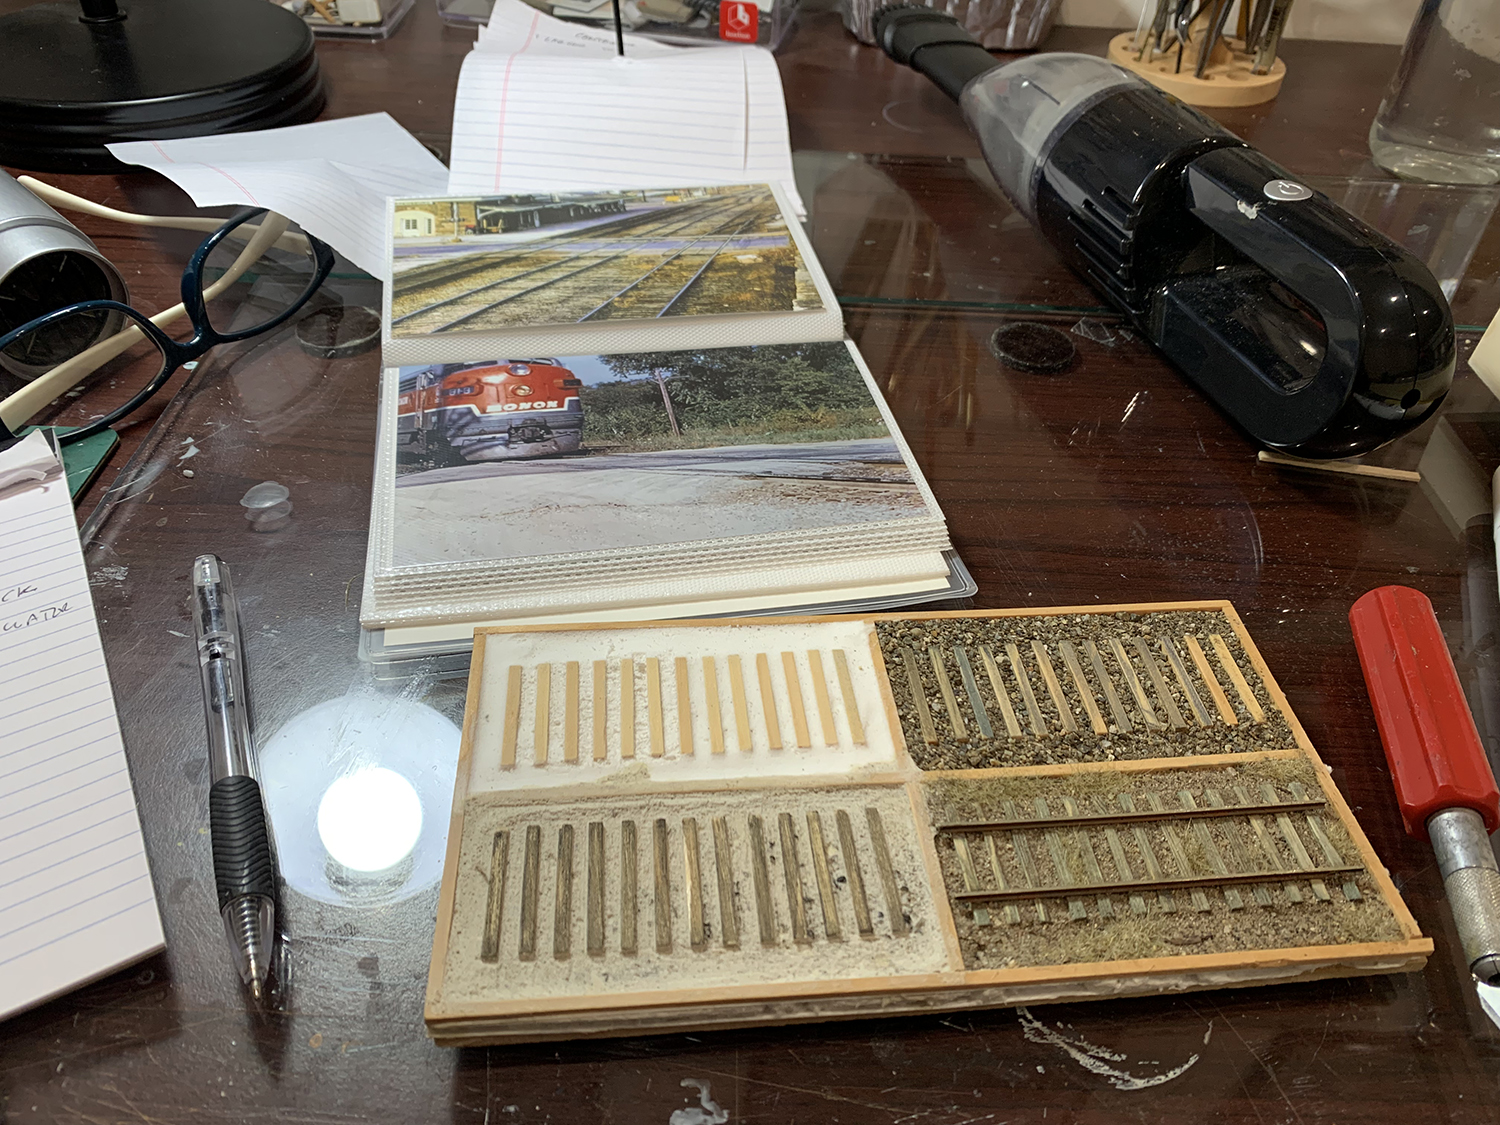
I decided to start with a test to figure out some methods, effects, what works, what doesn’t work. I have various test beds for track and was able to use them to try out various ideas and to provide a modeling road map and modeling destination when I eventually start building the trackbed.
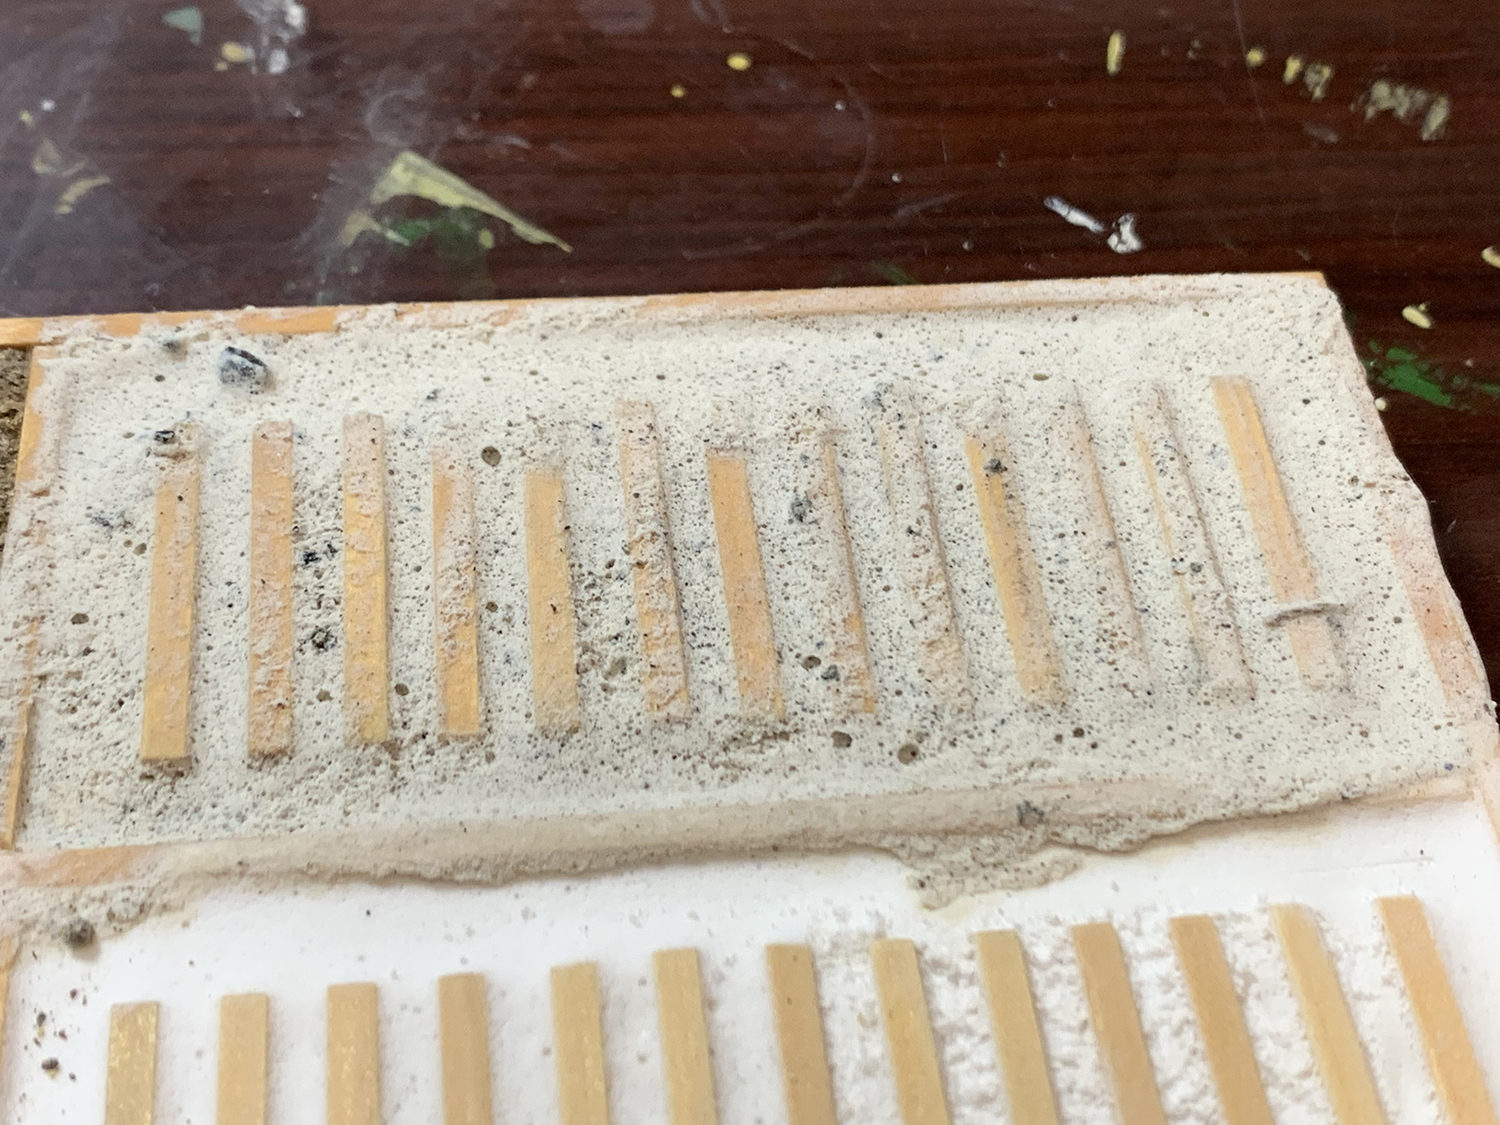
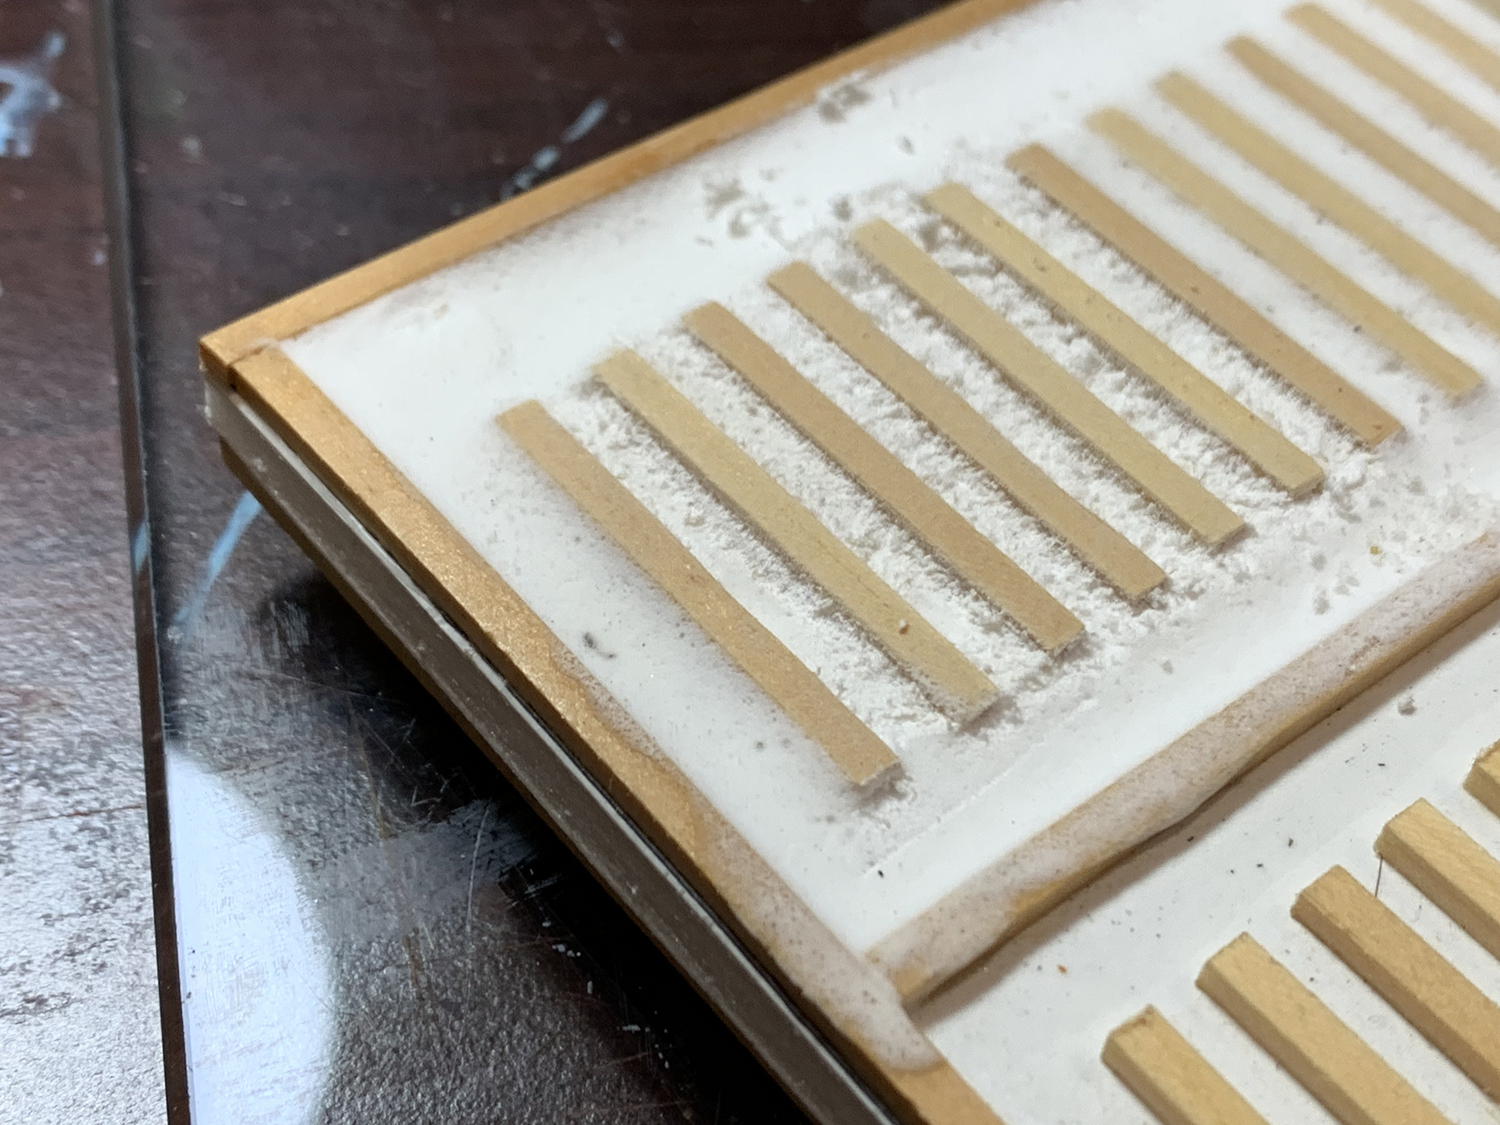
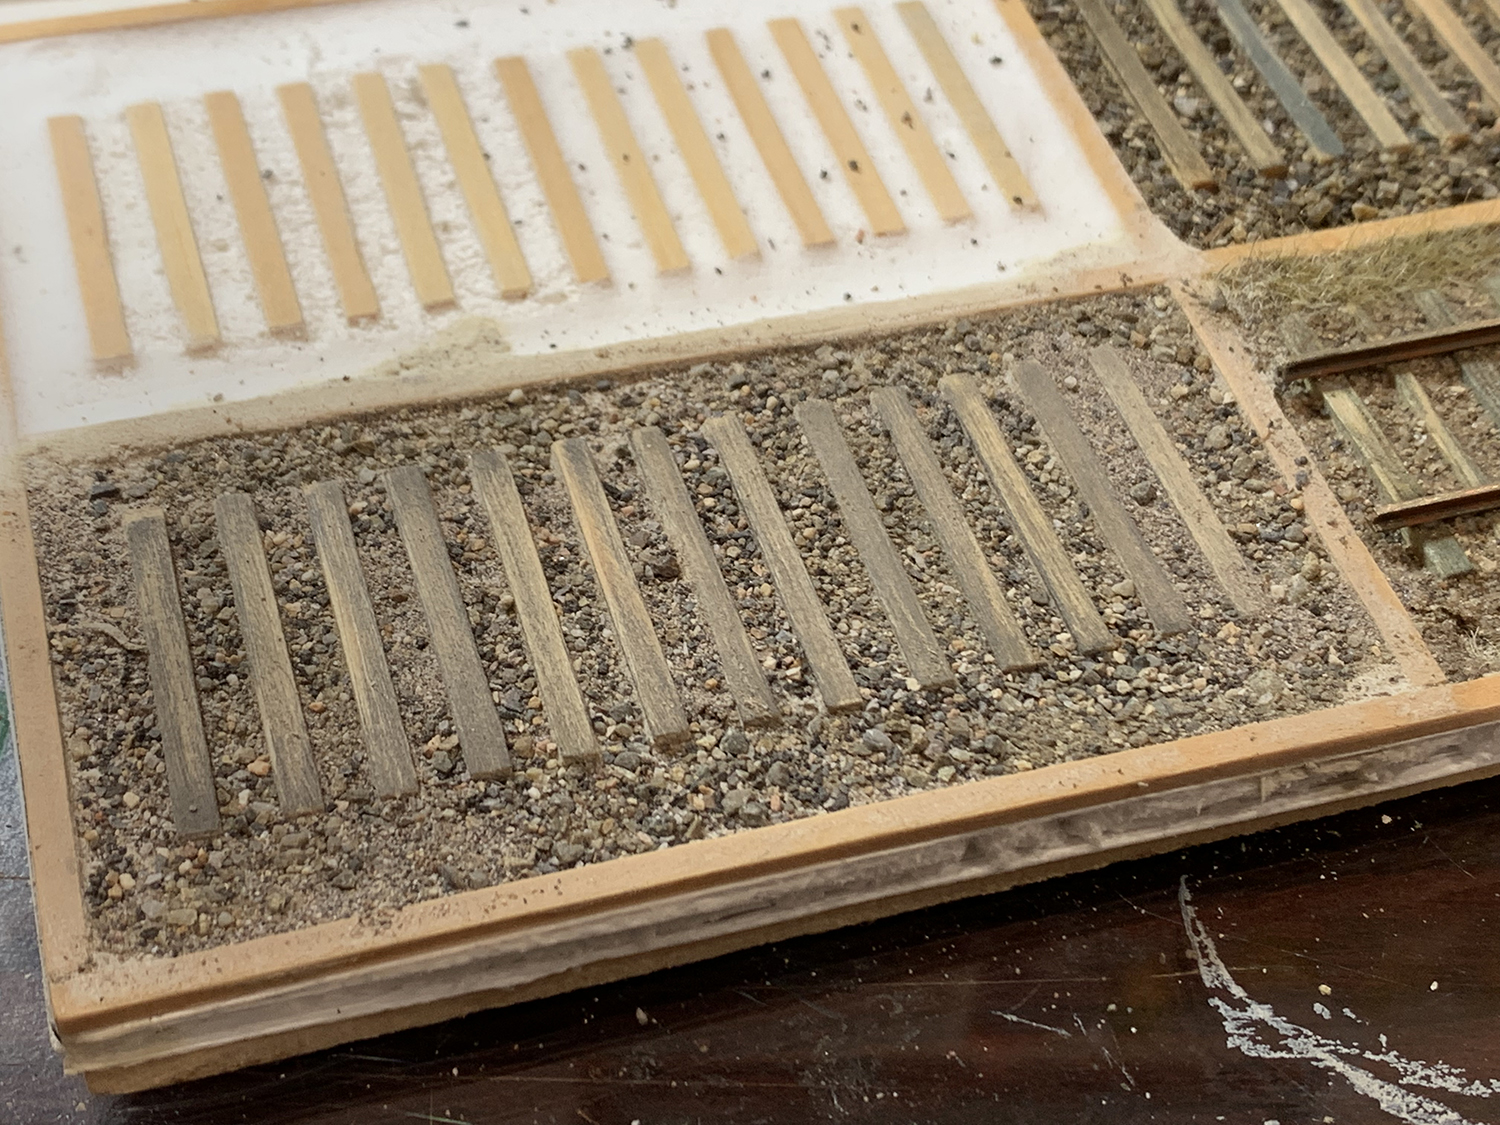
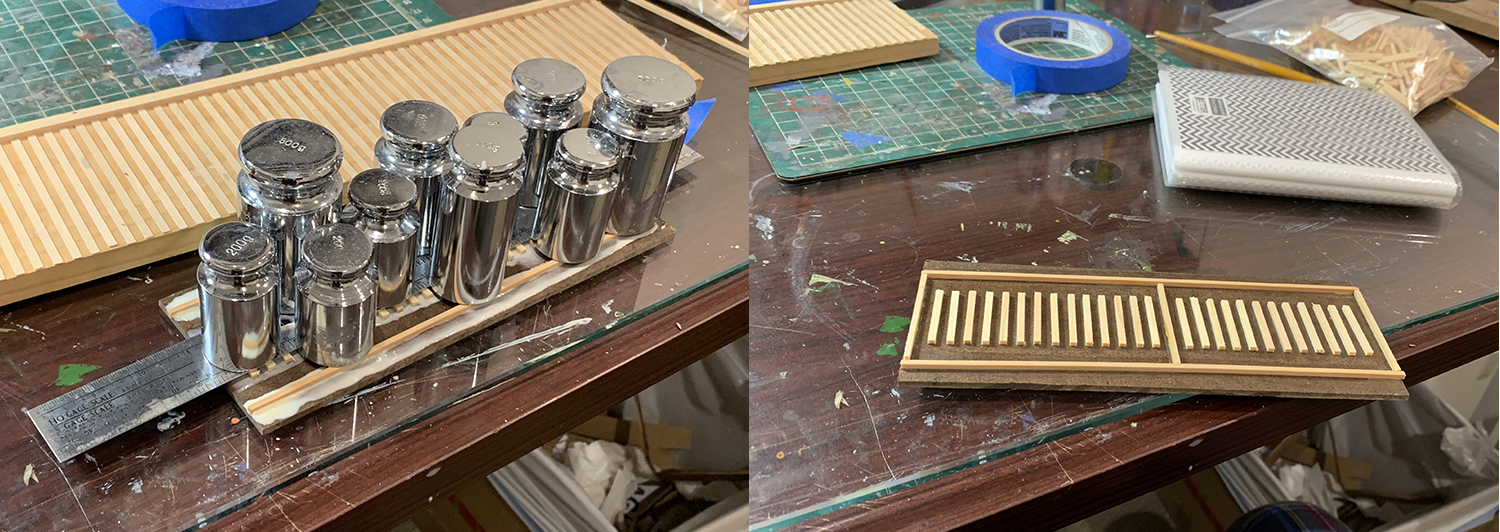
This is an older test platform I built four years ago. Luckily it had a few clean sections for me to try out ideas. This is a good example of the kind of preparation that goes into modeling. I would say that 60% of my time is spent testing ideas away from the main ‘build’. The fact that modeling on the final build is a mostly one-and-done situation I want to be able to get it ‘right’ the first time (no such thing as ‘right’ of course). I’m sure every experienced modeler has had that moment of panic when one’s carefully laid plans go sideways on the final build and days have be spent, first calming down, and then second scraping everything off in order to set up again – which in my case can take days. Test platforms such as these reduce those situations. By the way I’m all for seat-of-pants modeling and there are definitely times when that approach works best.The goals for these tests is to get the ballast line and surrounding ground at the same level as the top of the ties – there should be no ballast shoulder. I’m trying model poorly maintained right-of-way with even less maintenance on the team track. I’m aware that all I have to do is just dump a load of Woodland Scenic’s HO ballast on the model and then level it with a straight edge. but instead I’m trying to create a situation where I can carve the ballast profile in the same way that a sculptor can sculpt a piece of marble. I want to be able to control, from tie to tie, the way the roadbed profile changes. The variety of texture, wear and tear and weathering effects that can be found in trackwork can be quite considerable and is something that I want to model. In this photo I took Woodland Scenics foam putty, dumped some sand and ground-up stone, mixed it with water, and spread it over the ties. When dry I should be able to carve out a credible ballast profile.This is a variation of the above test but this time, I used foam putty heavily diluted with water and just poured it around the ties so that it flowed and then leveled out. It was a really nice effect and one that will use another time. One issue is that the water surface tension ‘pulled’ the foam up the sides of the ties. That was an effect I didn’t want and next time I will add a bit of dishwashing liquid (or use alcohol instead of water?) to reduce surface tension.This test used some ballast that I ground up from stones. I was able to get several grain sizes using a pestle and mortar and filtering the results using a variety of tools including kitchen sieves and sifting pans. Worn road beds tend to be a mixture of different grades of ballast and surrounding soil that has blown or flowed onto the road bed and so I needed different grades of ballast which I mixed with fine dust. It was a pretty good effect. One thing to watch out for is using ballast that is overscale. Standing an HO figure next to the track will help me remove any ballast grains that are too big and I can already see that there are several that are too big in this photo.Sifting stones after they have been ground up in the pestle and mortar. I use gold miners’ sifting pans and kitchen sieves.
Final Test
I decide to take what I had learned from the quick tests (done over several days) and apply them to a final test.
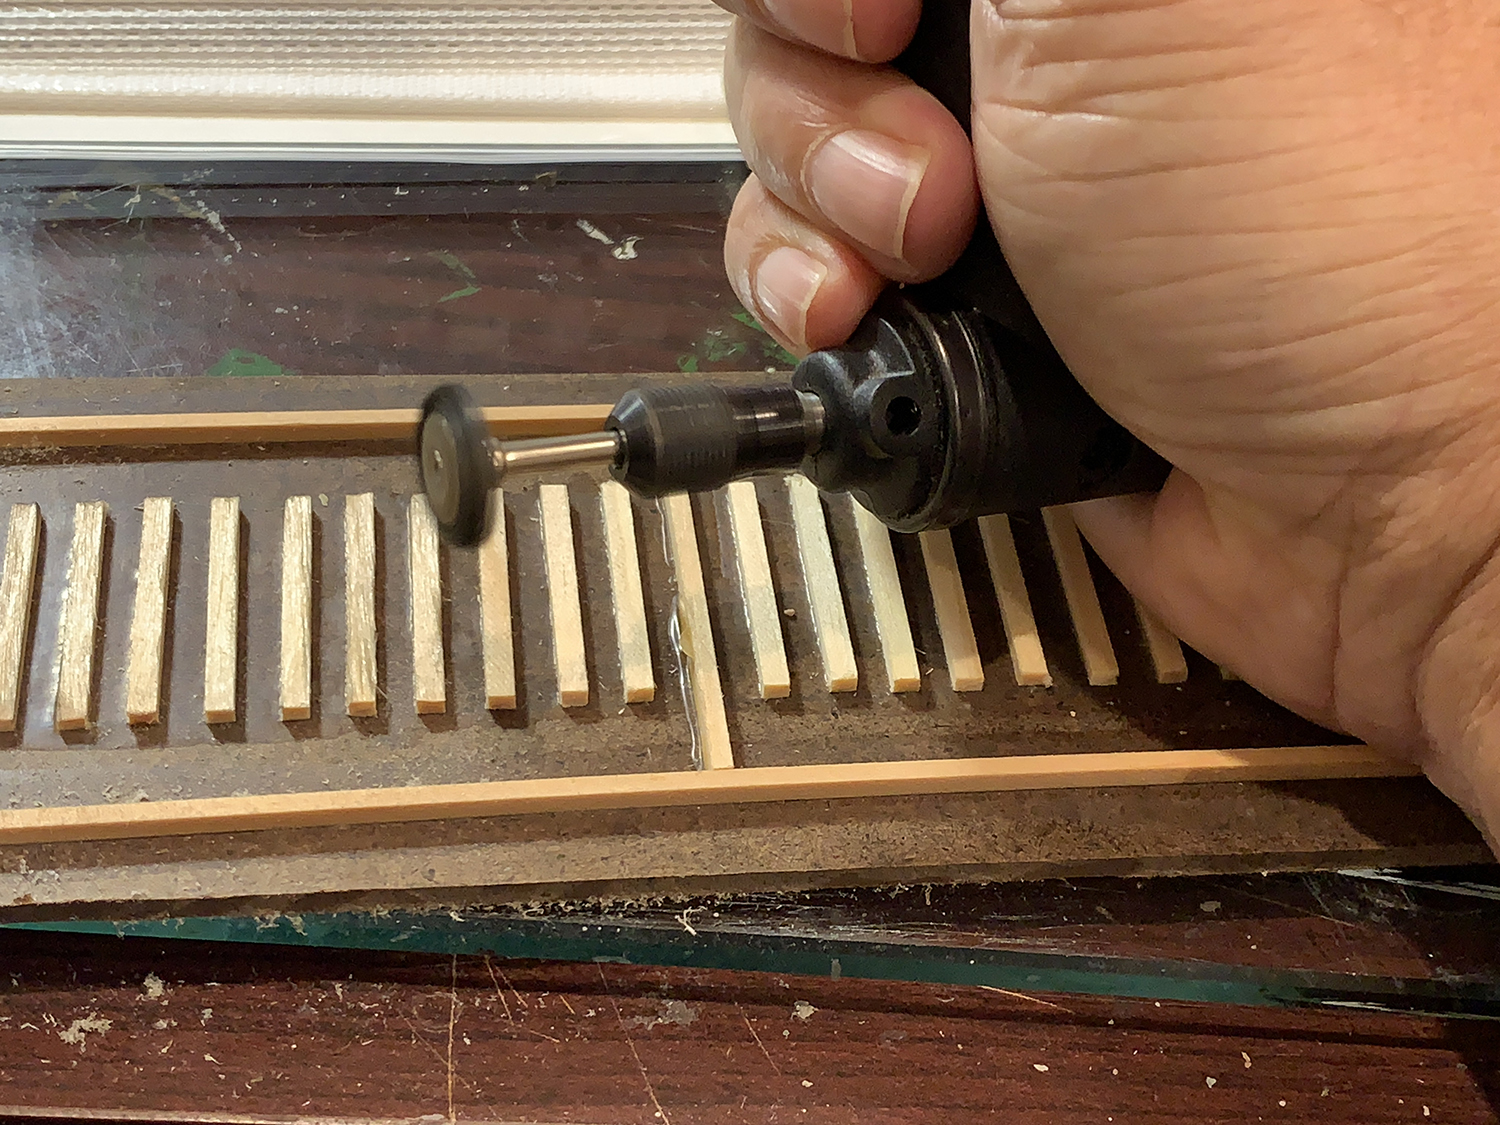
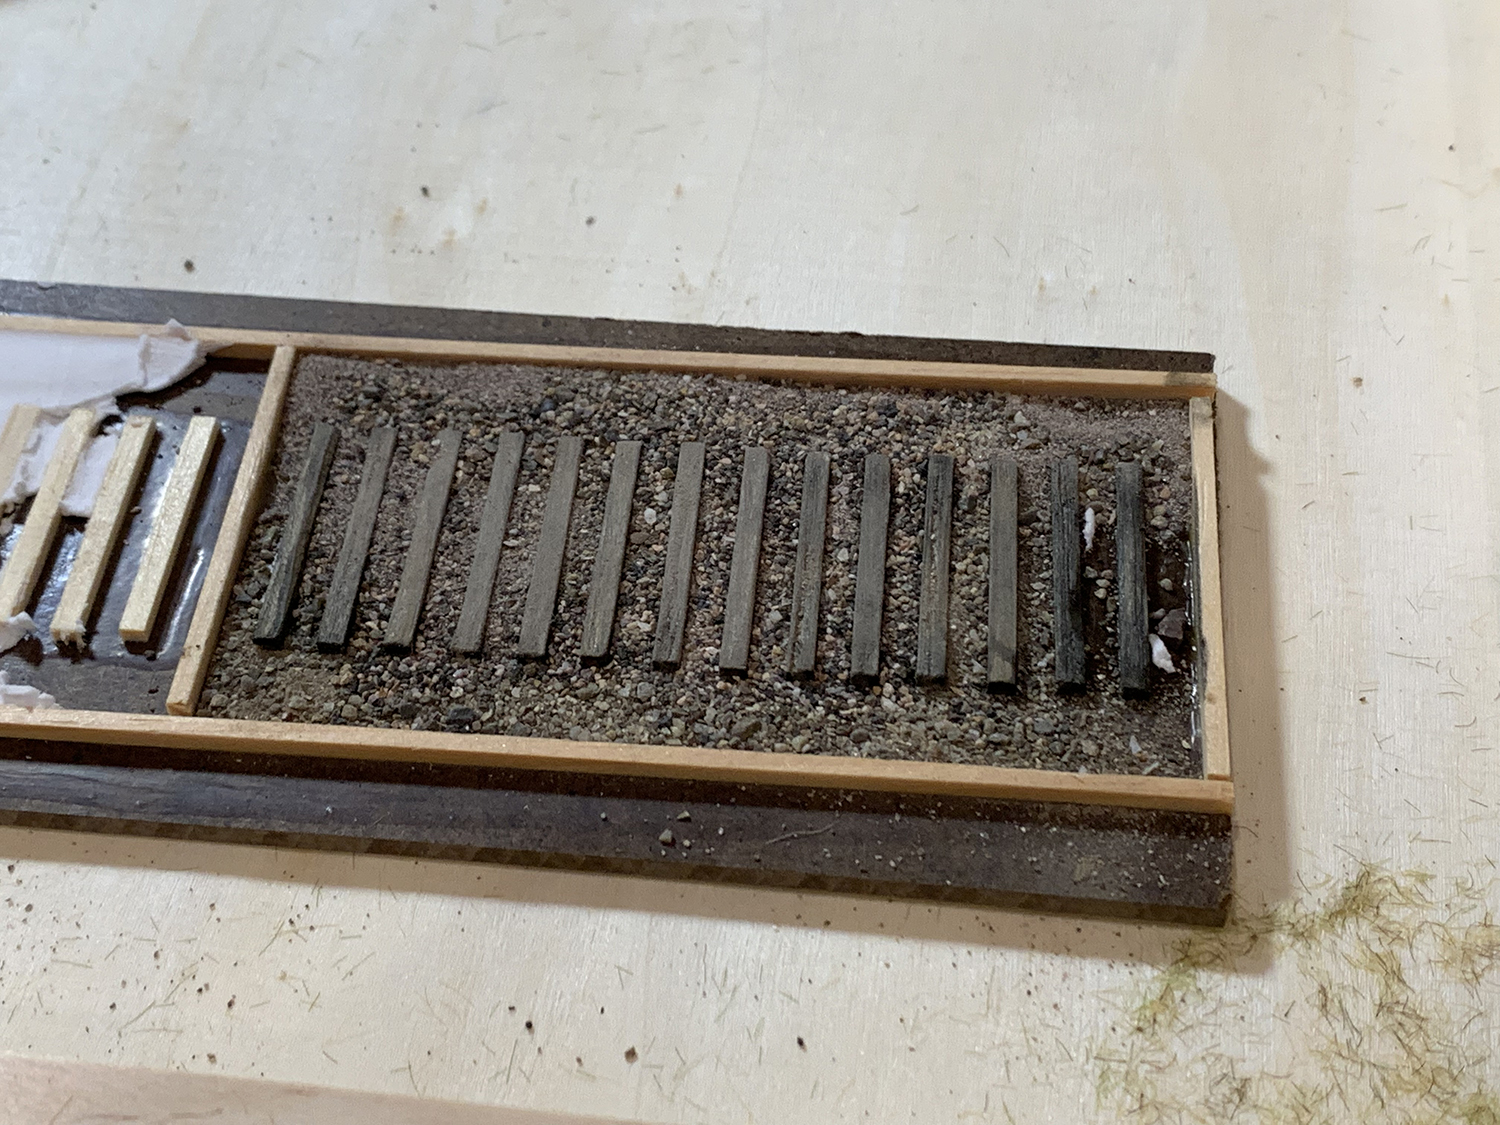
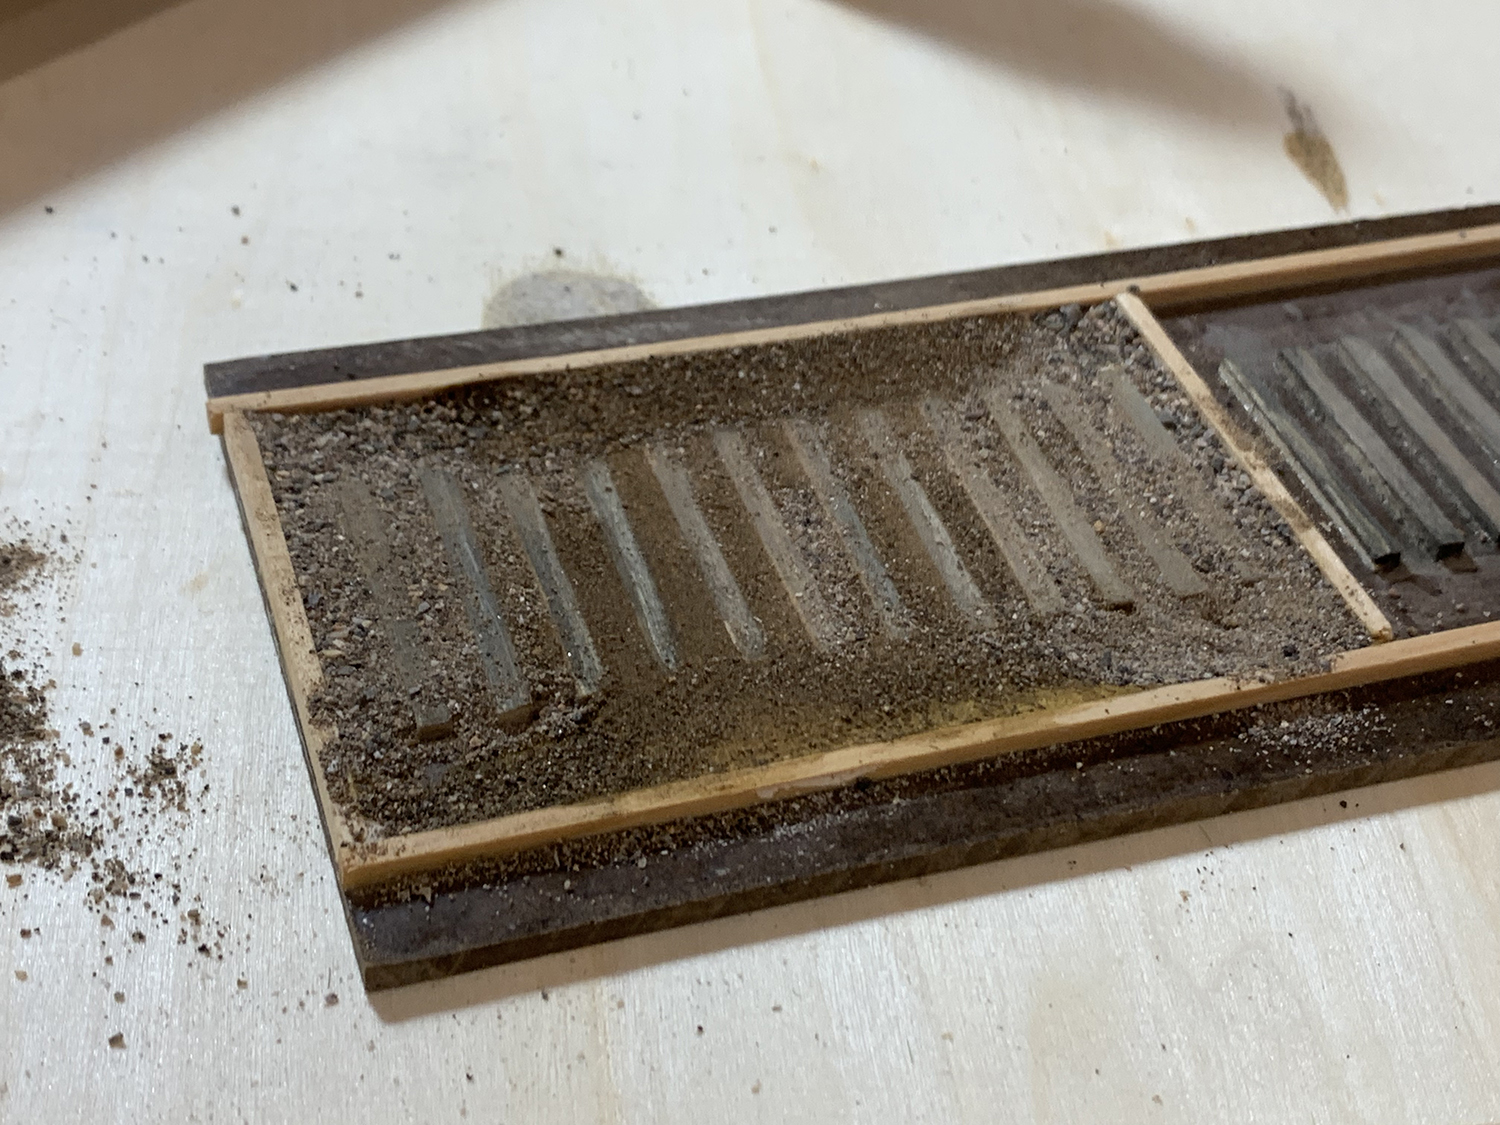
I quickly built a new test platform. Years ago I built a tie-spacing tool that allows me to quickly hand-lay ties. I have since bought the Fast Tracks tie jigs as they have a range of spaces that match mainline, secondary and branch tie spacings.Weathering ties once glued is much easier after they have been glued. It is a multi-part process – Dremel, knife, weathering pen, hand-carving, and sanding. This is the first time I used my Dremel to wear down the wood – much easier than doing it by hand – and I was very pleased with the results. One has to be careful not to overdo it – one only needs a gentle treatment to begin with. The wood grain should be as fine as possible otherwise the weathering starts to look over-scale. Hand-weathering and carving is next followed by a little sanding to remove burrs and blend in the worn grain effects.There are two types of test that I use: dry tests (no glue) and wet tests (glued). This is a dry test where I just dumped some ballast mixture on the test and added some color to the ties just to see how the weathering would come out. Looked pretty good: the weathering was not overdone and wood grain and carving came out nice. I didn’t glue this down and once done I just tipped out the ballast.This is the start of the wet test. The method involves spreading Woodland Scenics Foam Putty over and around the ties so that ties are more or less buried. I’ll sand the top surface once dry and then start carving out the profile. Once the profile is carved I’ll color it and then add layers of different grades of ballast.This is result. I used three grades of ballast starting with the finest (almost dust) and then gently added larger grades. I also colored the ties using some marker pens and let the dirt add another layer of weathering to the wood. I felt that was heading in the right direction and decided to use this technique for the diorama. There is still plenty to do such as add vegetation, dig out ties, create pot holes but for the moment this was a good foundation to build upon.
I will post on the final diorama version in a few of days. I’ve almost completed it and it’s worth writing up a full post on that build alone.